
Understanding the Anatomy of a Bike
Knowing the different parts on a bike is essential for any cyclist, whether you’re a seasoned pro or a beginner. Proper maintenance, safety, and performance all rely on a comprehensive understanding of the various components that make up a bicycle. By familiarizing yourself with the different parts on a bike, you’ll be able to identify potential issues before they become major problems, ensure your safety on the road, and optimize your bike’s performance.

Click Image to Find eBike Products
A bike is made up of numerous components, each playing a crucial role in its overall function. From the frame and fork to the wheels, drivetrain, and braking system, every part works together to provide a smooth and efficient ride. In this article, we’ll delve into the world of bicycle components, exploring the different types, functions, and importance of each part.
By understanding the anatomy of a bike, you’ll be able to make informed decisions when it comes to maintenance, repairs, and upgrades. You’ll also be able to communicate more effectively with bike mechanics and other cyclists, ensuring that you get the most out of your ride. Whether you’re commuting to work, hitting the trails, or simply cruising around the neighborhood, knowing the parts on a bike is essential for a safe and enjoyable cycling experience.
In the following sections, we’ll take a closer look at the different components that make up a bicycle, including the frame and fork, wheels, drivetrain, braking system, and more. By the end of this article, you’ll have a comprehensive understanding of the parts on a bike and be able to take your cycling experience to the next level.

How to Identify and Inspect Your Bike’s Frame and Fork
The frame and fork are two of the most critical parts on a bike, providing the structural foundation for the entire vehicle. The frame is the main structure of the bike, connecting the front and rear wheels, while the fork is responsible for holding the front wheel in place and absorbing shock from the road. Understanding the different types of frames and forks, as well as how to inspect them for damage or wear, is essential for maintaining your bike’s performance and safety.
There are several types of frames, including steel, aluminum, carbon fiber, and titanium. Each material has its own unique characteristics, such as weight, strength, and durability. When inspecting your frame, look for signs of damage, such as cracks, dents, or rust. Check the frame’s alignment and ensure that it is properly secured to the fork and rear wheel.
The fork is also a critical component, responsible for absorbing shock and vibrations from the road. There are several types of forks, including rigid, suspension, and carbon fiber. When inspecting your fork, look for signs of wear, such as scratches or cracks. Check the fork’s alignment and ensure that it is properly secured to the frame and front wheel.
Proper alignment and adjustment of the frame and fork are crucial for maintaining your bike’s performance and safety. Misaligned or improperly adjusted components can lead to poor handling, reduced braking performance, and increased risk of accidents. To ensure proper alignment, use a bike alignment tool or consult a professional mechanic.
Regular inspection and maintenance of your bike’s frame and fork can help prevent damage and ensure optimal performance. By understanding the different types of frames and forks, as well as how to inspect and maintain them, you can keep your bike running smoothly and safely.

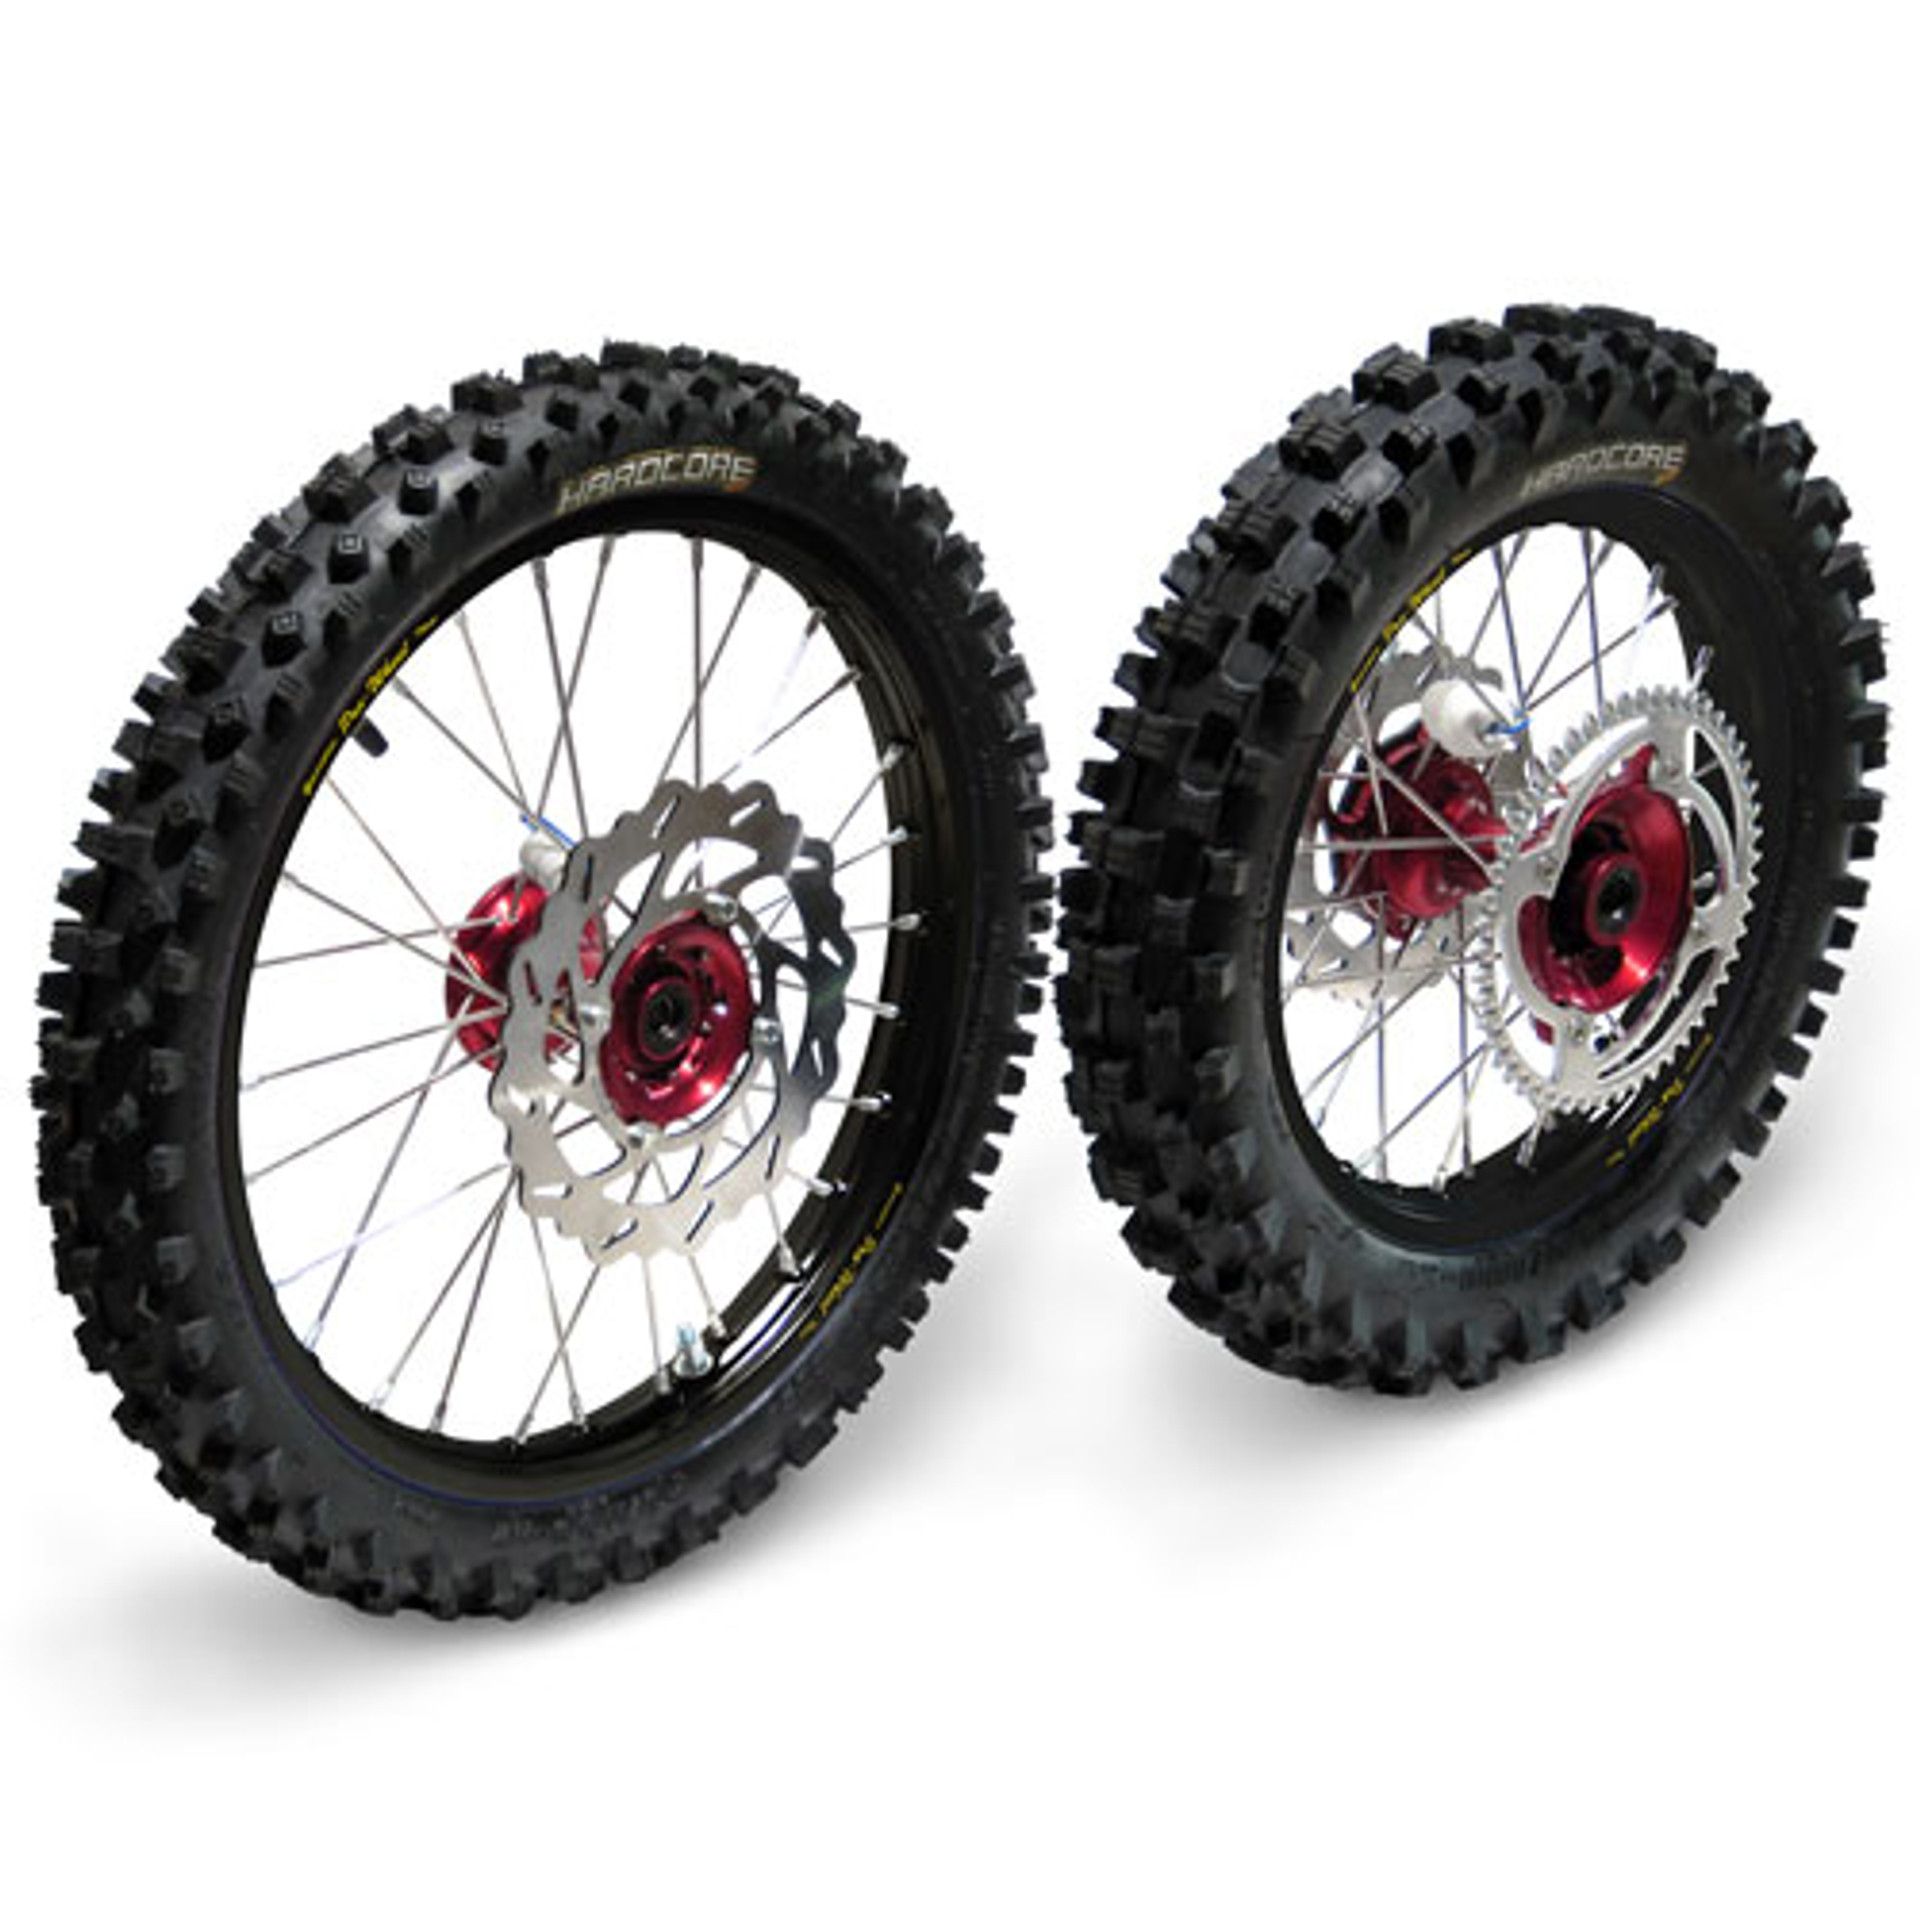
The Wheels: A Closer Look at Rims, Tires, and Hubs
The wheels are a crucial part of a bike, providing the foundation for speed, efficiency, and control. Understanding the different types of rims, tires, and hubs can help you make informed decisions when it comes to choosing the right wheels for your riding style. In this section, we’ll delve into the world of wheels, exploring the various components that make up this critical part of a bike.
Rims are the outermost part of the wheel, providing the structural foundation for the tire. There are several types of rims, including aluminum, carbon fiber, and steel. Each material has its own unique characteristics, such as weight, strength, and durability. When choosing a rim, consider factors such as your riding style, terrain, and personal preferences.
Tires are the rubber components that make contact with the road, providing traction, comfort, and control. There are several types of tires, including road, mountain, and hybrid. Each type of tire is designed for specific riding conditions, such as smooth roads, rough trails, or a combination of both. When choosing a tire, consider factors such as tread pattern, width, and pressure.
Hubs are the central component of the wheel, connecting the rim to the bike’s frame. There are several types of hubs, including quick-release, bolt-on, and thru-axle. Each type of hub has its own unique characteristics, such as ease of use, durability, and weight. When choosing a hub, consider factors such as your riding style, terrain, and personal preferences.
When it comes to maintaining your wheels, regular inspection and maintenance are crucial. Check your tires for signs of wear, such as cracks, cuts, or excessive wear. Inspect your rims for signs of damage, such as dents, scratches, or corrosion. Lubricate your hubs regularly to ensure smooth operation and prevent wear.
By understanding the different types of rims, tires, and hubs, you can make informed decisions when it comes to choosing the right wheels for your riding style. Whether you’re a road cyclist, mountain biker, or commuter, the right wheels can make all the difference in your riding experience.
Drivetrain 101: Understanding Gears, Chainrings, and Cassettes
The drivetrain is a critical part of a bike, responsible for transmitting power from the pedals to the wheels. Understanding the different components of the drivetrain, including gears, chainrings, and cassettes, can help you optimize your bike’s performance and efficiency. In this section, we’ll break down the drivetrain, explaining the functions of each component and discussing the different types of drivetrains available.
Gears are the toothed wheels that transmit power from the pedals to the wheels. There are several types of gears, including derailleur gears, internal gear hub gears, and single-speed gears. Derailleur gears are the most common type, using a derailleur to shift the chain between different gears. Internal gear hub gears use a hub to shift the gears, while single-speed gears use a single gear ratio.
Chainrings are the toothed rings that attach to the crankset, providing the interface between the pedals and the gears. There are several types of chainrings, including single, double, and triple chainrings. Single chainrings use a single ring, while double and triple chainrings use multiple rings to provide a wider range of gears.
Cassettes are the toothed wheels that attach to the rear wheel, providing the interface between the gears and the wheel. There are several types of cassettes, including 7-speed, 8-speed, and 9-speed cassettes. The number of speeds refers to the number of gears available, with higher numbers providing a wider range of gears.
When choosing a drivetrain, consider factors such as your riding style, terrain, and personal preferences. Derailleur gears are suitable for most riding styles, while internal gear hub gears are ideal for commuting and touring. Single-speed gears are suitable for flat terrain and casual riding.
Regular maintenance is crucial to ensure optimal performance and efficiency. Check your chain for signs of wear, such as stretching or rust. Clean and lubricate your chain regularly to prevent wear and corrosion. Adjust your derailleur and gears regularly to ensure proper shifting and alignment.
![]()
Braking Systems: A Guide to Calipers, Levers, and Rotors
Braking systems are a critical part of a bike, providing the necessary stopping power to ensure safe and controlled riding. Understanding the different components of a braking system, including calipers, levers, and rotors, can help you optimize your bike’s performance and safety. In this section, we’ll focus on braking systems, explaining the different types of calipers, levers, and rotors, and providing tips on how to adjust and maintain your brakes for optimal performance and safety.
Calipers are the components that house the brake pads, which make contact with the rotor to slow or stop the bike. There are several types of calipers, including rim calipers, disc calipers, and hydraulic calipers. Rim calipers are the most common type, using a cable to activate the brake pads. Disc calipers use a rotor and brake pads to slow or stop the bike, while hydraulic calipers use fluid pressure to activate the brake pads.
Levers are the components that activate the brake calipers, providing the necessary pressure to slow or stop the bike. There are several types of levers, including brake levers and gear levers. Brake levers are the most common type, using a cable to activate the brake calipers. Gear levers are used to shift gears, but can also be used to activate the brake calipers.
Rotors are the components that make contact with the brake pads to slow or stop the bike. There are several types of rotors, including steel rotors, aluminum rotors, and carbon fiber rotors. Steel rotors are the most common type, providing a durable and reliable braking surface. Aluminum rotors are lighter and provide better heat dissipation, while carbon fiber rotors are the lightest and provide the best heat dissipation.
When adjusting and maintaining your brakes, it’s essential to follow proper procedures to ensure optimal performance and safety. Check your brake pads for signs of wear, such as thinning or cracking. Clean and lubricate your brake calipers and levers regularly to prevent corrosion and wear. Adjust your brake calipers and levers regularly to ensure proper alignment and pressure.
By understanding the different components of a braking system, including calipers, levers, and rotors, you can optimize your bike’s performance and safety. Regular maintenance and adjustment are crucial to ensure optimal braking performance and prevent accidents.

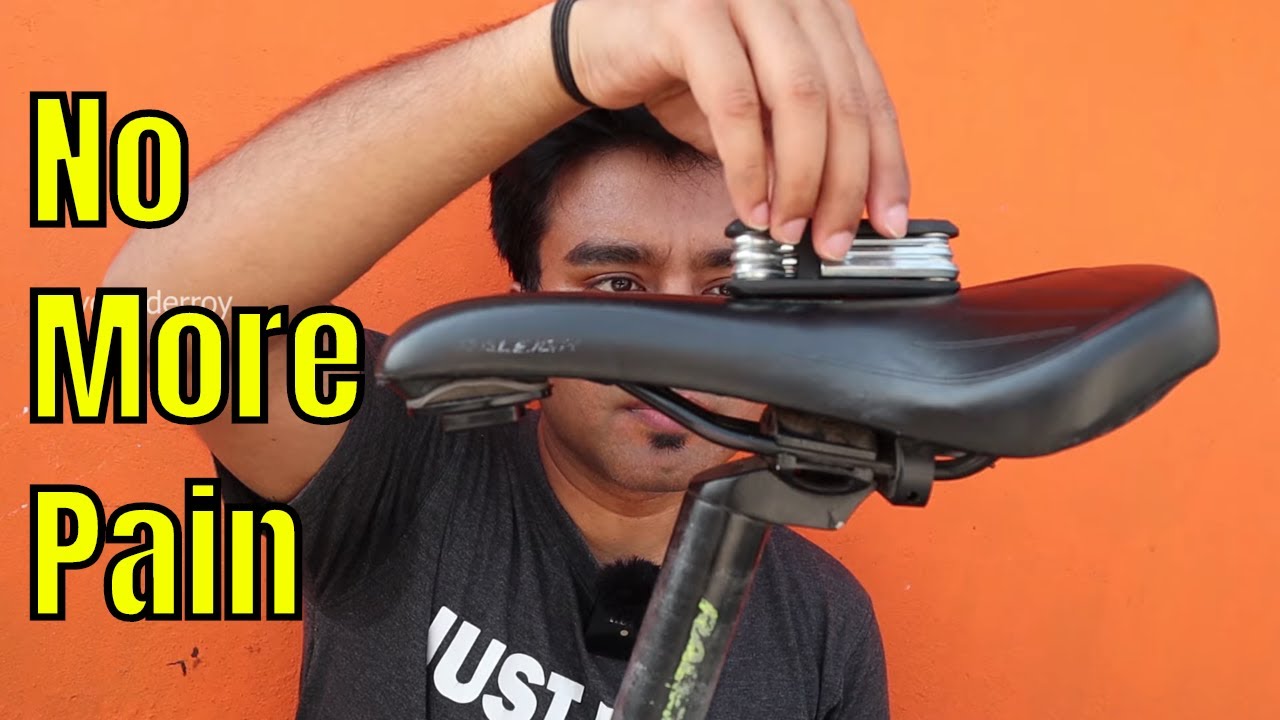
The Importance of Proper Seat and Handlebar Adjustment
Proper seat and handlebar adjustment is crucial for optimal comfort, efficiency, and safety while riding a bike. A well-adjusted seat and handlebar can help prevent discomfort, fatigue, and injury, while also improving overall performance and control. In this section, we’ll discuss the importance of proper seat and handlebar adjustment, and provide tips on how to adjust these components to fit your riding style.
The seat, also known as the saddle, is a critical component of a bike, providing support and comfort for the rider. A properly adjusted seat can help prevent discomfort, numbness, and pain in the legs, back, and buttocks. To adjust the seat, start by ensuring that the saddle height is correct, with the leg almost fully extended when the pedal is in its lowest position. Then, adjust the saddle fore and aft to ensure that the knee is over the pedal spindle when the pedal is in its lowest position.
The handlebar is another critical component of a bike, providing control and stability for the rider. A properly adjusted handlebar can help prevent discomfort, fatigue, and injury, while also improving overall performance and control. To adjust the handlebar, start by ensuring that the handlebar height is correct, with the elbows slightly bent when the hands are on the hoods. Then, adjust the handlebar fore and aft to ensure that the hands are in a comfortable position when gripping the hoods or drops.
When adjusting the seat and handlebar, it’s essential to consider the rider’s body position and riding style. For example, a rider with a more upright riding position may require a higher handlebar and a more forward saddle position, while a rider with a more aggressive riding position may require a lower handlebar and a more rearward saddle position.
Regular maintenance is also crucial to ensure that the seat and handlebar remain properly adjusted. Check the seat and handlebar regularly for signs of wear or damage, and adjust them as needed to maintain optimal comfort, efficiency, and safety.
By properly adjusting the seat and handlebar, riders can enjoy a more comfortable, efficient, and safe ride. Whether you’re a casual rider or a serious enthusiast, proper seat and handlebar adjustment is essential for optimal performance and enjoyment.
Pedals, Cranksets, and Bottom Brackets: The Heart of Your Bike
Pedals, cranksets, and bottom brackets are the heart of your bike, providing the necessary components for efficient and effective pedaling. Understanding the functions and importance of these components can help you optimize your bike’s performance and ensure a smooth ride. In this section, we’ll explore the world of pedals, cranksets, and bottom brackets, discussing their functions, types, and maintenance tips.
Pedals are the components that attach to the crankset, providing the interface between the rider’s feet and the bike. There are several types of pedals, including platform pedals, clipless pedals, and toe clips. Platform pedals are the most common type, providing a flat surface for the rider’s feet. Clipless pedals use a cleat system to secure the rider’s feet, while toe clips use a strap to secure the rider’s feet.
Cranksets are the components that convert the rider’s pedaling motion into rotational energy, propelling the bike forward. There are several types of cranksets, including single-chainring, double-chainring, and triple-chainring cranksets. Single-chainring cranksets use a single chainring, while double-chainring and triple-chainring cranksets use multiple chainrings to provide a wider range of gears.
Bottom brackets are the components that attach the crankset to the frame, providing a smooth and efficient pedaling motion. There are several types of bottom brackets, including threaded, press-fit, and cartridge bottom brackets. Threaded bottom brackets use a threaded interface to attach the crankset, while press-fit and cartridge bottom brackets use a press-fit or cartridge interface.
Regular maintenance is crucial to ensure optimal performance and prevent wear and tear on these components. Check your pedals regularly for signs of wear, such as worn-out bearings or loose screws. Clean and lubricate your crankset and bottom bracket regularly to prevent corrosion and wear. Adjust your crankset and bottom bracket regularly to ensure proper alignment and smooth pedaling motion.
By understanding the functions and importance of pedals, cranksets, and bottom brackets, you can optimize your bike’s performance and ensure a smooth ride. Whether you’re a casual rider or a serious enthusiast, proper maintenance and adjustment of these components are essential for optimal performance and enjoyment.
Putting it All Together: Tips for Assembling and Maintaining Your Bike
Assembling and maintaining a bike can be a daunting task, especially for those new to cycling. However, with the right knowledge and tools, it can be a rewarding and enjoyable experience. In this section, we’ll provide a comprehensive guide to assembling and maintaining your bike, including tips on how to troubleshoot common issues and perform routine maintenance tasks.
When assembling a bike, it’s essential to follow the manufacturer’s instructions and take your time to ensure that all components are properly installed and adjusted. Start by attaching the wheels to the frame, followed by the pedals, crankset, and bottom bracket. Next, install the drivetrain components, including the gears, chainrings, and cassettes. Finally, attach the brakes, seat, and handlebars.
Regular maintenance is crucial to ensure optimal performance and prevent wear and tear on your bike’s components. Check your tire pressure regularly and adjust as needed. Clean and lubricate your chain and gears regularly to prevent corrosion and wear. Adjust your brakes and derailleurs regularly to ensure proper alignment and smooth shifting.
When troubleshooting common issues, start by identifying the problem and consulting the manufacturer’s instructions or online resources. Common issues include faulty brakes, gears that won’t shift, and loose or damaged components. Use a multi-tool or Allen wrench to make adjustments and repairs, and always follow proper safety procedures when working on your bike.
By following these tips and guidelines, you can ensure that your bike is properly assembled and maintained, providing a safe and enjoyable riding experience. Whether you’re a casual rider or a serious enthusiast, regular maintenance and troubleshooting can help extend the life of your bike and prevent costly repairs.
Remember to always follow proper safety procedures when working on your bike, and consult a professional mechanic if you’re unsure or uncomfortable with any aspect of assembly or maintenance. With the right knowledge and tools, you can keep your bike running smoothly and enjoy the many benefits of cycling.
