The Importance of Proper Tire Pressure
Proper tire pressure is crucial for optimal road bike performance, safety, and longevity. Maintaining the recommended tire pressure can significantly improve a rider’s overall experience, reducing the risk of punctures, and enhancing the bike’s handling and responsiveness. When tires are under-inflated, they can lead to reduced traction, increased rolling resistance, and a higher likelihood of tire damage. On the other hand, over-inflated tires can result in a harsh ride, reduced grip, and increased risk of tire blowouts.

Click Image to Find eBike Products
For road bike enthusiasts, understanding the importance of proper tire pressure is essential. It’s not just about inflating the tires to the recommended pressure; it’s about finding the optimal pressure that suits the rider’s style, weight, and terrain. By doing so, riders can enjoy a smoother ride, improved efficiency, and increased confidence on the road.
When it comes to learning how to air up road bike tires, it’s essential to consider the type of tire, the rider’s weight, and the terrain. The recommended tire pressure can be found on the sidewall of the tire or in the bike’s manual. However, this is just a starting point, and riders may need to experiment to find the optimal pressure that suits their needs.
By maintaining proper tire pressure, riders can enjoy a range of benefits, including improved performance, increased safety, and reduced risk of punctures. Whether you’re a seasoned pro or a beginner, understanding the importance of proper tire pressure is crucial for getting the most out of your road bike.
Understanding Tire Pressure Measurements
When it comes to inflating road bike tires, understanding the different units of measurement for tire pressure is crucial. The three most common units of measurement are PSI (Pounds per Square Inch), BAR (Barometric Pressure), and kPa (Kilopascals). Each unit has its own unique characteristics, and it’s essential to understand how to read tire pressure gauges and convert between units.
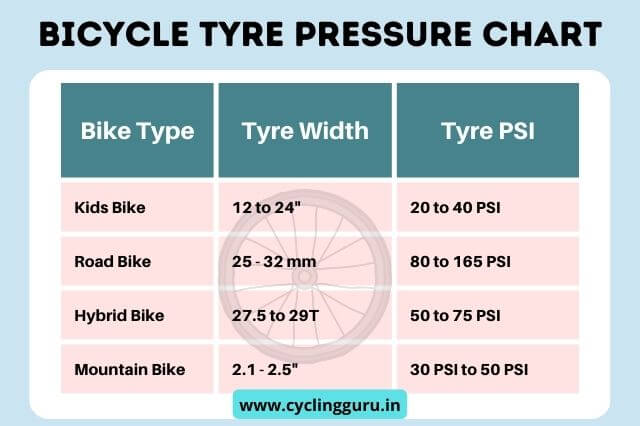
PSI is the most commonly used unit of measurement for tire pressure in the United States. It measures the pressure of the tire in pounds per square inch, with most road bike tires requiring a pressure between 80-120 PSI. BAR, on the other hand, is commonly used in Europe and measures the pressure in barometric pressure. kPa is a metric unit of measurement that is also widely used.
When reading tire pressure gauges, it’s essential to understand the recommended pressure range for road bike tires. This information can be found on the sidewall of the tire or in the bike’s manual. The recommended pressure range is usually indicated by a series of numbers, such as “80-100 PSI” or “6-8 BAR”. This range indicates the optimal pressure for the tire, taking into account factors such as the rider’s weight, terrain, and riding style.
When learning how to air up road bike tires, it’s also important to understand how to convert between units. For example, if a tire requires a pressure of 100 PSI, this is equivalent to 6.9 BAR or 690 kPa. By understanding how to convert between units, riders can ensure that their tires are inflated to the optimal pressure, regardless of the unit of measurement used.
By understanding tire pressure measurements, riders can take the first step towards optimal tire inflation. Whether you’re a seasoned pro or a beginner, knowing how to read tire pressure gauges and convert between units is essential for getting the most out of your road bike.
Choosing the Right Pump for the Job
When it comes to inflating road bike tires, having the right pump can make all the difference. With so many options available, it can be overwhelming to choose the best pump for your needs. In this section, we’ll explore the different types of pumps available, including floor pumps, hand pumps, and CO2 inflators.
Floor pumps are a popular choice among road cyclists due to their ease of use and high-pressure capabilities. They are typically more affordable than other types of pumps and can be found in most bike shops. Popular brands such as Lezyne and Topeak offer high-quality floor pumps that are designed specifically for road bike tires.
Hand pumps, on the other hand, are a great option for riders who need a portable pump that can be taken on the go. They are often smaller and lighter than floor pumps, making them ideal for commuting or touring. Silca is a well-known brand that offers high-quality hand pumps that are designed for road bike tires.
CO2 inflators are another option for riders who need a quick and easy way to inflate their tires. They are often used in conjunction with a floor pump or hand pump to top off the tire pressure. CO2 inflators are a great option for riders who need to make quick adjustments to their tire pressure during a ride.
When choosing a pump, it’s essential to consider the type of valve on your tire. Presta valves, for example, require a specific type of pump that is designed to accommodate the valve’s unique design. Schrader valves, on the other hand, can be used with a standard pump.
By choosing the right pump for your road bike tires, you can ensure that you’re getting the best possible performance and safety. Whether you’re a seasoned pro or a beginner, having the right pump can make all the difference in your riding experience.

Step-by-Step Guide to Inflating Road Bike Tires
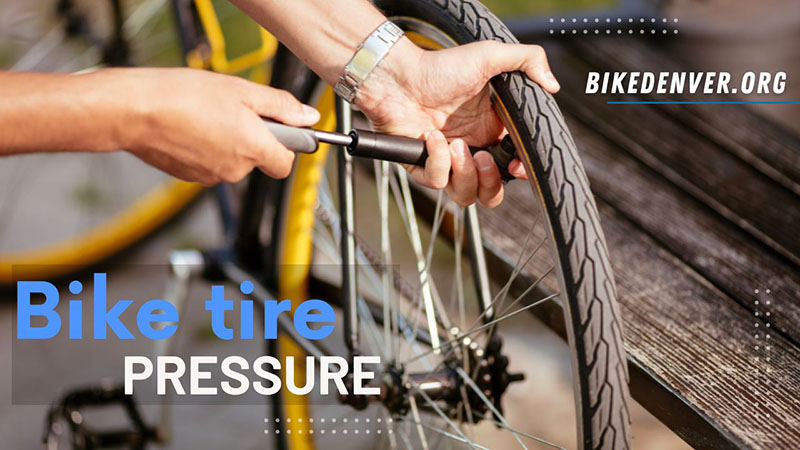
Inflating road bike tires can seem like a daunting task, but with the right steps, it can be a straightforward process. Here’s a step-by-step guide on how to air up road bike tires:
Step 1: Gather the necessary equipment, including a pump, tire pressure gauge, and the bike itself. Make sure the pump is compatible with the type of valve on the tire.
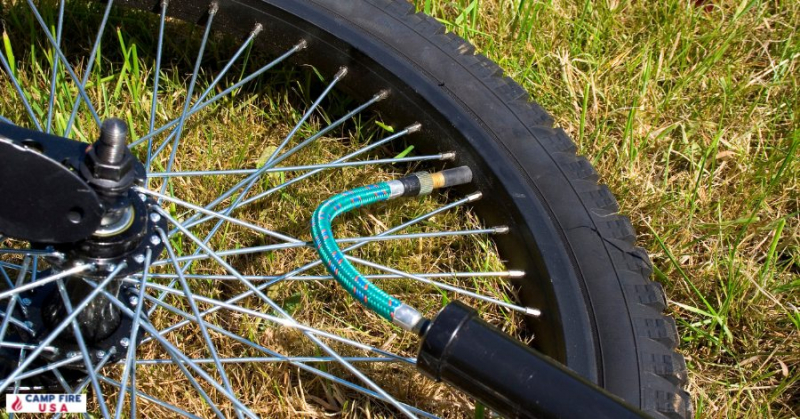
Step 2: Remove the valve cap and attach the pump to the valve stem. For Presta valves, make sure the pump is securely attached to the valve stem and the valve is open. For Schrader valves, simply attach the pump to the valve stem.
Step 3: Set the desired pressure using the tire pressure gauge. Make sure to check the recommended pressure range for the tire, which can be found on the sidewall of the tire or in the bike’s manual.
Step 4: Begin pumping the tire, using slow and steady strokes to avoid over-inflating the tire. Check the pressure gauge regularly to ensure the desired pressure is reached.
Step 5: Once the desired pressure is reached, remove the pump from the valve stem and replace the valve cap. Double-check the pressure gauge to ensure the pressure has not dropped.
Step 6: Inspect the tire for any signs of leaks or damage. Check the tire for any hissing sounds or visual signs of air escaping.
By following these steps, you can ensure that your road bike tires are properly inflated and ready for your next ride. Remember to always check the pressure before each ride and to adjust the pressure according to the recommended range for optimal performance.
Tire Valve Types and How to Use Them
When it comes to inflating road bike tires, understanding the different types of tire valves is crucial. There are three main types of tire valves: Presta, Schrader, and Dunlop. Each type of valve has its own unique characteristics and requires a specific type of pump.
Presta valves are the most common type of valve used on road bikes. They are characterized by a small, narrow stem and a locknut that must be unscrewed before inflation. To use a Presta valve, simply attach the pump to the valve stem and turn the locknut counterclockwise to open the valve. Then, inflate the tire to the desired pressure and close the valve by turning the locknut clockwise.
Schrader valves, on the other hand, are more commonly used on mountain bikes and hybrid bikes. They are characterized by a larger, more robust stem and a spring-loaded valve core. To use a Schrader valve, simply attach the pump to the valve stem and press the valve core to open the valve. Then, inflate the tire to the desired pressure and release the valve core to close the valve.
Dunlop valves are less common, but still used on some road bikes. They are characterized by a small, narrow stem and a valve core that must be unscrewed before inflation. To use a Dunlop valve, simply attach the pump to the valve stem and turn the valve core counterclockwise to open the valve. Then, inflate the tire to the desired pressure and close the valve by turning the valve core clockwise.
Converting between valve types can be a bit tricky, but it’s not impossible. For example, if you have a Presta valve and need to use a Schrader pump, you can purchase a Presta-to-Schrader adapter. Similarly, if you have a Schrader valve and need to use a Presta pump, you can purchase a Schrader-to-Presta adapter.
By understanding the different types of tire valves and how to use them, you can ensure that your road bike tires are properly inflated and ready for your next ride. Remember to always check the valve type before inflating your tires and to use the correct type of pump to avoid any damage or safety issues.
Common Mistakes to Avoid When Inflating Road Bike Tires
When it comes to inflating road bike tires, there are several common mistakes to avoid. These mistakes can lead to reduced performance, increased risk of punctures, and even safety issues. Here are some of the most common mistakes to avoid when inflating road bike tires:
Over-inflation: Over-inflating your road bike tires can lead to a harsh ride, reduced traction, and increased risk of tire blowouts. Make sure to check the recommended pressure range for your tires and avoid over-inflating them.
Under-inflation: Under-inflating your road bike tires can lead to reduced performance, increased risk of punctures, and increased rolling resistance. Make sure to check the recommended pressure range for your tires and avoid under-inflating them.
Using the wrong type of pump: Using the wrong type of pump can lead to incorrect pressure readings, damage to the tire or valve, and even safety issues. Make sure to use a pump that is compatible with your tire valve type and follow the manufacturer’s instructions.
Not checking for leaks: Not checking for leaks can lead to reduced tire pressure, reduced performance, and increased risk of punctures. Make sure to check your tires for leaks after inflation and before each ride.
Not adjusting for temperature: Not adjusting for temperature can lead to incorrect pressure readings and reduced performance. Make sure to check the temperature of your tires and adjust the pressure accordingly.
By avoiding these common mistakes, you can ensure that your road bike tires are properly inflated and ready for your next ride. Remember to always check the recommended pressure range for your tires, use the correct type of pump, and check for leaks after inflation.

Tire Pressure and Riding Style: How to Adjust for Optimal Performance
Tire pressure plays a significant role in determining the performance of a road bike. The optimal tire pressure can vary depending on the riding style, terrain, and personal preference. In this section, we will discuss how to adjust tire pressure for different types of riding, including racing, commuting, and touring.
Racing: For racing, a higher tire pressure is often preferred to minimize rolling resistance and maximize speed. A pressure range of 100-120 PSI is common for racing tires. However, it’s essential to note that higher pressure can also lead to a harsher ride and reduced traction.
Commuting: For commuting, a lower tire pressure is often preferred to provide a more comfortable ride and better traction on varied terrain. A pressure range of 80-100 PSI is common for commuting tires.
Touring: For touring, a lower tire pressure is often preferred to provide a more comfortable ride and better traction on varied terrain. A pressure range of 60-80 PSI is common for touring tires.
Adjusting tire pressure for different types of riding requires a good understanding of the relationship between tire pressure and performance. It’s essential to experiment with different pressure settings to find the optimal pressure for your specific riding style and terrain.
In addition to adjusting tire pressure for different types of riding, it’s also essential to consider the weight of the rider and the load being carried. A heavier rider or a load may require a higher tire pressure to maintain optimal performance and safety.
By adjusting tire pressure for different types of riding, you can optimize the performance of your road bike and enjoy a more comfortable and efficient ride. Remember to always check the recommended pressure range for your tires and adjust accordingly to ensure optimal performance and safety.

Maintenance and Safety Checks for Road Bike Tires
Regular maintenance and safety checks are essential to ensure the longevity and safety of road bike tires. In this section, we will discuss the importance of regular tire maintenance and safety checks, including how to inspect for wear, damage, and proper inflation.
Inspecting for Wear: Regularly inspecting your road bike tires for wear is crucial to ensure safety and performance. Look for signs of wear such as cracks, cuts, and excessive wear on the tread and sidewalls. If you notice any signs of wear, replace the tire immediately.
Inspecting for Damage: Regularly inspecting your road bike tires for damage is crucial to ensure safety and performance. Look for signs of damage such as punctures, cuts, and excessive wear on the tread and sidewalls. If you notice any signs of damage, replace the tire immediately.
Checking for Proper Inflation: Regularly checking your road bike tires for proper inflation is crucial to ensure safety and performance. Use a tire pressure gauge to check the pressure and compare it to the recommended pressure range for your tires. If the pressure is too low, inflate the tire to the recommended pressure. If the pressure is too high, deflate the tire to the recommended pressure.
Additional Safety Checks: In addition to inspecting for wear, damage, and proper inflation, there are several other safety checks you can perform to ensure the safety and performance of your road bike tires. These include checking the tire’s tread depth, looking for signs of uneven wear, and checking the tire’s sidewalls for signs of damage.
By performing regular maintenance and safety checks, you can ensure the longevity and safety of your road bike tires. Remember to always check your tires before each ride and to replace them if you notice any signs of wear or damage.