Why Bleeding Your RockShox Reverb is Crucial for Optimal Performance
Regular maintenance is essential for any hydraulic system, and the RockShox Reverb is no exception. Bleeding a RockShox Reverb is a critical step in ensuring smooth and reliable operation of the dropper post. Over time, air can enter the system, causing the post to malfunction or become stuck. This can lead to frustrating performance issues, decreased ride quality, and even safety concerns.

Click Image to Find eBike Products
The RockShox Reverb is a complex system that relies on precise hydraulic pressure to function correctly. When air enters the system, it can disrupt this delicate balance, causing the post to behave erratically. Bleeding the system removes any air that may have accumulated, restoring the optimal pressure and ensuring that the post operates smoothly and reliably.
In addition to resolving performance issues, bleeding a RockShox Reverb can also help to prevent more serious problems from developing. For example, if air is allowed to accumulate in the system, it can cause the seals to become damaged, leading to costly repairs or even replacement of the post. By bleeding the system regularly, riders can help to extend the life of their RockShox Reverb and ensure that it continues to perform at its best.
Furthermore, bleeding a RockShox Reverb is a relatively simple process that can be performed at home with the right tools and knowledge. By following a few simple steps, riders can save themselves the hassle and expense of taking their bike to a professional mechanic. In the next section, we will take a closer look at the anatomy of the RockShox Reverb and explore the steps involved in preparing it for bleeding.

Understanding the Anatomy of Your RockShox Reverb
The RockShox Reverb is a complex system that relies on a combination of hydraulic and mechanical components to provide seamless height adjustment. At its core, the Reverb consists of a hydraulic cylinder, a piston, and a series of seals and O-rings that work together to maintain optimal pressure and prevent fluid leakage.
The hydraulic cylinder is the heart of the Reverb system, and it is responsible for storing the hydraulic fluid that powers the post’s movement. The piston is a movable component that is connected to the post’s actuator, and it is responsible for converting the hydraulic pressure into mechanical movement.
The seals and O-rings that are used in the Reverb system are critical components that help to maintain the optimal pressure and prevent fluid leakage. These seals and O-rings are designed to be durable and long-lasting, but they can still be prone to wear and tear over time.
One of the key benefits of the RockShox Reverb is its ability to provide smooth and reliable operation, even in the most demanding conditions. This is due in part to the system’s use of a hydraulic fluid that is specifically designed to maintain its viscosity and lubricity over a wide range of temperatures.
However, even with its advanced design and materials, the RockShox Reverb is still susceptible to issues such as air in the system or faulty seals. These issues can cause the post to malfunction or become stuck, which can be frustrating and even safety-critical. In the next section, we will explore the steps involved in preparing the Reverb for bleeding, which is a critical step in resolving these issues and maintaining optimal performance.

How to Prepare Your RockShox Reverb for Bleeding
Before you can start bleeding your RockShox Reverb, you need to prepare the dropper post for the process. This involves removing any dirt or debris that may have accumulated on the post, as well as ensuring that the post is in the correct position.
Start by removing the saddle and any other components that may be attached to the post. This will give you clear access to the post’s actuator and hydraulic cylinder. Next, use a soft-bristled brush or a clean cloth to remove any dirt or debris that may have accumulated on the post.
Once the post is clean, use a torque wrench to loosen the actuator’s retaining ring. This will allow you to remove the actuator and access the hydraulic cylinder. Be careful not to damage the retaining ring or the actuator’s threads.
With the actuator removed, use a clean cloth to wipe down the hydraulic cylinder and remove any dirt or debris that may have accumulated on it. This is an important step, as any dirt or debris that is left on the cylinder can contaminate the hydraulic fluid and cause problems during the bleeding process.
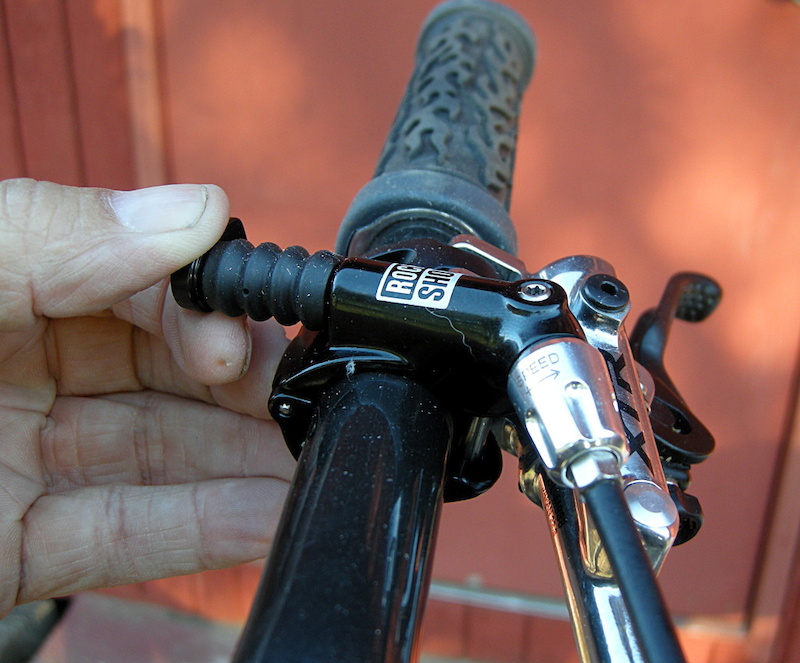
Finally, use a dropper post bleeding kit to attach the bleeding hose to the hydraulic cylinder. Make sure that the hose is securely attached and that there are no leaks in the system. This will ensure that the bleeding process is successful and that the post is properly bled.
By following these steps, you can ensure that your RockShox Reverb is properly prepared for bleeding. In the next section, we will provide a step-by-step guide on how to bleed the RockShox Reverb, including the tools and materials needed, and troubleshooting common issues that may arise during the process.
A Step-by-Step Guide to Bleeding Your RockShox Reverb
Bleeding a RockShox Reverb is a relatively straightforward process that can be completed with the right tools and materials. Here is a step-by-step guide to help you bleed your RockShox Reverb:
Step 1: Attach the bleeding hose to the hydraulic cylinder. Make sure that the hose is securely attached and that there are no leaks in the system.
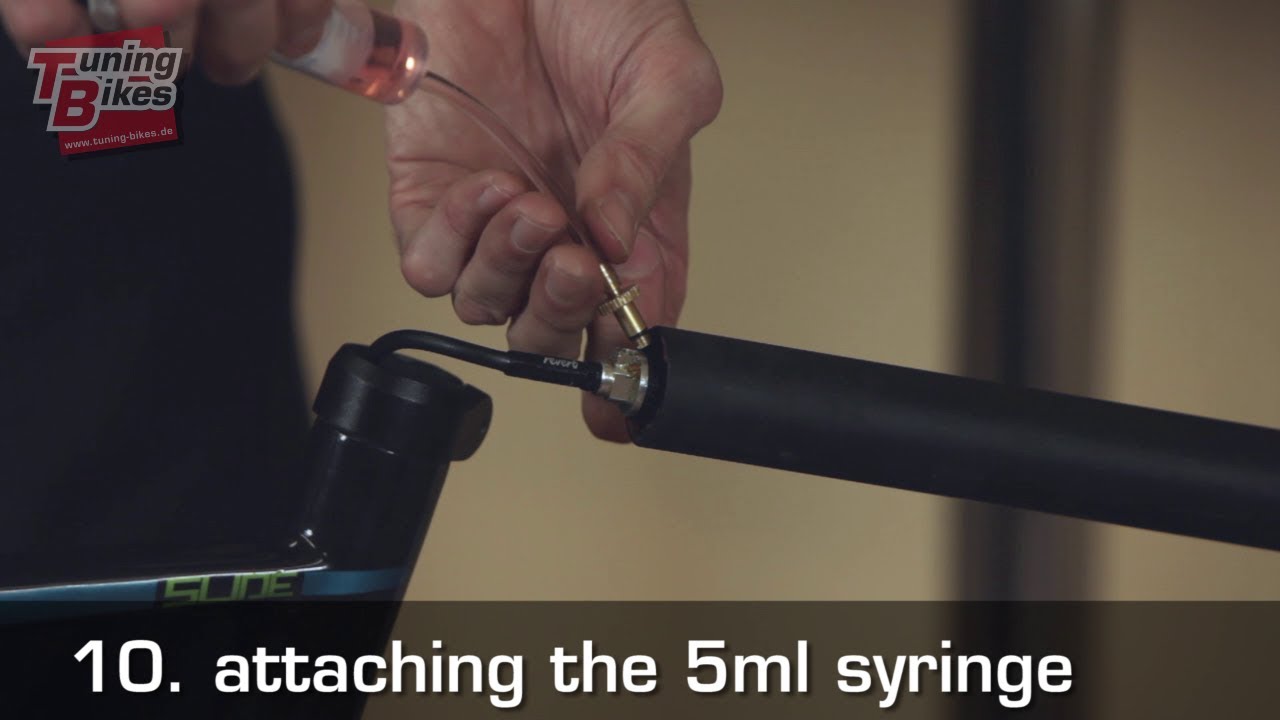
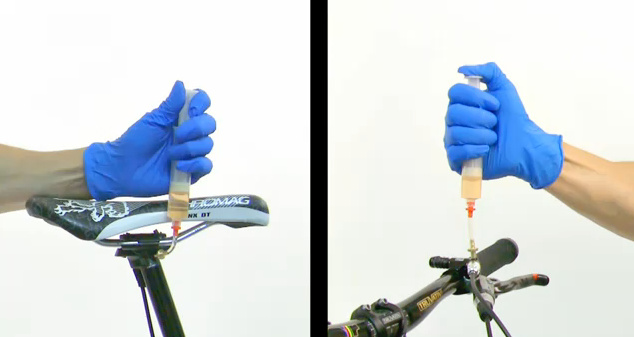
Step 2: Use a syringe to inject hydraulic fluid into the bleeding hose. Make sure to use the correct type of fluid for your RockShox Reverb, as specified in the owner’s manual.
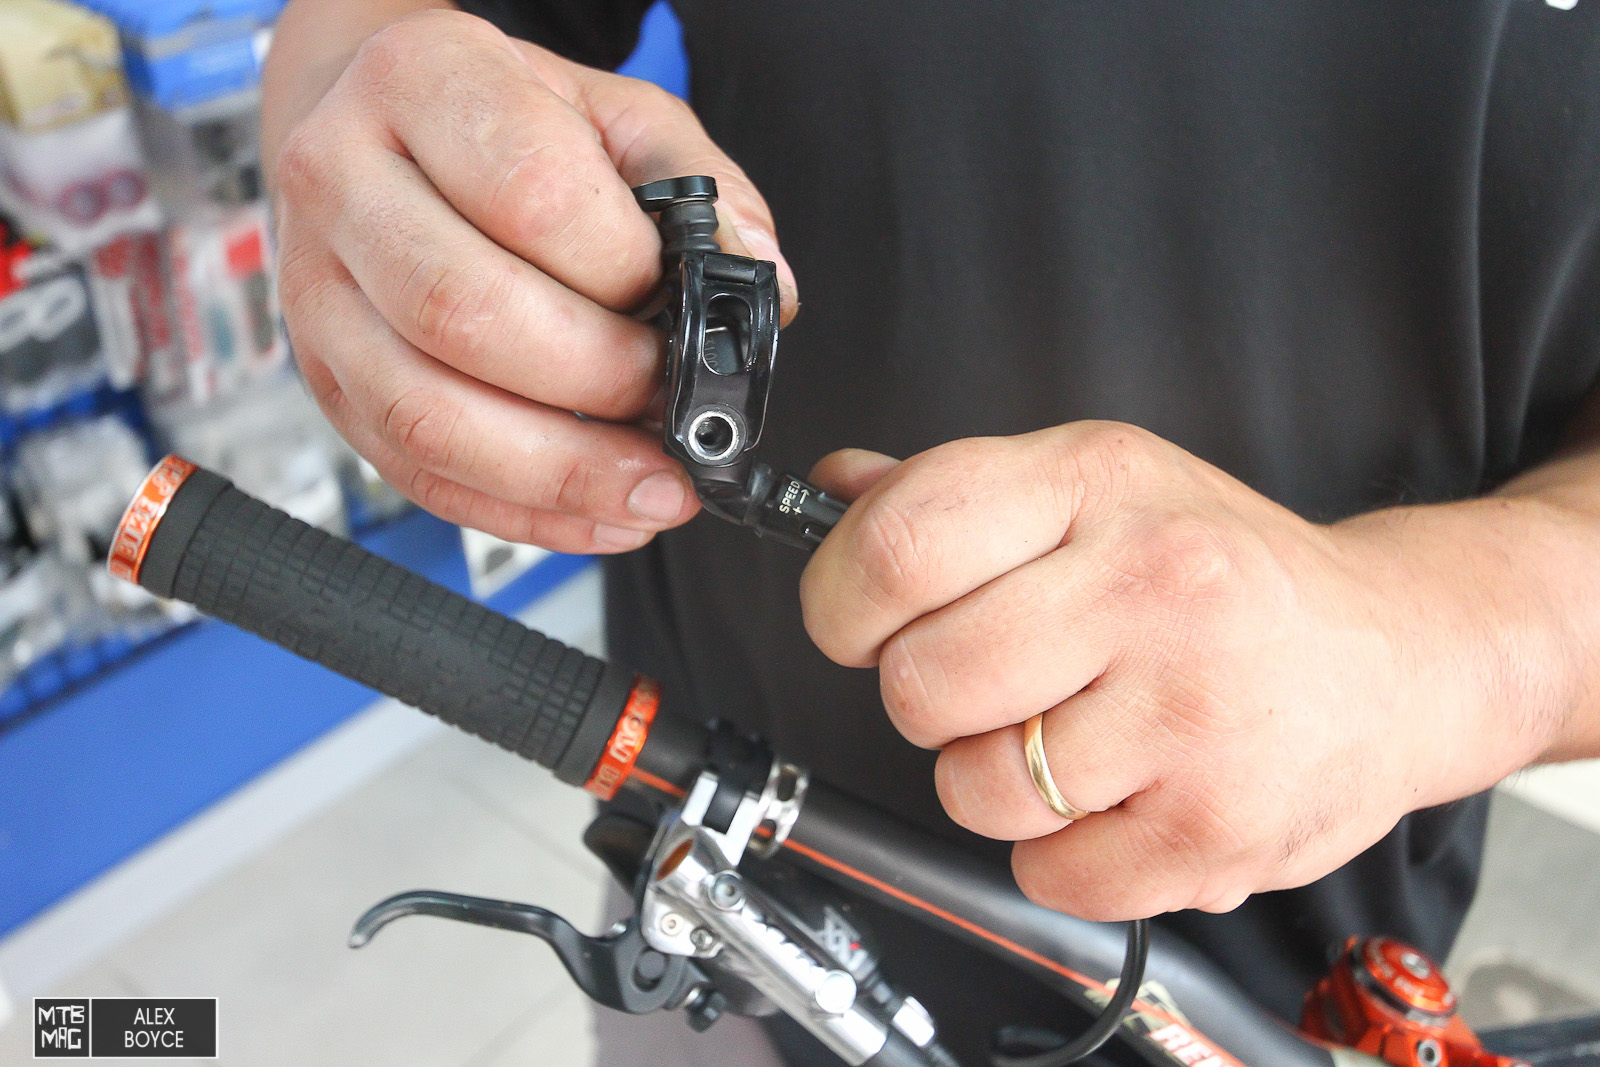
Step 3: Use a wrench to loosen the actuator’s retaining ring. This will allow you to remove any air that may be trapped in the system.
Step 4: Use a dropper post bleeding kit to remove any air that may be trapped in the system. This kit typically includes a specialized tool that is designed to remove air from the hydraulic cylinder.
Step 5: Repeat steps 2-4 until the hydraulic fluid is flowing smoothly and there are no signs of air in the system.
Step 6: Once the bleeding process is complete, use a torque wrench to tighten the actuator’s retaining ring. Make sure that the ring is tightened to the specified torque value, as specified in the owner’s manual.
Troubleshooting Common Issues:
If you encounter any issues during the bleeding process, such as air in the system or faulty seals, refer to the troubleshooting section below for guidance on how to resolve these problems.
Tools and Materials Needed:
To bleed a RockShox Reverb, you will need the following tools and materials:
* Dropper post bleeding kit
* Hydraulic fluid
* Syringe
* Wrench
* Torque wrench
By following these steps and using the correct tools and materials, you can successfully bleed your RockShox Reverb and ensure optimal performance and longevity.
Troubleshooting Common Issues with Your RockShox Reverb
Despite regular maintenance and bleeding, issues can still arise with your RockShox Reverb. Here are some common problems and their solutions:
Air in the System:
If you notice that your RockShox Reverb is not functioning smoothly, or if you hear a hissing sound when you move the post, it may be due to air in the system. To resolve this issue, you will need to bleed the system again, following the steps outlined in the previous section.
Faulty Seals:
If you notice that your RockShox Reverb is leaking hydraulic fluid, it may be due to faulty seals. To resolve this issue, you will need to replace the seals, which can be done by following the manufacturer’s instructions or by taking your bike to a professional mechanic.
Stuck or Frozen Post:
If your RockShox Reverb post becomes stuck or frozen, it may be due to dirt or debris in the system. To resolve this issue, you will need to clean the post and the hydraulic cylinder, and then bleed the system again.
Post Not Returning to Full Height:
If your RockShox Reverb post is not returning to its full height, it may be due to a problem with the hydraulic system or the post’s actuator. To resolve this issue, you will need to check the hydraulic system for any blockages or leaks, and then adjust or replace the post’s actuator as needed.
By following these troubleshooting tips, you can quickly and easily resolve common issues with your RockShox Reverb and get back to riding with confidence.

Best Practices for Maintaining Your RockShox Reverb
To keep your RockShox Reverb in good working condition, it’s essential to follow some best practices for maintenance. Here are some tips to help you keep your dropper post running smoothly:
Regular Cleaning:
Regular cleaning is essential to keep your RockShox Reverb free from dirt and debris. Use a soft-bristled brush or a clean cloth to wipe down the post and the hydraulic cylinder. Make sure to clean the post’s actuator and the hydraulic cylinder’s seals to prevent dirt and debris from accumulating.
Regular Inspection:
Regular inspection is crucial to identify any signs of wear and tear on your RockShox Reverb. Check the post’s actuator and the hydraulic cylinder’s seals for any signs of damage or wear. Also, check the hydraulic fluid level and top it off as needed.
Identifying Signs of Wear and Tear:
It’s essential to identify signs of wear and tear on your RockShox Reverb to prevent any major issues from arising. Check for any signs of leakage, such as hydraulic fluid on the post or the frame. Also, check for any signs of corrosion or rust on the post’s actuator or the hydraulic cylinder’s seals.
By following these best practices, you can keep your RockShox Reverb in good working condition and ensure optimal performance and longevity. Remember to always refer to your owner’s manual for specific maintenance instructions and guidelines.
In the next section, we will discuss the options for upgrading or replacing your RockShox Reverb, including the benefits and drawbacks of each, and provide guidance on how to choose the best option for your needs.
Upgrading or Replacing Your RockShox Reverb: What You Need to Know
If you’re considering upgrading or replacing your RockShox Reverb, there are several options to consider. Here are some of the benefits and drawbacks of each option:
Upgrading to a Newer Model:
If you’re looking to upgrade to a newer model of the RockShox Reverb, you may be able to take advantage of new features and technologies that can improve the performance and reliability of your dropper post. However, upgrading to a newer model can also be expensive, and you may need to consider the cost of new components and installation.
Replacing with a Different Brand:
If you’re not satisfied with the performance of your RockShox Reverb, you may be considering replacing it with a different brand. There are several other brands of dropper posts available, each with their own unique features and benefits. However, replacing your dropper post with a different brand can also be expensive, and you may need to consider the cost of new components and installation.
Refurbishing or Rebuilding Your Existing Post:
If you’re not ready to replace your RockShox Reverb entirely, you may be able to refurbish or rebuild your existing post. This can be a cost-effective option, but it may require some technical expertise and specialized tools.
When deciding whether to upgrade, replace, or refurbish your RockShox Reverb, it’s essential to consider your specific needs and preferences. Think about the type of riding you do, the terrain you ride on, and the level of performance you need from your dropper post. By considering these factors, you can make an informed decision that meets your needs and budget.
In the next section, we will summarize the key takeaways from this article, emphasizing the importance of regular maintenance and bleeding for optimal performance and longevity of the RockShox Reverb.
Conclusion: Mastering the Art of Dropper Post Maintenance
In conclusion, mastering the art of dropper post maintenance is crucial for optimal performance and longevity of the RockShox Reverb. By following the steps outlined in this article, you can ensure that your dropper post is functioning smoothly and reliably, and that you’re getting the most out of your ride.
Regular maintenance, including bleeding, is essential for keeping your RockShox Reverb in good working condition. By understanding the anatomy of your dropper post and following the steps outlined in this article, you can troubleshoot common issues and keep your post running smoothly.
Additionally, upgrading or replacing your RockShox Reverb can be a great way to improve the performance and reliability of your dropper post. By considering your options and choosing the best one for your needs, you can ensure that you’re getting the most out of your ride.
By following the tips and guidelines outlined in this article, you can master the art of dropper post maintenance and keep your RockShox Reverb running smoothly and reliably. Remember to always refer to your owner’s manual for specific maintenance instructions and guidelines, and don’t hesitate to seek professional help if you’re unsure about any aspect of dropper post maintenance.
With regular maintenance and bleeding, you can ensure that your RockShox Reverb is functioning at its best, and that you’re getting the most out of your ride. Happy trails!