Can You Bring a Bike on a Plane? An In-Depth Analysis
Deciding whether to bring your bike along on a plane trip can be a daunting task. The question “can you bring a bike on a plane” is a common one among cycling enthusiasts and travelers alike. Understanding the answer to this question is crucial before planning a trip with a bicycle, as it can significantly impact your travel experience. This comprehensive guide will delve into the intricacies of airline policies, preparation checklists, bike boxes and cases, and alternative transportation options to help you make an informed decision.

Click Image to Find eBike Products

Airline Policies: Navigating the Complexities
When considering whether you can bring a bike on a plane, it’s essential to understand the various airline policies regarding bicycle transportation. Each airline has its own set of rules and regulations, which can significantly impact your travel experience. Generally, there are three categories for transporting bicycles on planes: checked baggage, oversized baggage, and specialized bike transportation options.
Checked baggage is the standard option for transporting most luggage, including bicycles. However, due to size and weight restrictions, some airlines may classify bikes as oversized baggage, resulting in additional fees. Specialized bike transportation options, such as dedicated bike bags or boxes, may be available and can sometimes offer a more streamlined process with lower fees.
To ensure a smooth experience, research your chosen airline’s policies before booking your ticket. Look for information on size and weight limits, fees, and packing requirements. Being well-informed about these policies will help you avoid unexpected charges and make the check-in process more manageable.
Preparing Your Bike for Air Travel: A Checklist
To ensure a hassle-free experience when bringing a bike on a plane, it’s crucial to follow a thorough preparation checklist. This list includes disassembling, packing, and protecting the bike during transit. Here’s a detailed breakdown of the steps to take:
- Disassemble the bike: Remove the pedals, handlebars, and wheels. Some airlines may require further disassembly, so check their policies beforehand.
- Clean the bike: Thoroughly clean the bike to prevent dirt and grime from damaging the frame or other components during transit.
- Deflate the tires: Partially deflate the tires to minimize the risk of damage during pressure changes in the cargo hold.
- Protect the bike: Wrap each component in bubble wrap or a soft cloth to prevent scratches and damage. Use additional padding for fragile parts like the derailleur and brakes.
- Secure the bike: Use cable ties or zip ties to keep the bike’s components together, making it easier to transport and less likely to incur damage.
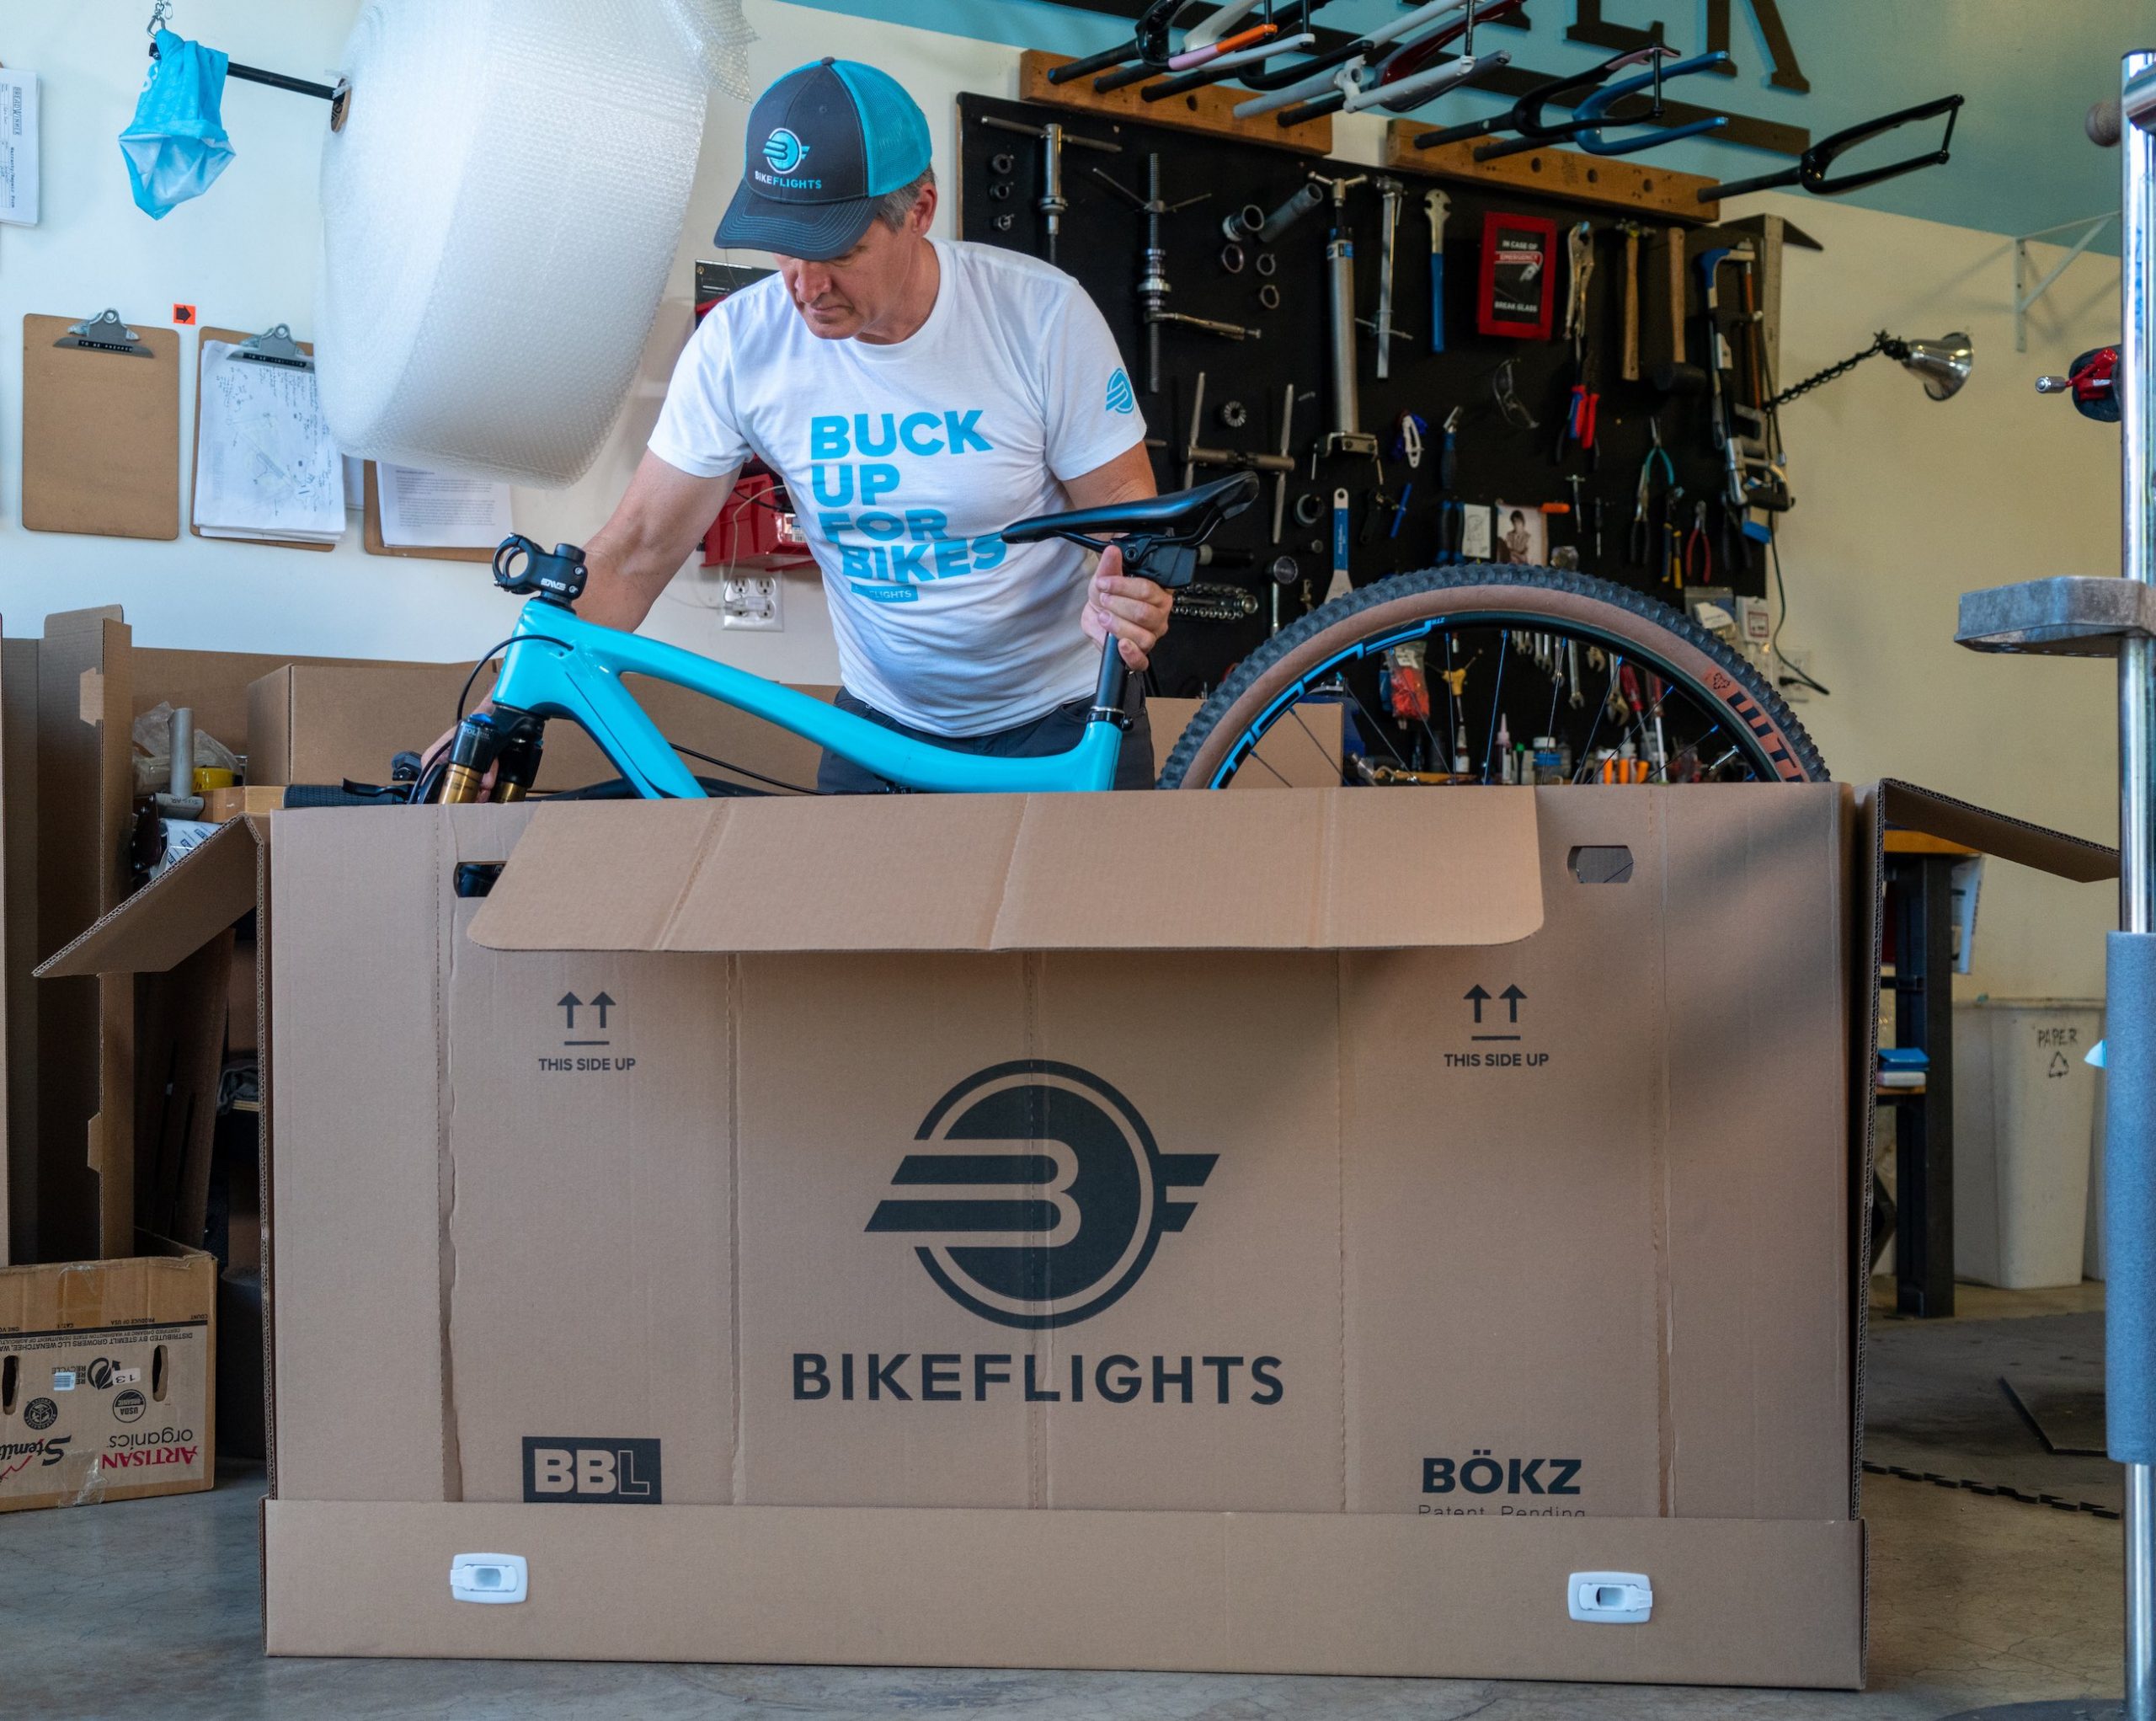
- Pack the bike: Place the wrapped and secured bike components in a suitable bike box or case, following the manufacturer’s instructions for proper assembly.
- Label the bike: Clearly mark the bike box or case as “Fragile” and include your name, contact information, and destination details.
By following this checklist, you can help ensure that your bike arrives at its destination in the best possible condition. Remember to consult the airline’s policies for any additional requirements or recommendations.

Bike Boxes and Cases: Selecting the Right Protection
Protecting your bike during air travel is crucial, and choosing the right bike box or case can make all the difference. Various options are available, each with its unique features, benefits, and costs. Here’s a comparison of some popular bike boxes and cases, along with recommendations based on user reviews and expert opinions.
Cardboard Bike Boxes
Cardboard bike boxes are often provided free of charge by bike shops when you purchase a new bike or need to transport it. They are lightweight and disposable, making them a convenient option for one-way trips. However, they may not offer the same level of protection as more durable options.
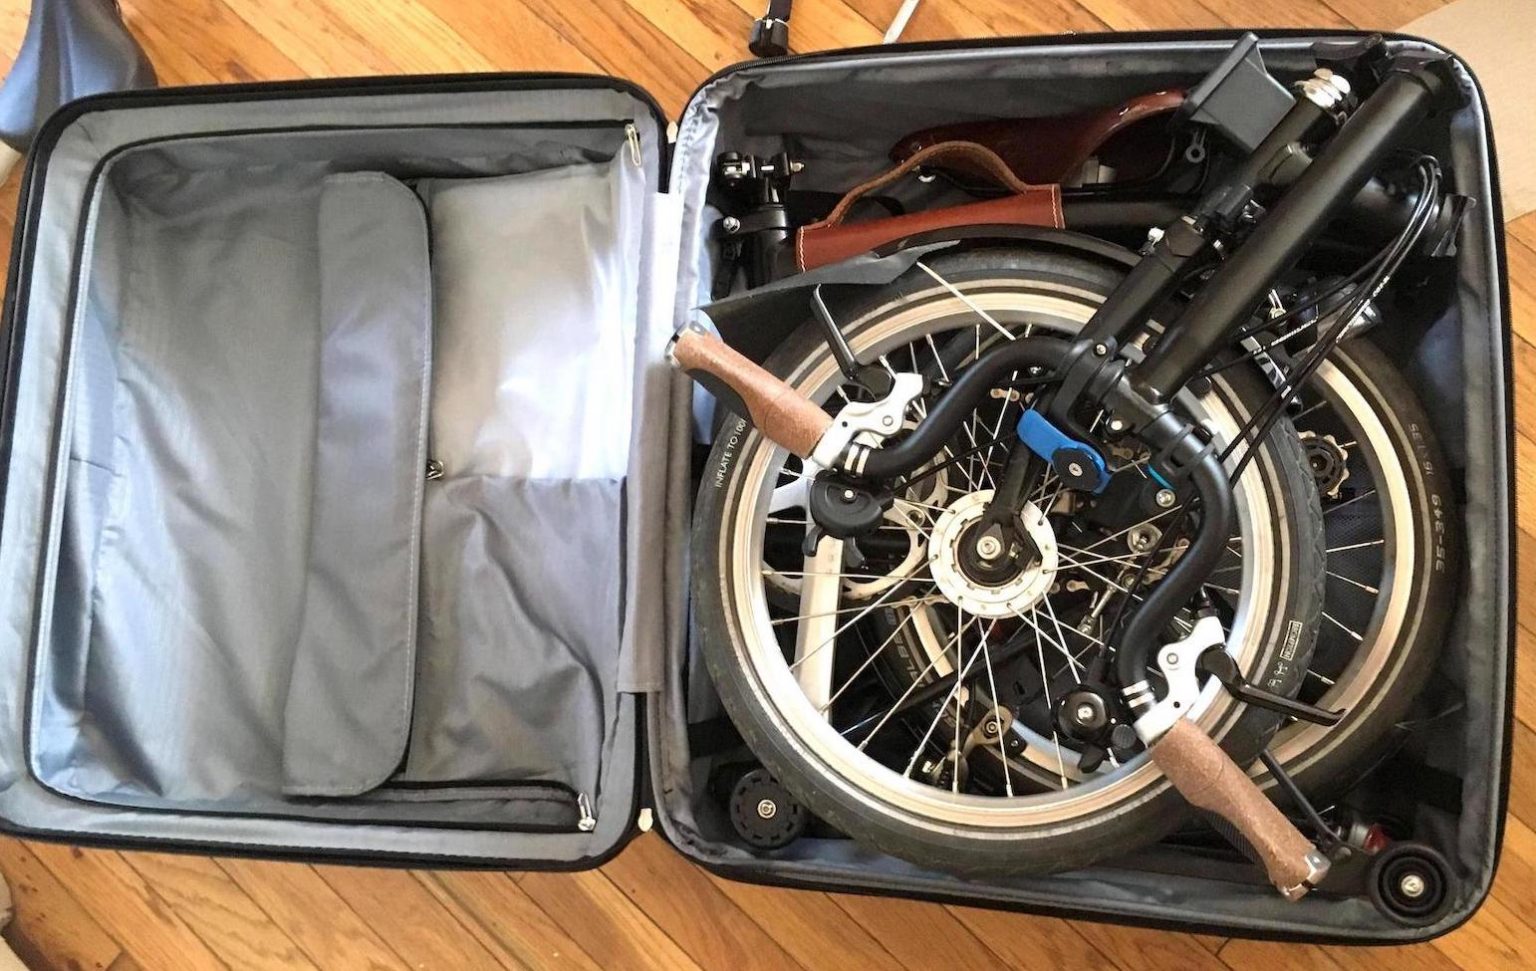
Soft Bike Cases
Soft bike cases are made of padded fabric and are designed to protect your bike during transit. They are typically more affordable than hard cases and are easier to store when not in use. However, they may not provide sufficient protection against rough handling or heavy impacts.
Hard Bike Cases
Hard bike cases are made of sturdy materials like plastic or aluminum and offer superior protection for your bike. They often come with built-in wheels and handles for easy transport, but they can be more expensive and heavier than other options. Some popular hard bike cases include the ![]()
How to Pack a Bike for Air Travel: Step-by-Step Instructions
Now that you have reviewed the checklist for preparing your bike for air travel and explored the various bike boxes and cases available, it’s time to learn how to pack your bike for air travel. Follow these comprehensive, step-by-step instructions to ensure a smooth and damage-free transportation process.
- Disassemble the bike: Remove the pedals, handlebars, and wheels. Some airlines may require further disassembly, so check their policies beforehand.
- Clean the bike: Thoroughly clean the bike to prevent dirt and grime from damaging the frame or other components during transit.
- Deflate the tires: Partially deflate the tires to minimize the risk of damage during pressure changes in the cargo hold.
- Protect the bike: Wrap each component in bubble wrap or a soft cloth to prevent scratches and damage. Use additional padding for fragile parts like the derailleur and brakes.
- Secure the bike: Use cable ties or zip ties to keep the bike’s components together, making it easier to transport and less likely to incur damage.
- Assemble the bike box or case: Carefully follow the manufacturer’s instructions for assembling your chosen bike box or case. Ensure that it is properly secured and ready to receive the bike components.
- Place the bike in the box or case: Lay out the wrapped and secured bike components in the bike box or case, following the manufacturer’s recommendations for proper assembly.
- Fill any empty spaces: Use foam or additional bubble wrap to fill any empty spaces in the bike box or case, providing extra protection and preventing components from shifting during transit.
- Close and secure the bike box or case: Follow the manufacturer’s instructions for closing and securing the bike box or case. Ensure that it is properly sealed and that all latches or locks are engaged.
- Label the bike box or case: Clearly mark the bike box or case as “Fragile” and include your name, contact information, and destination details.
By following these step-by-step instructions, you can help ensure that your bike is safely and securely packed for air travel. Remember to consult the airline’s policies for any additional requirements or recommendations.

At the Airport: Check-In and Security Procedures
When traveling with a bicycle on a plane, it’s essential to understand the check-in and security procedures to ensure a smooth experience. Here, we will discuss the steps to follow, including any additional fees, paperwork, or inspections that may be required.
Check-In Procedures
Arrive at the airport with ample time to spare, as checking in a bicycle may take longer than regular luggage. Approach the check-in counter with your bike box or case, along with your photo identification and travel documents. Inform the agent that you have a bicycle to check in, and provide any necessary paperwork, such as a bike-specific baggage declaration form if required by the airline.
Additional Fees
Be prepared to pay any additional fees associated with checking a bicycle. These fees vary by airline and can depend on factors such as the size, weight, and type of bike box or case used. Some airlines may offer specialized bike transportation options for an additional fee, so research your chosen airline’s policies beforehand.
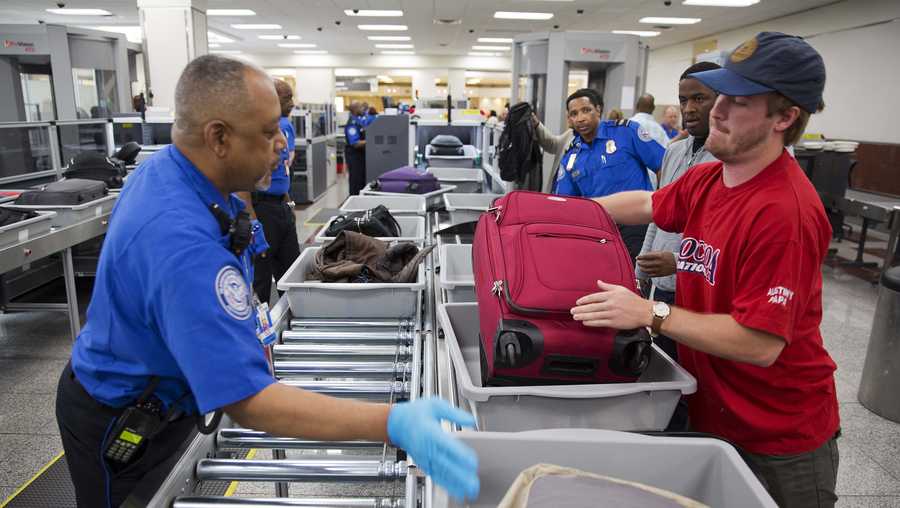
Security Procedures
Bike boxes and cases are typically subject to the same security screenings as other luggage. However, due to their size and shape, they may require additional inspections. If your bike box or case is selected for further inspection, cooperate with the Transportation Security Administration (TSA) or other airport security personnel and follow their instructions.
Oversized Baggage
If your bike box or case exceeds the standard size limitations for checked baggage, it may be classified as oversized baggage. In this case, you may need to follow specific procedures or handle your oversized item differently than regular luggage. Consult your airline’s policies for more information on handling oversized baggage.
By understanding the check-in and security procedures for traveling with a bicycle on a plane, you can help ensure a smooth and hassle-free experience. Remember to research your chosen airline’s policies and arrive at the airport with ample time to spare.
Upon Arrival: Assembling and Inspecting Your Bike
After a long flight, the last thing you want is to encounter issues with your bicycle upon arrival. To ensure a smooth transition, follow these steps for assembling and inspecting your bike, making sure all parts are intact and functioning properly.
Assembling Your Bike
Locate a spacious area, preferably indoors, to assemble your bike. This will provide ample room and protect your bike from the elements. Begin by unpacking your bike box or case, taking care to lay out all components in an organized manner. Refer to the disassembly checklist you created before your trip to ensure you have all necessary parts and tools. Carefully reassemble your bike, double-checking that all bolts and screws are tightened to the manufacturer’s recommended torque settings.
Inspecting Your Bike
Once your bike is fully assembled, perform a thorough inspection. Check for any signs of damage, such as scratches, dents, or bent components. Pay particular attention to the frame, wheels, and delicate components like the derailleur and brakes. Inflate your tires to the recommended pressure and test ride your bike in a safe area to ensure everything is functioning correctly. If you notice any issues, document them with photographs and contact the airline or bike box/case manufacturer as soon as possible to file a claim.
Maintenance and Adjustments
After a long flight, your bike may require some maintenance and adjustments. Familiarize yourself with your bike’s maintenance schedule and perform any necessary tasks, such as lubricating the chain, adjusting the brakes, or tightening loose components. If you are not comfortable performing these tasks yourself, consider visiting a local bike shop for assistance.
By following these steps for assembling and inspecting your bike upon arrival, you can help ensure a smooth and enjoyable experience. Always allow ample time for this process, and be prepared to make any necessary adjustments or repairs before embarking on your cycling adventure.
Alternatives to Air Travel: Exploring Other Transportation Options
While air travel is a popular choice for long-distance travel, it may not always be the most convenient or cost-effective option for transporting your bicycle. In this section, we will discuss alternative transportation methods, such as trains, buses, and personal vehicles, and weigh their pros and cons compared to air travel.
Trains
Train travel can be an excellent alternative to air travel, as many trains offer dedicated spaces for bicycles. Some trains even allow you to bring your bike on board without disassembly. Research your chosen train line’s bicycle transportation policies, as they can vary significantly. Keep in mind that train schedules and routes may be limited compared to air travel, so plan accordingly.
Buses
Like trains, bus companies often have specific policies regarding bicycle transportation. Some buses provide dedicated spaces for bicycles, while others may require you to disassemble and pack your bike in a suitable case. Be sure to research your chosen bus company’s bicycle transportation policies and plan for any additional time required for packing and loading your bike.
Personal Vehicles
Traveling by car, van, or RV can provide flexibility and convenience when transporting your bicycle. You can avoid the hassle of disassembly, packing, and checking fees associated with air travel. However, personal vehicle travel may not be as time-efficient as air travel, and fuel costs, tolls, and parking fees should be considered.
Pros and Cons
Each transportation method has its advantages and disadvantages. Air travel offers speed and convenience but can be expensive and may require disassembly, packing, and checking fees. Trains and buses can be more budget-friendly and allow you to bring your bike on board without disassembly, but schedules and routes may be limited. Personal vehicle travel provides flexibility and convenience but can be time-consuming and may incur additional costs.
By exploring alternative transportation options for traveling with a bicycle, you can make an informed decision based on your specific needs and preferences. Always research your chosen transportation method’s bicycle transportation policies and plan accordingly to ensure a smooth and enjoyable experience.