
When It’s Time to Change a Bike Pedal: Understanding the Necessity
Bike pedals are an essential component of any bicycle, providing the crucial connection between the rider and the bike. Over time, bike pedals may experience wear and tear, necessitating a change. Regular bike maintenance is vital to ensure the optimal performance and safety of your bike. Changing bike pedals can also be an opportunity to upgrade to clipless pedals, which offer increased efficiency and control for experienced riders. Personal preference, such as a desire for a different style or color, can also be a reason to change bike pedals. By understanding the necessity of changing bike pedals, cyclists can make informed decisions about their bike maintenance and upgrades.

Click Image to Find eBike Products

Tools and Equipment for Changing Bike Pedals
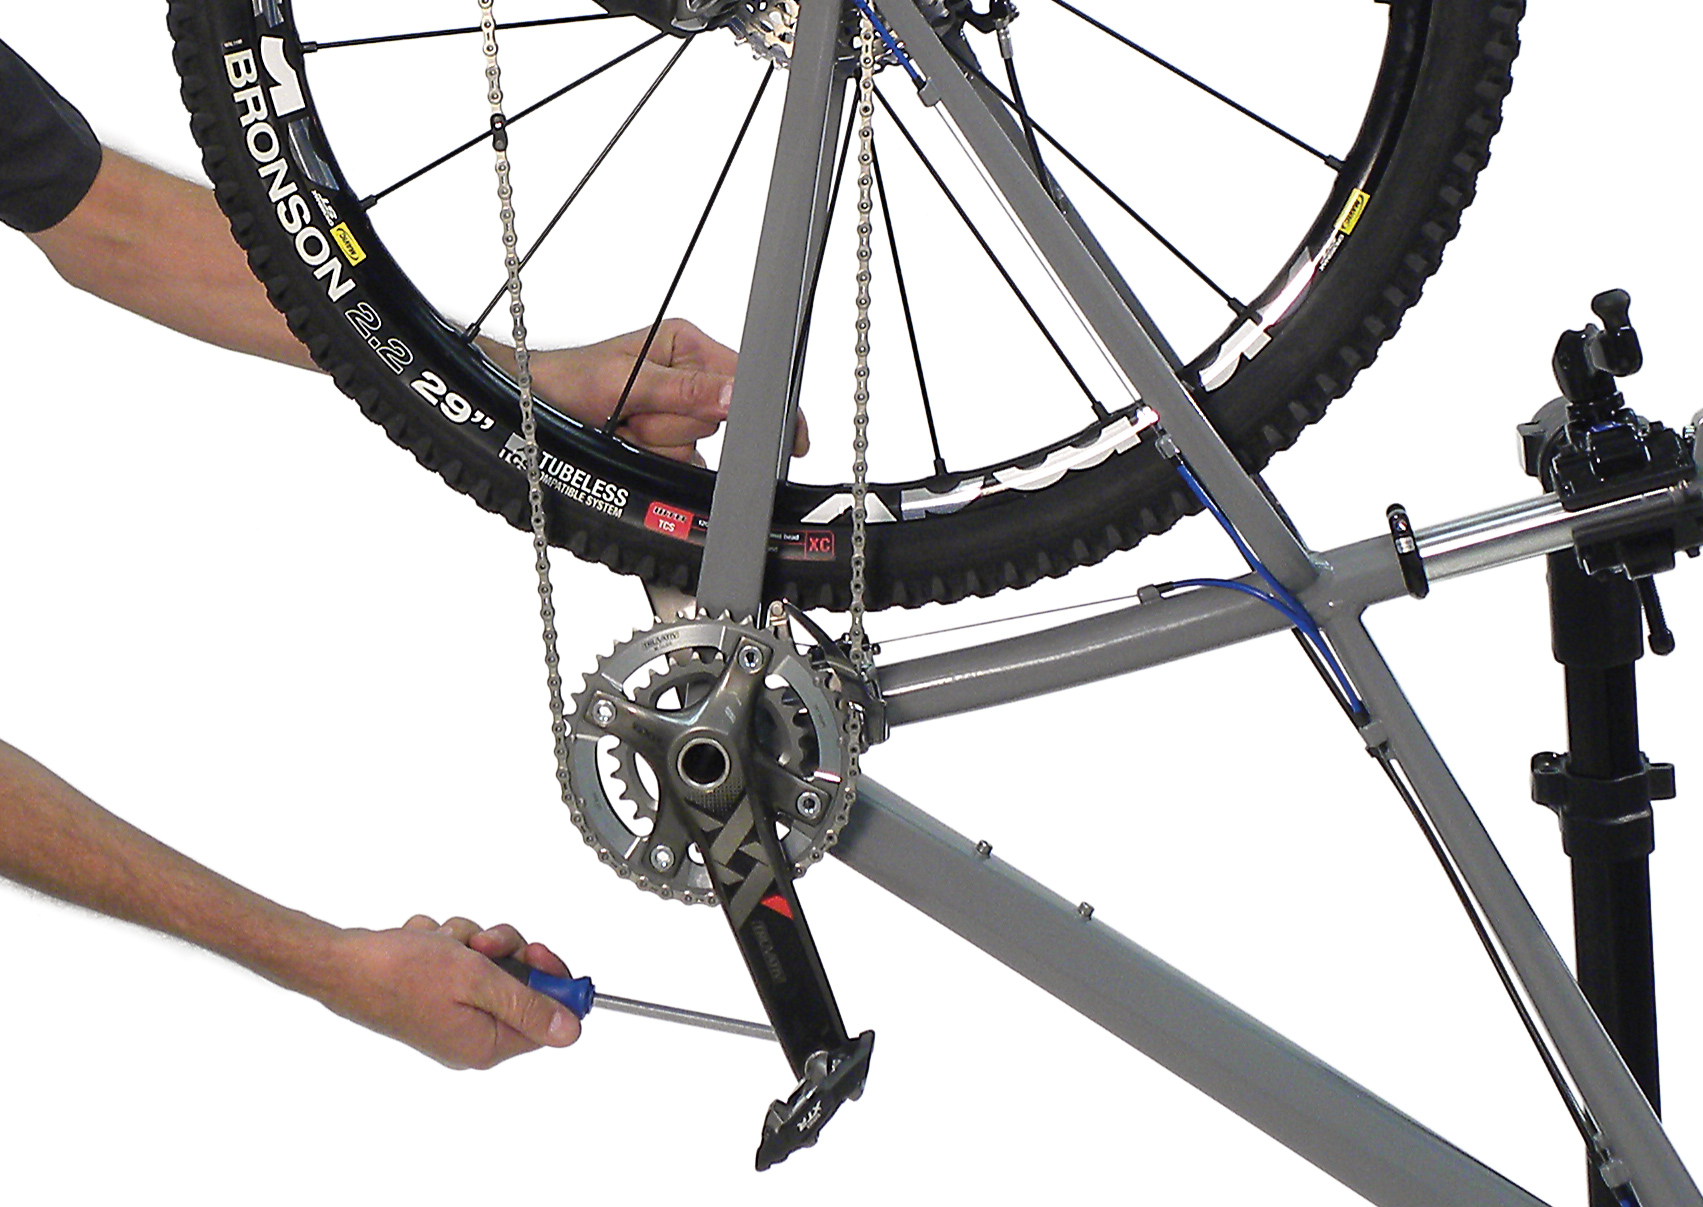
To change a bike pedal, you’ll need a few essential tools and equipment. A pedal wrench is the most common tool for removing and installing bike pedals. These wrenches are specifically designed to fit the unique shape of bike pedals, providing the necessary leverage for the job. A 15mm wrench or an adjustable wrench can also be used as alternatives, although they may not offer the same level of precision and efficiency as a pedal wrench. Additionally, a bike stand can provide stability and ease of use during the pedal change process, allowing you to securely position your bike at a comfortable working height.
How to Remove the Existing Bike Pedal: Step-by-Step Instructions
To remove the existing bike pedal, follow these detailed steps for a smooth and efficient process:
Identify the right and left pedals: Before you start, it’s essential to know that the right pedal is reverse-threaded, meaning it tightens when you turn it clockwise and loosens when you turn it counterclockwise. The left pedal, on the other hand, is standard-threaded and tightens when turned counterclockwise and loosens when turned clockwise.
Apply the appropriate amount of force: When removing the pedals, ensure you apply the correct amount of force. Pedals are typically tight, so you may need to use additional leverage. Be cautious not to overdo it, as excessive force can damage the crank arms or pedal threads.
Use the correct tools: A pedal wrench is the ideal tool for removing bike pedals, as it provides the necessary leverage and fits the unique shape of the pedal. If you don’t have a pedal wrench, a 15mm wrench or an adjustable wrench can be used as alternatives, although they may not offer the same level of precision and efficiency.
Steps for removing the right pedal:
a. Place the wrench on the flat surface of the right pedal.
b. Apply counterclockwise force to loosen and remove the pedal.
Steps for removing the left pedal:
a. Place the wrench on the flat surface of the left pedal.
b. Apply clockwise force to loosen and remove the pedal.
Tips for a successful pedal removal:
Use a quality wrench to ensure a better grip and prevent slippage.
If you encounter resistance, try tapping the wrench gently with a rubber mallet to help break the pedal free.
If the pedal still won’t budge, apply some penetrating oil to the threads and let it sit for a while before attempting removal again.

How to Install the New Bike Pedal: A Comprehensive Walkthrough
After successfully removing the existing bike pedals, it’s time to install the new ones. Follow these steps for a proper installation:
Apply grease: Before installing the new pedals, apply a thin layer of grease to the pedal threads. This step reduces the likelihood of cross-threading and seizing, ensuring a smooth and secure installation.
Align the threads: Carefully align the pedal threads with the crank arms. It’s crucial to ensure that the threads are correctly engaged before tightening the pedals.
Tighten the pedals: Using a pedal wrench or an adjustable wrench, tighten the pedals to the recommended torque. For most pedals, a torque of 30-40 Nm is appropriate. Over-tightening can strip the threads or damage the crank arms, while under-tightening can lead to pedal slippage and reduced performance.
Right pedal installation:
a. Align the right pedal’s thread with the right crank arm.
b. Turn the pedal clockwise to tighten.
Left pedal installation:
a. Align the left pedal’s thread with the left crank arm.
b. Turn the pedal counterclockwise to tighten.
Tips for a successful pedal installation:
Double-check that the pedals are correctly threaded before tightening to prevent cross-threading.
Use a torque wrench to ensure the pedals are tightened to the recommended torque.
After installation, test the pedals by applying force to ensure they are securely fastened.
Troubleshooting Common Issues During the Pedal Change Process
Changing bike pedals can sometimes present challenges. Here are some common issues and their solutions:
Cross-threading: Cross-threading occurs when the pedal threads are not correctly aligned during installation, causing damage to the crank arms or pedals. To avoid cross-threading, ensure the threads are correctly engaged before tightening the pedals. If cross-threading has already occurred, you may need to replace the affected components.
Seized pedals: Pedals can become seized due to corrosion or insufficient lubrication. To remove a seized pedal, try soaking the threads in penetrating oil for several hours before attempting removal. If the pedal still won’t budge, use a pedal wrench in conjunction with a rubber mallet to gently tap the wrench and help break the pedal free.
Difficulty aligning the threads: If you’re having trouble aligning the pedal threads with the crank arms, try using a flashlight to illuminate the area, making it easier to see the threads. Additionally, ensure that the pedal is correctly oriented before attempting to engage the threads.
Preventive measures:
Regularly inspect and maintain your bike pedals to prevent issues from arising.
Apply grease to the pedal threads before installation to reduce the likelihood of cross-threading and seizing.
Use the correct tools for the job, and avoid using excessive force during the pedal change process.

Maintaining Your New Bike Pedals: Best Practices and Tips
Proper maintenance is crucial for ensuring the longevity and performance of your bike pedals. Here are some best practices and tips for maintaining your new bike pedals:
Regular cleaning: Remove dirt, debris, and grime from your pedals using a brush, warm water, and mild soap. Rinse the pedals thoroughly and dry them to prevent corrosion.
Lubrication: Apply a light lubricant, such as a bike-specific grease or oil, to the pedal threads and bearing surfaces. This step reduces friction, minimizes wear, and ensures smooth operation.
Inspection: Periodically inspect your pedals for signs of wear, damage, or loosening. Tighten the pedals if necessary, and replace them if they show excessive wear or damage.
Winter care: Protect your pedals from the corrosive effects of road salt and other winter hazards by applying a protective coating, such as wax or a specialized corrosion inhibitor.
Storage: Store your bike in a dry, clean environment to minimize the risk of corrosion and damage to your pedals.
By following these best practices and tips, you can ensure that your bike pedals remain in optimal condition, enhancing the overall performance and safety of your bike.
Selecting the Right Bike Pedals for Your Needs: A Brief Overview
Choosing the right bike pedals is essential for enhancing your riding experience. Here is a brief overview of the different types of bike pedals available, along with their advantages and disadvantages:
Flat Pedals
Flat pedals, also known as platform pedals, are the most common type of pedal. They offer a simple, user-friendly design and are suitable for various riding styles, from casual commuting to downhill mountain biking.
- Advantages: Easy to use, versatile, and compatible with any shoe type.
- Disadvantages: Less efficient than clipless pedals, and riders may experience foot slippage during intense pedaling.
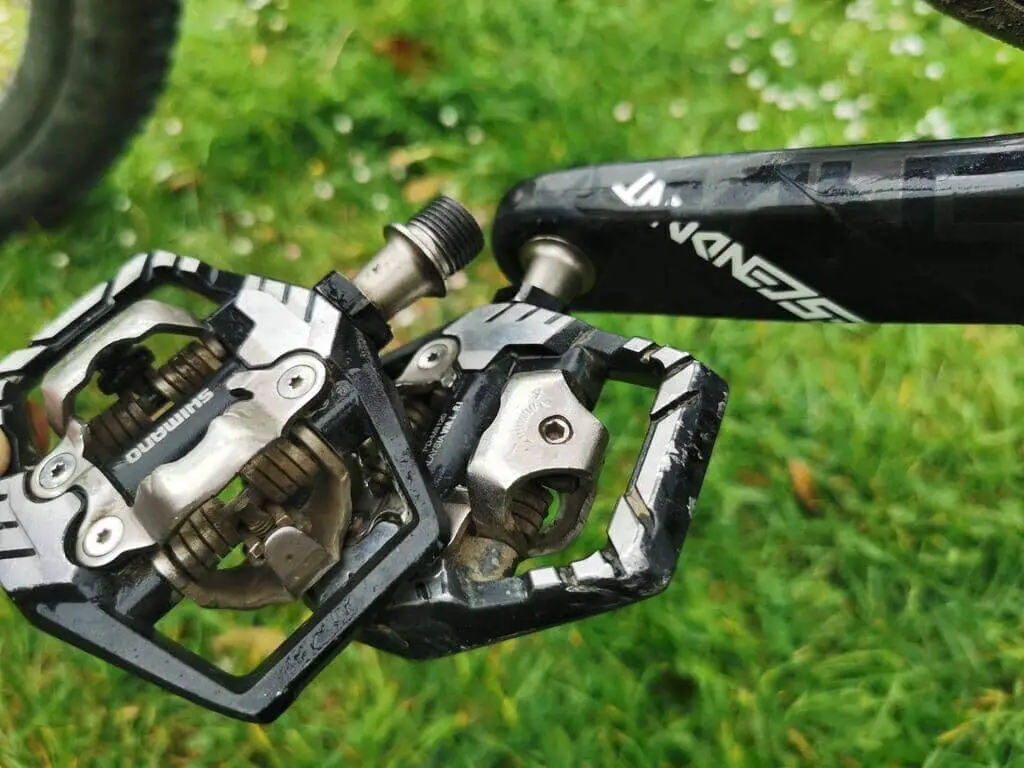
Clipless Pedals
Clipless pedals require special shoes with cleats that attach to the pedals, creating a secure connection between the rider and the bike. This connection enhances pedaling efficiency and power transfer.
- Advantages: Increased pedaling efficiency, improved power transfer, and a secure connection between the rider and the bike.
- Disadvantages: Require special shoes and cleats, and there is a learning curve for first-time users.
Hybrid Pedals
Hybrid pedals, also known as combination pedals, offer the benefits of both flat and clipless pedals. One side is flat, while the other features a clipless mechanism. This design allows riders to switch between shoe types and riding styles seamlessly.
- Advantages: Versatile, user-friendly, and suitable for various riding styles and shoe types.
- Disadvantages: Less efficient than dedicated clipless pedals and may not provide the same level of security as clipless pedals.
When selecting the right bike pedals, consider your riding style, skill level, and personal preferences. By choosing the appropriate pedals, you can significantly enhance your biking experience and overall performance.
Upgrading Your Bike: Additional Components to Consider
Changing bike pedals is just one aspect of upgrading your bike. Various other components can be upgraded to enhance the overall performance and comfort of your bike. Here are some additional components to consider:
Bike Seats
Bike seats, also known as saddles, play a crucial role in determining your riding comfort. Upgrading to a high-quality saddle designed for your riding style and body type can significantly improve your biking experience.
Handlebars
Upgrading your handlebars can provide better control, comfort, and ergonomics. Consider the material, width, shape, and rise of the handlebars to find the best option for your riding style and preferences.
Drivetrains
Drivetrains, which include the chain, cassette, derailleurs, and shifters, are essential for optimal gear shifting and pedaling efficiency. Upgrading to a higher-quality drivetrain can improve your bike’s performance and reduce maintenance requirements.
Suspension Systems
For mountain bikers, upgrading your bike’s suspension system can significantly enhance your riding experience. High-quality suspension forks and shocks offer better control, traction, and comfort on rough terrains.
Brakes
Upgrading your brakes can provide better stopping power, modulation, and safety. High-quality brakes, such as hydraulic disc brakes, offer superior performance, especially in wet or challenging conditions.
Wheels and Tires
Upgrading your wheels and tires can improve your bike’s performance, handling, and durability. Consider the material, rim width, spoke count, and tire tread pattern when selecting new wheels and tires.
When upgrading your bike, focus on components that align with your riding style, skill level, and preferences. By investing in high-quality components, you can significantly enhance your biking experience and overall performance.