Why Change Your Pedals: Benefits and Considerations
For cyclists, the pedals are a critical component of the bicycle, providing the interface between the rider’s feet and the bike. Over time, pedals can wear out, become less efficient, or no longer meet the rider’s needs. Changing pedals on a bicycle can bring numerous benefits, including improved performance, increased comfort, and enhanced safety. By upgrading to new pedals, cyclists can experience a more efficient and enjoyable ride.

Click Image to Find eBike Products
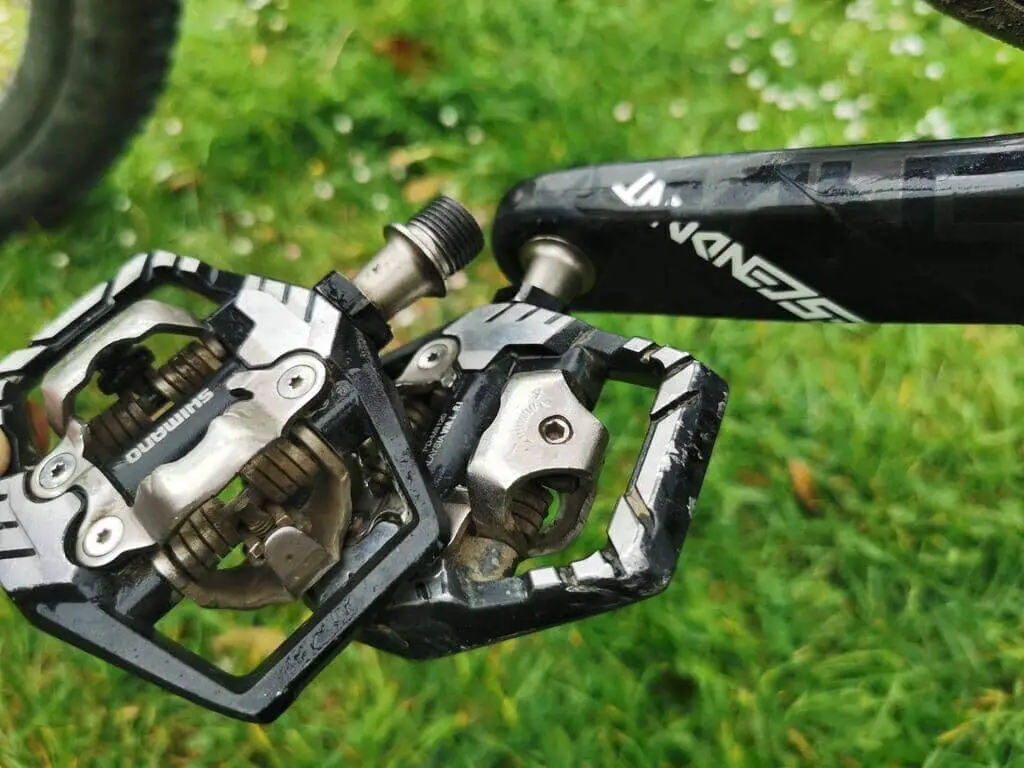
There are several types of pedals available, each designed to cater to different riding styles and preferences. Clipless pedals, for example, offer a secure connection between the shoe and pedal, providing improved stability and control. Platform pedals, on the other hand, provide a larger surface area for the foot, making them ideal for casual riding or commuting. Hybrid pedals combine the benefits of both, offering a clipless system with a platform for added support.
When considering changing pedals on a bicycle, it’s essential to think about the type of riding you’ll be doing most often. If you’re a competitive cyclist, clipless pedals may be the best choice. However, if you’re a casual rider or commuter, platform or hybrid pedals might be more suitable. Additionally, factors such as compatibility, material, and features should also be taken into account to ensure the new pedals meet your needs and preferences.
Some popular pedal brands, such as Shimano, SRAM, and Speedplay, offer a wide range of pedals designed to cater to different riding styles and preferences. These brands are known for their high-quality products, innovative designs, and durability. By choosing a reputable brand, cyclists can ensure they’re getting a reliable and efficient pedal system.
In conclusion, changing pedals on a bicycle can bring numerous benefits, including improved performance, increased comfort, and enhanced safety. By considering the type of riding you’ll be doing, compatibility, material, and features, cyclists can choose the perfect pedals for their needs. With the right pedals, cyclists can experience a more efficient and enjoyable ride, making every outing a pleasure.

Choosing the Right Pedals for Your Bike: A Buyer’s Guide
When it comes to changing pedals on a bicycle, selecting the right pedals can be a daunting task. With so many options available, it’s essential to consider several key factors to ensure you choose the perfect pedals for your bike. In this buyer’s guide, we’ll outline the crucial factors to consider, including compatibility, material, and features.
Compatibility is a critical factor to consider when choosing new pedals. Ensure the pedals are compatible with your bike’s crank arms and bottom bracket. Check the pedal’s spindle diameter and thread type to ensure they match your bike’s specifications. Additionally, consider the type of cleats or shoes you’ll be using with the pedals.
The material of the pedals is also an important consideration. Pedals can be made from a variety of materials, including aluminum, steel, and titanium. Aluminum pedals are lightweight and corrosion-resistant, while steel pedals are durable and affordable. Titanium pedals offer a high strength-to-weight ratio, making them ideal for high-performance applications.
Features are another essential factor to consider when choosing pedals. Consider the type of riding you’ll be doing most often and the features that are important to you. For example, if you’re a competitive cyclist, you may want pedals with a high level of adjustability and customization. If you’re a casual rider, you may prioritize pedals with a simple and intuitive design.
Popular pedal brands, such as Shimano, SRAM, and Speedplay, offer a wide range of pedals designed to cater to different riding styles and preferences. Shimano pedals are known for their high-quality bearings and durable construction. SRAM pedals offer a high level of adjustability and customization. Speedplay pedals are designed for high-performance applications and offer a unique pedal system.
When selecting pedals, it’s also essential to consider the level of maintenance and upkeep required. Some pedals require regular lubrication and cleaning, while others are designed to be low-maintenance. Consider the level of maintenance you’re willing and able to perform, and choose pedals that fit your needs.
By considering these key factors, you can choose the perfect pedals for your bike and enjoy a more efficient and enjoyable ride. Remember to always follow the manufacturer’s instructions for installation and maintenance to ensure the longevity of your pedals.
Preparing Your Bike for Pedal Replacement: Essential Tools and Steps
Before starting the pedal replacement process, it’s essential to prepare your bike and gather the necessary tools. Changing pedals on a bicycle requires some basic tools and a bit of preparation to ensure a smooth and successful process.
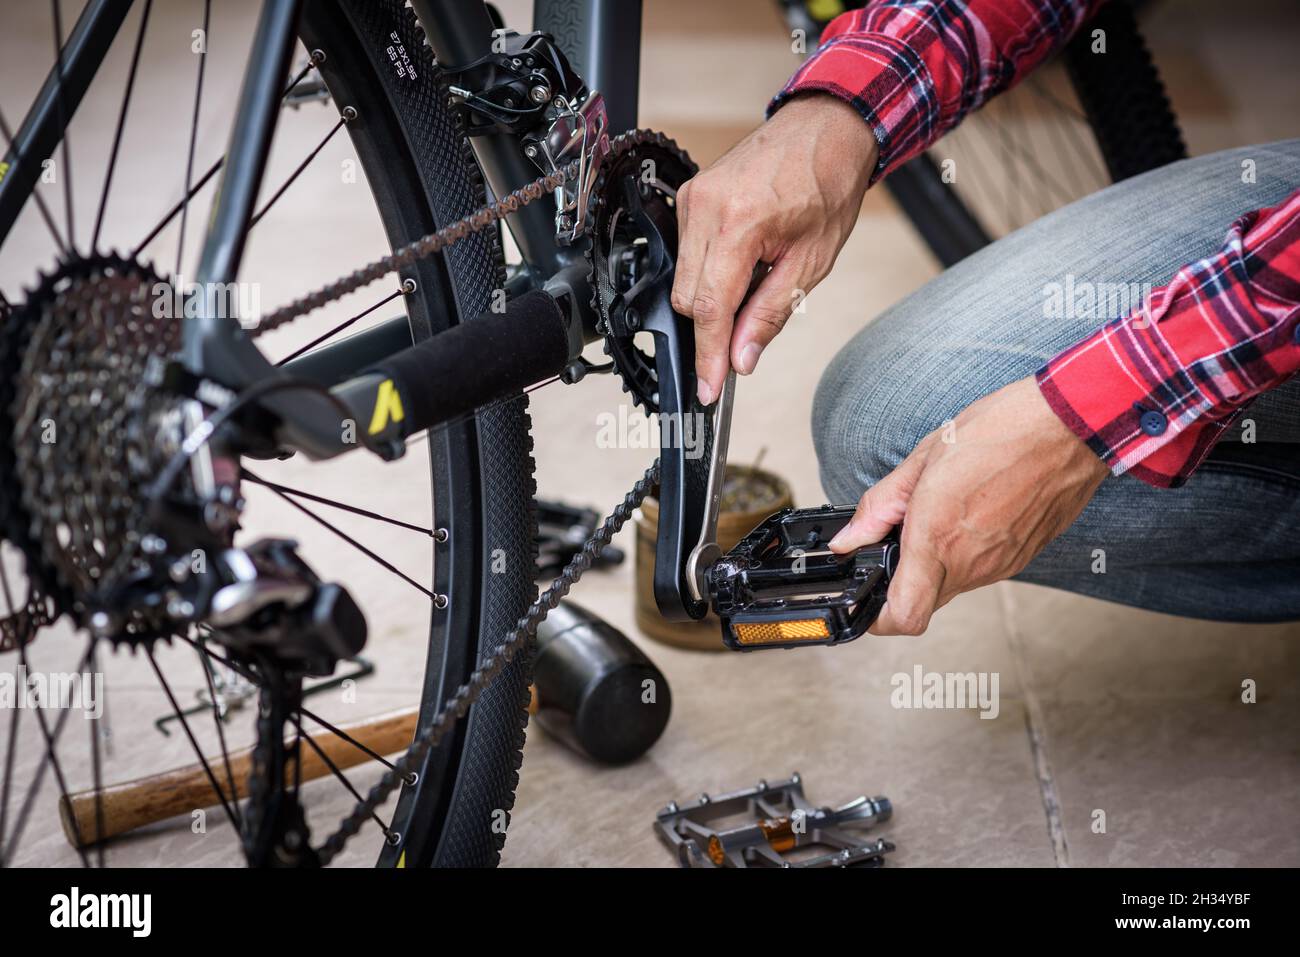
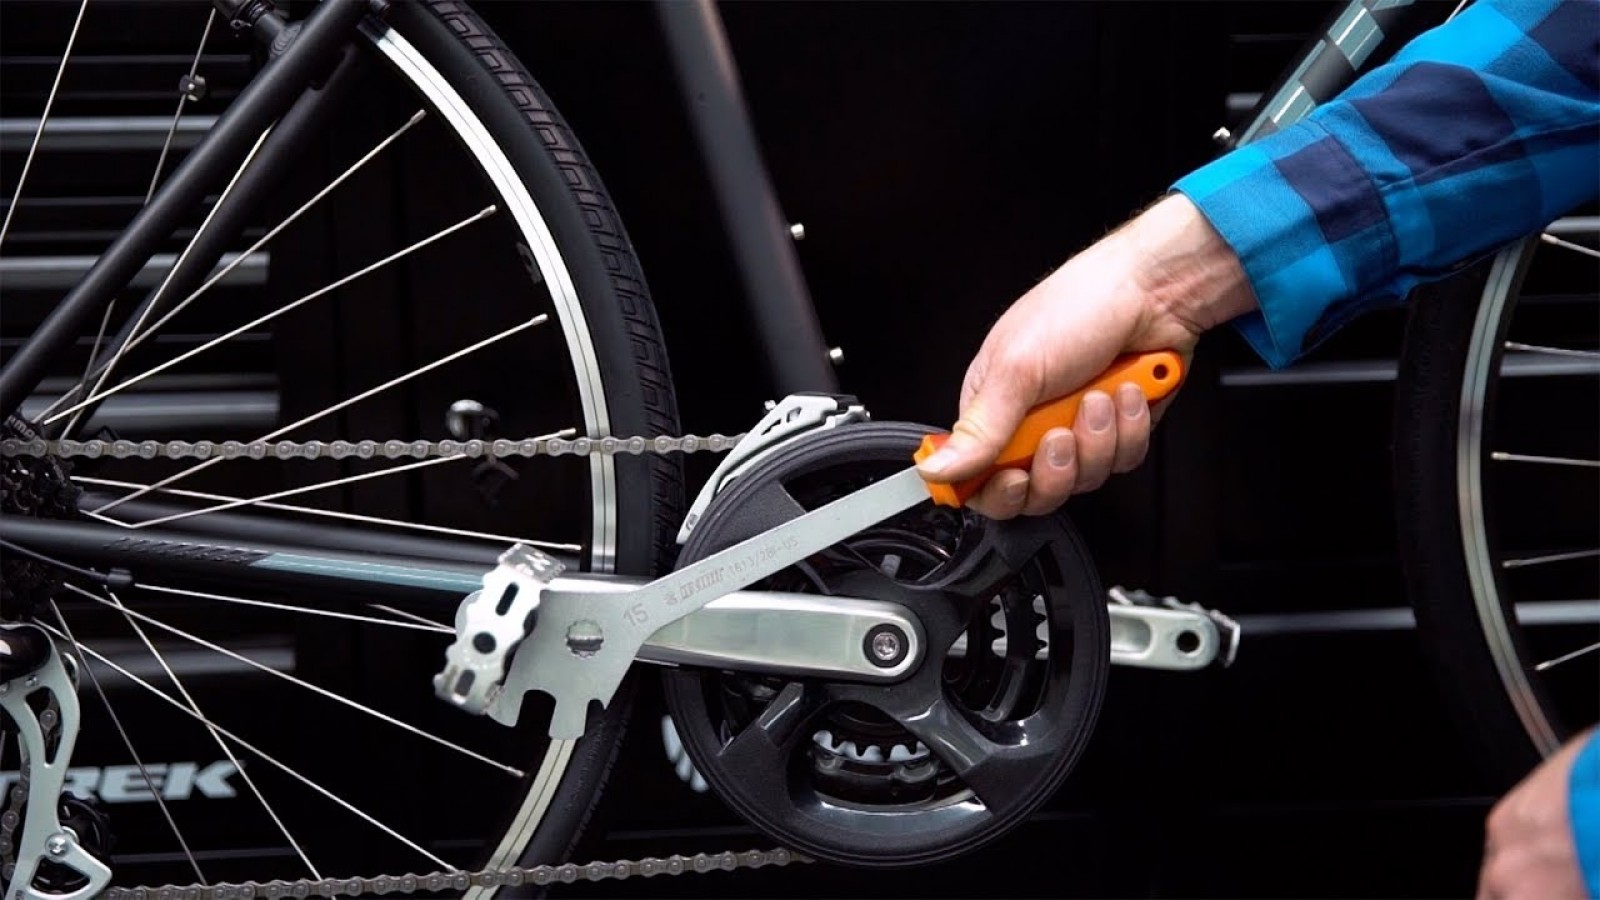
The first step is to gather the necessary tools, including an Allen wrench, pedal wrench, and grease. The Allen wrench is used to loosen the pedal bolts, while the pedal wrench is used to remove the pedals from the crank arms. Grease is applied to the pedal threads to ensure smooth installation and prevent corrosion.
Next, remove the old pedals from the crank arms using the pedal wrench. Be careful not to damage the crank arms or threads during the removal process. Once the pedals are removed, inspect the crank arms for any debris or corrosion. Clean the crank arms with a soft brush and apply grease to the threads to prepare them for the new pedals.
It’s also essential to check the pedal bolts for any damage or wear. If the bolts are damaged, replace them with new ones to ensure a secure and safe installation. Apply grease to the pedal bolts and threads to ensure smooth installation and prevent corrosion.
Before installing the new pedals, ensure the crank arms are clean and free of debris. Apply a small amount of grease to the pedal threads and insert the pedals into the crank arms. Hand-tighten the pedal bolts to secure the pedals in place.
By following these essential steps and gathering the necessary tools, you’ll be well-prepared to replace your bike pedals and enjoy a smooth and successful installation process. Remember to always refer to your bike’s manual for specific instructions and guidelines for pedal replacement.
With the bike prepared and the tools gathered, you’re now ready to start the pedal replacement process. In the next section, we’ll provide a step-by-step guide on how to install new pedals, including how to apply grease, align the pedals, and tighten the bolts.

A Step-by-Step Guide to Installing New Pedals
Installing new pedals on a bicycle can seem like a daunting task, but with the right tools and a bit of patience, it can be a straightforward process. In this section, we’ll provide a step-by-step guide on how to install new pedals, including how to apply grease, align the pedals, and tighten the bolts.
Step 1: Apply Grease to the Pedal Threads
Before installing the new pedals, apply a small amount of grease to the pedal threads. This will help ensure a smooth installation and prevent corrosion. Use a high-quality grease specifically designed for bicycle pedals.
Step 2: Align the Pedals
Next, align the pedals with the crank arms. Make sure the pedals are properly seated and the threads are aligned. Use a pedal wrench to gently turn the pedals and ensure they are securely attached to the crank arms.
Step 3: Tighten the Bolts
Once the pedals are aligned, tighten the bolts using an Allen wrench. Make sure the bolts are tightened securely, but do not overtighten. Overtightening can damage the pedals or the crank arms.
Step 4: Check the Pedal Tension
After installing the new pedals, check the pedal tension to ensure it is properly adjusted. The pedal tension should be firm, but not too tight. If the pedal tension is too loose, the pedals may come loose while riding.
Step 5: Test the Pedals
Finally, test the pedals to ensure they are properly installed and functioning correctly. Take the bicycle for a test ride to ensure the pedals are securely attached and the pedal stroke is smooth.
By following these steps, you can ensure a successful pedal installation and enjoy a smooth and efficient ride. Remember to always refer to your bicycle’s manual for specific instructions and guidelines for pedal installation.
With the new pedals installed, you’re now ready to test and adjust them to ensure a smooth ride. In the next section, we’ll provide tips on how to check pedal tension, adjust the cleats, and fine-tune the pedal stroke.

Troubleshooting Common Issues: Pedal Installation and Adjustment
When installing new pedals on a bicycle, it’s not uncommon to encounter some issues. In this section, we’ll address common problems that may arise during pedal installation and adjustment, and provide troubleshooting tips and solutions.
Loose Pedals
One of the most common issues with pedal installation is loose pedals. If the pedals are not tightened properly, they can come loose while riding, which can be dangerous. To fix this issue, check the pedal bolts and tighten them securely. Make sure not to overtighten, as this can damage the pedals or the crank arms.
Uneven Alignment
Another common issue is uneven alignment of the pedals. If the pedals are not aligned properly, it can cause discomfort and affect the performance of the bicycle. To fix this issue, check the pedal alignment and adjust it accordingly. Make sure the pedals are properly seated and the threads are aligned.
Creaking Sounds
Creaking sounds from the pedals can be annoying and affect the performance of the bicycle. To fix this issue, check the pedal bearings and lubricate them if necessary. Also, check the pedal threads and apply grease if necessary.
Pedal Play
Pedal play can be a problem if the pedals are not installed properly. To fix this issue, check the pedal bolts and tighten them securely. Also, check the pedal bearings and lubricate them if necessary.
By following these troubleshooting tips and solutions, you can fix common issues that may arise during pedal installation and adjustment. Remember to always refer to your bicycle’s manual for specific instructions and guidelines for pedal installation and adjustment.
With the pedals installed and adjusted properly, you’re now ready to test and fine-tune them to ensure a smooth ride. In the next section, we’ll provide tips on how to check pedal tension, adjust the cleats, and fine-tune the pedal stroke.
Testing and Adjusting Your New Pedals: Ensuring a Smooth Ride
Once you’ve installed your new pedals, it’s essential to test and adjust them to ensure a smooth ride. In this section, we’ll provide tips on how to check pedal tension, adjust the cleats, and fine-tune the pedal stroke.
Checking Pedal Tension
Pedal tension is critical to ensure a smooth ride. If the pedals are too loose, they can come loose while riding, which can be dangerous. On the other hand, if the pedals are too tight, they can cause discomfort and affect the performance of the bicycle. To check pedal tension, use a pedal wrench to tighten the pedal bolts. Check the pedal tension by applying gentle pressure to the pedals. If the pedals feel too loose or too tight, adjust the pedal tension accordingly.
Adjusting the Cleats
The cleats are the part of the pedal that attaches to the shoe. Adjusting the cleats is essential to ensure a comfortable and efficient ride. To adjust the cleats, use a cleat adjustment tool to loosen the cleat bolts. Then, adjust the cleats to the desired position and tighten the cleat bolts. Make sure the cleats are properly aligned and securely attached to the shoe.
Fine-Tuning the Pedal Stroke
The pedal stroke is the motion of the pedals as you ride. Fine-tuning the pedal stroke is essential to ensure a smooth and efficient ride. To fine-tune the pedal stroke, adjust the pedal tension and cleat position. Also, check the pedal bearings and lubricate them if necessary. By fine-tuning the pedal stroke, you can improve the performance of the bicycle and reduce fatigue.
By following these tips, you can test and adjust your new pedals to ensure a smooth ride. Remember to always refer to your bicycle’s manual for specific instructions and guidelines for pedal adjustment.
With your new pedals installed and adjusted, you’re now ready to enjoy a smooth and efficient ride. In the next section, we’ll provide tips on how to maintain and upkeep your new pedals, including regular cleaning, lubrication, and inspection.

Maintenance and Upkeep: Tips for Extending Pedal Life
To ensure the longevity of your new pedals, regular maintenance and upkeep are crucial. In this section, we’ll provide tips on how to maintain and upkeep your pedals, including regular cleaning, lubrication, and inspection.
Regular Cleaning
Regular cleaning is essential to remove dirt, dust, and other debris that can accumulate on the pedals. Use a soft brush to clean the pedals, paying attention to the areas around the bearings and the pedal threads. Avoid using harsh chemicals or abrasive materials that can damage the pedals.
Lubrication
Lubrication is critical to keep the pedals running smoothly. Apply a small amount of lubricant to the pedal bearings and threads. Use a high-quality lubricant specifically designed for bicycle pedals.
Inspection
Regular inspection is essential to identify any potential issues with the pedals. Check the pedals for any signs of wear or damage, such as cracks, dents, or corrosion. Also, check the pedal threads and bearings for any signs of wear or damage.
Replacing Worn-Out Pedals
Replacing worn-out pedals is essential to prevent accidents. If the pedals are worn out, they can cause the bicycle to malfunction, which can lead to accidents. Check the pedals regularly for any signs of wear or damage, and replace them if necessary.
By following these tips, you can extend the life of your pedals and ensure a smooth and efficient ride. Remember to always refer to your bicycle’s manual for specific instructions and guidelines for pedal maintenance and upkeep.
With proper maintenance and upkeep, your new pedals will provide you with years of reliable service. In the next section, we’ll summarize the benefits of changing bike pedals and encourage readers to take action.
Conclusion: Enjoy Your Upgraded Ride with New Pedals
Changing pedals on a bicycle can be a straightforward process, but it requires some knowledge and preparation. In this article, we’ve provided a step-by-step guide on how to replace bike pedals, including choosing the right pedals, preparing your bike, installing new pedals, troubleshooting common issues, testing and adjusting the pedals, and maintaining and upkeeping the new pedals.
By following these steps and tips, you can enjoy a smooth and efficient ride with your new pedals. Remember to always refer to your bicycle’s manual for specific instructions and guidelines for pedal replacement and maintenance.
Key Takeaways:
– Choose the right pedals for your bike, considering compatibility, material, and features.
– Prepare your bike for pedal replacement by gathering the necessary tools and cleaning the crank arms.
– Install new pedals by applying grease, aligning the pedals, and tightening the bolts.
– Troubleshoot common issues, such as loose pedals, uneven alignment, and creaking sounds.
– Test and adjust the new pedals to ensure a smooth ride.
– Maintain and upkeep the new pedals by regular cleaning, lubrication, and inspection.
By following these key takeaways, you can enjoy a safe and enjoyable ride with your new pedals. Share your experiences with new pedals in the comments below!