
The Essential Role of Proper Positioning on a Road Bike
Maintaining the correct position on a road bike is crucial for any cyclist, whether a beginner or an experienced rider. Adopting the proper posture offers numerous benefits, including enhanced efficiency, increased comfort, and reduced risk of injury. This article will delve into the importance of achieving the correct position on a road bike and provide actionable tips to help cyclists attain the optimal riding position.

Click Image to Find eBike Products

Understanding the Basic Anatomy of a Road Bike
To achieve the correct position on a road bike, it is essential to comprehend the primary components and their roles in ensuring a comfortable and efficient riding position. The main elements of a road bike include the frame, saddle, handlebars, and pedals. This section will discuss each component and its significance in contributing to the correct position on a road bike.
- Frame: The frame is the foundation of the bike, and its size and geometry play a critical role in determining the rider’s position. A properly fitting frame should allow the rider to maintain a comfortable and efficient posture while pedaling.
- Saddle: The saddle is where the rider spends most of their time, and its position and angle significantly impact the rider’s comfort and efficiency. Adjusting the saddle height and fore/aft position is crucial in achieving the correct position on a road bike.
- Handlebars: The handlebars are responsible for rider control and influence the rider’s posture. Adjusting the handlebar height, reach, and drop can help the rider achieve the ideal riding position, ensuring comfort and control during long rides.
- Pedals: Pedals are the interface between the rider and the bike, and their design and positioning can significantly affect pedaling efficiency and power transfer. Proper cleat positioning is essential in maximizing pedaling efficiency and minimizing knee strain.

Setting the Saddle Height: The Foundation of a Comfortable Ride
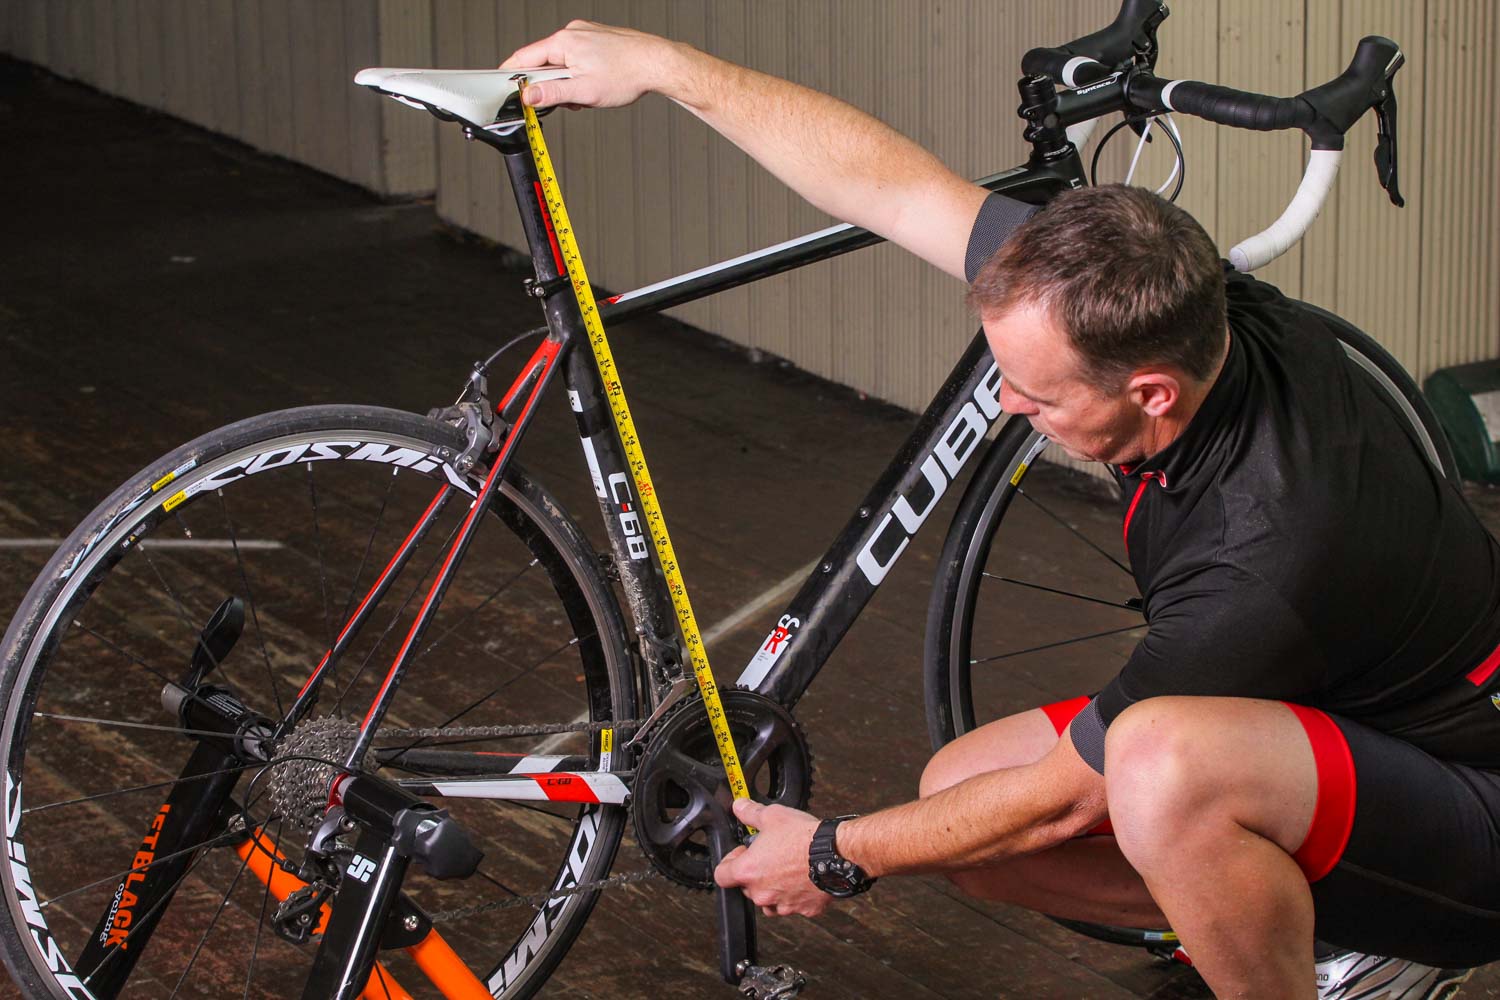
Setting the correct saddle height is the foundation for a comfortable and efficient road bike riding position. A properly adjusted saddle height ensures proper leg extension and pedaling efficiency, minimizing strain and discomfort during long rides. This section will discuss the steps to adjust the saddle height correctly and maintain the correct position on a road bike.
- Start by setting the saddle at the manufacturer’s recommended height, which is usually indicated on the seatpost or frame. This height is a good starting point and can be adjusted as needed.
- Clip into the pedals and place one heel on the pedal at the bottom of the pedal stroke. Your leg should be almost fully extended, with a slight bend in the knee.
- With your foot in the pedaling position, your knee should have a slight bend when the pedal is at the bottom of the stroke. This bend ensures a comfortable and efficient leg extension while pedaling.
- Perform a quick spin test to ensure the saddle height is correct. While pedaling, pay attention to your hips and knees. If your hips rock side-to-side or your knees move excessively inward or outward, adjust the saddle height accordingly.
- Once the saddle height is set, perform a short test ride to ensure the adjustment feels comfortable and efficient. Fine-tune the saddle height as needed until you find the correct position on a road bike.
Finding the Ideal Saddle Position: Balancing Comfort and Aerodynamics
The saddle position is a critical aspect of achieving the correct position on a road bike, as it influences both comfort and aerodynamics. Adjusting the saddle fore/aft position and tilt can help riders find the optimal balance between these two factors. This section will discuss the factors influencing saddle position and provide guidelines for finding the ideal saddle position.
Saddle Fore/Aft Adjustment
The saddle fore/aft position, or the horizontal adjustment of the saddle, affects the rider’s weight distribution and pedaling efficiency. To find the correct position:
- Clip into the pedals and position yourself in the riding position, with your hands on the hoods or drops.
- Draw an imaginary line between the bottom bracket and the center of the handlebar. The front of the saddle should be parallel to this line.
- Alternatively, you can use the pedal axle as a reference point. With your foot at the 3 o’clock position, a plumb line dropped from the kneecap should intersect the pedal axle.
Saddle Tilt
The saddle tilt, or the angle of the saddle, can impact comfort and power transfer. A saddle that is too far forward or backward can cause discomfort and strain, while a saddle that is too tilted can lead to knee pain or numbness. To adjust the saddle tilt:
- Ensure the saddle is level, or slightly tilted downward, to prevent sliding forward during rides.
- Test ride the bike and make further adjustments as needed to find the most comfortable position.
By balancing comfort and aerodynamics, riders can maintain the correct position on a road bike and enjoy a more efficient and enjoyable riding experience.

Handlebar Adjustments: Achieving the Perfect Reach and Drop
Properly adjusting the handlebars is crucial for achieving the correct position on a road bike, as it influences the rider’s reach, control, and comfort. By adjusting the stem length, handlebar height, and handlebar reach, riders can find the ideal riding position and optimize their control over the bike. This section will provide guidelines for adjusting the handlebars to achieve the perfect reach and drop.
Stem Length
The stem length affects the rider’s reach to the handlebars. A stem that is too long can result in an overly stretched riding position, while a stem that is too short can lead to a cramped position. To adjust the stem length:
- Choose a stem length that allows for a comfortable and neutral wrist position when gripping the hoods or drops.
- Consider the bike’s geometry and the rider’s flexibility. A more aggressive bike geometry or a less flexible rider may require a shorter stem, while a more relaxed bike geometry or a more flexible rider may benefit from a longer stem.
Handlebar Height
The handlebar height influences the rider’s comfort and aerodynamics. A lower handlebar height can improve aerodynamics but may lead to discomfort or strain over long distances. Conversely, a higher handlebar height can increase comfort but may sacrifice aerodynamics. To adjust the handlebar height:
- Start with the manufacturer’s recommended handlebar height, which is usually indicated on the frame or fork.
- Test ride the bike and make further adjustments as needed to find the most comfortable position. Consider factors such as back and neck comfort, shoulder tension, and overall control.
Handlebar Reach
The handlebar reach, or the horizontal distance between the saddle and the handlebars, impacts the rider’s comfort and control. A reach that is too long can result in an overly stretched position, while a reach that is too short can lead to a cramped position. To adjust the handlebar reach:
- Choose handlebars with a reach that allows for a comfortable and neutral wrist position when gripping the hoods or drops.
- Consider the bike’s geometry and the rider’s flexibility. A more aggressive bike geometry or a more flexible rider may require handlebars with a shorter reach, while a more relaxed bike geometry or a less flexible rider may benefit from handlebars with a longer reach.
By adjusting the handlebars to achieve the perfect reach and drop, riders can maintain the correct position on a road bike and enjoy a more comfortable and efficient riding experience.
Cleat Positioning: Maximizing Pedaling Efficiency and Power Transfer
Proper cleat positioning is essential for maintaining the correct position on a road bike, as it directly impacts pedaling efficiency and power transfer. By adjusting the cleats correctly, riders can minimize knee strain and ensure efficient pedaling. This section will discuss the significance of cleat positioning and provide guidelines for adjusting cleats correctly.
Why Cleat Positioning Matters
Cleat positioning affects the alignment of the foot, knee, and hip during the pedaling motion. Properly positioned cleats can help maintain a neutral foot position, reduce excessive foot pronation or supination, and minimize knee strain. By maximizing pedaling efficiency and power transfer, riders can enjoy a more comfortable and efficient riding experience.
Steps to Adjust Cleats Correctly
- Start by positioning the cleats in the middle of the shoe’s pedaling platform, ensuring equal float on both sides.
- Adjust the fore/aft position of the cleats to align the pedal axle with the ball of the foot. This alignment allows for optimal power transfer and minimizes knee strain.
- Set the cleat float to the manufacturer’s recommended setting or adjust it based on personal preference and comfort. Float allows for natural foot movement during the pedaling motion, reducing the risk of injury and discomfort.
- Test ride the bike and make further adjustments as needed to find the most comfortable and efficient position. Pay attention to knee comfort and overall pedaling efficiency.
By following these guidelines, riders can ensure proper cleat positioning and maintain the correct position on a road bike, maximizing pedaling efficiency and power transfer while minimizing knee strain.

How to Maintain a Correct Position While Cycling: Tips and Techniques
Maintaining the correct position on a road bike during long rides and while climbing or descending hills is crucial for maximizing efficiency, comfort, and reducing the risk of injury. This section will provide practical tips and techniques to help riders maintain the correct position on their road bikes in various scenarios.
Long Rides
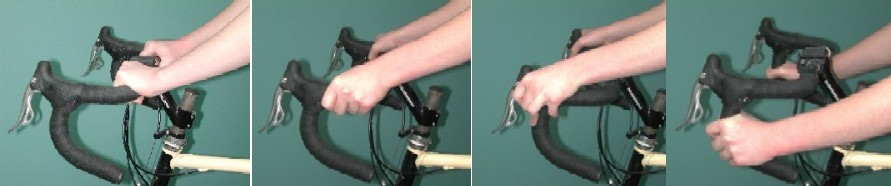
During long rides, it is essential to maintain a neutral spine and relaxed shoulders. Regularly change hand positions, move the hips slightly side-to-side, and stand up periodically to stretch and relieve pressure on the saddle. Focus on engaging the core muscles to support the upper body and maintain a comfortable position.
Climbing
When climbing hills, riders often adopt a more aggressive position, with the handlebars lower and the saddle higher. This position helps distribute body weight more evenly and maintains traction on the rear wheel. To maintain the correct position while climbing:
- Shift your body weight forward, keeping your chest over the handlebars and your elbows slightly bent.
- Maintain a light grip on the handlebars, avoiding excessive tension in the upper body.
- Engage the core muscles and glutes to support your climbing position and minimize strain on the lower back.
Descending
During descents, riders should prioritize control and stability. To maintain the correct position while descending:
- Adopt a more aerodynamic position, with your hands on the drops and your elbows bent.
- Keep your weight centered over the bike, with your pedals level and your knees slightly bent.
- Focus on maintaining a smooth and controlled descent, using your brakes judiciously and anticipating turns and obstacles.
By employing these tips and techniques, riders can maintain the correct position on a road bike during long rides, climbs, and descents, ensuring a comfortable and efficient riding experience.

The Role of Flexibility and Core Strength in Achieving the Correct Position
Flexibility and core strength play a vital role in supporting the correct position on a road bike, allowing riders to maintain a comfortable and efficient posture during long rides and challenging terrains. By incorporating stretches and exercises that target these areas, riders can improve their overall riding experience and reduce the risk of injury.
Flexibility
Flexibility is essential for maintaining a relaxed and efficient posture on a road bike. Tight muscles, particularly in the hips, hamstrings, and lower back, can lead to discomfort and strain during rides. To improve flexibility:
- Perform dynamic stretches before rides, such as leg swings, lunges, and hip circles, to prepare the muscles for activity.
- Incorporate static stretches after rides, focusing on the hips, hamstrings, and lower back, to promote muscle recovery and reduce muscle stiffness.
- Consider incorporating yoga or Pilates into your training routine, as these practices emphasize flexibility, balance, and core strength.
Core Strength
A strong core is crucial for maintaining the correct position on a road bike, as it supports the upper body and helps distribute body weight evenly. To improve core strength:
- Perform exercises that target the abdominal muscles, such as planks, bicycle crunches, and Russian twists.
- Incorporate exercises that strengthen the lower back, such as supermans, bird dogs, and bridges.
- Aim to engage the core muscles during rides, focusing on maintaining a neutral spine and relaxed shoulders.
By improving flexibility and core strength, riders can better maintain the correct position on a road bike, ensuring a more comfortable and efficient riding experience. Regular stretching and core exercises can help riders develop the necessary flexibility and strength to support their riding posture, reducing the risk of injury and discomfort during long rides and challenging terrains.
