
What is a Cup and Cone Bottom Bracket?
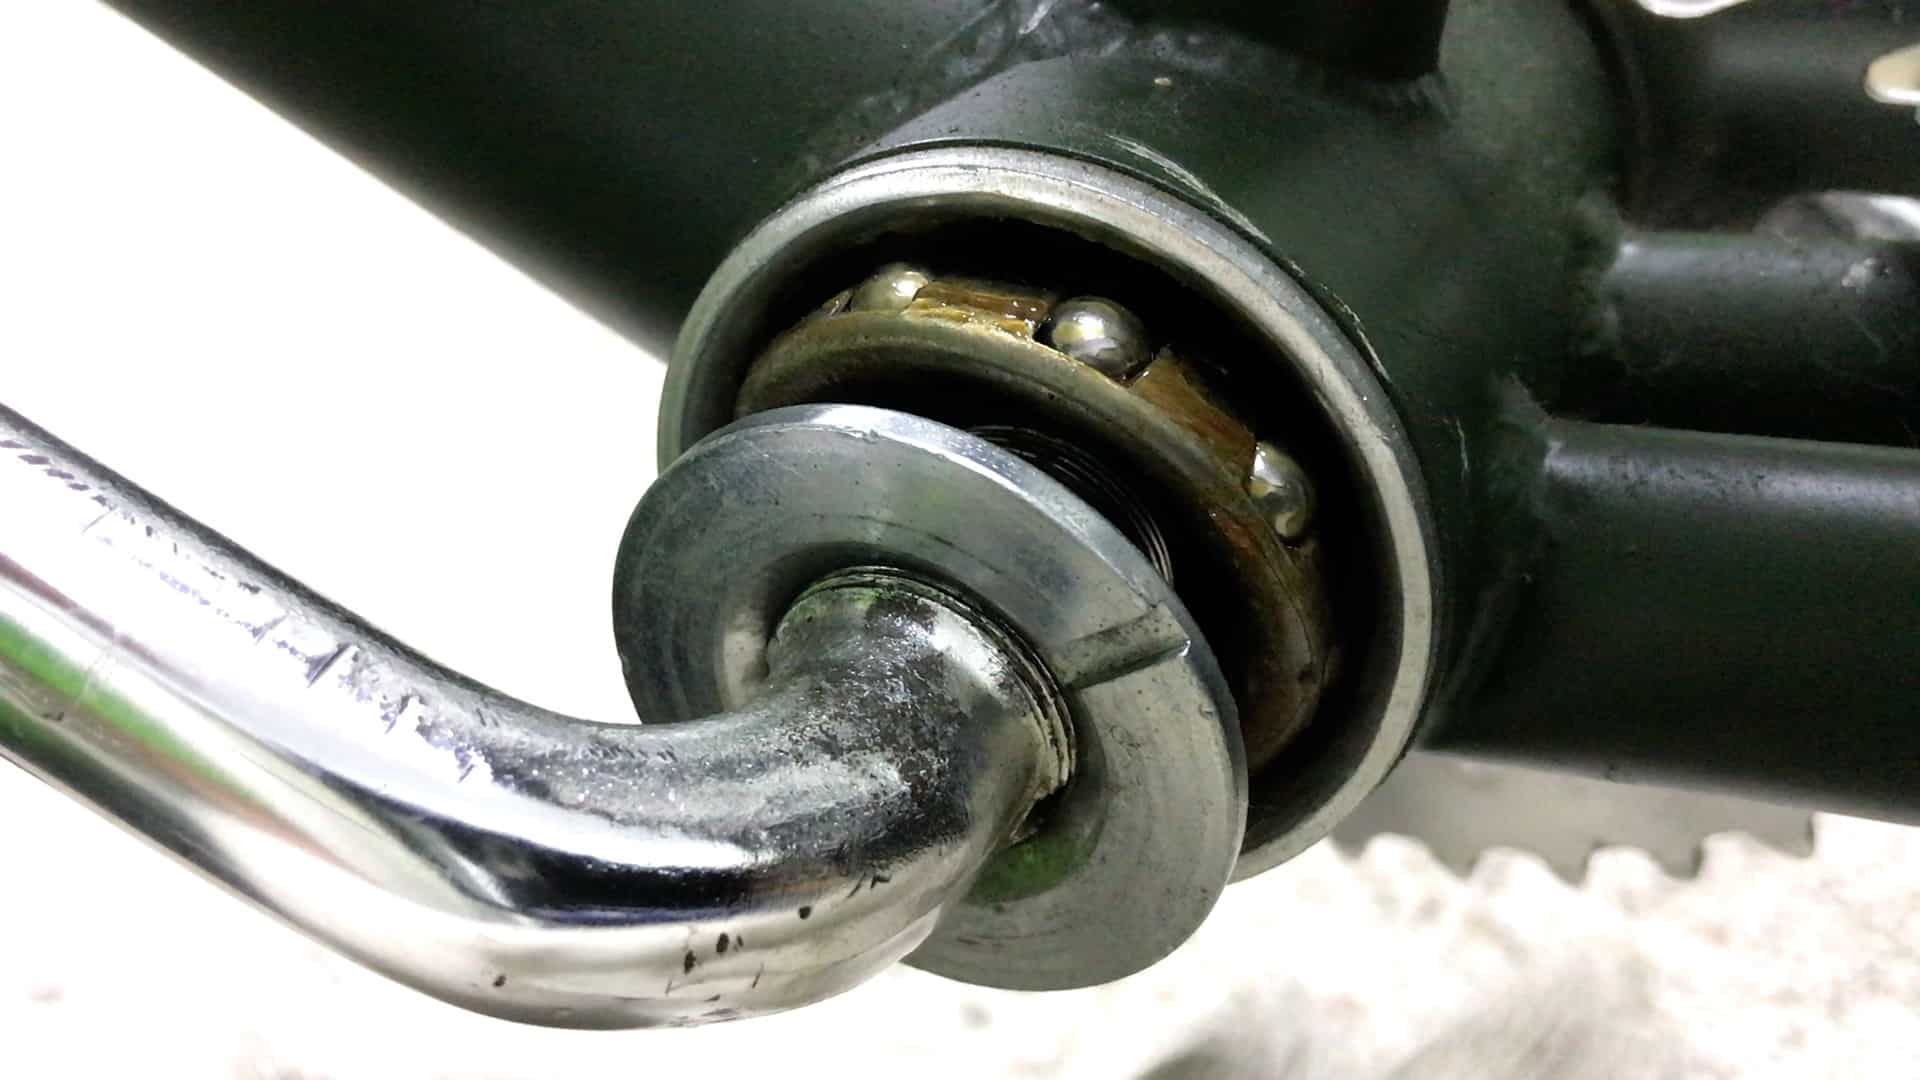
A cup and cone bottom bracket is a traditional bicycle component that connects the crankset to the frame. It consists of two primary parts: the fixed cup, which is threaded into the frame, and the adjustable cone, which is attached to the crank spindle. These components are designed to allow for smooth rotation and efficient power transfer while pedaling.

Click Image to Find eBike Products
Compared to other types of bottom brackets, such as cartridge or press-fit models, cup and cone bottom brackets offer several advantages. For instance, they are typically easier to maintain and service, as their components can be accessed and adjusted without removing the bottom bracket from the frame. Additionally, cup and cone bottom brackets are known for their durability and cost-effectiveness, making them a popular choice among cyclists and mechanics alike.
Why Choose a Cup and Cone Bottom Bracket?
Cup and cone bottom brackets offer several advantages that make them an attractive choice for cyclists. One of the primary benefits is ease of maintenance. Since the adjustable cone is accessible from the outside of the bottom bracket, it can be easily adjusted or replaced without removing the entire unit from the frame. This feature makes cup and cone bottom brackets a popular choice for cyclists who prefer to perform their own maintenance and repairs.
Another advantage of cup and cone bottom brackets is their durability. The simple design and high-quality materials used in these components ensure a long lifespan, even under heavy use. Additionally, cup and cone bottom brackets are generally more cost-effective than other types of bottom brackets, as they require fewer parts and are less expensive to manufacture.
Cup and cone bottom brackets also offer excellent performance and efficiency. The adjustable cone allows for precise bearing preload, which reduces friction and improves power transfer. This feature is particularly beneficial for cyclists who prioritize performance and speed.
Finally, cup and cone bottom brackets are often considered more aesthetically pleasing than other types of bottom brackets. The classic design and exposed bearings can add a touch of elegance and sophistication to any bicycle frame.
Popular Cup and Cone Bottom Bracket Models
Several well-known brands and models of cup and cone bottom brackets are available on the market. Here are some popular choices:
Shimano UN55
The Shimano UN55 is a classic cup and cone bottom bracket that offers excellent value for the price. It features high-quality bearings and a durable design that can withstand heavy use. The UN55 is compatible with most Shimano cranksets and is available in various spindle lengths.
Campagnolo Veloce
The Campagnolo Veloce is a high-quality cup and cone bottom bracket designed for use with Campagnolo cranksets. It features adjustable bearings that allow for precise preload and smooth operation. The Veloce is made from high-quality materials and is built to last, making it a popular choice among serious cyclists.
Phil Wood
Phil Wood is a well-known brand in the cycling world, known for its high-quality components. Its cup and cone bottom bracket is no exception. It features adjustable bearings made from high-quality steel and a durable design that can withstand heavy use. The Phil Wood bottom bracket is available in various spindle lengths and is compatible with most cranksets.

How to Install a Cup and Cone Bottom Bracket
Installing a cup and cone bottom bracket requires a few specialized tools and some mechanical aptitude. Here’s a step-by-step guide to installing a cup and cone bottom bracket:
Tools Needed
To install a cup and cone bottom bracket, you’ll need the following tools:
- Bottom bracket cup tool
- Bottom bracket cone wrench
- Grease
- Torque wrench
- Chain whip (if installing a fixed cup)
Installation Steps
- Clean the bottom bracket shell and remove any old grease or debris.
- Apply a thin layer of grease to the threads of the bottom bracket cups.
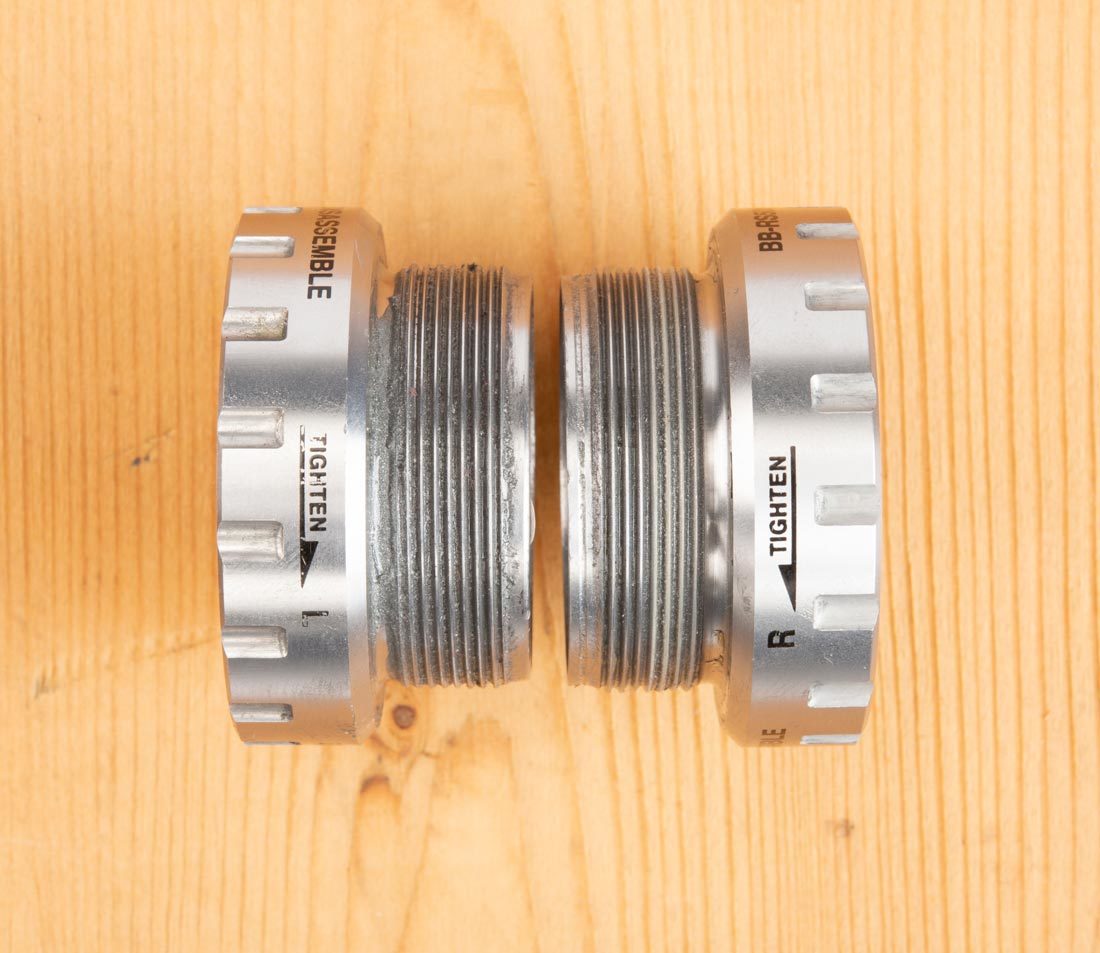
- Install the fixed cup using the bottom bracket cup tool. Hand-tighten the cup, then use the torque wrench to tighten it to the manufacturer’s specifications.
- Grease the spindle and bearings of the adjustable cone.
- Install the adjustable cone into the bottom bracket shell, using the bottom bracket cone wrench to hold it in place.
- Adjust the bearing preload by threading the adjustable cone in or out. The preload should be tight enough to eliminate play but loose enough to allow smooth rotation.
- Install the crankset and chainring(s), then adjust the chain tension if necessary.
Adjustment Tips
Here are some tips for adjusting the bearing preload on a cup and cone bottom bracket:
- Use a feeler gauge to measure the play in the bearings. The play should be no more than 0.1mm.
- Adjust the preload by threading the adjustable cone in or out. A small adjustment can make a big difference in bearing preload.
- Retighten the lockring after adjusting the preload. The lockring helps to prevent the adjustable cone from moving during use.
- Recheck the bearing preload periodically, especially after extended use or heavy loads.

How to Maintain a Cup and Cone Bottom Bracket
Maintaining a cup and cone bottom bracket is relatively simple, but it does require some regular attention. Here are the key maintenance tasks to keep your cup and cone bottom bracket in good condition:
Cleaning
Cleaning your bottom bracket is an essential part of maintenance. Use a brush and degreaser to remove any dirt, grime, or old grease from the bottom bracket shell and cups. Be sure to clean the adjustable cone and bearings as well.
Greasing
Greasing the threads of the bottom bracket cups and the spindle is important to prevent corrosion and ensure smooth operation. Use a high-quality grease and apply it sparingly to the threads and spindle.
Adjusting
Adjusting the bearing preload is a critical part of maintaining a cup and cone bottom bracket. Check the bearing preload periodically and adjust as necessary to eliminate play and ensure smooth rotation. Use a feeler gauge to measure the play and a wrench to adjust the preload.
Frequency
How often you need to maintain your cup and cone bottom bracket will depend on how often you ride and the conditions you ride in. As a general rule, aim to clean and grease your bottom bracket every 6 months, and adjust the bearing preload as needed.
Tips
- Use a high-quality grease to prevent corrosion and ensure smooth operation.
- Be careful not to overtighten the bottom bracket cups, as this can strip the threads or damage the bearings.
- Use a torque wrench to ensure that you tighten the cups to the correct specification.
- Check the bearing preload regularly, especially after extended use or heavy loads.
How to Troubleshoot Common Issues with Cup and Cone Bottom Brackets
Cup and cone bottom brackets are generally reliable and low-maintenance, but they can occasionally develop issues. Here are some common problems and how to solve them:
Creaking
Creaking is often caused by loose bearings or a loose bottom bracket shell. To fix this issue, tighten the bottom bracket cups to the correct torque specification, and adjust the bearing preload as necessary. If the creaking persists, check the crank arms and pedals for loose bolts, and tighten as necessary.
Clicking
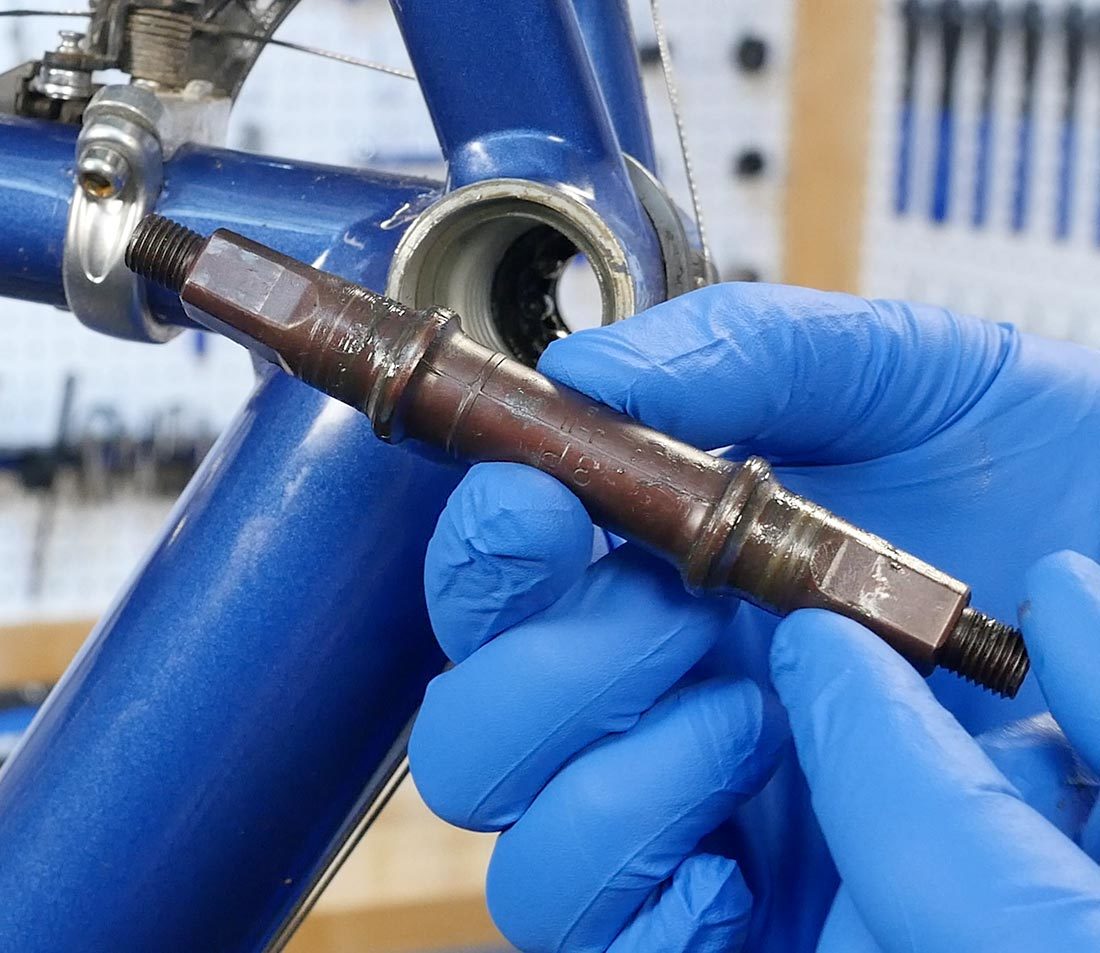
Clicking can be caused by a variety of issues, including loose bearings, a damaged spindle, or debris in the bottom bracket. To troubleshoot this issue, start by adjusting the bearing preload and checking for loose bolts. If the clicking persists, disassemble the bottom bracket and inspect the spindle and bearings for damage or debris. Clean and regrease the components as necessary.
Stiffness
Stiffness can be caused by a variety of issues, including a damaged spindle, worn bearings, or a misaligned bottom bracket. To troubleshoot this issue, start by adjusting the bearing preload and checking for loose bolts. If the stiffness persists, disassemble the bottom bracket and inspect the spindle and bearings for damage or wear. If the spindle or bearings are damaged, replace them. If the bottom bracket is misaligned, realign it using a bottom bracket alignment tool.
Tips
- Always use the correct torque specifications when tightening bolts.
- Regularly inspect the bottom bracket for signs of wear or damage.
- Keep the bottom bracket clean and well-lubricated to prevent issues.
- If you’re not comfortable troubleshooting issues yourself, take your bike to a professional mechanic.
Upgrading to a Higher-End Cup and Cone Bottom Bracket
While standard cup and cone bottom brackets are reliable and affordable, upgrading to a higher-end model can offer improved performance, durability, and aesthetics. Here are some benefits of upgrading and some high-end brands and models to consider:
Benefits of Upgrading
Upgrading to a higher-end cup and cone bottom bracket can offer several benefits, including:
- Improved durability: Higher-end bottom brackets are often made with higher-quality materials and manufacturing processes, resulting in a more durable and longer-lasting product.
- Better performance: Higher-end bottom brackets often have more precise bearing adjustments, resulting in smoother and more efficient pedaling.
- Enhanced aesthetics: Higher-end bottom brackets often have more refined and polished finishes, adding a touch of elegance to your bicycle.
High-End Brands and Models
Here are some high-end cup and cone bottom bracket brands and models to consider:
- Chris King: Known for their high-quality manufacturing and precision bearings, Chris King bottom brackets are a popular choice among serious cyclists. Their cups and cones are made from solid stainless steel and are available in a range of colors to match your bike.
- Phil Wood: Phil Wood bottom brackets are hand-built in the USA and are known for their durability and precision. They offer a range of models for different frame and crankset configurations, all featuring high-quality bearings and finishes.
- White Industries: White Industries bottom brackets are made in the USA and feature high-quality bearings and precision machining. They offer a range of models for different frame and crankset configurations, all featuring refined finishes and durable construction.
Tips
- Consider your budget and riding style when choosing a higher-end bottom bracket.
- Research different brands and models to find the best fit for your needs.
- Always use the correct torque specifications when installing a higher-end bottom bracket.
- Regularly maintain your bottom bracket to ensure optimal performance and longevity.
Conclusion: The Timeless Appeal of Cup and Cone Bottom Brackets
Cup and cone bottom brackets have been a staple in the cycling world for decades, and for good reason. They offer a simple, reliable, and cost-effective solution for transferring power from the pedals to the wheels. While other types of bottom brackets have come and gone, the cup and cone design has endured, thanks to its ease of maintenance, durability, and versatility.
From classic models like the Shimano UN55 and Campagnolo Veloce to high-end options like Chris King, Phil Wood, and White Industries, there is a cup and cone bottom bracket to fit every budget and riding style. By following the installation, maintenance, and troubleshooting tips outlined in this guide, you can ensure that your cup and cone bottom bracket stays in good condition and performs at its best for years to come.
So whether you’re building a vintage road bike or restoring a classic mountain bike, consider the many benefits of using a cup and cone bottom bracket. With its timeless appeal and enduring popularity, it’s a component that is sure to provide reliable performance and classic style for years to come.