
The Significance of Efficient Bicycle Storage
Efficient garage storage for bicycles is crucial for several reasons. First, it helps maximize the use of available space, allowing for a clutter-free and organized garage. By storing bicycles properly, you can prevent them from becoming tripping hazards or taking up valuable floor space. Additionally, having a designated storage area ensures that your bicycles are easily accessible when you need them, making it simple to grab and go for a ride.

Click Image to Find eBike Products

Assessing Your Garage Storage Needs
When evaluating your garage storage needs for bicycles, consider several factors. First, determine the number of bicycles you need to store, as this will influence the size and capacity of the storage solution you require. Additionally, assess the available space in your garage, taking into account any limitations or opportunities the space presents. For instance, high ceilings may allow for overhead storage options, while limited wall space might necessitate freestanding units.
Lastly, think about the desired features of your garage storage for bicycles. You may prioritize ease of access, space efficiency, or security, depending on your specific needs and preferences. By carefully considering these factors, you can select a storage solution that meets your requirements and enhances the functionality of your garage.

Selecting the Right Bicycle Storage Solution
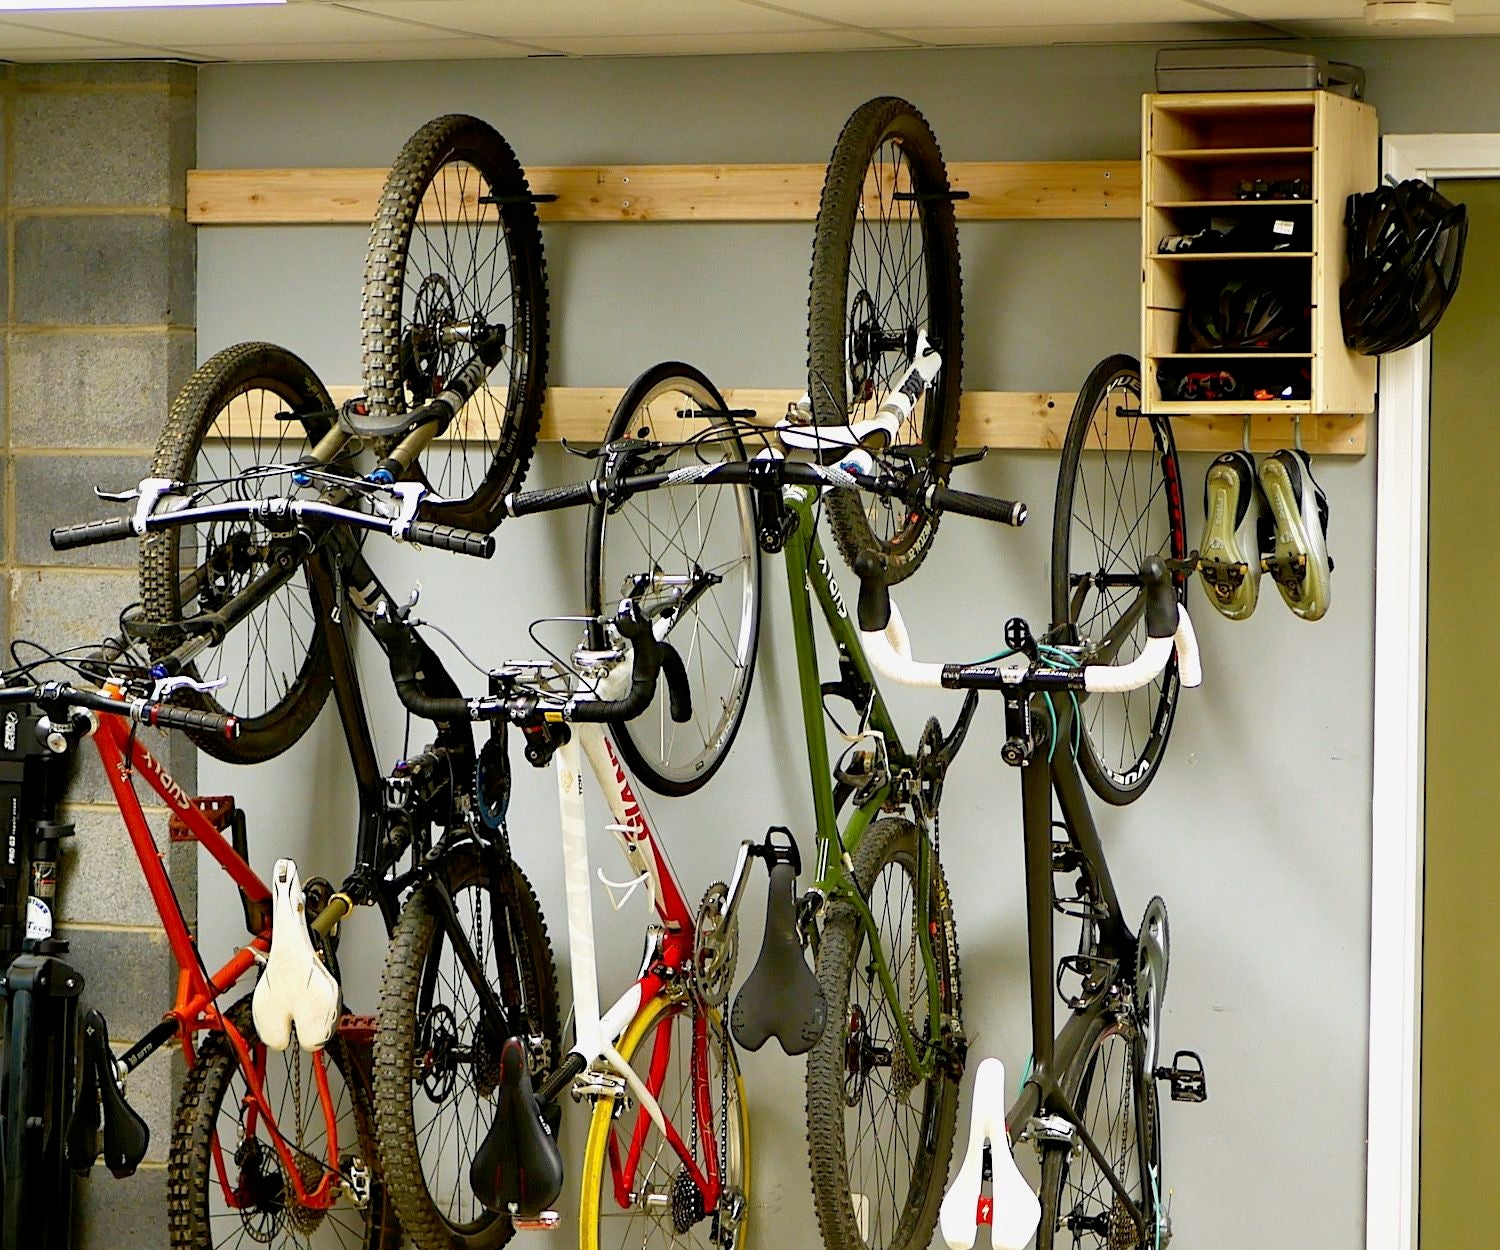
When it comes to garage storage for bicycles, you have several options to choose from, each with its unique advantages and disadvantages. Wall-mounted racks are an excellent choice for those seeking space efficiency and easy access. They can be mounted at varying heights, accommodating different garage layouts and ceiling heights. However, they may not be ideal for garages with limited wall space or for those who frequently rearrange their storage solutions.
Ceiling hoists are another option for garage bicycle storage, providing significant space savings and ease of use. They allow you to lift and lower bicycles with minimal effort, keeping them out of the way when not in use. However, they may require additional installation efforts and might not be suitable for garages with low ceilings or for those who prefer ground-level access to their bicycles.
Freestanding units offer versatility and modularity, adapting to various garage layouts and storage needs. They can accommodate multiple bicycles and often include additional storage options for accessories. Nevertheless, they may take up more floor space than other solutions and might not be as space-efficient as wall-mounted racks or ceiling hoists.

How to Install a Wall-Mounted Bicycle Rack
Installing a wall-mounted bicycle rack in your garage can be a straightforward process with the right tools and instructions. Here’s a step-by-step guide to help you get started:
- Gather your tools: You will need a stud finder, level, pencil, drill, wall anchors, and screws, along with the wall-mounted bicycle rack of your choice.
- Locate the studs: Use a stud finder to identify the studs in your garage wall where you want to mount the rack. Mark the stud locations with a pencil.
- Position the rack: Hold the rack against the wall, aligning it with the marked stud locations. Use a level to ensure the rack is straight.
- Mark the mounting holes: Once the rack is level, mark the mounting holes on the wall with a pencil.
- Drill pilot holes: Using a drill bit slightly smaller than your screws, drill pilot holes at the marked locations.
- Install wall anchors: If you’re not mounting directly into studs, install wall anchors in the pilot holes.
- Mount the rack: Align the rack with the pilot holes or wall anchors and secure it to the wall with screws.
- Safety considerations: Always follow the manufacturer’s instructions for your specific wall-mounted bicycle rack. Ensure the rack is securely fastened to the wall, capable of supporting the weight of your bicycles.

Maximizing Space with Ceiling Hoists
Ceiling hoists offer an innovative solution for garage storage for bicycles, providing space efficiency and ease of use. By lifting bicycles off the floor and suspending them from the ceiling, you can significantly increase the available floor space in your garage. This is particularly beneficial for garages with limited square footage or high ceilings.
Installing a ceiling hoist typically involves the following steps:
- Identify a suitable location: Choose a spot on the ceiling with enough clearance for your bicycle and easy access. Ensure there are no obstructions, such as support beams or lighting fixtures, in the way.
- Secure the ceiling bracket: Attach the ceiling bracket to the joists using lag bolts, ensuring it is securely fastened and capable of supporting the weight of your bicycle.
- Install the hoist unit: Connect the hoist unit to the ceiling bracket, following the manufacturer’s instructions. Ensure it is level and secure.
- Attach the lifting strap: Secure the lifting strap to the hoist unit and thread it through the pulleys. Attach the hook to your bicycle, ensuring it is securely fastened and capable of supporting the weight.
- Operate the hoist: Using the provided controls, lift your bicycle off the ground and suspend it from the ceiling. Lower it carefully when you’re ready to use it.
Ceiling hoists are an excellent option for those seeking to maximize their garage storage for bicycles while maintaining easy access and maintaining a clutter-free space.
Organizing Your Garage with Freestanding Units
Freestanding bicycle storage units offer a versatile and adaptable solution for garage storage for bicycles. These units come in various shapes, sizes, and configurations, allowing you to customize your storage solution to your specific needs and preferences. Some popular freestanding unit options include bicycle racks, shelves, and cabinets.
One of the primary advantages of freestanding units is their modularity. You can easily rearrange or expand your storage system as your needs change, making them an excellent option for those who frequently add or modify their bicycle collection. Additionally, many freestanding units offer integrated storage for accessories, such as helmets, locks, and pumps, helping to keep your garage organized and clutter-free.
When selecting a freestanding unit for your garage storage for bicycles, consider the following factors:
- Size and capacity: Ensure the unit can accommodate your current and future bicycle collection.
- Stability and durability: Look for units constructed from sturdy materials and designed to remain stable when loaded with bicycles.
- Accessibility: Opt for units that allow easy access to your bicycles, minimizing the effort required to load and unload them.
- Aesthetics: Choose a unit that complements your garage’s design and décor.
Freestanding bicycle storage units provide a flexible and practical solution for organizing your garage and maximizing your available storage space.

Maintaining Your Garage Bicycle Storage System
Regular maintenance of your chosen garage bicycle storage solution is crucial for ensuring longevity and optimal performance. By following these tips and best practices, you can keep your storage system in excellent condition and avoid potential issues:
- Inspect your storage system regularly: Periodically examine your storage solution for signs of wear, damage, or instability. Address any issues promptly to prevent further deterioration or accidents.
- Clean your storage system: Dust, debris, and dirt can accumulate on your storage system over time, potentially affecting its functionality or appearance. Regularly clean your storage solution using a soft cloth and mild detergent, following the manufacturer’s instructions.
- Tighten screws and bolts: Over time, screws and bolts may loosen due to vibrations or regular use. Periodically check and tighten these components to maintain stability and safety.
- Lubricate moving parts: If your storage system includes any moving parts, such as pulleys or wheels, apply a light lubricant to ensure smooth operation and prevent wear.
- Store bicycles properly: To prevent damage to your bicycles and storage system, ensure your bicycles are correctly positioned and secured within the storage solution. Avoid overloading the system or exceeding its weight capacity.
By following these maintenance tips, you can keep your garage storage for bicycles in excellent condition and enjoy a clutter-free, organized, and safe garage environment.
Incorporating Security Measures for Your Bicycles
Protecting your valuable bicycles from theft is an essential aspect of garage storage for bicycles. By incorporating security measures, you can enjoy peace of mind and safeguard your investment. Consider the following options when enhancing the security of your garage bicycle storage:
- Locking mechanisms: Choose storage solutions with built-in locks or integrate locks into your system. Wall-mounted racks, ceiling hoists, and freestanding units can all be equipped with locks to secure your bicycles in place.
- Cable systems: Use cable locks to secure your bicycles to the storage system or to each other. These locks are flexible and can be easily adjusted to accommodate various bicycle configurations and storage solutions.
- Surveillance options: Install security cameras or motion detectors in your garage to monitor activity and deter potential thieves. Modern systems often include smartphone apps, allowing you to view live footage and receive notifications when motion is detected.
- Garage door openers: Ensure your garage door is equipped with a secure opener, such as a remote-controlled or smart garage door opener. This can help prevent unauthorized access to your garage and stored bicycles.
By incorporating these security measures into your garage storage for bicycles, you can create a safe and secure environment for your valuable bicycles.