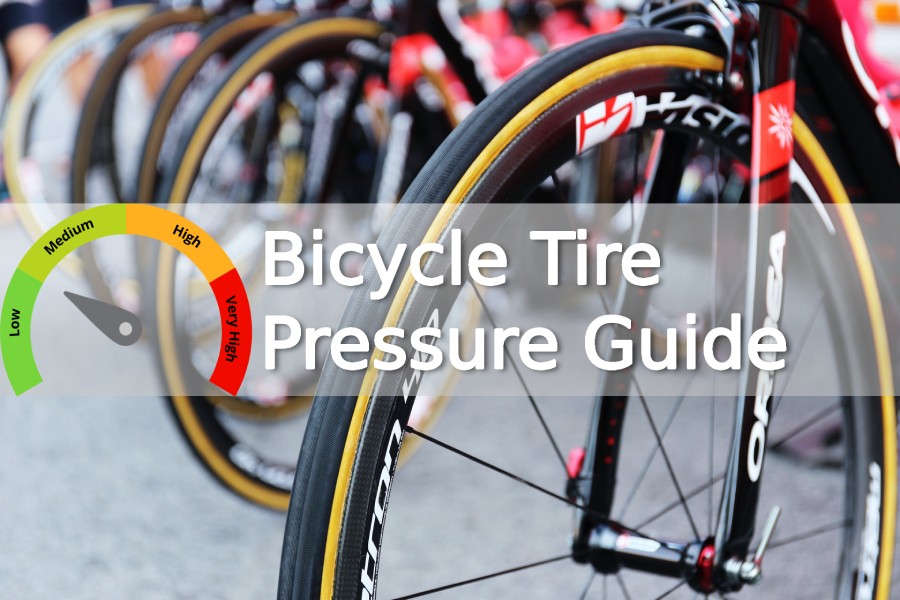
Understanding the Importance of Proper Tire Inflation
Proper tire inflation is crucial for gravel bike riders, as it directly affects the overall performance, safety, and efficiency of the ride. Maintaining optimal tire pressure can improve traction, reduce the risk of punctures, and enhance the bike’s handling and stability. Gravel bike tire psi, in particular, plays a significant role in determining the ride quality, as it influences the tire’s ability to absorb shock, maintain contact with the ground, and respond to steering input.

Click Image to Find eBike Products
A gravel bike with under-inflated tires can lead to a range of issues, including reduced traction, increased risk of punctures, and compromised handling. On the other hand, over-inflated tires can result in a harsh ride, reduced grip, and increased risk of tire damage. Therefore, it is essential to find the optimal tire pressure for your gravel bike, taking into account factors such as rider weight, terrain, and tire type.
Research has shown that proper tire inflation can improve rolling resistance, reduce energy expenditure, and enhance overall ride comfort. In fact, a study by the International Journal of Sports Medicine found that optimal tire pressure can reduce rolling resistance by up to 20%, resulting in improved performance and reduced fatigue. Furthermore, proper tire inflation can also extend the lifespan of the tire, reducing the need for frequent replacements and minimizing waste.
In addition to performance benefits, proper tire inflation is also essential for safety reasons. Under-inflated tires can lead to reduced traction, increased stopping distances, and compromised handling, increasing the risk of accidents and injuries. Therefore, it is crucial to prioritize proper tire inflation and make it a regular part of your pre-ride routine.
By understanding the importance of proper tire inflation, gravel bike riders can take the first step towards optimizing their ride quality, improving performance, and reducing the risk of accidents. In the next section, we will explore the factors that influence tire pressure and provide tips on how to determine the ideal pressure range for your specific gravel bike setup.
How to Choose the Right Tire Pressure for Your Gravel Bike
Choosing the right tire pressure for your gravel bike can be a daunting task, as it depends on several factors, including rider weight, terrain, and tire type. To determine the ideal pressure range for your specific gravel bike setup, consider the following factors:
Rider weight is a critical factor in determining tire pressure, as it affects the amount of pressure required to maintain optimal tire shape and traction. Generally, heavier riders require higher tire pressure to prevent excessive tire sag and maintain stability. Conversely, lighter riders can opt for lower tire pressure to achieve a more comfortable ride.
Terrain is another essential factor to consider when determining tire pressure. Gravel bikes often encounter a variety of terrain, including smooth roads, rough gravel, and technical trails. For smooth roads, higher tire pressure can provide improved rolling efficiency and reduced rolling resistance. However, for rough gravel and technical trails, lower tire pressure can offer improved traction and control.
Tire type is also a crucial factor in determining tire pressure. Different tire types, such as clincher, tubular, and tubeless, have distinct pressure requirements. Clincher tires, for example, typically require higher pressure than tubular or tubeless tires. Additionally, tire width and tread pattern can also affect tire pressure, with wider tires and more aggressive tread patterns requiring lower pressure.
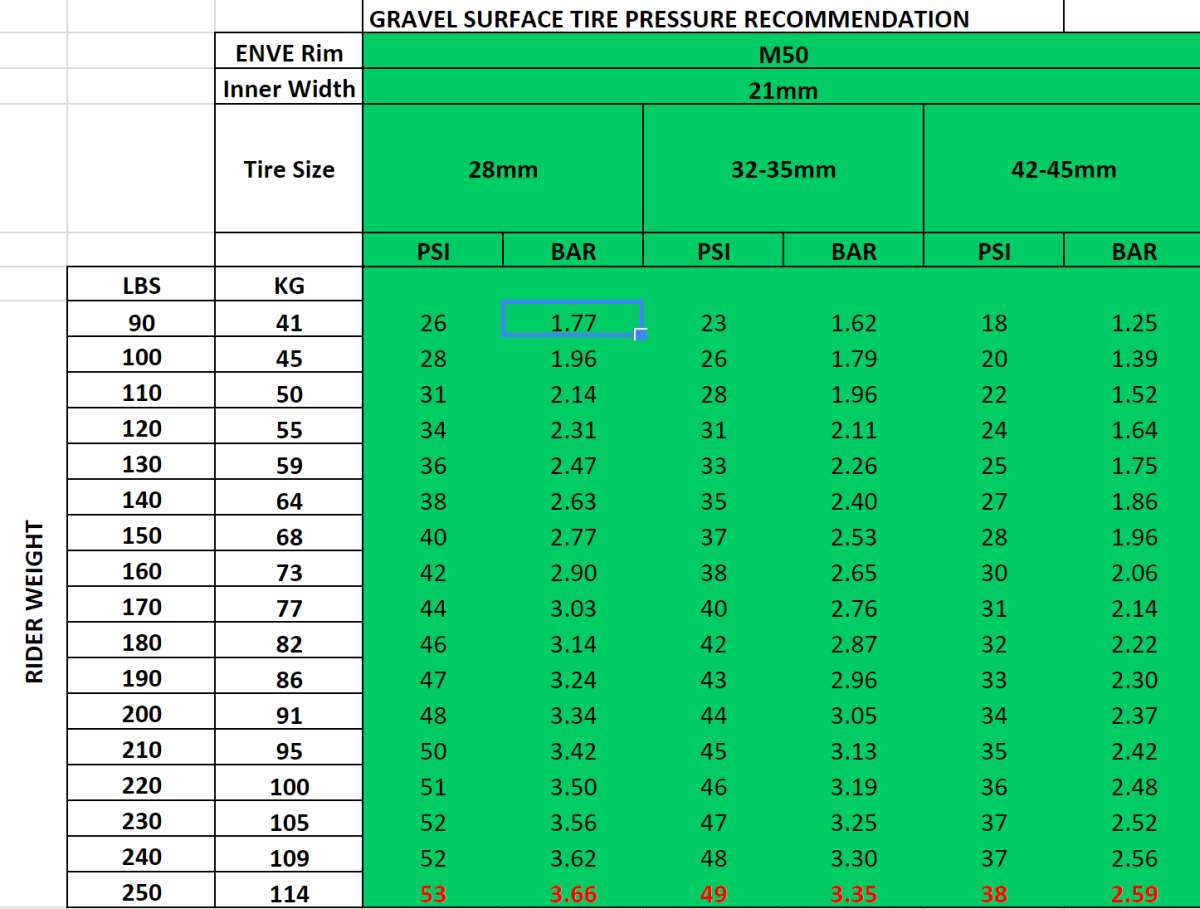
To determine the ideal pressure range for your gravel bike, start by consulting the manufacturer’s recommended pressure range, which can usually be found on the sidewall of the tire or in the owner’s manual. Next, consider your rider weight, terrain, and tire type to adjust the pressure accordingly. A general rule of thumb is to start with a higher pressure and gradually decrease it until you achieve the desired ride quality.
For example, a rider weighing 150 pounds (68 kg) on a gravel bike with 40mm clincher tires may start with a pressure range of 40-50 psi (2.7-3.4 bar) for smooth roads and decrease it to 30-40 psi (2.1-2.7 bar) for rough gravel and technical trails. However, this is just a starting point, and the ideal pressure range may vary depending on individual preferences and riding styles.
By considering these factors and adjusting the tire pressure accordingly, gravel bike riders can achieve optimal performance, comfort, and safety. In the next section, we will explore the impact of tire pressure on gravel bike handling and stability.
The Impact of Tire Pressure on Gravel Bike Handling and Stability
Tire pressure plays a significant role in determining the handling and stability of a gravel bike. The relationship between tire pressure and handling is complex, and it’s influenced by several factors, including tire width, tread pattern, and bike geometry.
Tire width is a critical factor in determining the handling characteristics of a gravel bike. Wider tires tend to be more stable and provide better traction, but they can also be more prone to rolling resistance. Tire pressure can affect the handling of wider tires by altering the tire’s shape and contact patch. For example, a higher tire pressure can reduce the tire’s contact patch, making it more prone to slipping and sliding.
Tread pattern is another important factor in determining the handling characteristics of a gravel bike. Different tread patterns can provide varying levels of traction and stability, and tire pressure can affect the performance of the tread pattern. For example, a tire with a more aggressive tread pattern may require a lower tire pressure to maintain optimal traction and stability.
Bike geometry also plays a significant role in determining the handling characteristics of a gravel bike. The bike’s geometry can affect the way the tire interacts with the road, and tire pressure can alter the bike’s handling characteristics. For example, a bike with a more aggressive geometry may require a higher tire pressure to maintain stability and control.
The relationship between tire pressure and handling is also influenced by the type of terrain being ridden. For example, on smooth roads, a higher tire pressure can provide improved rolling efficiency and reduced rolling resistance. However, on rough gravel and technical trails, a lower tire pressure can offer improved traction and control.
Gravel bike tire psi can also affect the bike’s stability, particularly when cornering or descending. A higher tire pressure can provide improved stability and control, but it can also make the bike more prone to slipping and sliding. A lower tire pressure can provide improved traction and stability, but it can also make the bike more prone to rolling and losing control.
By understanding the relationship between tire pressure and handling, gravel bike riders can optimize their tire pressure to achieve improved performance, stability, and control. In the next section, we will explore real-world examples of tire pressure settings for popular gravel bikes.
Real-World Examples: Tire Pressure Settings for Popular Gravel Bikes
To help illustrate the importance of proper tire pressure, let’s take a look at some real-world examples of recommended tire pressure settings for popular gravel bikes. Keep in mind that these settings are just a starting point, and you may need to adjust them based on your individual weight, riding style, and terrain.
For example, the Specialized Diverge, a popular gravel bike known for its versatility and comfort, recommends the following tire pressure settings:
- 700x38c tires: 35-45 psi (2.4-3.1 bar)
- 700x42c tires: 30-40 psi (2.1-2.7 bar)
Similarly, the Trek Checkpoint, another popular gravel bike, recommends the following tire pressure settings:
- 700x35c tires: 40-50 psi (2.7-3.4 bar)
- 700x40c tires: 35-45 psi (2.4-3.1 bar)
It’s worth noting that these settings are general recommendations and may vary depending on the specific tire model and terrain. Additionally, these settings are based on a rider weight of around 150-170 pounds (68-77 kg), so you may need to adjust them accordingly if you’re significantly heavier or lighter.
By using these settings as a starting point, you can begin to experiment with different tire pressures to find the optimal setting for your gravel bike. Remember to always check the manufacturer’s recommendations and to consider factors such as terrain, tire type, and rider weight when adjusting your tire pressure.
In the next section, we’ll explore the relationship between tire pressure and rider weight, and provide tips on how to adjust pressure based on individual weight and riding style.

Tire Pressure and Rider Weight: Finding the Sweet Spot
Rider weight is a critical factor in determining the optimal tire pressure for a gravel bike. The weight of the rider affects the amount of pressure required to maintain optimal tire shape and traction. Generally, heavier riders require higher tire pressure to prevent excessive tire sag and maintain stability.
However, finding the sweet spot between tire pressure and rider weight can be a challenge. If the tire pressure is too low, the tire may sag excessively, leading to reduced traction and increased risk of punctures. On the other hand, if the tire pressure is too high, the tire may become too stiff, leading to reduced comfort and increased risk of tire damage.
To find the optimal tire pressure for your gravel bike, consider the following guidelines:
- For riders weighing 120-150 pounds (54-68 kg), a tire pressure of 30-40 psi (2.1-2.7 bar) may be suitable.
- For riders weighing 150-180 pounds (68-82 kg), a tire pressure of 35-45 psi (2.4-3.1 bar) may be suitable.
- For riders weighing 180-210 pounds (82-95 kg), a tire pressure of 40-50 psi (2.7-3.4 bar) may be suitable.
Keep in mind that these are general guidelines and may vary depending on the specific tire model, terrain, and riding style. It’s also important to note that these guidelines are based on a gravel bike with a standard tire width of 35-40mm.
In addition to rider weight, riding style also plays a significant role in determining the optimal tire pressure. For example, riders who prefer a more aggressive riding style may require higher tire pressure to maintain stability and control.
By considering both rider weight and riding style, you can find the sweet spot for your gravel bike’s tire pressure and enjoy a smoother, more comfortable ride.
In the next section, we’ll discuss the importance of proper tire pressure in preventing punctures and tire damage.
The Role of Tire Pressure in Preventing Punctures and Tire Damage
Proper tire pressure is crucial in preventing punctures and tire damage on a gravel bike. Under-inflation can lead to increased risk of flats and tire wear, while over-inflation can cause the tire to become too stiff and prone to damage.
When a tire is under-inflated, the sidewalls and tread are more susceptible to damage from road debris and potholes. This can lead to punctures, tire wear, and even tire failure. On the other hand, when a tire is over-inflated, it can become too stiff and lose its ability to absorb shock and vibrations. This can lead to a harsh ride and increased risk of tire damage.
Gravel bike tire psi plays a significant role in preventing punctures and tire damage. A tire that is properly inflated will have a more even contact patch with the road, reducing the risk of punctures and tire wear. Additionally, proper tire pressure can help to distribute the weight of the bike and rider more evenly, reducing the stress on the tire and minimizing the risk of damage.
It’s also important to note that tire pressure can affect the performance of the tire’s puncture-resistant features. Many modern gravel bike tires feature puncture-resistant materials and designs, such as Kevlar or tire liners. However, these features can be compromised if the tire is not properly inflated.
To prevent punctures and tire damage, it’s essential to maintain the recommended tire pressure for your gravel bike. This can be found in the owner’s manual or on the sidewall of the tire. Additionally, regular tire inspections can help to identify any potential issues before they become major problems.
By maintaining proper tire pressure and regularly inspecting your tires, you can help to prevent punctures and tire damage, and ensure a smoother, more enjoyable ride on your gravel bike.
In the next section, we’ll discuss the different tools and techniques available for measuring tire pressure, including digital gauges, analog gauges, and smartphone apps.
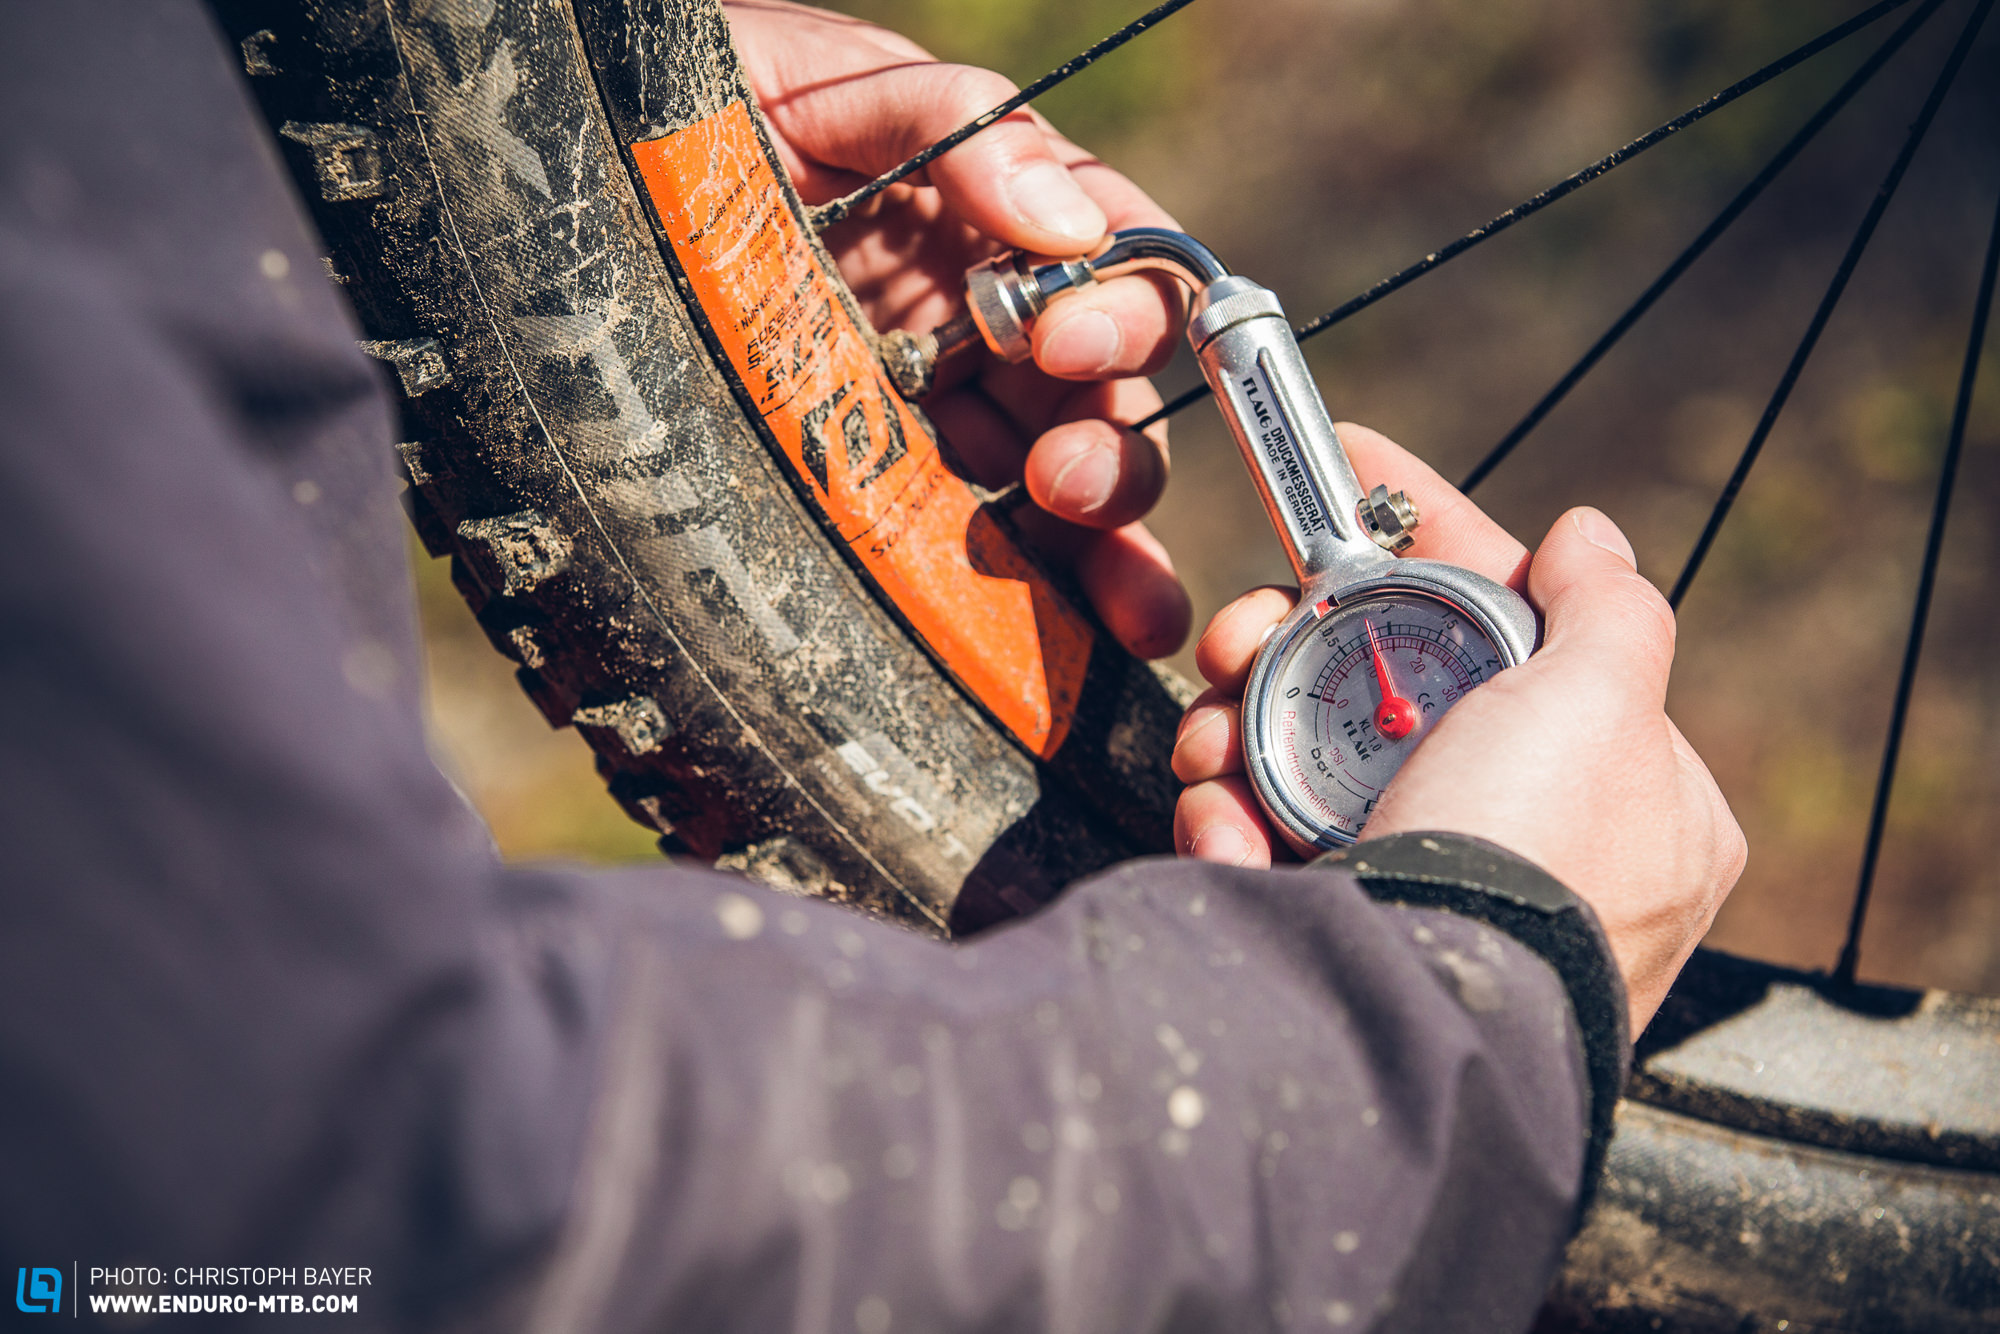
Tools and Techniques for Accurate Tire Pressure Measurement
Accurate tire pressure measurement is crucial for optimizing the performance and safety of your gravel bike. There are several tools and techniques available for measuring tire pressure, each with its own advantages and disadvantages.
Digital gauges are a popular choice for measuring tire pressure. They are easy to use, accurate, and provide a quick reading. Digital gauges can be found at most bike shops and online retailers, and they are relatively affordable.
Analog gauges are another option for measuring tire pressure. They are less common than digital gauges but still provide accurate readings. Analog gauges can be more difficult to use than digital gauges, but they are often more durable and less prone to battery drain.
Smartphone apps are also available for measuring tire pressure. These apps use the phone’s built-in pressure sensor to provide accurate readings. Smartphone apps are convenient and often free, but they may not be as accurate as dedicated tire pressure gauges.
When choosing a tire pressure gauge, consider the following factors:
- Accuracy: Look for a gauge that provides accurate readings to within 0.1 psi.
- Ease of use: Choose a gauge that is easy to use and provides a quick reading.
- Durability: Select a gauge that is durable and can withstand regular use.
- Price: Consider the cost of the gauge and whether it fits within your budget.
Regardless of the tool or technique used, it’s essential to measure tire pressure regularly to ensure optimal performance and safety. Regular tire pressure checks can help prevent punctures, improve handling, and reduce the risk of tire damage.
In the next section, we’ll provide a step-by-step guide to optimizing your gravel bike’s tire pressure, including tips on how to monitor and adjust pressure over time.
Putting it all Together: A Step-by-Step Guide to Optimizing Your Gravel Bike’s Tire Pressure
Now that we’ve discussed the importance of proper tire pressure, the factors that influence it, and the tools and techniques available for measuring it, let’s put it all together with a step-by-step guide to optimizing your gravel bike’s tire pressure.
Step 1: Determine Your Ideal Tire Pressure Range
Use the guidelines provided in this article to determine your ideal tire pressure range based on your rider weight, terrain, and tire type.
Step 2: Choose the Right Tire Pressure Gauge
Select a tire pressure gauge that is accurate, easy to use, and durable. Consider digital gauges, analog gauges, or smartphone apps.
Step 3: Measure Your Tire Pressure
Use your chosen tire pressure gauge to measure your tire pressure. Make sure to measure the pressure when the tire is cold, as this will give you the most accurate reading.
Step 4: Adjust Your Tire Pressure
Adjust your tire pressure to the ideal range determined in Step 1. Make sure to adjust the pressure in small increments and re-measure the pressure after each adjustment.
Step 5: Monitor and Adjust Your Tire Pressure Over Time
Regularly monitor your tire pressure and adjust it as needed. This will ensure that your tire pressure remains optimal and your gravel bike continues to perform at its best.
By following these steps, you can optimize your gravel bike’s tire pressure and enjoy a smoother, more comfortable ride. Remember to always prioritize proper tire pressure to ensure your safety and the performance of your bike.