
Why Handlebar Height Matters for a Comfortable Ride
Proper handlebar height is essential for a comfortable and efficient ride. When the handlebars are at the correct height, it allows for optimal body positioning, reducing the strain on the back, neck, and shoulders. This, in turn, can help prevent common cycling-related injuries, such as back pain and numbness in the hands and wrists. Furthermore, a well-adjusted handlebar height can improve breathing and overall cycling performance, enabling riders to maintain a consistent pace and enjoy a more enjoyable ride.

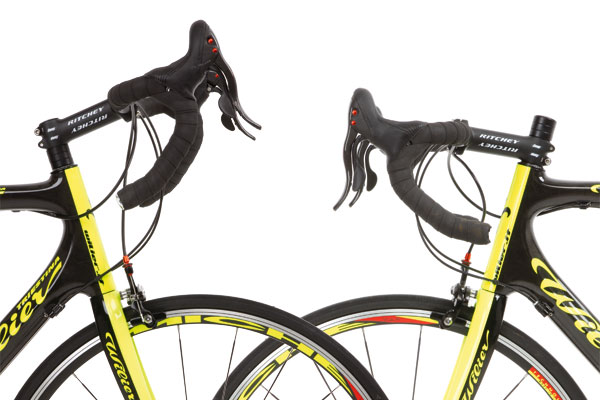
Click Image to Find eBike Products
For instance, if the handlebars are too low, riders may experience discomfort in the neck and shoulders, leading to poor posture and reduced visibility. On the other hand, if the handlebars are too high, riders may feel stretched out, causing strain on the back and shoulders. By adjusting the handlebar height to the ideal position, riders can maintain a comfortable riding position, reducing the risk of injury and improving overall performance.
In addition to comfort and performance, proper handlebar height can also impact safety. When riders are comfortable and able to maintain a consistent position, they are better able to react to obstacles and changes in the road, reducing the risk of accidents. By learning how to adjust bicycle handlebar height, riders can take the first step towards a more comfortable, efficient, and safe ride.

Understanding Your Bike’s Handlebar Types and Limitations
When it comes to adjusting the handlebar height of your bicycle, it’s essential to understand the type of handlebars you have and their limitations. There are several types of handlebars, each with its unique characteristics and adjustability features. Drop bars, for example, are commonly found on road bikes and offer a wide range of adjustability, allowing riders to customize the height and angle of the handlebars to suit their riding style.
Flat bars, on the other hand, are typically found on mountain bikes and hybrid bikes, and offer less adjustability than drop bars. However, some flat bars may have a slight amount of adjustability, allowing riders to fine-tune the height and angle of the handlebars. Upright bars, also known as comfort bars, are designed for comfort and offer a more upright riding position, but may have limited adjustability.
Some popular bike models with adjustable handlebars include the Trek Domane, which features a proprietary handlebar design that allows for easy adjustability, and the Specialized Roubaix, which offers a range of handlebar options with varying degrees of adjustability. When learning how to adjust bicycle handlebar height, it’s crucial to consult your bike’s manufacturer instructions to understand the specific adjustability features of your handlebars.
In addition to understanding the type of handlebars you have, it’s also important to consider the limitations of your bike’s stem and headset. Some stems may have a limited range of adjustability, while others may offer more flexibility. Similarly, some headsets may have a fixed position, while others may allow for some degree of adjustability. By understanding the limitations of your bike’s components, you can make informed decisions when adjusting the handlebar height to ensure a comfortable and safe ride.

Tools and Materials Needed for Adjustment
Before attempting to adjust the handlebar height of your bicycle, it’s essential to gather the necessary tools and materials. The specific tools required may vary depending on the type of handlebars and stem you have, but here are some common tools and materials you may need:
Allen wrenches: These are used to loosen and tighten the stem and handlebar bolts. Make sure to have a set of Allen wrenches in various sizes, as the bolts may require different sizes.
Torque wrenches: These are used to ensure proper torque when tightening the stem and handlebar bolts. A torque wrench can help prevent over-tightening, which can damage the components.
Handlebar adjustment tools: Some handlebars may require specialized tools for adjustment, such as a handlebar adjustment wrench or a stem adjustment tool. Consult your bike’s manufacturer instructions to determine if any specialized tools are required.
Grease and lubricants: Applying grease or lubricants to the stem and handlebar bolts can help ensure smooth adjustment and prevent corrosion.
Bike manufacturer recommendations: Check your bike’s manufacturer instructions for specific recommendations on tools and materials required for adjusting the handlebar height. Some manufacturers may have specific requirements or recommendations for adjusting the handlebar height.
When learning how to adjust bicycle handlebar height, it’s crucial to have the right tools and materials to ensure a safe and successful adjustment. By gathering the necessary tools and materials, you can ensure a comfortable and efficient ride.

Step-by-Step Guide to Adjusting Handlebar Height
Adjusting the handlebar height of your bicycle can seem intimidating, but with the right tools and a step-by-step guide, you can achieve a comfortable and efficient ride. Here’s a detailed guide on how to adjust bicycle handlebar height:
Step 1: Loosen the Stem
Begin by loosening the stem bolts using an Allen wrench. Turn the bolts counterclockwise until they are loose, but do not remove them yet. This will allow you to adjust the handlebar position.
Step 2: Adjust the Handlebar Position
Next, adjust the handlebar position to the desired height. You can do this by sliding the handlebars up or down the stem. Make sure to align the handlebars with the stem and ensure they are securely seated.
Step 3: Tighten the Stem
Once you have adjusted the handlebar position, tighten the stem bolts in a star pattern (tightening one bolt a little, then moving to the next one, and so on). Make sure to tighten the bolts securely, but do not overtighten.
Step 4: Check the Handlebar Alignment
After tightening the stem, check the handlebar alignment to ensure it is straight and level. You can use a spirit level or a straightedge to check the alignment.
Step 5: Test the Handlebars
Finally, test the handlebars by applying gentle pressure to ensure they are securely attached to the stem. If the handlebars feel loose or unstable, you may need to adjust the stem bolts further.
Additional Tips:
When adjusting the handlebar height, make sure to keep the handlebars aligned with the stem and ensure they are securely seated. Also, be careful not to overtighten the stem bolts, as this can damage the components.
By following these steps and tips, you can successfully adjust the handlebar height of your bicycle and achieve a comfortable and efficient ride.

Tips for Finding the Perfect Handlebar Height
Finding the perfect handlebar height is crucial for a comfortable and efficient ride. Here are some tips to help you determine the ideal handlebar height for your body:
Consider Your Arm Length
Your arm length plays a significant role in determining the ideal handlebar height. If you have longer arms, you may prefer a higher handlebar height to maintain a comfortable riding position. On the other hand, if you have shorter arms, a lower handlebar height may be more suitable.
Think About Your Riding Style
Your riding style also affects the ideal handlebar height. If you’re a road biker, you may prefer a lower handlebar height to maintain an aerodynamic position. However, if you’re a mountain biker, a higher handlebar height may be more suitable to provide better control and visibility.
Personal Comfort is Key
Ultimately, the ideal handlebar height is one that provides personal comfort and allows you to maintain a comfortable riding position. Experiment with different handlebar heights to find the one that works best for you.
Measuring and Calculating the Optimal Handlebar Height
To measure and calculate the optimal handlebar height, you can use the following formula:
Handlebar Height = (Arm Length x 0.75) + (Seat Height x 0.25)
This formula takes into account your arm length and seat height to provide an estimate of the optimal handlebar height. However, keep in mind that this is just a rough estimate, and you may need to adjust the handlebar height based on your personal comfort and riding style.
Additional Tips
When adjusting the handlebar height, make sure to keep the handlebars aligned with the stem and ensure they are securely seated. Also, be careful not to overtighten the stem bolts, as this can damage the components.
By following these tips and considering your arm length, riding style, and personal comfort, you can find the perfect handlebar height and enjoy a comfortable and efficient ride.
Common Mistakes to Avoid When Adjusting Handlebar Height
When adjusting the handlebar height of your bicycle, it’s essential to avoid common mistakes that can affect the ride and safety. Here are some mistakes to watch out for:
Over-Tightening
Over-tightening the stem bolts can damage the components and lead to a stiff or unresponsive handlebar. This can also cause discomfort and fatigue during long rides. To avoid over-tightening, use a torque wrench to ensure the correct torque specification is applied.
Under-Tightening
Under-tightening the stem bolts can lead to a loose or unstable handlebar, which can be hazardous during rides. Make sure to tighten the stem bolts securely, but avoid over-tightening.
Improper Alignment
Improper alignment of the handlebars can cause discomfort, fatigue, and affect the overall performance of the bike. Make sure to align the handlebars with the stem and ensure they are securely seated.
Ignoring Manufacturer Recommendations
Ignoring manufacturer recommendations for handlebar height adjustment can lead to incorrect adjustments and affect the safety and performance of the bike. Always consult the manufacturer’s instructions for specific recommendations on handlebar height adjustment.
Not Testing the Handlebars
Not testing the handlebars after adjustment can lead to discovering issues during rides, which can be hazardous. Always test the handlebars after adjustment to ensure they are secure and functioning properly.
By avoiding these common mistakes, you can ensure a safe and comfortable ride when adjusting the handlebar height of your bicycle. Remember to always consult the manufacturer’s instructions and use the correct tools and techniques to avoid any issues.

Additional Considerations for Specific Riding Styles
When adjusting the handlebar height of your bicycle, it’s essential to consider the specific riding style you’ll be using the bike for. Different riding styles require different handlebar heights to optimize comfort, performance, and safety.
Road Biking
For road biking, a lower handlebar height is often preferred to maintain an aerodynamic position and reduce wind resistance. However, this can also lead to discomfort and fatigue during long rides. To optimize handlebar height for road biking, consider a height that allows you to maintain a comfortable position while still being able to breathe easily and see the road ahead.
Mountain Biking
For mountain biking, a higher handlebar height is often preferred to provide better control and visibility on technical trails. However, this can also lead to a less aerodynamic position and reduced performance on smoother sections of trail. To optimize handlebar height for mountain biking, consider a height that allows you to maintain control and visibility while still being able to breathe easily and navigate technical sections of trail.
Commuting
For commuting, a comfortable handlebar height is essential to reduce fatigue and discomfort during daily rides. Consider a height that allows you to maintain a comfortable position while still being able to see the road ahead and breathe easily.
Tips for Optimizing Handlebar Height
Regardless of the riding style, there are several tips to keep in mind when optimizing handlebar height:
Experiment with different handlebar heights to find the most comfortable position for your body.
Consider the type of handlebars you have and their limitations when it comes to adjustability.
Use a torque wrench to ensure proper torque specification is applied when adjusting the handlebar height.
Double-check the handlebar height adjustment and take a test ride to ensure a comfortable and safe ride.
By considering the specific riding style and following these tips, you can optimize the handlebar height of your bicycle to ensure a comfortable and safe ride.

Final Check and Test Ride
After adjusting the handlebar height of your bicycle, it’s essential to double-check the adjustment and take a test ride to ensure a comfortable and safe ride. Here are some tips to keep in mind:
Double-Check the Handlebar Height Adjustment
Before taking a test ride, double-check the handlebar height adjustment to ensure it’s secure and properly aligned. Make sure the handlebars are level and the stem is tightened to the correct torque specification.
Take a Test Ride
Take a test ride to ensure the handlebar height adjustment is comfortable and safe. Pay attention to any discomfort or issues with the handlebars, and make adjustments as needed.
Fine-Tune the Adjustment
If necessary, fine-tune the handlebar height adjustment to ensure a comfortable and safe ride. Make small adjustments and test the handlebars again until you find the perfect height.
Importance of a Comfortable Ride
A comfortable ride is essential for enjoying cycling and reducing the risk of injury. By adjusting the handlebar height and taking a test ride, you can ensure a comfortable and safe ride.
Conclusion
Adjusting the handlebar height of your bicycle is a simple process that can make a big difference in your riding experience. By following these tips and taking a test ride, you can ensure a comfortable and safe ride. Remember to always double-check the handlebar height adjustment and fine-tune the adjustment as needed.
