Understanding Disc Brake Pads
Disc brake pads are a crucial component of a vehicle’s braking system. They are designed to clamp down on the brake rotor when the brakes are applied, creating friction and generating the necessary stopping force. Over time, disc brake pads wear down and need to be replaced to maintain optimal braking performance and ensure safety on the road. When discussing how to change disc brake pads, it’s essential to understand the two primary types of disc brake pads: organic and metallic. Organic brake pads, also known as non-asbestos organic (NAO) pads, are made from materials like rubber, glass, and carbon. They offer quieter and smoother braking but tend to wear down faster than metallic pads. Metallic brake pads, on the other hand, are made from various metals, such as copper, steel, and iron. They are more durable and provide better heat resistance but can be noisier and generate more brake dust.

Click Image to Find eBike Products
Gathering Tools and Materials
To change disc brake pads, you’ll need several essential tools and materials. High-quality tools and materials can ensure optimal performance and safety. Here’s a list of what you’ll need:
- New disc brake pads: Select brake pads that are compatible with your vehicle’s make and model. Opt for reputable brands known for their durability, heat resistance, and low noise levels.
- C-clamp: A C-clamp is necessary for compressing the brake caliper piston. Ensure the clamp is sturdy and can handle the pressure required for the job.
- Wire brush: A wire brush helps remove rust and debris from the brake caliper and other components.
- Brake cleaner: Brake cleaner is used to clean the brake rotor and caliper, ensuring a debris-free surface for the new brake pads.
- Lug wrench: A lug wrench is needed to remove the wheel lug nuts.
- Jack and jack stands: Use a reliable jack and jack stands to lift and secure the vehicle during the brake pad replacement process.
- Gloves and safety glasses: Protect your hands and eyes from brake dust and debris.
When changing disc brake pads, investing in high-quality tools and materials can make a significant difference in the ease and success of the process. By using the right tools, you can ensure a safer, more efficient brake pad replacement, ultimately contributing to the overall performance and longevity of your vehicle’s braking system.
Preparing the Vehicle
Before you begin changing disc brake pads, it’s essential to prepare your vehicle properly to ensure safety and accessibility. Follow these steps to prepare your vehicle:
- Find a flat, stable surface to perform the brake pad replacement. This will help prevent the vehicle from rolling or shifting during the process.
- Turn off the engine and apply the parking brake. Applying the parking brake will help prevent the vehicle from moving while you work on it.
- Lift the vehicle with a jack and secure it with jack stands. Place the jack stands under the vehicle’s frame or other sturdy points to support the vehicle’s weight. Make sure the vehicle is secure before you start working on it.
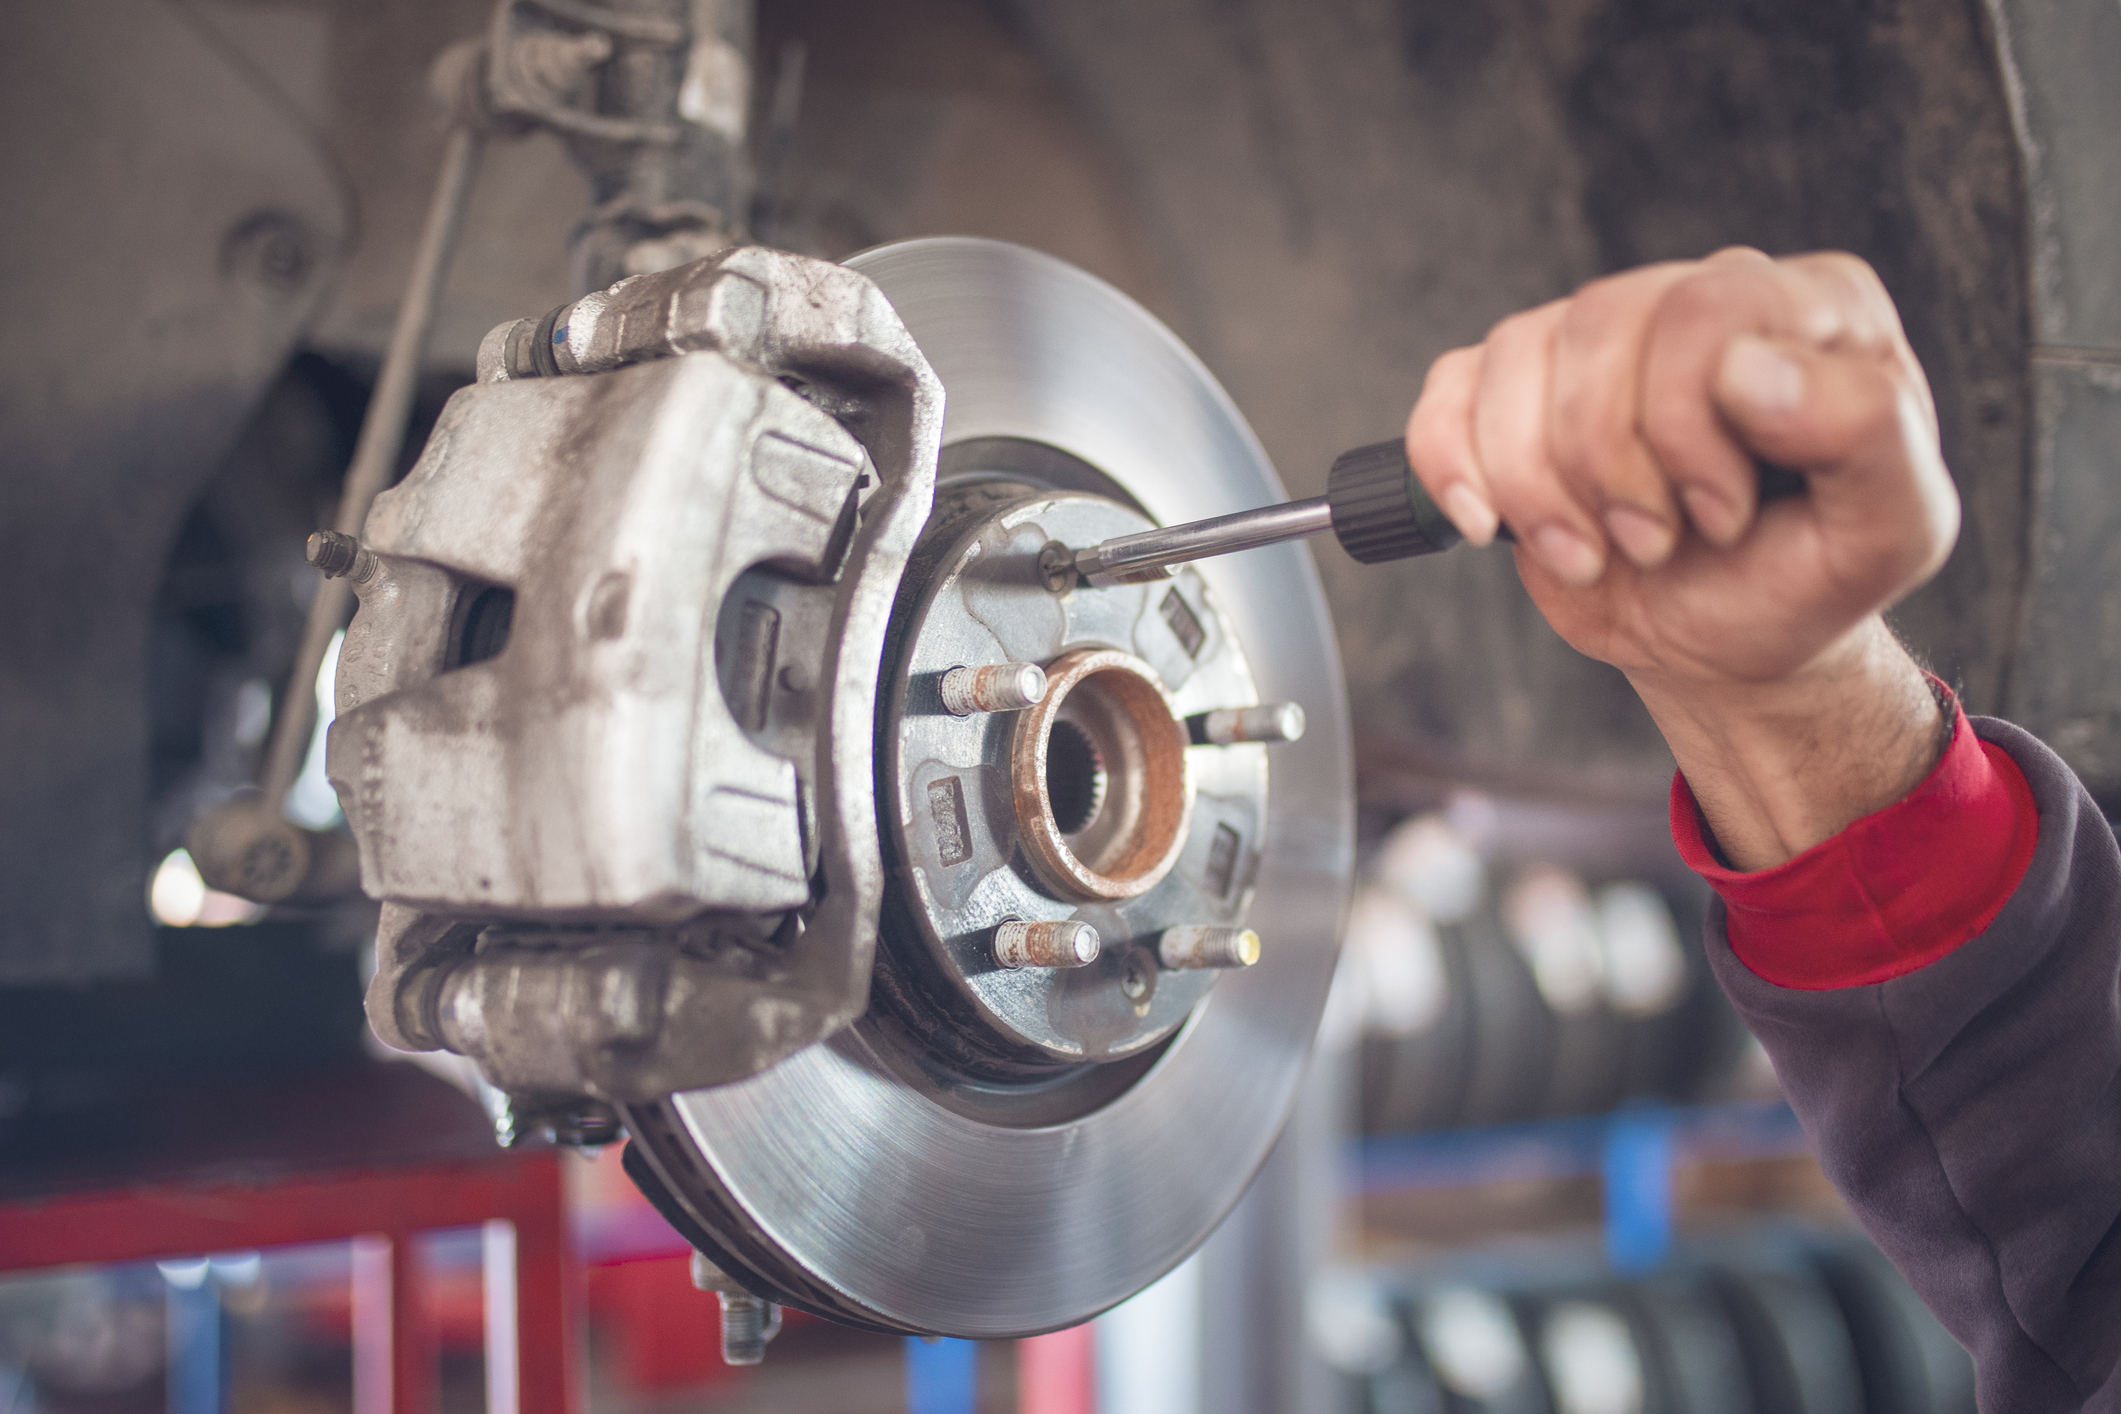
- Remove the wheel to access the brake assembly. Use a lug wrench to loosen the lug nuts before removing the wheel. Set the wheel aside in a safe place.
- Inspect the brake rotor and caliper for any debris or rust. Use a wire brush to remove any rust or debris, ensuring a clean surface for the new brake pads.
- Cover any sensitive components near the brake assembly with a cloth or plastic sheet. This will help protect these components from brake dust and debris during the brake pad replacement process.
By following these steps, you’ll create a safe and accessible environment for changing disc brake pads. Proper preparation can help ensure a smoother, more efficient brake pad replacement process, ultimately contributing to the overall performance and longevity of your vehicle’s braking system.

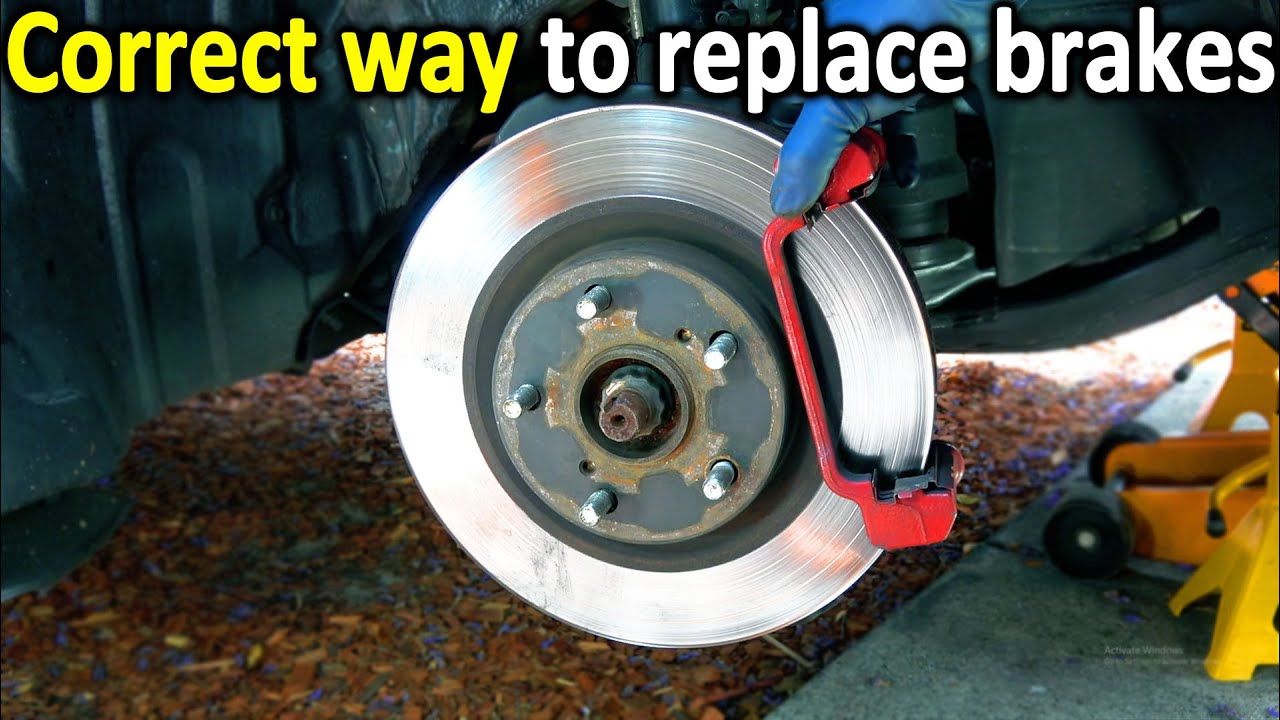
Removing the Old Brake Pads
Once you’ve prepared your vehicle, it’s time to remove the old brake pads. Follow these steps to ensure a proper and safe removal process:
- Locate the brake caliper, which houses the brake pads. The caliper is typically a metal housing bolted to the suspension or brake mounts, with one or two rubber hoses attached to it.
- Identify the brake caliper piston. This component moves in and out to apply pressure to the brake pads and rotor. You’ll need to compress this piston to remove the old brake pads.
- Use a C-clamp to compress the brake caliper piston. Attach the C-clamp to the caliper body and screw the clamp’s threaded end onto the piston. Slowly tighten the clamp until the piston is fully compressed.
- Unbolt the caliper from the suspension or brake mounts. You may need to use a socket wrench or a box wrench to remove the bolts. Once unbolted, carefully lift the caliper away from the brake rotor and suspension components.
- Remove the retaining clips or pins that hold the brake pads in place. These clips or pins are usually located on the inside or outside of the caliper.
- Slide out the old brake pads. Be cautious when handling the old brake pads, as they may contain sharp edges or debris.
- Inspect the brake rotor and caliper for any damage or debris. Use a wire brush to remove any rust or debris, ensuring a clean surface for the new brake pads.
- Avoid touching the brake rotor with bare hands, as oils from your skin can affect the rotor’s performance and cause premature wear.
By following these steps, you’ll successfully remove the old brake pads and prepare your vehicle for the installation of new brake pads. Proper removal of the old brake pads is crucial for ensuring a safe and efficient brake pad replacement process.
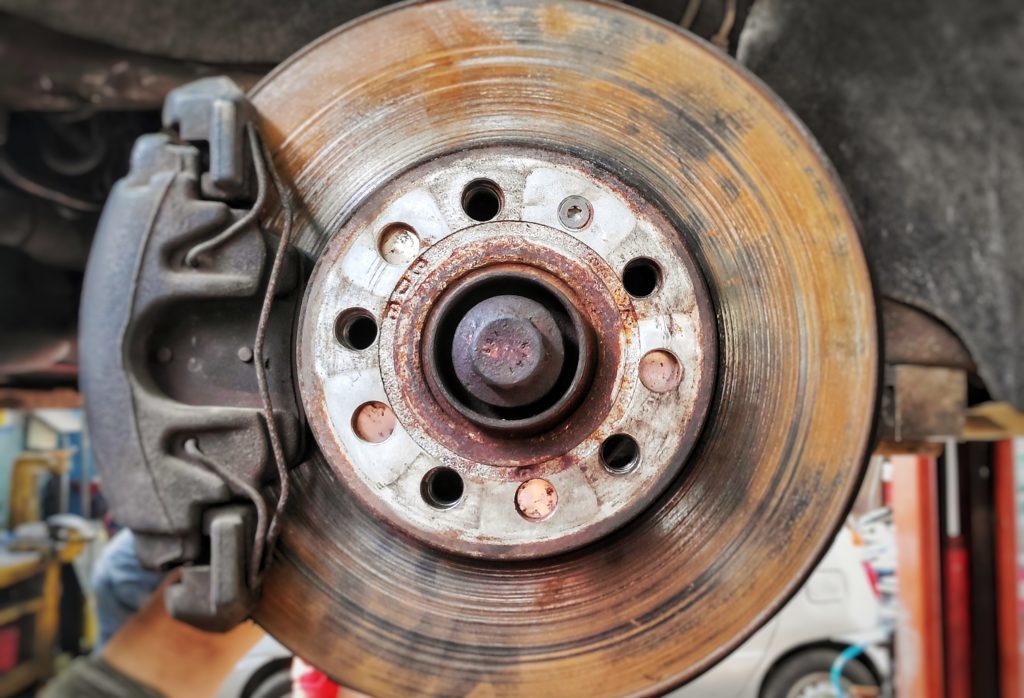
Inspecting the Brake Rotor
After removing the old brake pads, it’s essential to inspect the brake rotor for any signs of wear, scoring, or damage. The brake rotor plays a critical role in the braking system, and its condition can significantly impact the performance and safety of your vehicle. Here’s how to inspect the brake rotor:
- Examine the rotor surface for any visible signs of wear, scoring, or damage. Look for grooves, gouges, or cracks on the rotor surface. If you notice any of these signs, it may be necessary to replace the rotor.
- Measure the rotor thickness. Most brake rotors have a minimum thickness specification stamped on the rotor’s edge or in the brake caliper. Use a micrometer to measure the rotor thickness and compare it to the minimum thickness specification. If the rotor is worn beyond the minimum thickness, it must be replaced.
- Check the rotor for run-out. Run-out refers to the rotor’s deviation from a perfect flat surface. Use a dial indicator to measure the rotor run-out. If the run-out exceeds the manufacturer’s specifications, the rotor may need to be resurfaced or replaced.
- Clean the rotor surface. Use a wire brush and brake cleaner to remove any debris, rust, or oils from the rotor surface. A clean, smooth rotor surface is essential for optimal braking performance and new brake pad longevity.
In some cases, you may be able to resurface the rotor instead of replacing it. Resurfacing involves removing a thin layer of material from the rotor surface to create a smooth, even surface. However, if the rotor is significantly worn, damaged, or has excessive run-out, it’s best to replace it with a new one. Consult your vehicle’s owner’s manual for specific recommendations and guidelines regarding brake rotor maintenance and replacement.

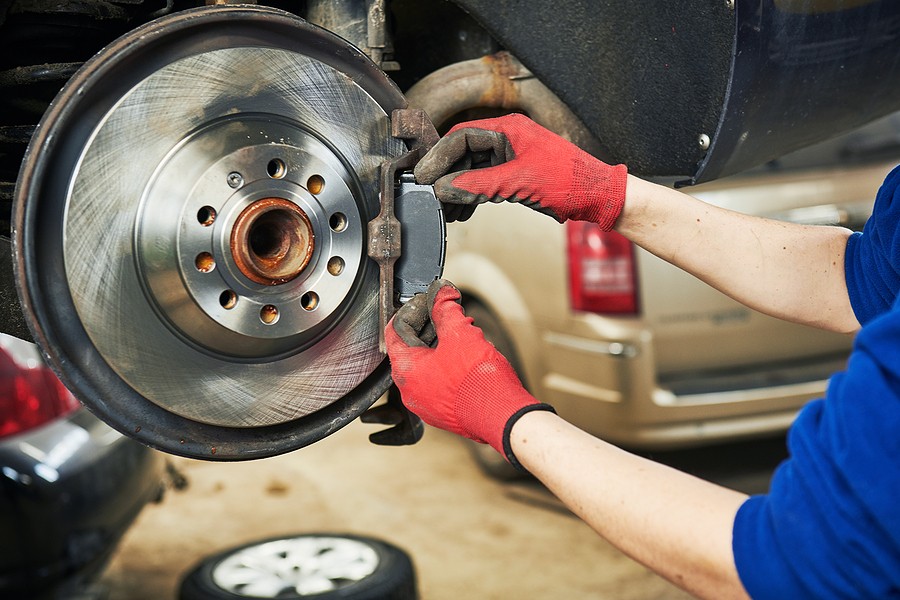
Installing the New Brake Pads
After inspecting the brake rotor, you’re ready to install the new brake pads. Proper installation is crucial for safe and effective braking. Follow these steps to install the new brake pads:
- Apply a thin layer of brake lubricant to the contact points. These points include the back of the brake pads, the caliper piston, and the slide pins. Brake lubricant helps reduce noise, vibration, and wear, ensuring smooth and efficient braking performance.
- Position the new brake pads in the caliper. Make sure the pads are correctly aligned with the brake rotor and caliper piston. Some brake pads have wear indicators that protrude beyond the pad surface. These indicators should face the brake rotor.
- Reassemble the brake caliper. Carefully slide the caliper back over the brake rotor, aligning it with the brake pads. Make sure the caliper slides smoothly along the slide pins or guide pins.
- Bolt the caliper back onto the suspension or brake mounts. Use the same bolts you removed when disassembling the brake caliper. Torque the bolts to the manufacturer’s specified tightness.
- Reattach the wheel and lower the vehicle. Before lowering the vehicle, make sure the lug nuts are tightened securely. Once the vehicle is on the ground, double-check the lug nuts to ensure they are properly torqued.
- Perform a final inspection of the brake system. Check for proper brake pad alignment, even wear, and adequate stopping power. Make any necessary adjustments before test-driving the vehicle.
By following these steps, you’ll ensure a proper installation of your new brake pads. Proper installation is crucial for safe and effective braking, so take your time and double-check your work before test-driving the vehicle.
Testing and Adjusting the Brakes
After installing the new brake pads, it’s essential to test and adjust the brakes for optimal performance. Follow these steps to ensure your brakes are correctly aligned, wearing evenly, and providing adequate stopping power:
- Begin by pumping the brake pedal several times. This action will help seat the new brake pads against the brake rotor and ensure proper hydraulic pressure in the brake lines.
- Test-drive the vehicle at low speeds in a safe area. Pay attention to any vibrations, noises, or pulling sensations. These symptoms may indicate improper brake pad alignment, uneven wear, or other issues requiring adjustment.
- Check the brake pad alignment. Inspect the gap between the brake pads and the rotor. The gap should be consistent on both sides of the rotor. If the gap is uneven, you may need to adjust the brake caliper or slide pins.
- Inspect the brake pads for even wear. The pads should wear evenly across their surface. If one pad wears more than the other, it may indicate a problem with the caliper, piston, or brake hose. Addressing these issues can help ensure even wear and prolong the life of the brake pads.
- Test the stopping power. Perform a series of hard braking tests from a safe speed. Ensure the vehicle stops smoothly and evenly without pulling to one side or vibrating excessively. If you notice any issues, recheck the brake pad alignment, evenness of wear, and hydraulic pressure.
- Bed in the new brake pads. Bedding in the pads involves applying light, intermittent pressure to the brakes during the first 100-200 miles of driving. This process helps the brake pads and rotors form a consistent, even layer of friction material, improving braking performance and longevity.
By following these steps, you can ensure your brakes are correctly adjusted and performing optimally after changing the disc brake pads. Regular maintenance and inspections will help maintain the longevity and safety of your vehicle’s braking system.

Maintaining Your Brakes
Regular brake maintenance is crucial for ensuring the safety, reliability, and longevity of your vehicle’s braking system. By performing periodic inspections, rotor resurfacing, and timely pad replacement, you can maintain optimal braking performance and prevent costly repairs. Consider the following maintenance tips:
- Inspect the brakes regularly. Check the brake pads for wear and the rotors for scoring, grooves, or damage. Schedule professional inspections if you notice any issues or if it’s been more than a year since your last inspection.
- Replace brake pads as needed. Most brake pads should be replaced when they reach a minimum thickness of 3-4 millimeters. Consult your vehicle’s owner’s manual for specific recommendations and guidelines.
- Resurface or replace damaged rotors. If the rotors show signs of excessive wear, scoring, or damage, they may need to be resurfaced or replaced. Consult a professional mechanic for advice and assistance.
- Bleed the brakes periodically. Over time, air can enter the brake lines, reducing hydraulic pressure and brake performance. Bleeding the brakes involves removing air from the brake lines, restoring optimal hydraulic pressure.
- Address any issues promptly. If you notice any unusual noises, vibrations, or performance issues, have your brakes inspected and repaired as soon as possible. Ignoring brake problems can lead to more severe issues and more costly repairs.
By following these maintenance tips, you can ensure your vehicle’s braking system remains safe, reliable, and efficient. Remember, your brakes are one of the most critical safety features of your vehicle, so don’t neglect regular inspections and maintenance.