
When to Change a Rear Bicycle Tire
A rear bicycle tire, like any other tire, requires periodic replacement due to wear and tear, damage, or loss of tire pressure. Regularly inspecting your bicycle’s tires can help you determine when it’s time for a change. Here are some signs that indicate it’s time to replace your rear bicycle tire:

Click Image to Find eBike Products
- Tread wear: Over time, the tread on your tire will become shallow and worn down, reducing its grip on the road. If the tread is worn down to the point where the tire’s casing is visible, it’s time for a replacement.
- Damage: Cuts, punctures, or other forms of damage can compromise the integrity of your tire, making it more susceptible to flats or blowouts. If the damage is severe or cannot be repaired, replace the tire.
- Loss of tire pressure: A tire that consistently loses air or cannot hold pressure may have a slow leak or be damaged. If the tire cannot maintain proper inflation, it’s time for a replacement.
- Age: Tires naturally degrade over time due to exposure to the elements, even if they are not used frequently. If your tire is more than a few years old, it’s a good idea to replace it as a precautionary measure.
- Performance: If you notice a decrease in your bicycle’s performance, such as reduced speed, handling, or stability, it may be due to a worn-out tire. Replacing the tire can help restore your bicycle’s performance and ensure a safe and enjoyable ride.
- Tire levers: These are thin, curved pieces of plastic or metal that help you pry the tire bead off the rim. They come in various shapes and sizes, but any standard tire lever will do the job.
- Patch kit or replacement tube: If you’re dealing with a puncture, a patch kit can help you fix the issue. However, if the tire is severely damaged or worn out, it’s best to replace the tube entirely.
- Bicycle pump or CO2 inflator: You’ll need a way to inflate the new tube or repair the old one. A bicycle pump is the most common option, but CO2 inflators are also popular for their convenience and speed.
- Wrench: Depending on your bicycle’s design, you may need a wrench to loosen or tighten the nuts and bolts that hold the wheel in place. A standard adjustable wrench should suffice for most bicycles.
- Flip the bike upside down: Place the bicycle upside down on a soft, stable surface, such as a carpet or a towel. This position, also known as the “inverted position,” makes it easier to access the rear wheel and tire.
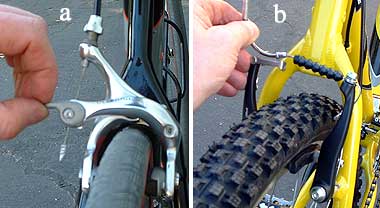
- Release the brakes: Squeeze the brake calipers to release the brake pads from the rim. This step is crucial as it allows the wheel to spin freely during the tire replacement process.
- Deflate the tire: Use a tire lever or your fingers to press the valve and release the air from the tire. It’s essential to deflate the tire completely to make it easier to remove the tire bead from the rim.
- Shift the gears: Before removing the rear wheel, shift the gears to the smallest cog or sprocket. This step makes it easier to release the chain from the cassette or freewheel.
- Release the chain: Locate the derailleur pulley and use your fingers to push it towards the smallest cog or sprocket. This action should release the chain from the cassette or freewheel, allowing you to remove the wheel.
- Remove the wheel: With the chain released, carefully lift the wheel out of the bicycle frame. It’s essential to support the weight of the wheel to avoid damaging the frame or the wheel itself.
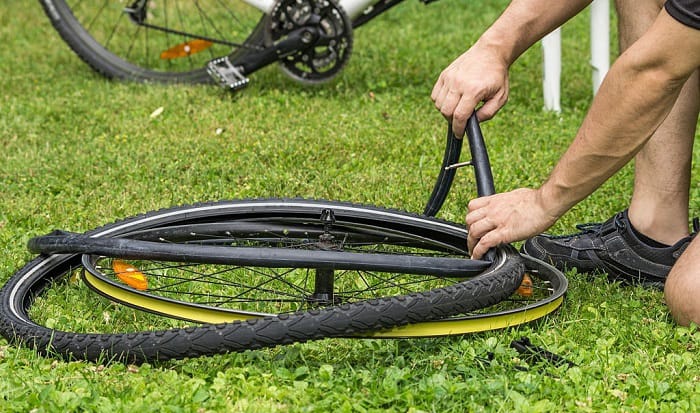
- Remove the tire: Use a tire lever or your fingers to pry the tire bead off the rim. Start at the valve stem and work your way around the rim until the tire is completely off the rim.
- Remove the damaged tube or tire: Once the tire is off the rim, remove the damaged inner tube or tire. If you’re replacing the inner tube, remove it from the tire carefully to avoid puncturing it further.
- Inspect the tire: Before installing the new inner tube or tire, inspect the tire for any damage, such as cuts, punctures, or embedded debris. Remove any debris and repair any damage as necessary.
- Install the new inner tube or tire: If you’re replacing the inner tube, inflate it slightly to give it some shape. Then, insert the inner tube into the tire, making sure that the valve stem is properly aligned with the rim hole. Once the inner tube is in place, use your hands to press the tire bead back onto the rim, starting at the valve stem and working your way around the rim.
Use a bicycle pump or CO2 inflator to inflate the new inner tube or tire to the recommended pressure. It’s essential to inflate the tire to the correct pressure to ensure proper performance and safety. - Align the chain: Before reattaching the wheel, make sure that the chain is properly aligned with the cassette or freewheel. If necessary, shift the gears to the smallest cog or sprocket to make it easier to align the chain.
- Insert the wheel: Carefully lift the wheel and insert it back into the bicycle frame. Make sure that the chain is properly engaged with the cassette or freewheel and that the wheel is centered in the frame.
- Secure the wheel: Once the wheel is in place, use a wrench to tighten the nuts or quick-release lever that holds the wheel in place. Make sure that the wheel is securely fastened to prevent it from shifting during riding.
- Check the chain alignment: After securing the wheel, double-check that the chain is properly aligned with the cassette or freewheel. If necessary, adjust the chain to ensure proper alignment.
- Check the tire pressure: Make sure that the tire is inflated to the recommended pressure. A tire that’s underinflated can cause handling issues, while a tire that’s overinflated can be more susceptible to punctures and damage.
- Check the wheel alignment: Spin the wheel to make sure that it’s properly aligned and centered. A wheel that’s crooked or wobbling can cause handling issues and increase the risk of accidents.
- Test the brakes: Make sure that the brakes are properly adjusted and functioning correctly. Test the brakes at low speeds to ensure that they’re responsive and effective.
- Take a short test ride: Once you’ve checked the tire pressure, wheel alignment, and brakes, take a short test ride to make sure that everything is working correctly. Pay attention to how the bike handles and feels, and make any necessary adjustments.
- Check the tire pressure regularly: Make sure that the tire is inflated to the recommended pressure. A tire that’s underinflated can cause handling issues, while a tire that’s overinflated can be more susceptible to punctures and damage.
- Inspect the tire visually: Regularly inspect the tire for signs of wear, damage, or debris. Remove any debris and repair or replace the tire as necessary.
- Avoid riding on rough surfaces: Riding on rough surfaces, such as gravel or debris, can cause damage to the tire and increase the risk of punctures.
- Store the bike properly: Store the bike in a dry, cool place to prevent damage to the tire from exposure to the elements.
- Consider using tire liners or sealant: Tire liners or sealant can provide an extra layer of protection against punctures and damage.
Gathering the Necessary Tools and Materials
Before you begin changing your rear bicycle tire, it’s essential to gather all the necessary tools and materials to ensure a smooth and efficient process. Here’s a list of what you’ll need:
Having these tools and materials on hand before you start the tire replacement process can save you time and frustration. It’s also a good idea to familiarize yourself with their proper use and function, as this can help you avoid potential mistakes or damage to your bicycle.
Preparing the Bicycle for Tire Removal
Before you can change the rear bicycle tire, you need to prepare the bicycle for tire removal. Here are the steps to follow:
By following these steps, you’ll have the bicycle prepared for tire removal, making the process smoother and more efficient. It’s also a good idea to double-check that you’ve completed each step correctly before moving on to the next one, as this can help you avoid potential mistakes or damage to your bicycle.

Removing the Rear Wheel
Once you’ve prepared the bicycle for tire removal, it’s time to remove the rear wheel. Here are the steps to follow:
By following these steps, you’ll have successfully removed the rear wheel, making it easier to replace the inner tube or tire. It’s also a good idea to double-check that you’ve completed each step correctly before moving on to the next one, as this can help you avoid potential mistakes or damage to your bicycle.

Replacing the Tube or Tire
Now that you’ve removed the rear wheel, it’s time to replace the inner tube or tire. Here are the steps to follow:
By following these steps, you’ll have successfully replaced the inner tube or tire. It’s also a good idea to double-check that you’ve completed each step correctly before moving on to the next one, as this can help you avoid potential mistakes or damage to your bicycle.

Reattaching the Rear Wheel
Once you’ve replaced the inner tube or tire, it’s time to reattach the rear wheel. Here are the steps to follow:
By following these steps, you’ll have successfully reattached the rear wheel. It’s also a good idea to double-check that you’ve completed each step correctly before moving on to the next one, as this can help you avoid potential mistakes or damage to your bicycle.
Testing the New Tire
Before you hit the road with your newly replaced rear bicycle tire, it’s important to test the tire to ensure that it’s properly installed and functioning correctly. Here are some tips on how to test the new tire:
By following these steps, you can ensure that your new rear bicycle tire is properly installed and functioning correctly. Regular maintenance and inspections can also help you identify and address any issues before they become serious problems.

Maintaining the New Tire
Congratulations, you’ve successfully replaced your rear bicycle tire! To ensure that your new tire lasts as long as possible and performs at its best, it’s important to maintain it properly. Here are some tips on how to maintain your new tire:
By following these tips, you can help ensure that your new rear bicycle tire lasts as long as possible and performs at its best. Regular maintenance and inspections can also help you identify and address any issues before they become serious problems.
