
Introduction: The Art of Bicycle Frame Building
Building a custom bicycle frame is an artisanal process that combines technical expertise, creativity, and passion for cycling. By learning how to make a bicycle frame, you can create a unique, tailored ride that fits your body and style perfectly. This comprehensive guide will walk you through the essential steps, materials, and techniques required to build your own bicycle frame. The benefits of building a custom bicycle frame extend beyond the tailored fit and unique design. Constructing your own frame offers a profound sense of satisfaction, as you bring your vision to life with your own hands. Moreover, the knowledge and skills acquired throughout the process can lead to a deeper appreciation for the craftsmanship and technology behind high-quality bicycles.

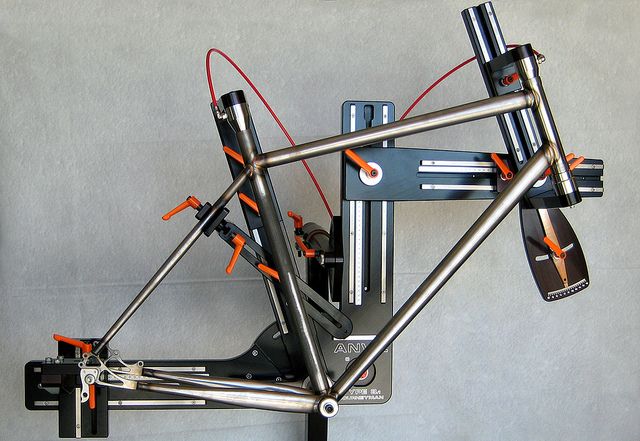
Click Image to Find eBike Products
Choosing the Right Material: Steel, Aluminum, Titanium, or Carbon Fiber?
When learning how to make a bicycle frame, selecting the appropriate material is crucial. Each material offers unique properties, advantages, and disadvantages. Your choice will depend on your skill level, budget, and desired riding experience. Steel is a classic material for bicycle frames, known for its durability, repairability, and comfortable ride quality. It is relatively easy to work with, making it suitable for beginners. However, steel frames can be heavy compared to other materials.
Aluminum is a popular choice for its lightweight and cost-effective properties. It is resistant to corrosion and offers a stiff ride, ideal for racing and high-performance applications. However, aluminum can be challenging to work with, requiring specific tools and techniques. Additionally, aluminum frames may require more frequent replacement due to fatigue.
Titanium is a high-performance material, offering a perfect balance between strength, weight, and durability. It is corrosion-resistant and provides a smooth, comfortable ride. However, titanium is expensive and challenging to work with, requiring advanced skills and equipment.
Carbon fiber is a modern, high-tech material used in professional racing and high-performance bicycles. It is incredibly lightweight and strong, allowing for unique shapes and designs. However, carbon fiber is expensive, challenging to work with, and requires specialized tools and knowledge. It is not recommended for beginners.
In summary, consider your skill level, budget, and desired riding experience when choosing the material for your bicycle frame. Each material has its advantages and disadvantages, so selecting the one that best fits your needs is essential.
Designing the Frame: Geometry, Tubing, and Aesthetics
Designing a functional and visually appealing bicycle frame involves careful consideration of frame geometry, tubing selection, and aesthetics. Here are some tips to help you create a beautiful and efficient frame. Frame size is a critical factor in ensuring a comfortable and efficient riding experience. Measure your inseam and consult bicycle sizing charts to determine the appropriate frame size for your body. Consider factors such as top tube length, seat tube angle, and head tube angle when designing the frame geometry.
Tubing selection is another essential aspect of frame design. Choosing the right tubing diameters and wall thicknesses can significantly impact the frame’s strength, weight, and ride quality. Thinner walls and larger diameters can create a stiffer frame, while thicker walls and smaller diameters can provide more compliance and comfort.
Aesthetics play a significant role in creating a unique and personalized bicycle frame. Consider incorporating personal style elements into the frame design, such as custom paint jobs, decals, or engravings. Additionally, selecting visually appealing tubing shapes and profiles can enhance the overall look of the frame.
When designing the frame, consider the intended use and riding style. For example, a road bike frame will have different geometry and tubing selection than a mountain bike frame. Additionally, consider factors such as handling, stability, and aerodynamics when designing the frame.
In summary, designing a functional and visually appealing bicycle frame involves careful consideration of frame geometry, tubing selection, and aesthetics. By following these tips, you can create a beautiful and efficient frame tailored to your body and riding style.

Gathering Tools and Equipment: Building Your Bicycle Frame Workshop
Building a bicycle frame requires a variety of tools and equipment. Here are some essential items to include in your bicycle frame building workshop:
- Jig: A jig is a critical piece of equipment for building bicycle frames. It holds the tubes in place and ensures accurate alignment during the welding process. Choose a jig that is compatible with the material and style of frame you plan to build.
- Welding machine: Depending on the material you choose for your frame, you will need a welding machine suitable for that material. TIG (Tungsten Inert Gas) welding is commonly used for steel and titanium frames, while MIG (Metal Inert Gas) welding is often used for aluminum frames.
- Files and measuring instruments: Precision is key when building a bicycle frame. Invest in high-quality files and measuring instruments, such as calipers, rulers, and protractors, to ensure accurate cuts and measurements.
- Safety equipment: Welding can be a dangerous process, so it’s essential to invest in safety equipment, such as welding helmets, gloves, and protective clothing.
In addition to these essential tools and equipment, consider investing in a well-organized workspace. A clutter-free workspace can help improve efficiency and reduce the risk of accidents.
When handling tools and materials, always prioritize safety. Follow the manufacturer’s instructions and safety guidelines for each tool, and wear appropriate safety equipment. Keep your workspace clean and well-organized, and be mindful of potential hazards, such as sharp edges or hot surfaces.
In summary, building a bicycle frame requires a variety of tools and equipment. Invest in a jig, welding machine, files, and measuring instruments, and prioritize safety when handling tools and materials. A well-organized workspace can help improve efficiency and reduce the risk of accidents.
Cutting and Preparing Tubes: Ensuring Precision and Accuracy
Cutting and preparing tubes is a critical step in building a high-quality bicycle frame. Precision and accuracy are essential to ensure a successful frame build. Here are some techniques for cutting and preparing tubes for welding:
Accurate mitering
Mitering is the process of cutting tubes at specific angles to fit together perfectly. Accurate mitering is crucial for a strong and aesthetically pleasing frame. Use a mitering tool or jig to ensure precise cuts. Measure and mark the tubes carefully before cutting, and double-check your measurements before making the final cut.
Cleaning and deburring
Cleaning and deburring the tubes are essential for a successful weld. Remove any dirt, rust, or oil from the tubes using a wire brush or sandpaper. Deburring removes sharp edges and burrs from the cut ends of the tubes, which can interfere with the weld. Use a deburring tool or file to smooth the edges carefully.
Consistency is key
Consistency is crucial when cutting and preparing tubes. Use the same tools and techniques for each tube to ensure uniformity. This consistency will help ensure a stable and strong frame.
Precision and accuracy
Precision and accuracy are critical when cutting and preparing tubes. Double-check all measurements and cuts before proceeding to the welding stage. A small mistake in this stage can lead to significant problems during the welding stage.
In summary, cutting and preparing tubes is a critical step in building a high-quality bicycle frame. Accurate mitering, cleaning, and deburring are essential for a successful weld. Consistency, precision, and accuracy are crucial for a stable and strong frame. By following these techniques, you can ensure a successful frame build and create a beautiful and functional bicycle frame.

Welding Techniques: Mastering the Art of Joining Metal
Welding is a critical step in building a bicycle frame, and choosing the right welding technique is essential for a strong and durable frame. Here are some welding techniques suitable for bicycle frame building:
TIG welding
TIG (Tungsten Inert Gas) welding is a popular technique for bicycle frame building due to its precision and control. TIG welding uses a non-consumable tungsten electrode to produce a clean, narrow weld with minimal spatter. This technique is ideal for thin-walled tubing and requires a high level of skill and precision.
MIG welding
MIG (Metal Inert Gas) welding is a faster and more accessible technique than TIG welding. MIG welding uses a consumable wire electrode and a shielding gas to protect the weld from oxidation. This technique is ideal for thicker tubing and requires less skill than TIG welding but may produce more spatter and a wider weld.
Fillet welding
Fillet welding is a technique used to join two tubes at a right angle. This technique is commonly used in bicycle frame building to join the top tube, down tube, and seat tube. Fillet welding requires precision and consistency to ensure a strong and aesthetically pleasing weld.
Proper welding sequence
Proper welding sequence is essential for a stable and durable frame. Start by welding the joints with the least amount of stress, such as the seat tube and bottom bracket. Then, move on to the joints with more stress, such as the head tube and top tube. This sequence helps ensure that the frame remains stable and aligned during the welding process.
Heat control
Heat control is crucial when welding a bicycle frame. Overheating the tubing can cause warping, distortion, or weakening of the material. Use a welding torch with a small flame and move it quickly along the joint to avoid overheating. Additionally, allow the frame to cool between welds to prevent heat buildup.
Post-weld cleaning
Post-weld cleaning is essential for a smooth and aesthetically pleasing finish. Use a wire brush or sandpaper to remove any slag, spatter, or oxidation from the weld. This step helps ensure a clean and professional-looking frame.
In summary, welding is a critical step in building a bicycle frame, and choosing the right welding technique is essential for a strong and durable frame. TIG, MIG, and fillet welding are suitable techniques for bicycle frame building. Proper welding sequence, heat control, and post-weld cleaning are crucial for a successful weld. By following these techniques, you can ensure a stable and durable frame and create a beautiful and functional bicycle frame.

Assembling and Fine-Tuning the Frame: The Final Touches
Once the welding is complete, it’s time to assemble and fine-tune the bicycle frame. This stage requires attention to detail and precision to ensure a smooth and safe ride. Here are some steps to follow when assembling and fine-tuning the frame:
Assembling the frame
Begin by attaching the bottom bracket to the frame. Use a bottom bracket tool to tighten the bearings and ensure a snug fit. Next, attach the head tube to the frame and tighten the headset bearings. Make sure the headset is aligned correctly and the fork is centered in the frame.
Aligning components
Once the bottom bracket and head tube are attached, it’s time to align the components. Use a frame alignment tool to ensure that the frame is straight and true. Check the alignment of the rear triangle, chainstays, and seat tube. Make any necessary adjustments to ensure a smooth and safe ride.
Fine-tuning the fit and finish
After aligning the components, it’s time to fine-tune the fit and finish. Use a file or sandpaper to smooth out any rough edges or burrs. Check the paint finish for any imperfections and touch up as necessary. Make sure all bolts and screws are tightened to the recommended torque settings.
Common issues and solutions
During the assembly and fine-tuning stage, you may encounter some common issues such as misalignment, warping, or uneven paint finish. Here are some solutions for addressing these issues:
- Misalignment: Use a frame alignment tool to realign the frame. If necessary, make adjustments to the welds or frame components.
- Warping: Use a frame alignment tool to check for warping. If necessary, apply heat or cold to the affected area to straighten the frame. Make sure to control the heat to avoid damaging the frame.
- Uneven paint finish: Use touch-up paint or a paint pen to address any imperfections in the paint finish. Make sure to match the paint color and finish as closely as possible.
In summary, assembling and fine-tuning the frame is the final stage in building a bicycle frame. This stage requires attention to detail and precision to ensure a smooth and safe ride. Fine-tune the fit and finish, align the components, and address any common issues that may arise during this stage. By following these steps, you can create a beautiful and functional bicycle frame that meets your unique specifications and riding style.

Conclusion: The Joy of Building Your Own Bicycle Frame
Building your own bicycle frame is a rewarding and challenging experience that allows you to create a unique and personalized ride. By following the steps outlined in this comprehensive guide, you can ensure a successful frame build and enjoy the satisfaction of creating something with your own hands.
Choosing the right material, designing the frame, gathering tools and equipment, cutting and preparing tubes, mastering welding techniques, and assembling and fine-tuning the frame are all critical steps in the frame building process. Each step requires attention to detail, precision, and patience. By taking the time to learn and practice each step, you can create a beautiful and functional bicycle frame that meets your unique specifications and riding style.
Building a custom bicycle frame offers many benefits, including a tailored fit, unique design, and the satisfaction of creating something with your own hands. Whether you’re an experienced builder or a beginner, the joy of building your own bicycle frame is a rewarding experience that can provide a lifetime of enjoyment.
To continue your journey in bicycle frame building, consider seeking out additional resources and learning opportunities. Join a local bicycle building club, attend workshops or conferences, or enroll in a formal course to further develop your skills and knowledge.
Remember, building a bicycle frame is a process that requires patience, practice, and a commitment to safety. By following best practices and taking the time to learn and grow, you can create a beautiful and functional bicycle frame that you can be proud of.