Why Accurate Frame Measurement Matters
When it comes to cycling, a well-fitting bike is essential for a comfortable and efficient ride. One of the most critical factors in achieving a proper fit is accurate frame measurement. Measuring a bike frame correctly is crucial to ensure that the bike is the right size for the rider, which can significantly impact the overall cycling experience. A poorly fitting bike can lead to discomfort, injury, and reduced performance, making it essential to get the measurements right.
For instance, a bike with a frame that is too small can cause the rider to be hunched over, leading to back and neck pain. On the other hand, a frame that is too large can result in the rider stretching to reach the handlebars, causing discomfort and affecting the overall riding position. Furthermore, a bike that is not properly fitted can also lead to reduced performance, as the rider may not be able to maintain an optimal riding position.
Accurate frame measurement is also essential for safety reasons. A bike that is not properly fitted can increase the risk of accidents, as the rider may not be able to control the bike effectively. By taking the time to measure the bike frame correctly, riders can ensure that their bike is safe and comfortable to ride, allowing them to enjoy their cycling experience to the fullest.
In addition to comfort and safety, accurate frame measurement is also important for performance. A well-fitting bike can help riders achieve their optimal riding position, which can improve their overall performance and efficiency. By ensuring that the bike frame is the right size, riders can optimize their pedaling technique, reduce fatigue, and increase their overall speed and endurance.
Measuring a bike frame accurately requires attention to detail and a basic understanding of bike geometry. By taking the time to learn how to measure a frame on a bike, riders can ensure that their bike is properly fitted, which can make a significant difference in their overall cycling experience. In the next section, we will explore the different components of a bike frame and how they relate to the overall fit of the bike.
Understanding Bike Frame Geometry
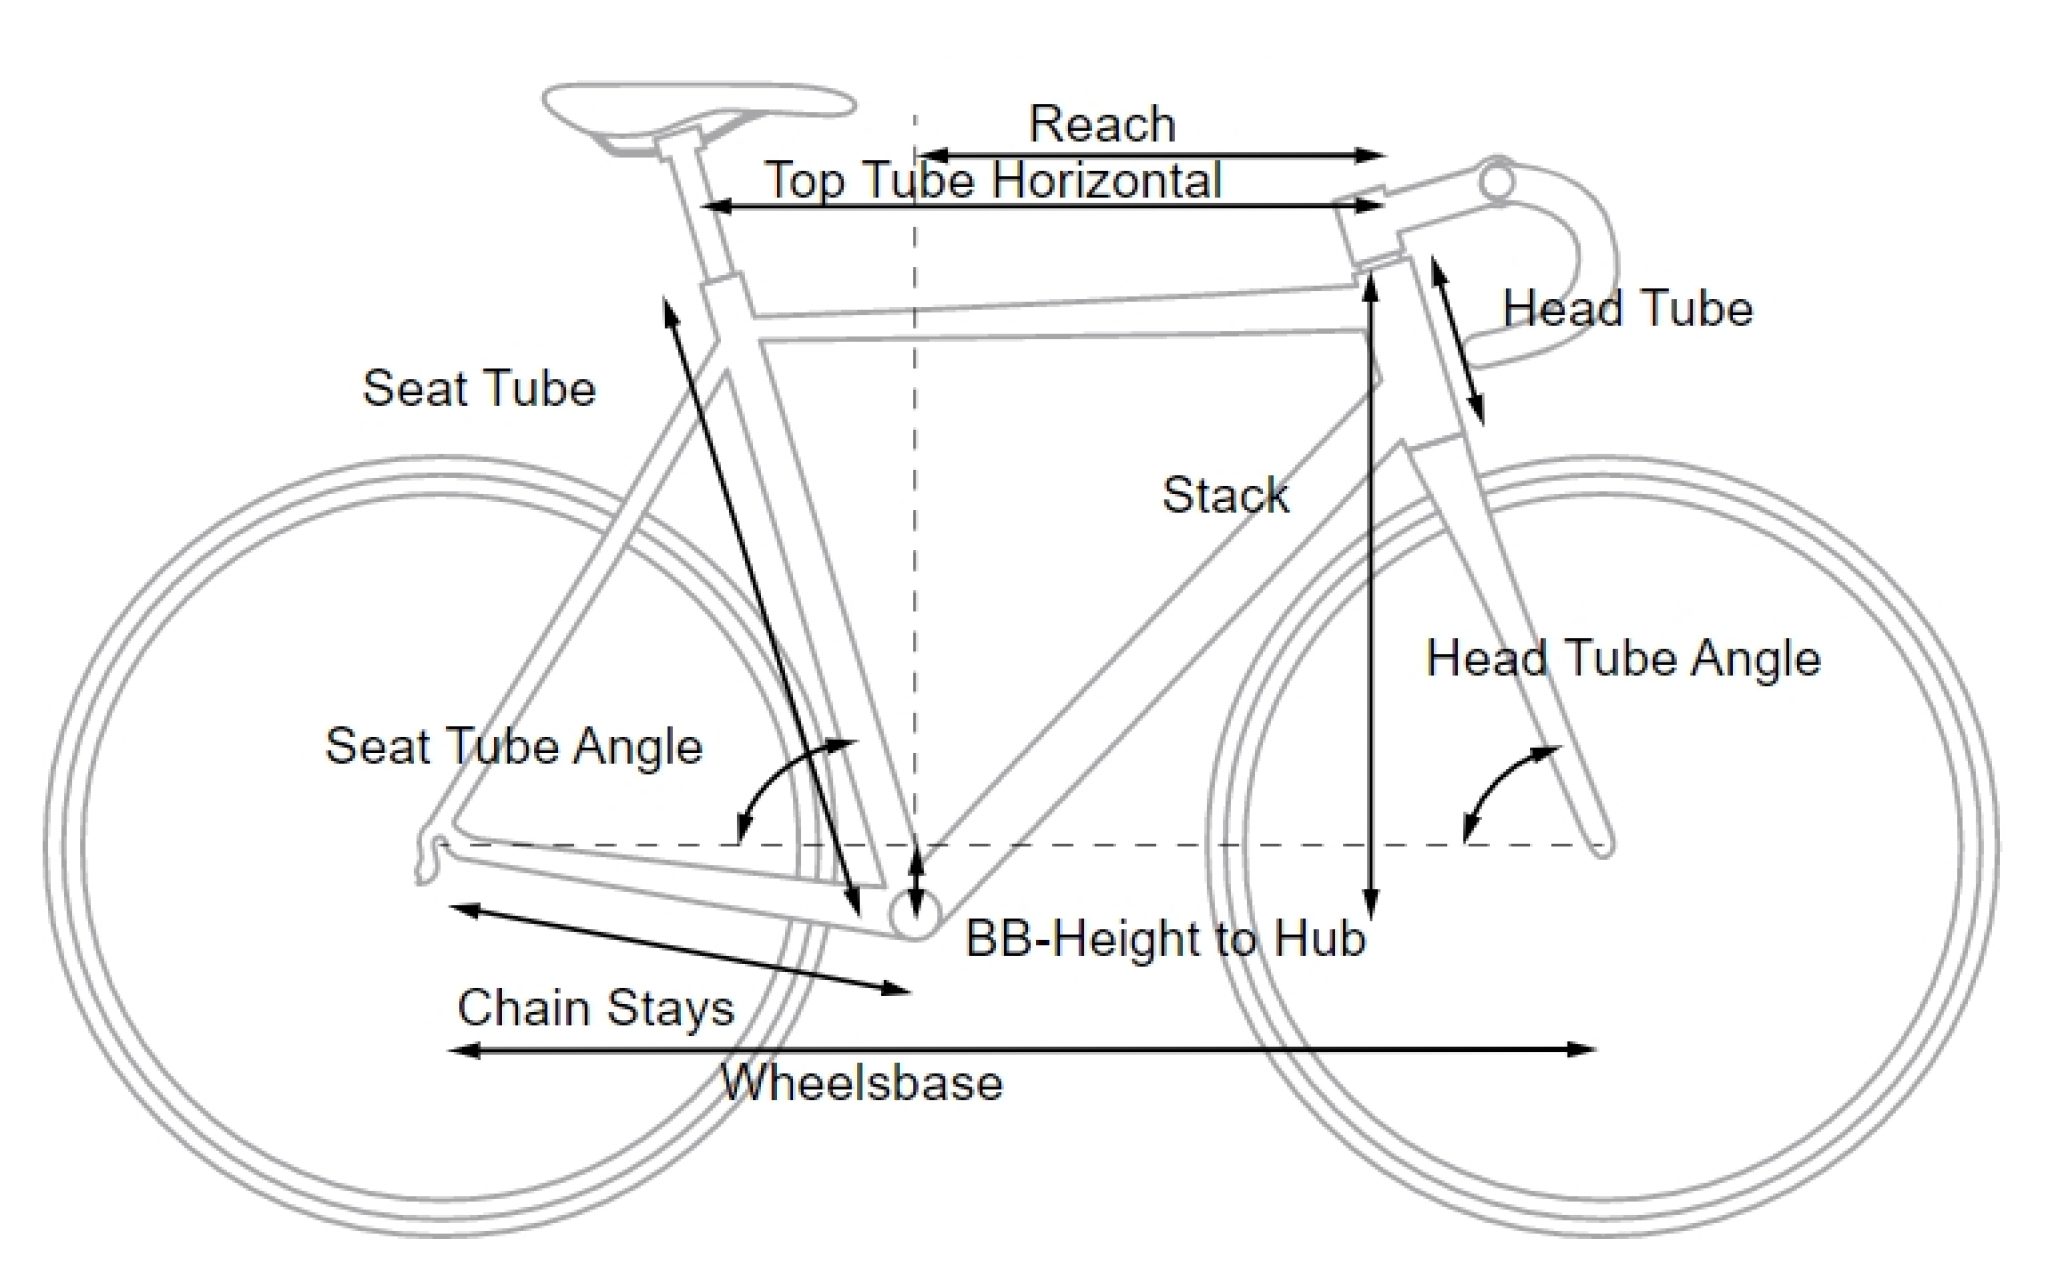
A bike frame is composed of several key components that work together to provide a comfortable and efficient ride. Understanding the different parts of a bike frame is essential for measuring and fitting a bike correctly. The main components of a bike frame include the seat tube, top tube, head tube, and chainstays.
The seat tube is the vertical tube that runs from the bottom bracket to the seat post. The length of the seat tube is critical in determining the overall size of the bike frame. A longer seat tube generally indicates a larger frame size, while a shorter seat tube indicates a smaller frame size.
The top tube is the horizontal tube that runs from the head tube to the seat tube. The length of the top tube affects the overall reach and comfort of the bike. A longer top tube can provide a more comfortable riding position, but may also make the bike more difficult to handle.
The head tube is the tube that contains the front fork and handlebars. The length and angle of the head tube can affect the overall handling and stability of the bike. A longer head tube can provide a more stable ride, but may also make the bike more difficult to maneuver.
The chainstays are the tubes that run from the bottom bracket to the rear dropouts. The length of the chainstays can affect the overall stability and efficiency of the bike. A longer chainstay can provide a more stable ride, but may also make the bike more difficult to accelerate.
Understanding how these components work together is essential for measuring and fitting a bike correctly. By taking into account the different components of a bike frame, riders can ensure that their bike is properly fitted and provides a comfortable and efficient ride. In the next section, we will provide a step-by-step guide on how to measure a bike frame, including the tools needed and the measurements to take.
How to Measure Your Bike Frame: A Step-by-Step Guide
Measuring a bike frame accurately requires attention to detail and the right tools. To get started, you will need a tape measure, a calculator, and a pencil and paper for recording your measurements. Here is a step-by-step guide on how to measure a bike frame:
Step 1: Measure the Seat Tube Length
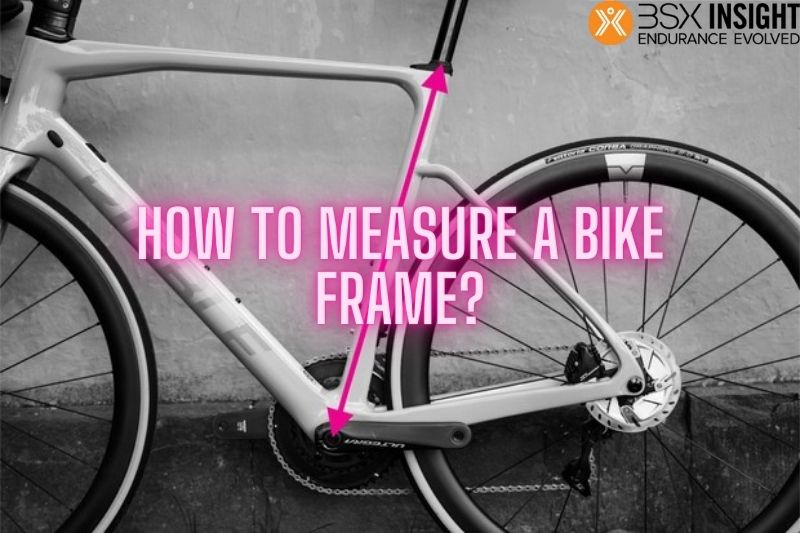
The seat tube length is the distance from the center of the bottom bracket to the top of the seat tube. To measure the seat tube length, place the tape measure at the center of the bottom bracket and extend it up to the top of the seat tube. Record this measurement in inches or centimeters.
Step 2: Measure the Top Tube Length
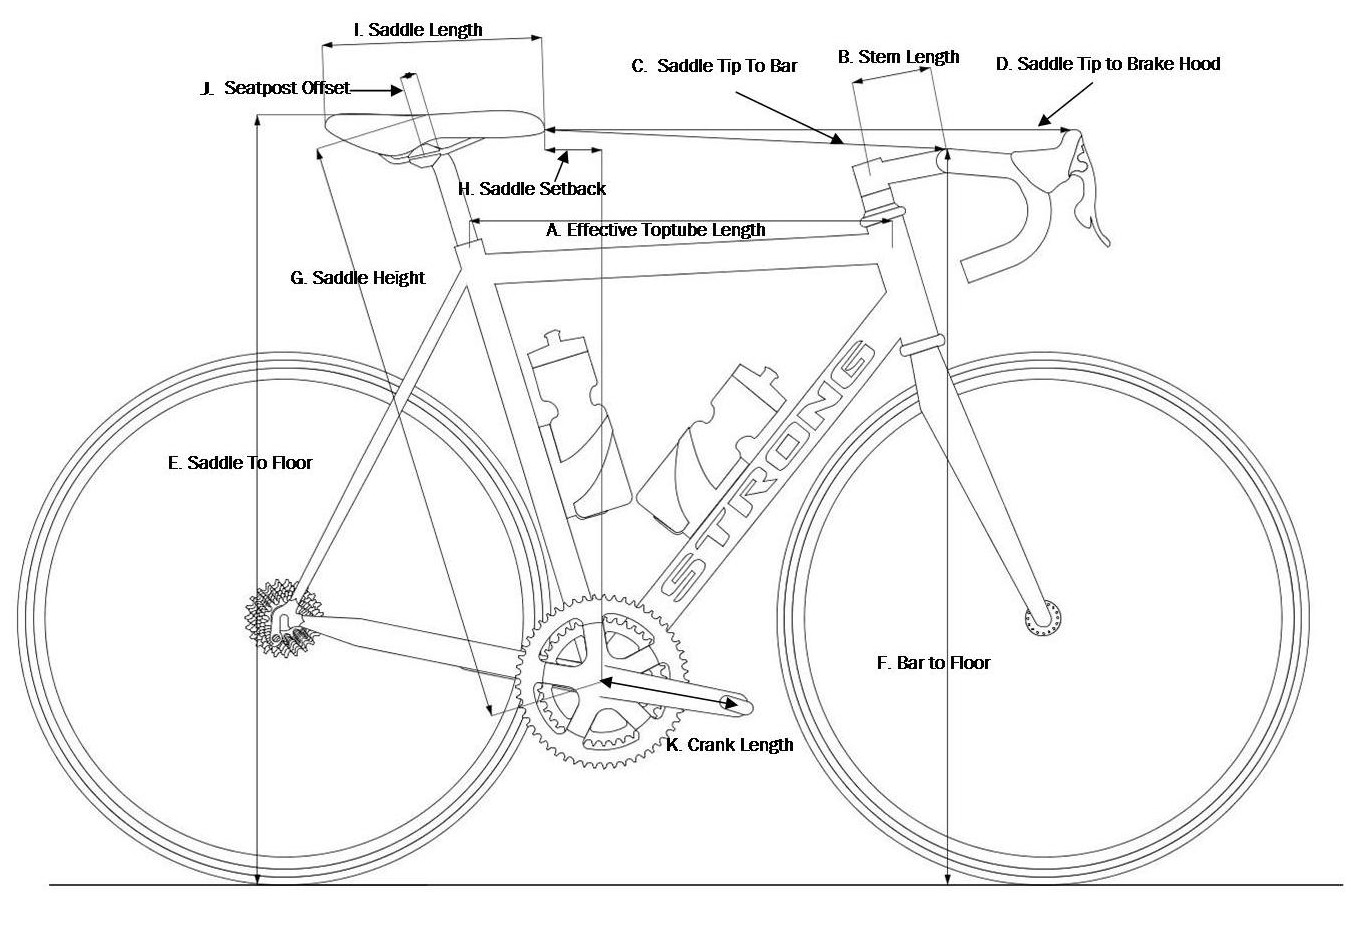
The top tube length is the distance from the center of the head tube to the center of the seat tube. To measure the top tube length, place the tape measure at the center of the head tube and extend it back to the center of the seat tube. Record this measurement in inches or centimeters.
Step 3: Measure the Head Tube Length
The head tube length is the distance from the center of the head tube to the top of the head tube. To measure the head tube length, place the tape measure at the center of the head tube and extend it up to the top of the head tube. Record this measurement in inches or centimeters.
Step 4: Measure the Chainstay Length
The chainstay length is the distance from the center of the bottom bracket to the center of the rear dropout. To measure the chainstay length, place the tape measure at the center of the bottom bracket and extend it back to the center of the rear dropout. Record this measurement in inches or centimeters.
Step 5: Calculate the Frame Size
Using the measurements taken, calculate the frame size using a frame size calculator or by consulting a frame size chart. This will give you an idea of the frame size that is right for you.
By following these steps, you can accurately measure your bike frame and determine the right size for your needs. Remember to always double-check your measurements and consult a professional if you are unsure about any part of the process.
Measuring for Different Types of Bikes
When it comes to measuring a bike frame, different types of bikes require different approaches. Road bikes, mountain bikes, and hybrid bikes all have unique frame geometries that need to be taken into account when measuring. Here are some tips for measuring frames for specific riding styles:
Road Bikes:
Road bikes typically have a more aggressive frame geometry, with a longer top tube and a shorter head tube. When measuring a road bike frame, pay attention to the seat tube length and the top tube length, as these will affect the overall fit and comfort of the bike.
Mountain Bikes:
Mountain bikes have a more relaxed frame geometry, with a shorter top tube and a longer head tube. When measuring a mountain bike frame, pay attention to the chainstay length and the head tube length, as these will affect the overall stability and handling of the bike.
Hybrid Bikes:
Hybrid bikes combine elements of road and mountain bikes, with a frame geometry that is designed for comfort and versatility. When measuring a hybrid bike frame, pay attention to the seat tube length and the top tube length, as these will affect the overall fit and comfort of the bike.
In addition to the type of bike, the riding style and personal preference of the rider should also be taken into account when measuring a bike frame. For example, a rider who prefers a more upright riding position may require a longer head tube and a shorter top tube.
By considering the type of bike and the riding style and personal preference of the rider, you can ensure that the bike frame is measured accurately and that the bike is properly fitted for a comfortable and efficient ride.
Using Online Frame Size Charts and Calculators
When it comes to determining the correct frame size for a bike, online frame size charts and calculators can be a valuable resource. Many bike manufacturers provide frame size charts and calculators on their websites, which can help riders determine the correct frame size based on their height, inseam, and riding style.
To use an online frame size chart or calculator, simply enter your height, inseam, and riding style into the tool, and it will provide you with a recommended frame size. Some tools may also ask for additional information, such as your arm length or leg length, to provide a more accurate recommendation.
One of the benefits of using online frame size charts and calculators is that they can help riders avoid the common mistake of choosing a frame size that is too small or too large. By using a tool that takes into account a rider’s specific measurements and riding style, riders can ensure that they are choosing a frame size that will provide a comfortable and efficient ride.
Another benefit of online frame size charts and calculators is that they can help riders compare different frame sizes and styles. For example, a rider may be considering two different bikes with different frame sizes and styles. By using an online frame size chart or calculator, the rider can compare the two bikes and determine which one is the best fit.
Some popular online frame size charts and calculators include the Trek Bike Size Calculator, the Specialized Bike Size Calculator, and the Cannondale Bike Size Calculator. These tools are all available on the respective manufacturer’s website and can be used to determine the correct frame size for a variety of different bikes.
By using online frame size charts and calculators, riders can ensure that they are choosing a frame size that will provide a comfortable and efficient ride. Whether you’re a seasoned cyclist or just starting out, these tools can help you find the perfect bike for your needs.
Common Mistakes to Avoid When Measuring a Bike Frame
When measuring a bike frame, there are several common mistakes to avoid in order to ensure accurate measurements. Here are some of the most common mistakes to watch out for:
Measuring Incorrectly:
One of the most common mistakes when measuring a bike frame is measuring incorrectly. This can happen when the tape measure is not placed correctly or when the measurement is not taken at the correct point. To avoid this mistake, make sure to follow the manufacturer’s instructions for measuring the frame and take multiple measurements to ensure accuracy.
Using the Wrong Tools:
Using the wrong tools can also lead to inaccurate measurements. For example, using a flexible tape measure instead of a rigid one can result in incorrect measurements. Make sure to use the correct tools for the job, such as a rigid tape measure and a calculator.
Not Considering the Riding Style:
Not considering the riding style can also lead to inaccurate measurements. For example, a road bike and a mountain bike have different frame geometries, and measuring a road bike frame using mountain bike measurements can result in incorrect measurements. Make sure to consider the riding style and the type of bike when measuring the frame.
Not Taking Multiple Measurements:
Not taking multiple measurements can also lead to inaccurate measurements. To ensure accuracy, take multiple measurements of the frame and compare them to the manufacturer’s specifications.
By avoiding these common mistakes, you can ensure accurate measurements and choose the right bike for your needs. Remember to always follow the manufacturer’s instructions and take multiple measurements to ensure accuracy.
How to Use Your Measurements to Choose the Right Bike
Once you have taken the necessary measurements, you can use them to choose the right bike for your needs. Here are some tips on how to use your measurements to choose the right bike:
Compare Measurements to Bike Manufacturer Specifications:
Compare your measurements to the specifications provided by the bike manufacturer. This will give you an idea of the frame size and type of bike that is best suited for your needs.
Consider Riding Style and Personal Preference:
Consider your riding style and personal preference when choosing a bike. For example, if you are a road bike rider, you may prefer a bike with a more aggressive frame geometry, while a mountain bike rider may prefer a bike with a more relaxed frame geometry.
Check the Frame Size Chart:
Check the frame size chart provided by the bike manufacturer to ensure that the bike you choose is the correct size for your needs.
Consider the Type of Bike:
Consider the type of bike you need. For example, if you are a commuter, you may prefer a hybrid bike, while a mountain bike rider may prefer a full-suspension bike.
Test the Bike:
Test the bike before purchasing to ensure that it is comfortable and efficient for your needs.
By following these tips, you can use your measurements to choose the right bike for your needs. Remember to always consider your riding style and personal preference when choosing a bike, and don’t be afraid to test the bike before purchasing.
Final Check: Ensuring a Comfortable and Efficient Ride
Before purchasing a bike, it’s essential to ensure that it’s comfortable and efficient for your needs. Here’s a final checklist to help you make the right decision:
Adjust the Bike to Fit the Rider:
Make sure the saddle height is correct and the handlebars are at a comfortable height. Adjust the bike to fit your body, taking into account your riding style and personal preference.
Test the Bike:
Test the bike before purchasing to ensure that it’s comfortable and efficient for your needs. Take it for a spin and pay attention to how it feels. Make any necessary adjustments to the bike to ensure a comfortable and efficient ride.
Check the Bike’s Ergonomics:
Check the bike’s ergonomics to ensure that it’s comfortable and efficient for your needs. Pay attention to the saddle, handlebars, and pedals, and make any necessary adjustments to ensure a comfortable and efficient ride.
Consider the Bike’s Maintenance:
Consider the bike’s maintenance requirements and ensure that it’s easy to maintain and repair. Look for a bike with a simple and intuitive design that makes it easy to perform routine maintenance tasks.
By following this final checklist, you can ensure that your bike is comfortable and efficient for your needs. Remember to always test the bike before purchasing and make any necessary adjustments to ensure a comfortable and efficient ride.


