Understanding the Basics of Puncture Repair
Knowing how to puncture repair is an essential skill for any vehicle owner. Not only can it save time and money, but it can also help prevent accidents and ensure a safer ride. A punctured tire can be a major inconvenience, but with the right knowledge and tools, it can be easily repaired. In this article, we will guide you through the process of puncture repair, from preparing the necessary tools and materials to troubleshooting common issues.

Click Image to Find eBike Products
The benefits of DIY tire repair are numerous. For one, it can save you money by avoiding the cost of a professional repair. Additionally, it can help you develop a sense of self-sufficiency and independence, as you learn to take care of your vehicle’s needs. However, it’s essential to note that not all punctures can be repaired, and in some cases, it may be necessary to replace the tire entirely.
To get started with puncture repair, you’ll need a few basic tools and materials. These include tire levers, patches, and glue. It’s essential to choose the right tools and materials for the job, as this will ensure a successful repair. In the next section, we’ll discuss the necessary tools and materials in more detail.
Before we dive into the repair process, it’s essential to understand the risks of not addressing a punctured tire promptly. A punctured tire can lead to a blowout, which can cause an accident and put you and others at risk. Additionally, driving on a punctured tire can cause further damage to the tire and the wheel, leading to costly repairs down the line.
By learning how to puncture repair, you can avoid these risks and ensure a safer and more enjoyable ride. In the following sections, we’ll guide you through the step-by-step process of puncture repair, from locating the puncture to reinstalling the tire.

Preparing for the Repair: Gathering Essential Tools and Materials
To ensure a successful puncture repair, it’s essential to gather the necessary tools and materials. The right tools will make the process easier, faster, and more effective. Here are the essential tools and materials you’ll need to get started:
Tire levers: These are used to pry the tire off the rim and to remove the punctured tube. Look for tire levers made from durable materials, such as steel or plastic, and choose a set that includes multiple levers of different sizes.
Patches: These are used to repair the punctured area of the tube. There are different types of patches available, including pre-glued patches and patch kits. Choose a patch that matches the size and type of your tube.
Glue: This is used to attach the patch to the tube. Look for a glue that is specifically designed for tire repair, such as rubber cement or tire patch glue.
Tire boot: This is a piece of material, such as a tire boot or a piece of cloth, that is used to reinforce the punctured area of the tire. This is especially useful for larger punctures or for punctures that are located in a sensitive area of the tire.
Wheel chocks: These are used to secure the wheel in place while you’re working on it. This is especially important if you’re working on a bike or a car with a raised suspension.
Other tools: You may also need other tools, such as a pump or a compressor, to inflate the tire after the repair. Additionally, you may need a tire pressure gauge to ensure that the tire is inflated to the recommended pressure.
When choosing tools and materials, make sure to select high-quality products that are designed specifically for tire repair. Avoid using tools or materials that are not designed for this purpose, as they may not be effective or safe to use.
By gathering the right tools and materials, you’ll be well-prepared to tackle the puncture repair process. In the next section, we’ll discuss the process of locating the puncture and preparing the tire for repair.

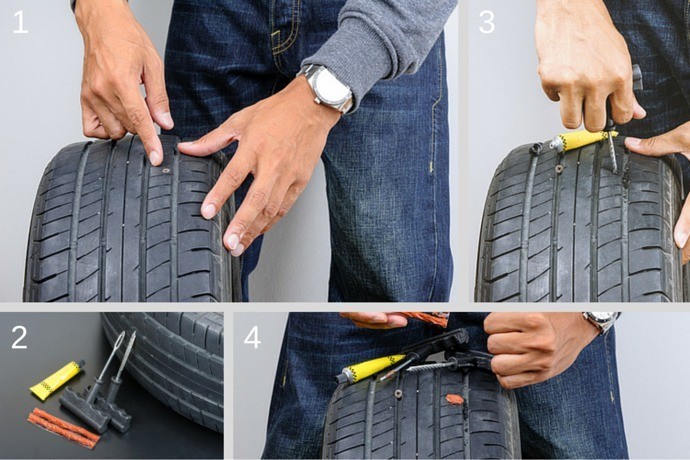
Locating the Puncture: A Step-by-Step Guide
Locating the puncture is a crucial step in the tire repair process. It’s essential to find the puncture quickly and accurately to ensure a successful repair. Here’s a step-by-step guide on how to locate the puncture:
Step 1: Inspect the Tire
Start by inspecting the tire for any visible signs of damage. Look for any cuts, tears, or holes in the tire. Check the tire’s sidewall and tread for any signs of wear or damage.
Step 2: Use Soap and Water to Locate the Leak
Once you’ve inspected the tire, use soap and water to locate the leak. Inflate the tire to the recommended pressure and then apply soap and water to the tire’s surface. The soap will help to highlight the area where the air is escaping.
Step 3: Mark the Puncture Site
Once you’ve located the puncture, mark the site with a piece of chalk or a marker. This will help you to identify the area where the puncture is located and ensure that you apply the patch correctly.
Tips for Locating the Puncture:
Use a bright light to inspect the tire, as this will help to highlight any signs of damage.
Check the tire’s valve stem and rim for any signs of damage or wear.
Use a tire pressure gauge to ensure that the tire is inflated to the recommended pressure.
By following these steps, you should be able to locate the puncture quickly and accurately. Remember to mark the puncture site clearly so that you can apply the patch correctly in the next step.
In the next section, we’ll discuss the process of removing the tire and inspecting the damage. This is an important step in the tire repair process, as it will help you to determine the best course of action for repair.
Removing the Tire and Inspecting the Damage
Once you’ve located the puncture, it’s time to remove the tire from the rim and inspect the damage. This is an important step in the tire repair process, as it will help you to determine the best course of action for repair.
Removing the Tire:
To remove the tire, you’ll need to loosen the nuts that hold it in place. Use a lug wrench to loosen the nuts, but do not remove them yet. Next, use a tire lever to pry the tire off the rim. Work your way around the tire, using the lever to loosen the tire from the rim.
Inspecting the Damage:
Once the tire is removed, inspect the damage to the tire and the rim. Check for any sharp objects that may have caused the puncture, such as nails or glass. Also, check the tire’s sidewall and tread for any signs of wear or damage.
Determining the Best Course of Action:
Based on the damage you’ve found, determine the best course of action for repair. If the puncture is small and only affects the tire’s tread, you may be able to repair it with a patch. However, if the puncture is large or affects the tire’s sidewall, you may need to replace the tire entirely.
Tips for Removing the Tire and Inspecting the Damage:
Use a tire lever to loosen the tire from the rim, as this will help to prevent damage to the tire or the rim.
Inspect the tire and the rim carefully, as this will help you to determine the best course of action for repair.
Consider using a tire boot to reinforce the punctured area, especially if the puncture is large or affects the tire’s sidewall.
By following these steps, you should be able to remove the tire and inspect the damage. In the next section, we’ll discuss the process of applying a patch to the punctured area.
.jpg)
Applying the Patch: A Step-by-Step Guide
Now that you’ve removed the tire and inspected the damage, it’s time to apply a patch to the punctured area. This is a crucial step in the tire repair process, as it will help to ensure a secure and lasting bond.
Cleaning and Preparing the Surface:
Before applying the patch, make sure to clean and prepare the surface of the tire. Use a tire cleaner to remove any dirt or debris from the area, and then use a tire buff to roughen the surface. This will help the patch to adhere better to the tire.
Applying the Glue:
Next, apply a small amount of glue to the patch and attach it to the tire. Make sure to follow the manufacturer’s instructions for the correct amount of glue to use and the correct way to apply it.
Attaching the Patch:
Once the glue is applied, attach the patch to the tire. Make sure to center the patch over the puncture and press it firmly onto the tire. Use a tire lever to ensure the patch is securely attached.
Tips for Applying the Patch:
Use a tire patch kit that includes a pre-glued patch, as this will make the process easier and faster.
Make sure to apply the patch to the correct area of the tire, as this will ensure a secure and lasting bond.
Use a tire lever to ensure the patch is securely attached, as this will help to prevent the patch from coming loose over time.
By following these steps, you should be able to apply a patch to the punctured area successfully. In the next section, we’ll discuss the process of reinstalling the tire and inflating it to the recommended pressure.

Reinstalling the Tire and Inflating to the Recommended Pressure
Now that you’ve applied the patch, it’s time to reinstall the tire and inflate it to the recommended pressure. This is an important step in the tire repair process, as it will help to ensure a safe and enjoyable ride.
Reinstalling the Tire:
To reinstall the tire, place it back onto the rim and hand tighten the nuts. Make sure the tire is properly seated and centered on the rim.
Tightening the Nuts:
Use a lug wrench to tighten the nuts in a star pattern. Make sure to tighten them snugly, but do not overtighten.
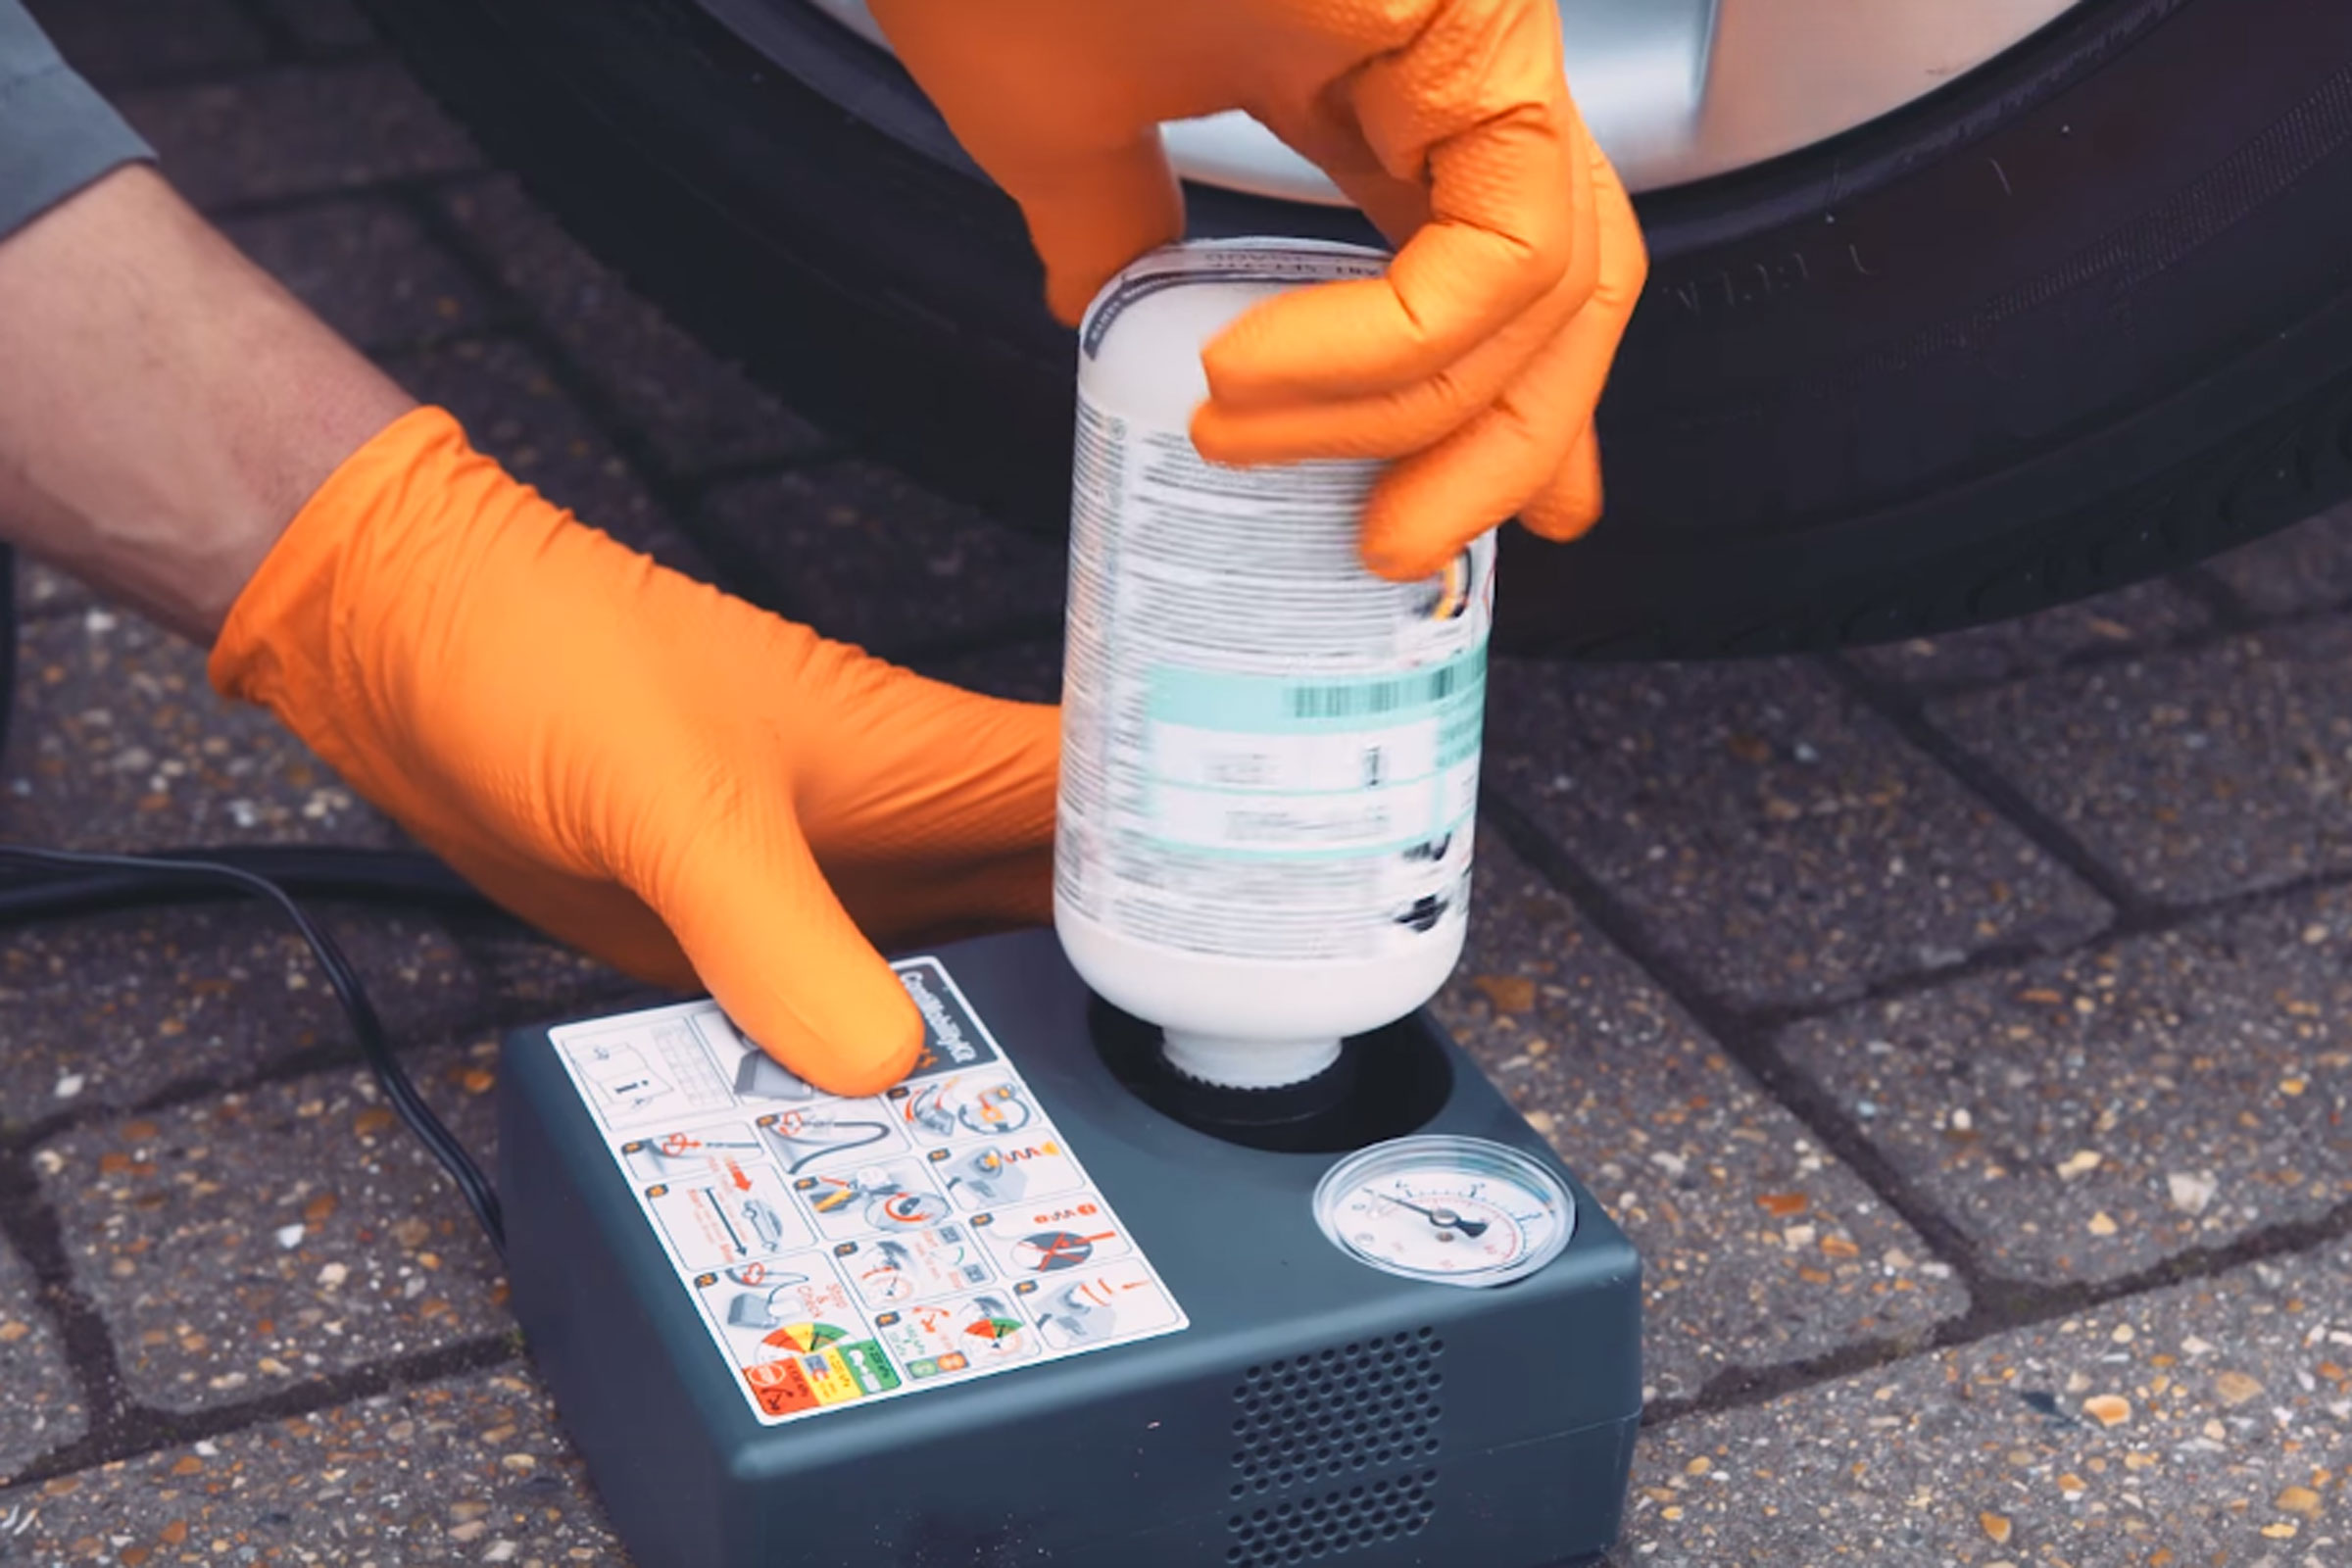
Inflating the Tire:
Use a tire pressure gauge to inflate the tire to the recommended pressure. This can be found on the tire’s sidewall or in the vehicle’s owner’s manual.
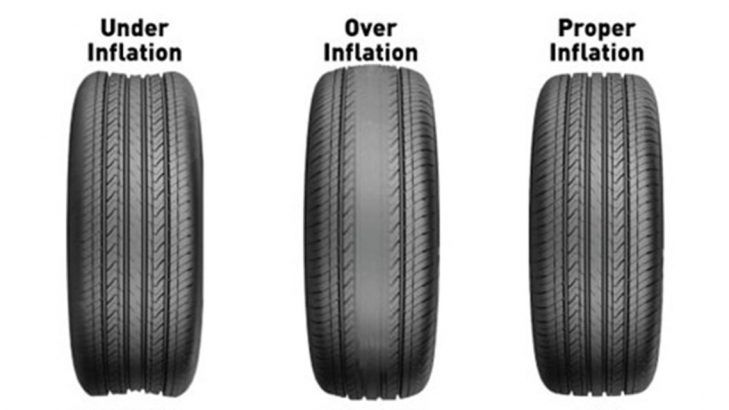
Importance of Proper Inflation:
Proper inflation is crucial for a safe and enjoyable ride. Underinflation can lead to reduced traction, uneven tire wear, and increased risk of a blowout. Overinflation can lead to reduced traction and uneven tire wear.
Tips for Reinstalling the Tire and Inflating to the Recommended Pressure:
Use a tire pressure gauge to ensure accurate inflation.
Check the tire’s sidewall for any signs of damage or wear.
Make sure the tire is properly seated and centered on the rim.
By following these steps, you should be able to reinstall the tire and inflate it to the recommended pressure successfully. In the next section, we’ll discuss common issues that may arise during the repair process and how to troubleshoot and resolve them.
Troubleshooting Common Issues and Preventing Future Punctures
Despite following the steps outlined in this article, you may still encounter some common issues during the repair process. In this section, we’ll discuss some of the most common issues and provide tips on how to troubleshoot and resolve them.
Difficulties with Patch Adhesion:
If you’re having trouble getting the patch to adhere to the tire, try using a patch adhesive or a tire patch kit that includes a pre-glued patch. You can also try cleaning the area around the puncture with a tire cleaner to ensure a clean surface for the patch to adhere to.
Tire Seating Issues:
If you’re having trouble getting the tire to seat properly on the rim, try using a tire lever to ensure the tire is properly seated and centered. You can also try inflating the tire to the recommended pressure and then deflating it slightly to ensure the tire is properly seated.
Preventing Future Punctures:
To prevent future punctures, make sure to regularly inspect your tires for any signs of wear or damage. Check the tire’s sidewall and tread for any signs of cracks or cuts, and make sure the tire is properly inflated to the recommended pressure.
Regular Tire Maintenance:
Regular tire maintenance is key to preventing future punctures. Make sure to check your tire pressure regularly, and consider getting your tires rotated every 5,000 to 8,000 miles. You can also consider using a tire sealant or a tire liner to help prevent punctures.
Tips for Troubleshooting and Preventing Future Punctures:
Use a tire pressure gauge to ensure accurate inflation.
Check the tire’s sidewall and tread for any signs of wear or damage.
Consider using a tire sealant or a tire liner to help prevent punctures.
By following these tips, you should be able to troubleshoot and resolve any common issues that may arise during the repair process, and prevent future punctures through regular tire maintenance.
Conclusion: Mastering the Art of Puncture Repair for a Safer and More Enjoyable Ride
In conclusion, knowing how to repair a punctured tire is an essential skill for any driver. By following the steps outlined in this article, you can master the art of puncture repair and ensure a safer and more enjoyable ride.
Remember, puncture repair is a relatively simple process that can be done with the right tools and materials. By practicing and mastering the skills outlined in this article, you can save time and money, and avoid the risks associated with not addressing a punctured tire promptly.
So, the next time you get a flat tire, don’t panic. Instead, follow the steps outlined in this article and repair the puncture yourself. With a little practice and patience, you’ll be able to master the art of puncture repair and enjoy a safer and more enjoyable ride.
By mastering the art of puncture repair, you’ll not only save time and money, but you’ll also gain a sense of confidence and independence. You’ll be able to tackle any puncture that comes your way, and enjoy the peace of mind that comes with knowing you can handle any situation that arises.
So, don’t wait any longer. Start practicing and mastering the art of puncture repair today. With a little effort and dedication, you’ll be able to enjoy a safer and more enjoyable ride, and save time and money in the process.