
Why Proper Tire Pressure Matters
Maintaining the right tire pressure is crucial for a safe and enjoyable ride. Properly inflated tires can improve handling, increase efficiency, and reduce the risk of punctures. Underinflated tires, on the other hand, can lead to a range of issues, including reduced traction, increased rolling resistance, and a higher risk of tire failure. Furthermore, underinflated tires can also affect the overall performance of the bike, making it more difficult to pedal and maneuver. By ensuring that your tires are inflated to the recommended pressure, you can enjoy a smoother ride, improved handling, and increased safety.

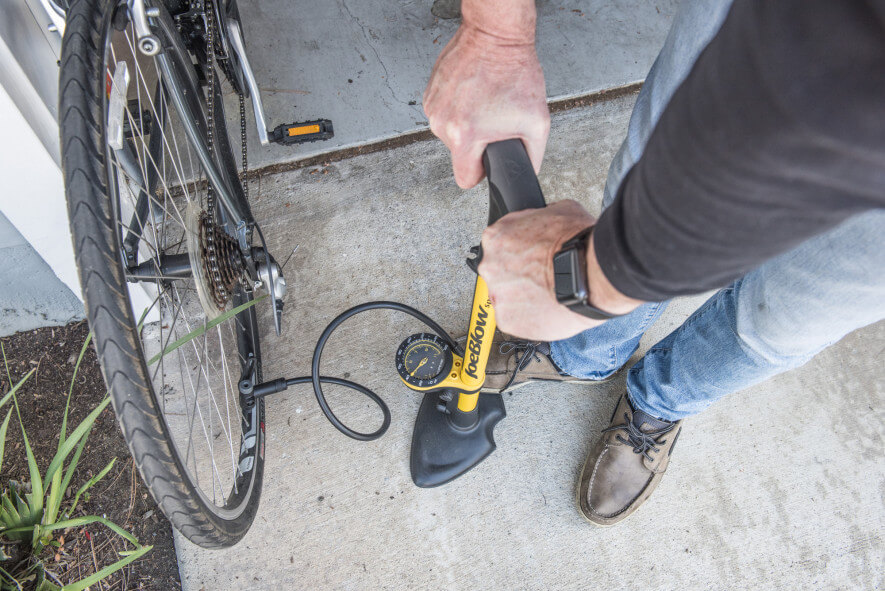
Click Image to Find eBike Products
When it comes to bike tire pressure, it’s essential to find the sweet spot. Overinflating can be just as problematic as underinflating, leading to a harsh ride, reduced traction, and increased risk of tire damage. To avoid these issues, it’s crucial to check your tire pressure regularly and adjust it according to the manufacturer’s recommendations. By doing so, you can ensure that your tires are properly inflated, providing optimal performance, safety, and efficiency.
For those new to bike maintenance, learning how to put air in a bicycle tire can seem daunting. However, with the right tools and a bit of practice, it’s a skill that can be mastered quickly. By understanding the importance of proper tire pressure and learning how to check and adjust it, you can take the first step towards becoming a more confident and self-sufficient cyclist.
Choosing the Right Pump for the Job
When it comes to inflating your bike tires, having the right pump can make all the difference. With so many options available, it can be overwhelming to choose the best one for your needs. In this section, we’ll explore the different types of bike pumps available, including floor pumps, hand pumps, and CO2 inflators, and provide tips on selecting the best one for you.
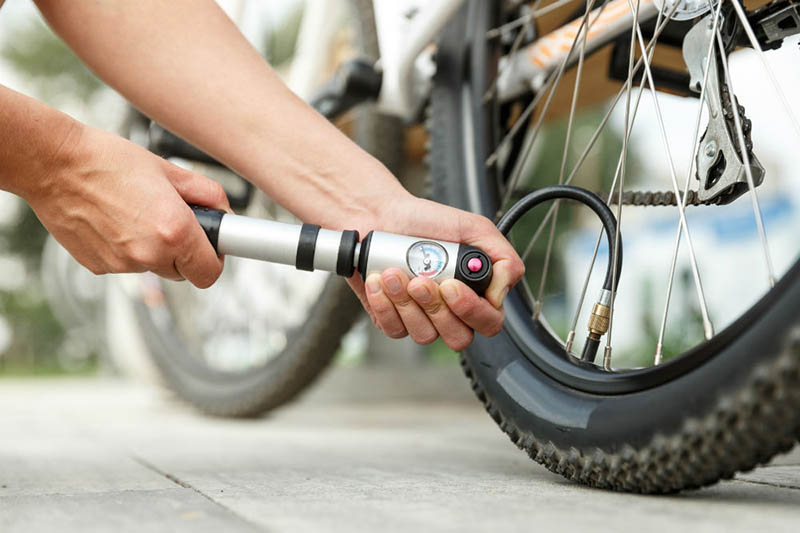
Floor pumps are a popular choice among cyclists, offering high pressure and ease of use. They are typically more expensive than hand pumps, but provide a more efficient and convenient way to inflate your tires. Hand pumps, on the other hand, are portable and affordable, making them a great option for on-the-go inflation. CO2 inflators are another option, providing a quick and easy way to inflate your tires with a CO2 cartridge.
When choosing a pump, consider the type of bike you have, the frequency of use, and your personal preferences. If you’re a frequent rider, a floor pump may be the best option. If you’re looking for a portable solution, a hand pump or CO2 inflator may be the way to go. Additionally, consider the pressure rating of the pump, as well as any additional features, such as a pressure gauge or valve adapter.
Learning how to put air in a bicycle tire is an essential skill for any cyclist, and having the right pump can make the process much easier. By choosing the right pump for your needs, you can ensure that your tires are properly inflated, providing optimal performance, safety, and efficiency.

How to Check Your Tire Pressure
Checking your tire pressure is a crucial step in maintaining the health and performance of your bike tires. Proper tire pressure can improve handling, increase efficiency, and reduce the risk of punctures. In this section, we’ll walk you through the steps to check your tire pressure, including finding the recommended pressure, using a pressure gauge, and checking for any signs of wear or damage.
The first step in checking your tire pressure is to find the recommended pressure for your bike tires. This information can usually be found on the sidewall of the tire or in the owner’s manual. Make sure to note the recommended pressure for both the front and rear tires, as they may be different.
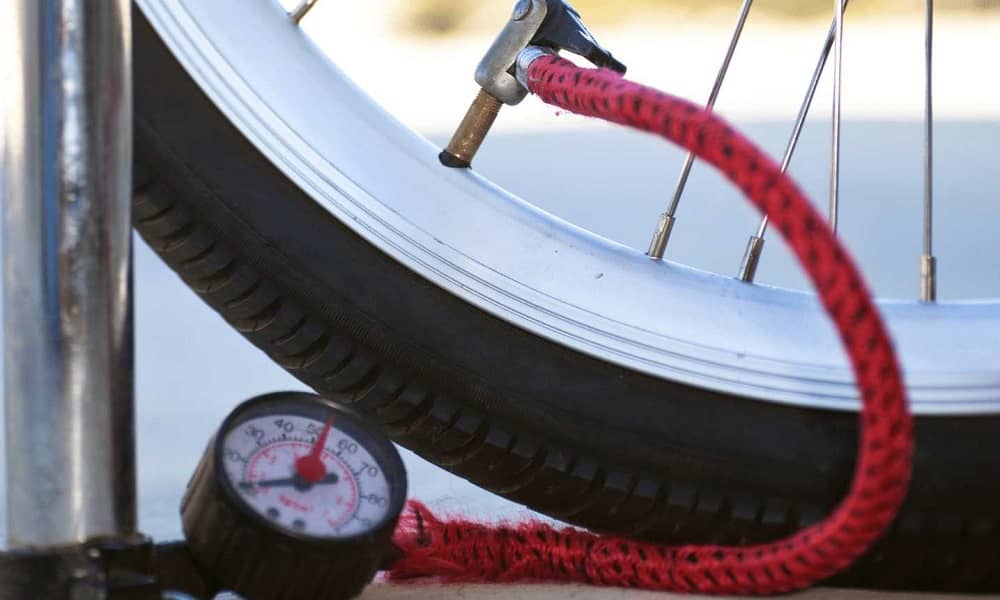
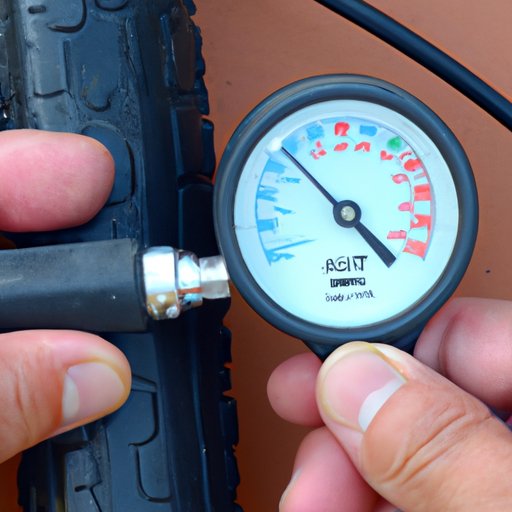
Next, you’ll need to use a pressure gauge to check the current pressure of your tires. There are several types of pressure gauges available, including digital and analog gauges. Digital gauges are more accurate and easier to use, but analog gauges can be more affordable. When using a pressure gauge, make sure to attach it to the valve stem and take a reading. Compare the reading to the recommended pressure and adjust as needed.
In addition to checking the pressure, it’s also important to inspect your tires for any signs of wear or damage. Look for cracks, cuts, or bulges on the sidewall or tread. Check the tread depth and make sure it’s not worn down too far. Also, check the valve stem for any signs of damage or corrosion.
By regularly checking your tire pressure and inspecting your tires for wear or damage, you can help extend the life of your tires and ensure a safe and enjoyable ride. Learning how to put air in a bicycle tire is an essential skill for any cyclist, and checking your tire pressure is a critical part of that process.
Step-by-Step Guide to Inflating Your Tires
Inflating your bike tires can seem like a daunting task, but with the right steps, it can be a breeze. In this section, we’ll provide a detailed, step-by-step guide on how to inflate your bike tires, including attaching the pump, turning on the valve, and checking the pressure.
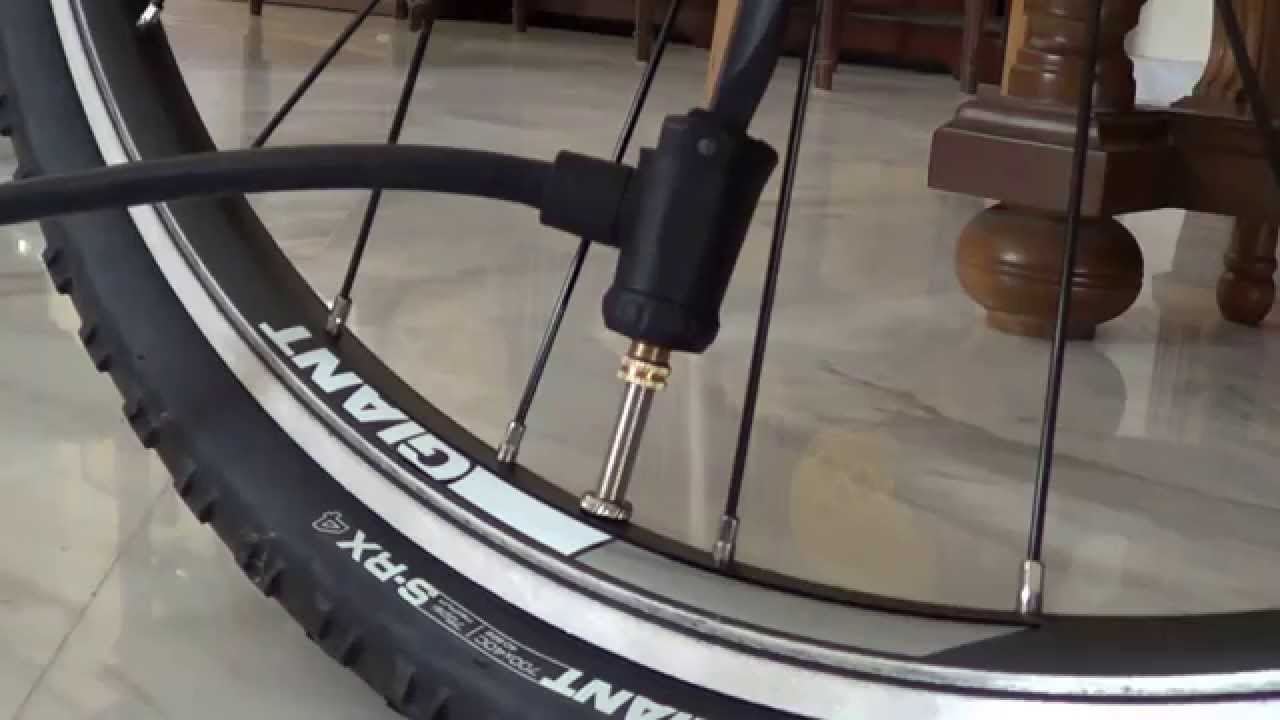
Step 1: Attach the Pump
Begin by attaching the pump to the valve stem on your bike tire. Make sure the pump is securely attached and the valve is turned to the “open” position. If you’re using a floor pump, make sure it’s standing upright and the hose is securely attached to the valve.
Step 2: Turn on the Valve
Next, turn on the valve by unscrewing the cap and pressing the valve stem to release any air that may be trapped. This will allow the pump to fill the tire with air.
Step 3: Pump the Tire
Begin pumping the tire by moving the pump’s handle up and down. You’ll start to feel the tire inflating as the pressure increases. Make sure to pump slowly and steadily to avoid over-inflating the tire.
Step 4: Check the Pressure
As you pump the tire, check the pressure gauge to ensure you’re reaching the recommended pressure. You can find the recommended pressure on the sidewall of the tire or in the owner’s manual. Once you’ve reached the recommended pressure, turn off the valve and remove the pump.
By following these simple steps, you can easily inflate your bike tires and ensure a safe and enjoyable ride. Learning how to put air in a bicycle tire is an essential skill for any cyclist, and with practice, you’ll become a pro in no time.
Tips for Inflating Your Tires with a CO2 Cartridge
Using a CO2 cartridge to inflate your bike tires can be a convenient and efficient way to get back on the road. However, it’s essential to use the right techniques to avoid over-inflating or under-inflating your tires. In this section, we’ll provide tips and tricks for using a CO2 inflator, including how to choose the right cartridge size, how to attach it to the valve, and how to avoid over-inflating.
Choosing the Right Cartridge Size
When selecting a CO2 cartridge, it’s crucial to choose the right size for your tire. A cartridge that’s too small may not provide enough air to reach the recommended pressure, while a cartridge that’s too large may over-inflate the tire. Check the manufacturer’s recommendations for the correct cartridge size for your tire.
Attaching the Cartridge to the Valve
To attach the CO2 cartridge to the valve, follow these steps:
1. Remove the valve cap and press the cartridge onto the valve stem.
2. Make sure the cartridge is securely attached and the valve is turned to the “open” position.
3. Hold the cartridge upright and press the trigger to release the CO2 gas.
Avoiding Over-Inflating
Over-inflating your tires can lead to reduced traction, increased risk of punctures, and uneven wear. To avoid over-inflating, follow these tips:
1. Check the pressure gauge regularly to ensure you’re not over-inflating the tire.
2. Use a CO2 cartridge with a built-in pressure gauge to monitor the pressure.
3. Inflate the tire in short bursts, checking the pressure gauge between each burst.
By following these tips and techniques, you can safely and efficiently inflate your bike tires with a CO2 cartridge. Learning how to put air in a bicycle tire with a CO2 cartridge is a valuable skill for any cyclist, and with practice, you’ll become a pro in no time.
Common Mistakes to Avoid When Inflating Your Tires
Inflating your bike tires can be a straightforward process, but there are several common mistakes to avoid in order to ensure your safety and the longevity of your tires. In this section, we’ll discuss the most common mistakes to avoid when inflating your bike tires, including over-inflating, under-inflating, and not checking the pressure regularly.
Over-Inflating
Over-inflating your tires can lead to reduced traction, increased risk of punctures, and uneven wear. When your tires are over-inflated, they become more susceptible to damage from road hazards and can lose their shape, leading to reduced performance and safety.
Under-Inflating
Under-inflating your tires can also have serious consequences, including reduced efficiency, increased risk of punctures, and uneven wear. When your tires are under-inflated, they can become overheated, leading to reduced performance and increased risk of damage.
Not Checking the Pressure Regularly
Not checking the pressure of your tires regularly can lead to a range of problems, including reduced performance, increased risk of punctures, and uneven wear. It’s essential to check the pressure of your tires at least once a week, and before long rides, to ensure they are properly inflated.
Other Common Mistakes
In addition to over-inflating, under-inflating, and not checking the pressure regularly, there are several other common mistakes to avoid when inflating your bike tires. These include:
1. Not using a pressure gauge to check the pressure of your tires.
2. Not inflating your tires to the recommended pressure.
3. Not checking for signs of wear or damage on your tires.
By avoiding these common mistakes, you can ensure your safety and the longevity of your tires. Learning how to put air in a bicycle tire is an essential skill for any cyclist, and by following these tips, you can become a more confident and self-sufficient rider.
How to Maintain Your Bike Pump and Tires
Maintaining your bike pump and tires is essential to ensure they continue to function properly and provide a safe and enjoyable ride. In this section, we’ll provide advice on how to maintain your bike pump and tires, including cleaning and lubricating the pump, checking for signs of wear, and replacing the tires when necessary.
Cleaning and Lubricating the Pump
Regularly cleaning and lubricating your bike pump can help extend its lifespan and ensure it continues to function properly. Use a soft cloth and mild soap to clean the pump, and apply a few drops of lubricant to the moving parts.
Checking for Signs of Wear
Regularly inspect your bike tires for signs of wear, such as cracks, cuts, or uneven wear. Check the tread depth and look for any signs of damage or wear on the sidewalls. If you notice any signs of wear, consider replacing the tires to ensure your safety.
Replacing the Tires
Replacing your bike tires can be a straightforward process, but it’s essential to choose the right tires for your bike and riding style. Consider the type of riding you’ll be doing, the terrain, and the weather conditions when selecting new tires.
Tips for Maintaining Your Bike Pump and Tires
Here are some additional tips for maintaining your bike pump and tires:
1. Regularly check the pressure of your tires to ensure they are properly inflated.
2. Use a tire pressure gauge to ensure accurate readings.
3. Consider using a tire sealant to help prevent punctures.
4. Store your bike in a dry, cool place to help extend the lifespan of the tires.
By following these tips and maintaining your bike pump and tires, you can ensure a safe and enjoyable ride. Learning how to put air in a bicycle tire is an essential skill for any cyclist, and by maintaining your equipment, you can become a more confident and self-sufficient rider.
Troubleshooting Common Issues with Your Bike Tires
Despite proper maintenance and care, issues can still arise with your bike tires. In this section, we’ll offer troubleshooting tips for common issues with your bike tires, such as leaks, punctures, and uneven wear, and provide guidance on how to fix them.
Leaks
If you notice that your tire is losing air, it’s likely due to a leak. To fix a leak, you’ll need to locate the source of the leak and repair or replace the tire as needed. Use a tire pressure gauge to check for any drops in pressure, and inspect the tire for any signs of damage or wear.
Punctures
Punctures are a common issue with bike tires, and can be caused by a variety of factors, including road debris, sharp objects, and tire wear. To fix a puncture, you’ll need to remove the object that caused the puncture, and then repair or replace the tire as needed.
Uneven Wear
Uneven wear on your bike tires can be caused by a variety of factors, including improper tire pressure, misaligned wheels, and worn-out tires. To fix uneven wear, you’ll need to check the tire pressure and adjust it as needed, and then inspect the wheels and tires for any signs of damage or wear.
Tips for Troubleshooting Common Issues
Here are some additional tips for troubleshooting common issues with your bike tires:
1. Regularly inspect your tires for any signs of damage or wear.
2. Use a tire pressure gauge to check for any drops in pressure.
3. Keep a spare tube and tire levers on hand in case of a puncture.
4. Consider using a tire sealant to help prevent punctures.
By following these tips and troubleshooting common issues with your bike tires, you can ensure a safe and enjoyable ride. Learning how to put air in a bicycle tire is an essential skill for any cyclist, and by being prepared for common issues, you can become a more confident and self-sufficient rider.
