Why Proper Tire Installation Matters
Proper tire installation is a crucial aspect of bike maintenance, and it’s essential to understand the importance of getting it right. When you learn how to put tires on a bike correctly, you can ensure a safe and enjoyable ride. Improperly installed tires can lead to a range of issues, from reduced bike performance to increased risk of accidents.

Click Image to Find eBike Products
Safety is a top concern when it comes to tire installation. A tire that’s not properly seated on the rim can cause the bike to lose control, leading to accidents and injuries. Furthermore, under-inflated tires can overheat, causing a blowout, while over-inflated tires can lead to a loss of traction. By installing tires correctly, you can significantly reduce the risk of accidents and ensure a safe ride.
In addition to safety concerns, proper tire installation can also improve bike performance. A well-installed tire can provide better traction, handling, and braking, making for a more enjoyable ride. Moreover, properly installed tires can extend the lifespan of the tire itself, saving you money and reducing waste. By following the correct procedures for installing bike tires, you can reap these benefits and more.

Preparing Your Bike for New Tires
Before learning how to put tires on a bike, it’s essential to prepare your bike for the new tires. This step is often overlooked, but it’s crucial in ensuring a smooth and safe installation process. By following these necessary steps, you can ensure a successful tire installation and avoid common mistakes.
The first step is to remove the old tires from the bike. This may seem obvious, but it’s essential to do it correctly to avoid damaging the rims or the new tires. Use tire levers to pry the old tire off the rim, working your way around the tire until it’s completely removed. Be careful not to damage the rim or the tire during this process.
Once the old tire is removed, inspect the rim for any debris or dirt that may have accumulated. Clean the rim thoroughly with a brush and some soap to ensure a smooth installation process. This is also a good time to inspect the rim for any damage or wear, and replace it if necessary.
Next, gather all the necessary tools and materials needed for the installation process. This includes tire levers, a pump or CO2 cartridge, and the new tires themselves. Make sure you have all the necessary items before starting the installation process to avoid delays or mistakes.
Choosing the Right Tires for Your Bike
When it comes to learning how to put tires on a bike, selecting the correct tires is a crucial step. With so many options available, it can be overwhelming to choose the right tires for your bike. However, by considering a few key factors, you can ensure you get the right tires for a safe and enjoyable ride.
The first factor to consider is tire size. Make sure to check your bike’s manual or the manufacturer’s website to determine the correct tire size for your bike. Using tires that are too small or too large can affect the bike’s performance and safety.
Tire type is another important factor to consider. There are several types of tires available, including road, mountain, and hybrid tires. Each type of tire is designed for specific riding conditions, so it’s essential to choose a tire that matches your riding style.
Tread pattern is also a critical factor to consider. Different tread patterns are designed for specific riding conditions, such as smooth roads or rough trails. A tire with the wrong tread pattern can affect the bike’s traction and handling.
Other factors to consider when choosing tires include tire pressure, durability, and weight. By considering these factors, you can ensure you get the right tires for your bike and a safe and enjoyable ride.

A Step-by-Step Guide to Installing Bike Tires
Now that you’ve prepared your bike and chosen the right tires, it’s time to learn how to put tires on a bike. Installing bike tires can seem like a daunting task, but with the right guidance, it’s a process that can be mastered with ease. Follow this step-by-step guide to ensure a successful tire installation.
Step 1: Remove the Old Tire (if applicable)
If you’re replacing an old tire, start by removing it from the rim. Use tire levers to pry the tire off the rim, working your way around the tire until it’s completely removed. Be careful not to damage the rim or the new tire during this process.
Step 2: Inspect the Rim
Before installing the new tire, inspect the rim for any debris or dirt that may have accumulated. Clean the rim thoroughly with a brush and some soap to ensure a smooth installation process.
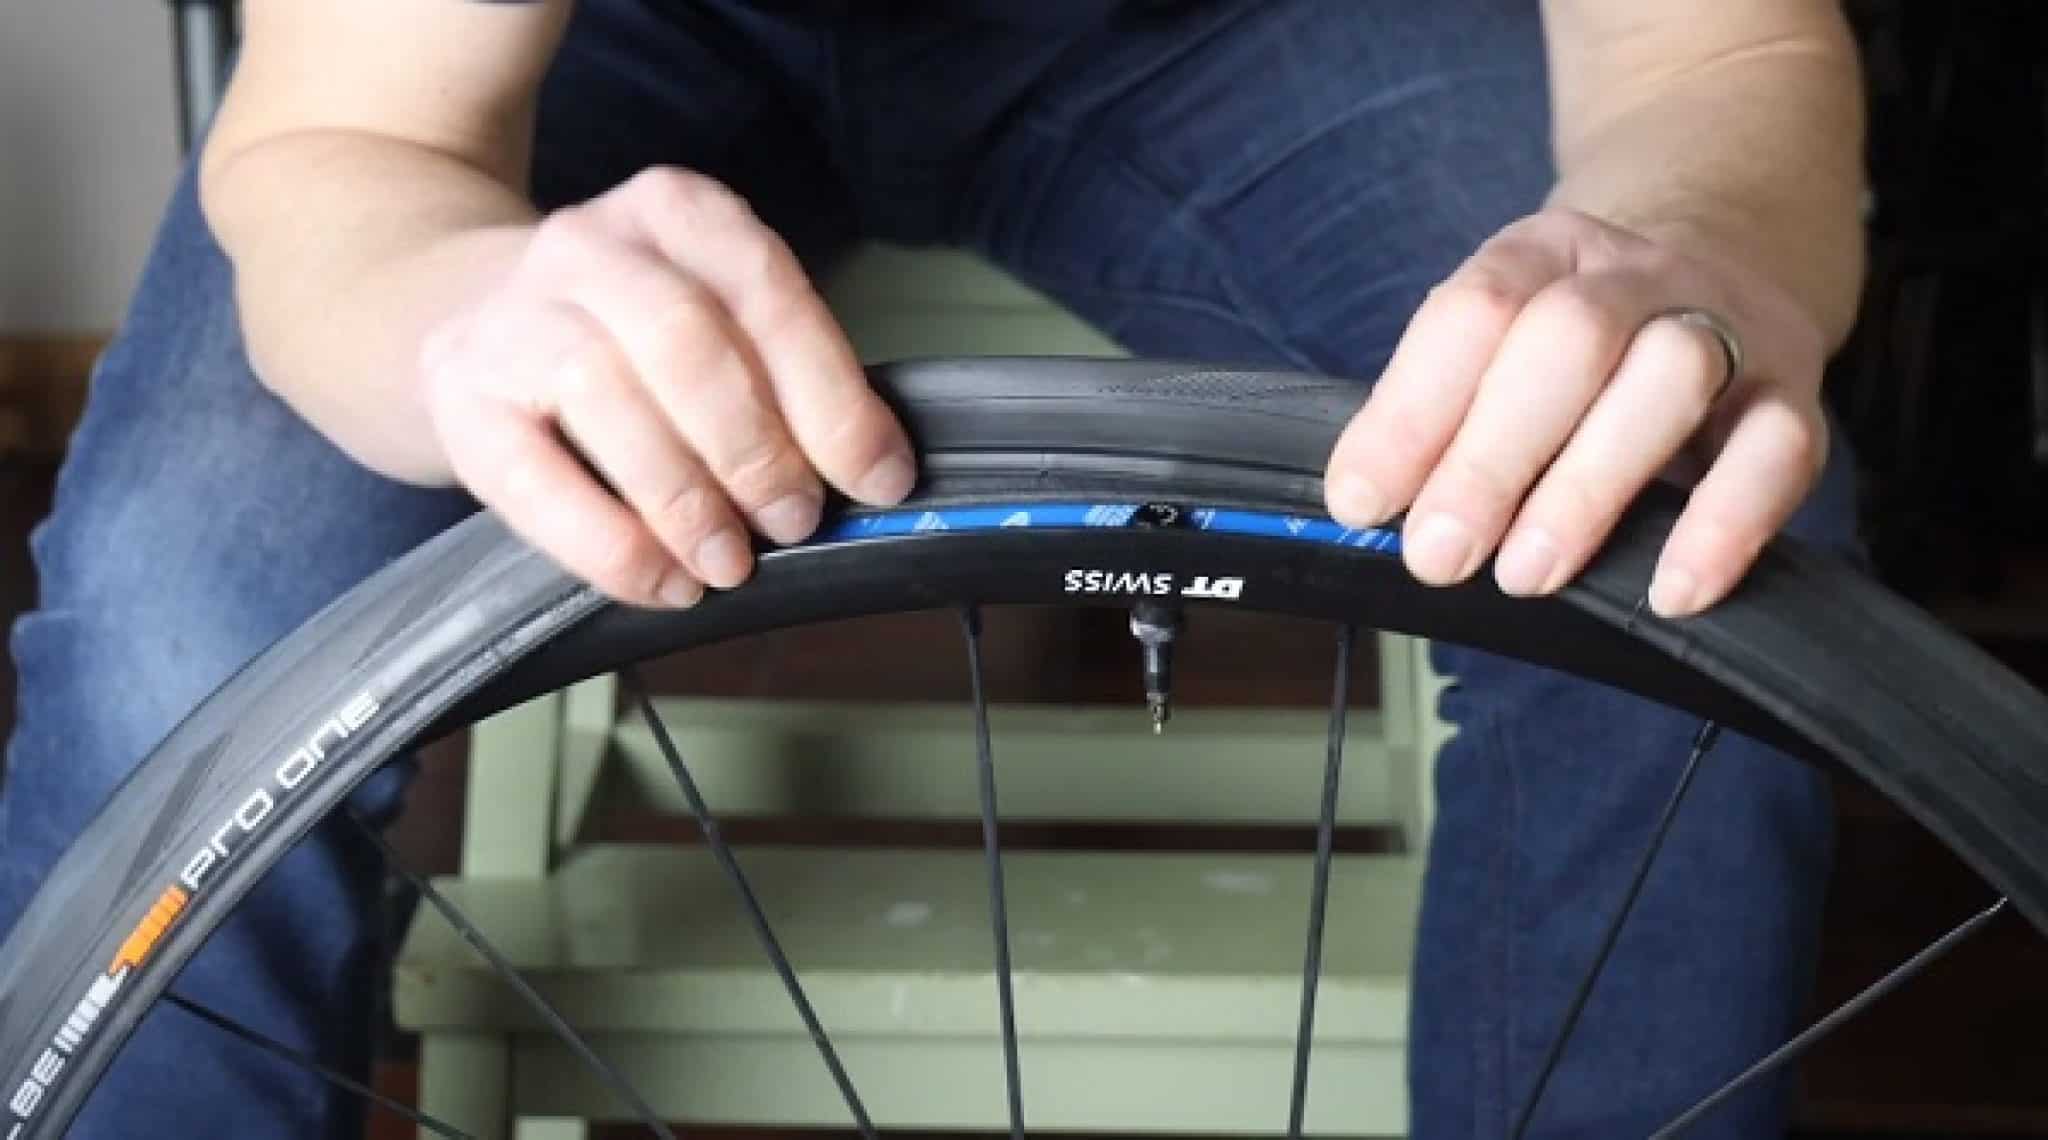
Step 3: Install the New Tire
Place the new tire onto the rim, making sure it’s properly seated. Use tire levers to ensure the tire is securely attached to the rim. Work your way around the tire, making sure it’s evenly seated and secure.
Step 4: Inflate the Tire
Once the tire is installed, inflate it to the recommended pressure. Use a pump or CO2 cartridge to inflate the tire, and check the pressure regularly to ensure it’s at the correct level.
Step 5: Final Check
Once the tire is installed and inflated, perform a final check to ensure everything is in order. Check the tire for any signs of damage or wear, and make any necessary adjustments.
By following these steps, you’ll be able to successfully install your bike tires and ensure a safe and smooth ride. Remember to always refer to your bike’s manual for specific instructions on how to put tires on a bike, and don’t hesitate to seek professional help if you’re unsure about any part of the process.
Tire Pressure and Inflation: Getting it Just Right
Proper tire pressure and inflation are crucial steps in the process of learning how to put tires on a bike. Incorrect tire pressure can lead to a range of issues, including reduced bike performance, uneven tire wear, and even safety concerns. In this section, we’ll discuss the importance of proper tire pressure and inflation, and provide guidance on how to get it just right.
Why Tire Pressure Matters
Tire pressure affects the bike’s overall performance, handling, and safety. Under-inflated tires can lead to reduced traction, increased rolling resistance, and a higher risk of punctures. On the other hand, over-inflated tires can result in a harsh ride, reduced grip, and increased wear on the tire’s center.
How to Check Tire Pressure
Checking tire pressure is a simple process that requires a few basic tools. You’ll need a tire pressure gauge, which can be found at most bike shops or online. Remove the valve cap and press the gauge onto the valve stem. Take a few readings to ensure accuracy, and compare the results to the recommended pressure range listed on the tire’s sidewall or in the bike’s manual.
Recommended Pressure Ranges
The recommended pressure range for your bike tires will vary depending on the type of tire, riding style, and terrain. As a general rule, road bikes typically require higher pressure (around 100-120 PSI), while mountain bikes require lower pressure (around 30-50 PSI). Always consult the bike’s manual or the tire manufacturer’s guidelines for specific recommendations.
The Consequences of Under or Over-Inflation
Failing to maintain proper tire pressure can have serious consequences. Under-inflated tires can lead to increased wear, reduced traction, and a higher risk of punctures. Over-inflated tires can result in a harsh ride, reduced grip, and increased wear on the tire’s center. In extreme cases, improper tire pressure can even lead to tire failure, which can be dangerous and costly.
By following these guidelines and maintaining proper tire pressure, you’ll be able to ensure a safe and smooth ride, and get the most out of your bike tires. Remember, proper tire pressure is a critical step in the process of learning how to put tires on a bike, and it’s essential for optimal bike performance and safety.
Common Mistakes to Avoid When Installing Bike Tires
When learning how to put tires on a bike, it’s essential to avoid common mistakes that can lead to safety concerns, reduced bike performance, and premature tire wear. In this section, we’ll identify common mistakes to avoid when installing bike tires, and provide guidance on how to ensure a successful installation.
Improper Tire Alignment
One of the most critical mistakes to avoid is improper tire alignment. When the tire is not properly aligned, it can lead to uneven wear, reduced traction, and increased risk of punctures. To avoid this mistake, ensure the tire is properly seated on the rim, and the valve stem is aligned with the rim’s valve hole.
Insufficient Tire Pressure
Insufficient tire pressure is another common mistake that can lead to reduced bike performance, increased risk of punctures, and premature tire wear. Always check the recommended pressure range for your bike tires, and ensure the pressure is at the correct level before hitting the road.
Inadequate Tire Inspection
Failing to inspect the tire and rim before installation can lead to safety concerns and reduced bike performance. Always inspect the tire for signs of wear, damage, or defects, and ensure the rim is clean and free of debris.
Other Common Mistakes
Other common mistakes to avoid when installing bike tires include using the wrong tire levers, failing to secure the tire to the rim, and not inflating the tire to the correct pressure. By being aware of these common mistakes, you can ensure a successful tire installation and enjoy a safe and smooth ride.
By following these guidelines and avoiding common mistakes, you’ll be able to ensure a successful tire installation and get the most out of your bike tires. Remember, proper tire installation is a critical step in the process of learning how to put tires on a bike, and it’s essential for optimal bike performance and safety.
Troubleshooting Common Issues with Bike Tires
Even with proper installation, bike tires can still encounter issues that affect performance and safety. In this section, we’ll provide troubleshooting tips for common issues with bike tires, including tire punctures, uneven wear, and tire damage.
Tire Punctures
Tire punctures are a common issue that can occur due to road debris, improper tire pressure, or tire damage. To troubleshoot a tire puncture, inspect the tire for signs of damage, and check the tire pressure to ensure it’s at the recommended level. If the puncture is minor, a tire plug or patch may be sufficient to repair the tire. However, if the puncture is severe, it may be necessary to replace the tire.
Uneven Wear
Uneven wear can occur due to improper tire alignment, insufficient tire pressure, or worn-out tire components. To troubleshoot uneven wear, inspect the tire for signs of wear, and check the tire pressure to ensure it’s at the recommended level. Adjusting the tire alignment and ensuring proper tire pressure can help to prevent uneven wear.
Tire Damage
Tire damage can occur due to road hazards, improper tire installation, or worn-out tire components. To troubleshoot tire damage, inspect the tire for signs of damage, and check the tire pressure to ensure it’s at the recommended level. If the damage is severe, it may be necessary to replace the tire.
Other Common Issues
Other common issues with bike tires include tire blowouts, tire slipping, and tire vibration. To troubleshoot these issues, inspect the tire for signs of damage, and check the tire pressure to ensure it’s at the recommended level. Adjusting the tire alignment, ensuring proper tire pressure, and replacing worn-out tire components can help to prevent these issues.
By following these troubleshooting tips, you’ll be able to identify and resolve common issues with bike tires, and ensure a safe and smooth ride. Remember, proper tire installation and maintenance are critical steps in the process of learning how to put tires on a bike, and they’re essential for optimal bike performance and safety.

Final Check and Maintenance: Ensuring a Safe and Smooth Ride
After installing new bike tires, it’s essential to perform a final check and maintenance to ensure a safe and smooth ride. In this section, we’ll provide a checklist for ensuring a safe and smooth ride, including a post-installation inspection, regular tire maintenance, and storage tips.
Post-Installation Inspection
After installing new bike tires, inspect the tires to ensure they’re properly seated on the rim, and the tire pressure is at the recommended level. Check the tire for signs of damage, and ensure the valve stem is securely attached to the rim.
Regular Tire Maintenance
Regular tire maintenance is critical to ensuring a safe and smooth ride. Check the tire pressure regularly, and inspect the tire for signs of wear or damage. Rotate the tires regularly to ensure even wear, and replace the tires when necessary.
Storage Tips
When storing your bike, ensure the tires are properly inflated, and the bike is stored in a dry, cool place. Avoid exposing the tires to direct sunlight, and store the bike away from chemicals or cleaning products that can damage the tires.
By following this final checklist, you’ll be able to ensure a safe and smooth ride, and get the most out of your bike tires. Remember, learning how to put tires on a bike is just the first step – regular maintenance and inspection are critical to ensuring optimal bike performance and safety.
By mastering the art of bike tire installation, you’ll be able to enjoy a safe and smooth ride, and get the most out of your bike. Whether you’re a seasoned cyclist or a beginner, following these guidelines will help you to learn how to put tires on a bike with confidence and ease.