
Why Raise Your Handlebars?
Raising the handlebars on an old bike can greatly enhance the overall riding experience. By elevating the handlebars, riders can enjoy improved comfort, reduced strain on the back and neck, and increased control while riding. This is especially beneficial for riders who have been experiencing discomfort or pain while riding their bike. By making this simple adjustment, riders can enjoy a more comfortable and enjoyable ride.

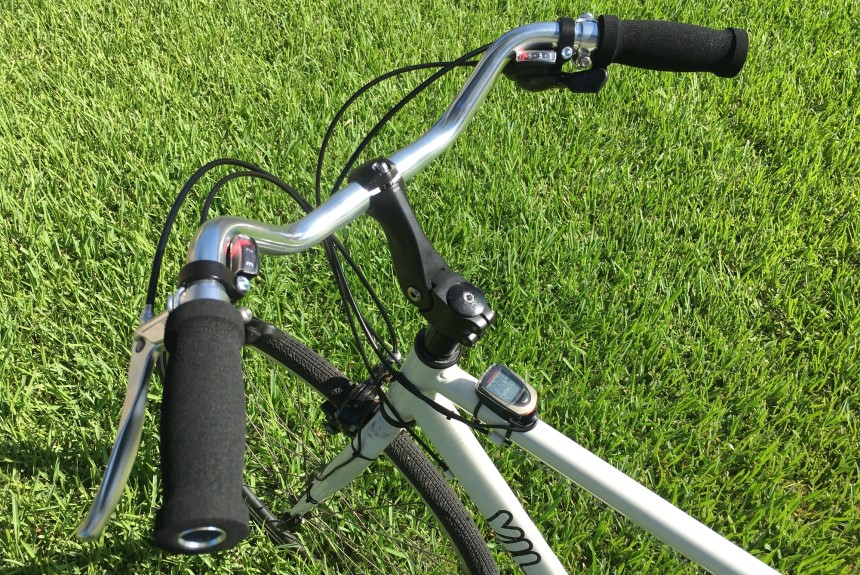
Click Image to Find eBike Products
One of the primary reasons to raise handlebars is to improve the riding position. When the handlebars are too low, riders may find themselves leaning forward, putting strain on their back and neck. By raising the handlebars, riders can achieve a more upright position, reducing the strain on their body and allowing for a more comfortable ride. This is particularly important for riders who spend extended periods on their bike, as it can help prevent fatigue and discomfort.
In addition to improving comfort, raising handlebars can also enhance the overall riding experience. By providing a more upright position, riders can enjoy improved visibility and control while riding. This can be especially beneficial for riders who navigate busy streets or trails, as it allows them to stay alert and aware of their surroundings. Furthermore, raising handlebars can also improve the bike’s overall handling, making it easier to maneuver and control.
For riders who are looking to upgrade their old bike, raising the handlebars is a simple and effective way to breathe new life into their ride. By making this adjustment, riders can enjoy a more comfortable and enjoyable ride, without having to purchase a new bike. This is especially beneficial for riders who are on a budget or prefer to work on their own bike.
Overall, raising the handlebars on an old bike is a simple and effective way to improve the overall riding experience. By providing a more comfortable and upright position, riders can enjoy improved comfort, reduced strain on the back and neck, and increased control while riding. Whether you’re a seasoned rider or just starting out, raising your handlebars is a great way to get the most out of your bike.
Assessing Your Bike’s Handlebar Height
To determine if your bike’s handlebars are too low, look for signs of discomfort, poor posture, and decreased control while riding. If you find yourself leaning forward or stretching to reach the handlebars, it may be a sign that your handlebars are too low. Additionally, if you experience back or neck pain after riding, it could be related to the handlebar height.
Another way to assess your bike’s handlebar height is to check your riding position. If you’re sitting upright with your hands on the handlebars and your elbows are bent at a 90-degree angle, your handlebars are likely at a good height. However, if your elbows are straight or your hands are too far forward, it may indicate that your handlebars are too low.
It’s also important to consider the type of riding you’ll be doing. If you’ll be riding on flat terrain or cruising around town, a lower handlebar height may be suitable. However, if you’ll be riding on hilly or mountainous terrain, a higher handlebar height may be necessary to provide better control and visibility.
When assessing your bike’s handlebar height, it’s also important to consider the type of bike you have. For example, road bikes typically have lower handlebars than mountain bikes, while hybrid bikes may have a more upright riding position. By taking into account the type of bike and riding you’ll be doing, you can determine if your handlebars are at a suitable height.
Finally, if you’re still unsure about your bike’s handlebar height, consider consulting with a professional bike mechanic or taking your bike to a local bike shop for an assessment. They can provide personalized advice and help you determine the best handlebar height for your riding style and bike type.

Tools and Materials Needed
To raise your bike’s handlebars, you’ll need a few basic tools and materials. The specific tools and materials required may vary depending on the type of bike and handlebars you have, but here are some common ones to get started:
Tools:
- Allen wrenches (3, 4, 5, and 6 mm)
- Screwdrivers (flathead and Phillips)
- Torque wrench (optional)
Materials:
- Handlebar risers or stem spacers
- Handlebar tape (if you plan to re-wrap your handlebars)
- Grease or lubricant (for the stem and handlebars)
When selecting handlebar risers or stem spacers, make sure to choose ones that are compatible with your bike’s handlebar material and size. You can find these at most bike shops or online retailers. It’s also a good idea to consult with a professional bike mechanic if you’re unsure about what type of risers or spacers to use.
In addition to these tools and materials, you may also want to consider investing in a bike stand or repair stand to make the process easier and safer. A bike stand can help you stabilize the bike and keep it at a comfortable working height, while a repair stand can provide additional support and stability for the bike.
Remember to always follow proper safety precautions when working on your bike, including wearing gloves and safety glasses, and making sure the bike is securely supported before starting work.

Step-by-Step Instructions for Raising Handlebars
Raising your bike’s handlebars is a relatively straightforward process that can be completed with a few basic tools and some patience. Here’s a step-by-step guide to help you raise your handlebars:
Step 1: Loosen the Stem
Start by loosening the stem using an Allen wrench. Turn the wrench counterclockwise to loosen the stem, but do not remove it yet. This will give you access to the handlebar and allow you to make adjustments.
Step 2: Remove Existing Spacers
Next, remove any existing spacers or risers from the handlebar. You may need to use a screwdriver or Allen wrench to remove any screws or bolts holding the spacers in place. Set the spacers aside and make sure the handlebar is clear of any debris.
Step 3: Install New Risers or Spacers
Now it’s time to install the new risers or spacers. Place the new risers or spacers onto the handlebar, making sure they are securely seated and aligned properly. Use a screwdriver or Allen wrench to tighten any screws or bolts holding the risers or spacers in place.
Step 4: Tighten the Stem
Once the new risers or spacers are installed, tighten the stem using an Allen wrench. Turn the wrench clockwise to tighten the stem, making sure it is securely tightened but not over-tightened.
Step 5: Check the Handlebar Height
Finally, check the handlebar height to make sure it is at the desired level. You may need to make some adjustments to the risers or spacers to get the handlebar to the perfect height. Once you’re satisfied with the handlebar height, tighten any screws or bolts holding the risers or spacers in place.
That’s it With these simple steps, you should be able to raise your bike’s handlebars and enjoy a more comfortable and upright riding position.

Tips for Choosing the Right Handlebar Risers or Stem Spacers
When it comes to choosing the right handlebar risers or stem spacers for your bike, there are several factors to consider. Here are some tips to help you make the right choice:
Consider the Type of Bike
The type of bike you have will play a big role in determining the type of handlebar risers or stem spacers you need. For example, if you have a road bike, you may want to choose risers or spacers that are designed specifically for road bikes. On the other hand, if you have a mountain bike, you may want to choose risers or spacers that are designed for off-road use.
Think About the Handlebar Material
The material of your handlebars will also play a role in determining the type of risers or spacers you need. For example, if you have carbon fiber handlebars, you may want to choose risers or spacers that are specifically designed for carbon fiber. This will help ensure that the risers or spacers do not damage the handlebars.
Consider the Desired Height Adjustment
Finally, you’ll want to consider the desired height adjustment when choosing handlebar risers or stem spacers. If you want to raise your handlebars by a small amount, you may want to choose risers or spacers that are designed for small height adjustments. On the other hand, if you want to raise your handlebars by a larger amount, you may want to choose risers or spacers that are designed for larger height adjustments.
Other Factors to Consider
In addition to the factors mentioned above, there are several other things to consider when choosing handlebar risers or stem spacers. For example, you’ll want to think about the weight and durability of the risers or spacers, as well as their compatibility with your bike’s other components.
By considering these factors, you can choose the right handlebar risers or stem spacers for your bike and enjoy a more comfortable and upright riding position.
Common Mistakes to Avoid When Raising Handlebars
When raising handlebars, there are several common mistakes to avoid. Here are some of the most common mistakes and how to avoid them:
Over-Tightening
One of the most common mistakes when raising handlebars is over-tightening the stem or spacers. This can cause damage to the handlebars, stem, or other components, and can also lead to a loss of control while riding. To avoid over-tightening, make sure to follow the manufacturer’s instructions for tightening the stem or spacers, and use a torque wrench to ensure the correct amount of torque is applied.
Incorrect Spacer Installation
Another common mistake is installing the spacers incorrectly. This can cause the handlebars to be uneven or unstable, and can also lead to a loss of control while riding. To avoid incorrect spacer installation, make sure to follow the manufacturer’s instructions for installing the spacers, and double-check that the spacers are properly seated and aligned.
Neglecting to Re-Check Bike Fit
Finally, neglecting to re-check bike fit after raising handlebars is a common mistake. This can cause discomfort, poor posture, and decreased control while riding. To avoid neglecting to re-check bike fit, make sure to re-check the bike fit after raising the handlebars, and make any necessary adjustments to the saddle height, cleat position, and other components.
Other Mistakes to Avoid
In addition to the mistakes mentioned above, there are several other mistakes to avoid when raising handlebars. These include:
- Not using the correct tools or materials
- Not following the manufacturer’s instructions
- Not testing the handlebars after raising them
By avoiding these common mistakes, you can ensure a safe and successful handlebar raising experience.

Re-Adjusting Your Bike Fit After Raising Handlebars
After raising your handlebars, it’s essential to re-assess and adjust your bike fit to ensure a comfortable and efficient riding position. Here are some key areas to focus on:
Saddle Height
Check that your saddle height is still correct after raising the handlebars. If the saddle is too high or too low, it can cause discomfort and affect your riding position. Make any necessary adjustments to the saddle height to ensure a comfortable and efficient riding position.
Cleat Position
Also, check the cleat position on your pedals. If the cleats are too far forward or too far back, it can cause discomfort and affect your riding position. Make any necessary adjustments to the cleat position to ensure a comfortable and efficient riding position.
Overall Riding Comfort
Finally, take a test ride to ensure that your bike fit is comfortable and efficient. Pay attention to any areas of discomfort or strain, and make any necessary adjustments to the bike fit. By re-assessing and adjusting your bike fit after raising the handlebars, you can ensure a comfortable and efficient riding position.
Additional Tips
In addition to the areas mentioned above, here are some additional tips to keep in mind when re-adjusting your bike fit after raising the handlebars:
- Check the brake lever position and adjust as necessary
- Check the gear lever position and adjust as necessary
- Check the handlebar position and adjust as necessary
By following these tips, you can ensure a comfortable and efficient riding position after raising your handlebars.

Conclusion: Enjoy Your Newly Elevated Ride
Congratulations You have successfully raised your bike’s handlebars and improved your riding experience. By following the steps outlined in this article, you have taken the first step towards a more comfortable and efficient ride.
Remember, raising your handlebars is just one part of maintaining your bike and ensuring a safe and enjoyable ride. Always follow proper safety precautions and bike maintenance to ensure your bike is in good working condition.
With your newly elevated ride, you can enjoy improved comfort, reduced strain on your back and neck, and enhanced overall riding experience. Whether you’re commuting to work, riding for exercise, or simply enjoying the outdoors, your bike is now more comfortable and efficient than ever.
So why wait? Get out there and enjoy your newly elevated ride Remember to always follow proper safety precautions and bike maintenance to ensure a safe and enjoyable ride.
By following the tips and guidelines outlined in this article, you can ensure a safe and enjoyable ride for years to come. Happy cycling!
