
When a Crank Puller is Not Available: An Overview
Removing a crank from a bicycle without a crank puller can be challenging, but it is not impossible. This article explores various alternative techniques for crank removal, providing cyclists with valuable insights when faced with such a situation. While a crank puller is the most recommended tool for this task, understanding these methods can help prevent potential damage to bicycle components and ensure a smooth maintenance process.

Click Image to Find eBike Products

Identifying the Crank Type: Know Your Bicycle
Before attempting any crank removal method, it is crucial to identify the crank type on your bicycle. This knowledge ensures that you select the appropriate technique and avoid causing damage to the components. The three primary crank types are square taper, splined, and external-type. Square taper cranks have a flat, square-shaped end, while splined cranks feature a series of grooves or splines. External-type cranks, commonly found in newer bicycles, have a hollow, splined axle that connects to the bottom bracket.
To identify your crank type, inspect the end of the crank arm where it connects to the bottom bracket. You may also refer to your bicycle’s user manual or consult the manufacturer’s website for detailed information on your specific model.
Method 1: Using a Screwdriver and Hammer
When a crank puller is not available, you can remove a square taper crank using a screwdriver and hammer. This method, however, requires caution and precision to prevent damaging the crank or other bicycle components.
To begin, secure the bicycle in a repair stand or clamp it to a stable surface. Locate a suitable screwdriver that fits snugly into the crank arm‘s square taper hole. Ideally, the screwdriver should be slightly smaller than the hole to minimize the risk of slippage. Insert the screwdriver into the hole and gently tap it with a hammer to loosen the crank arm.
Once the crank arm starts to loosen, apply more pressure to the hammer and continue tapping the screwdriver. Be cautious not to apply too much force, as this may cause the screwdriver to slip and damage the crank or other components. As the crank arm becomes more loose, you can use your hands to twist it off the bicycle.
While the screwdriver and hammer method can be effective, it is not recommended for novice mechanics or those unfamiliar with bicycle maintenance. This technique requires a certain level of skill and experience to execute safely and without causing damage. Additionally, this method may not be suitable for modern bicycles with delicate components or tight tolerances.
Method 2: Leverage with a Pair of Vise Grips or Adjustable Wrench
Another alternative technique for crank removal without a crank puller is using a pair of vise grips or an adjustable wrench. This method provides more leverage than the screwdriver and hammer method, but it also requires caution to prevent damaging the crank or other bicycle components.
To begin, secure the bicycle in a repair stand or clamp it to a stable surface. Locate the crank arm bolt, typically found on the backside of the crank arm. Using a wrench or socket, loosen the bolt but do not remove it completely. Ensure that the bolt remains slightly tightened to prevent the crank arm from spinning freely.
Next, attach a pair of vise grips or an adjustable wrench to the crank arm, positioning it as close to the bottom bracket as possible. Apply gentle pressure to hold the crank arm in place. Then, using a second wrench or socket, loosen the other side of the crank arm bolt. As the bolt becomes loose, increase the pressure on the vise grips or adjustable wrench to counteract the torque and prevent the crank arm from rotating.
Once the crank arm bolt is completely removed, carefully slide the crank arm off the bicycle. Be cautious not to damage the bottom bracket threads or other components during this process. When reinstalling the crank arm, tighten the bolt to the manufacturer’s recommended torque specifications.
While the vise grips or adjustable wrench method can be effective, it is not recommended for novice mechanics or those unfamiliar with bicycle maintenance. This technique requires a certain level of skill and experience to execute safely and without causing damage. Additionally, this method may not be suitable for modern bicycles with delicate components or tight tolerances.

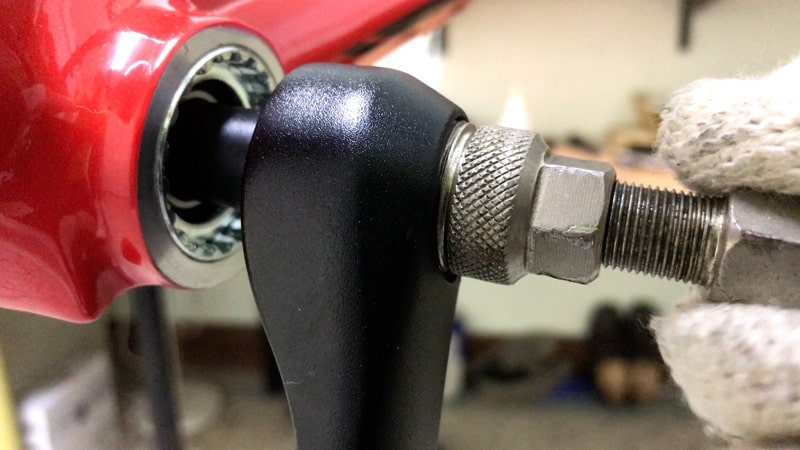
Method 3: Adapting a Cassette Lockring Removal Tool
A cassette lockring removal tool can be adapted for crank removal, providing a versatile option when a crank puller is not available. This method is most suitable for splined crank types, such as those found on Shimano and other modern bicycles.
To begin, secure the bicycle in a repair stand or clamp it to a stable surface. Obtain a cassette lockring removal tool compatible with your splined crank type. Ensure that the tool’s splines match those on the crank arm, as there are various spline patterns and sizes.
Next, slide the cassette lockring removal tool onto the crank arm, aligning the splines. Apply gentle pressure to ensure a snug fit. Once the tool is securely in place, use a wrench or socket to turn the tool counterclockwise, loosening the crank arm. As the crank arm becomes loose, continue to apply pressure to the cassette lockring removal tool to counteract the torque and prevent the crank arm from rotating.
After the crank arm bolt is completely removed, carefully slide the crank arm off the bicycle. Be cautious not to damage the bottom bracket threads or other components during this process. When reinstalling the crank arm, tighten the bolt to the manufacturer’s recommended torque specifications.
While the cassette lockring removal tool method can be effective, it is not recommended for novice mechanics or those unfamiliar with bicycle maintenance. This technique requires a certain level of skill and experience to execute safely and without causing damage. Additionally, this method may not be suitable for all crank types or bicycles with delicate components or tight tolerances.
When using a cassette lockring removal tool for crank removal, exercise caution and follow the manufacturer’s instructions carefully. Misuse of this tool may result in damage to the crank arm, bottom bracket, or other bicycle components.
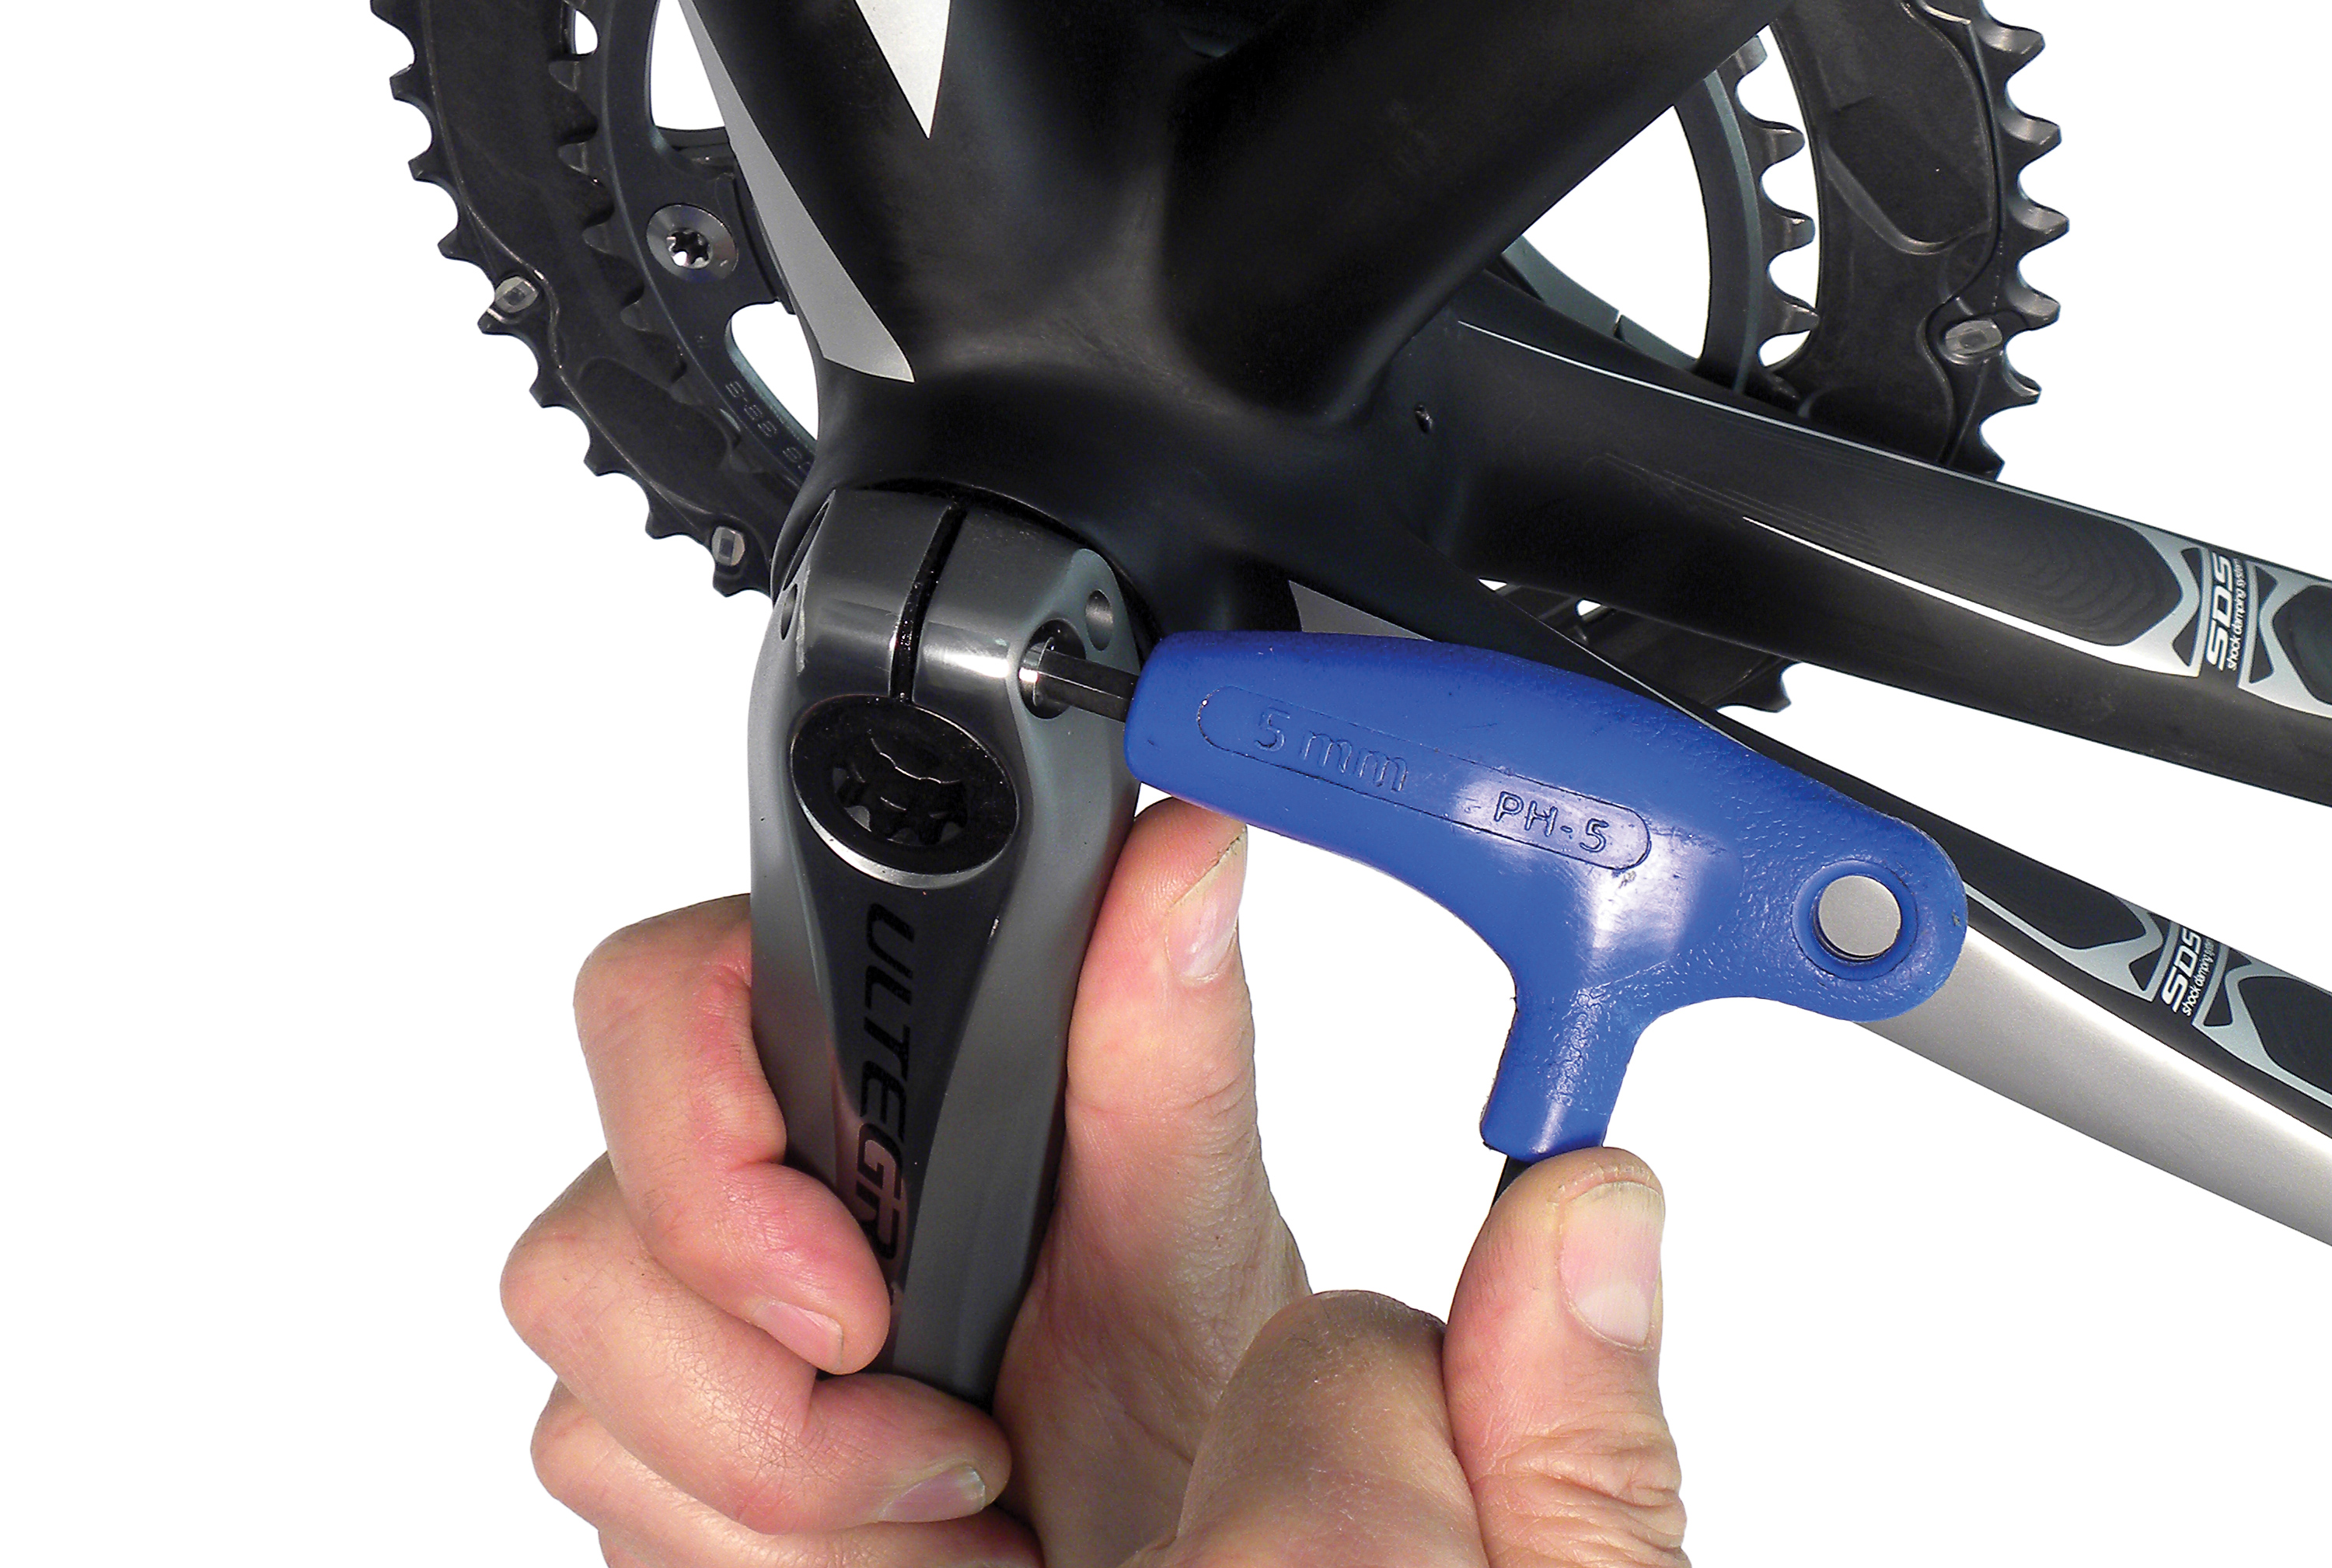
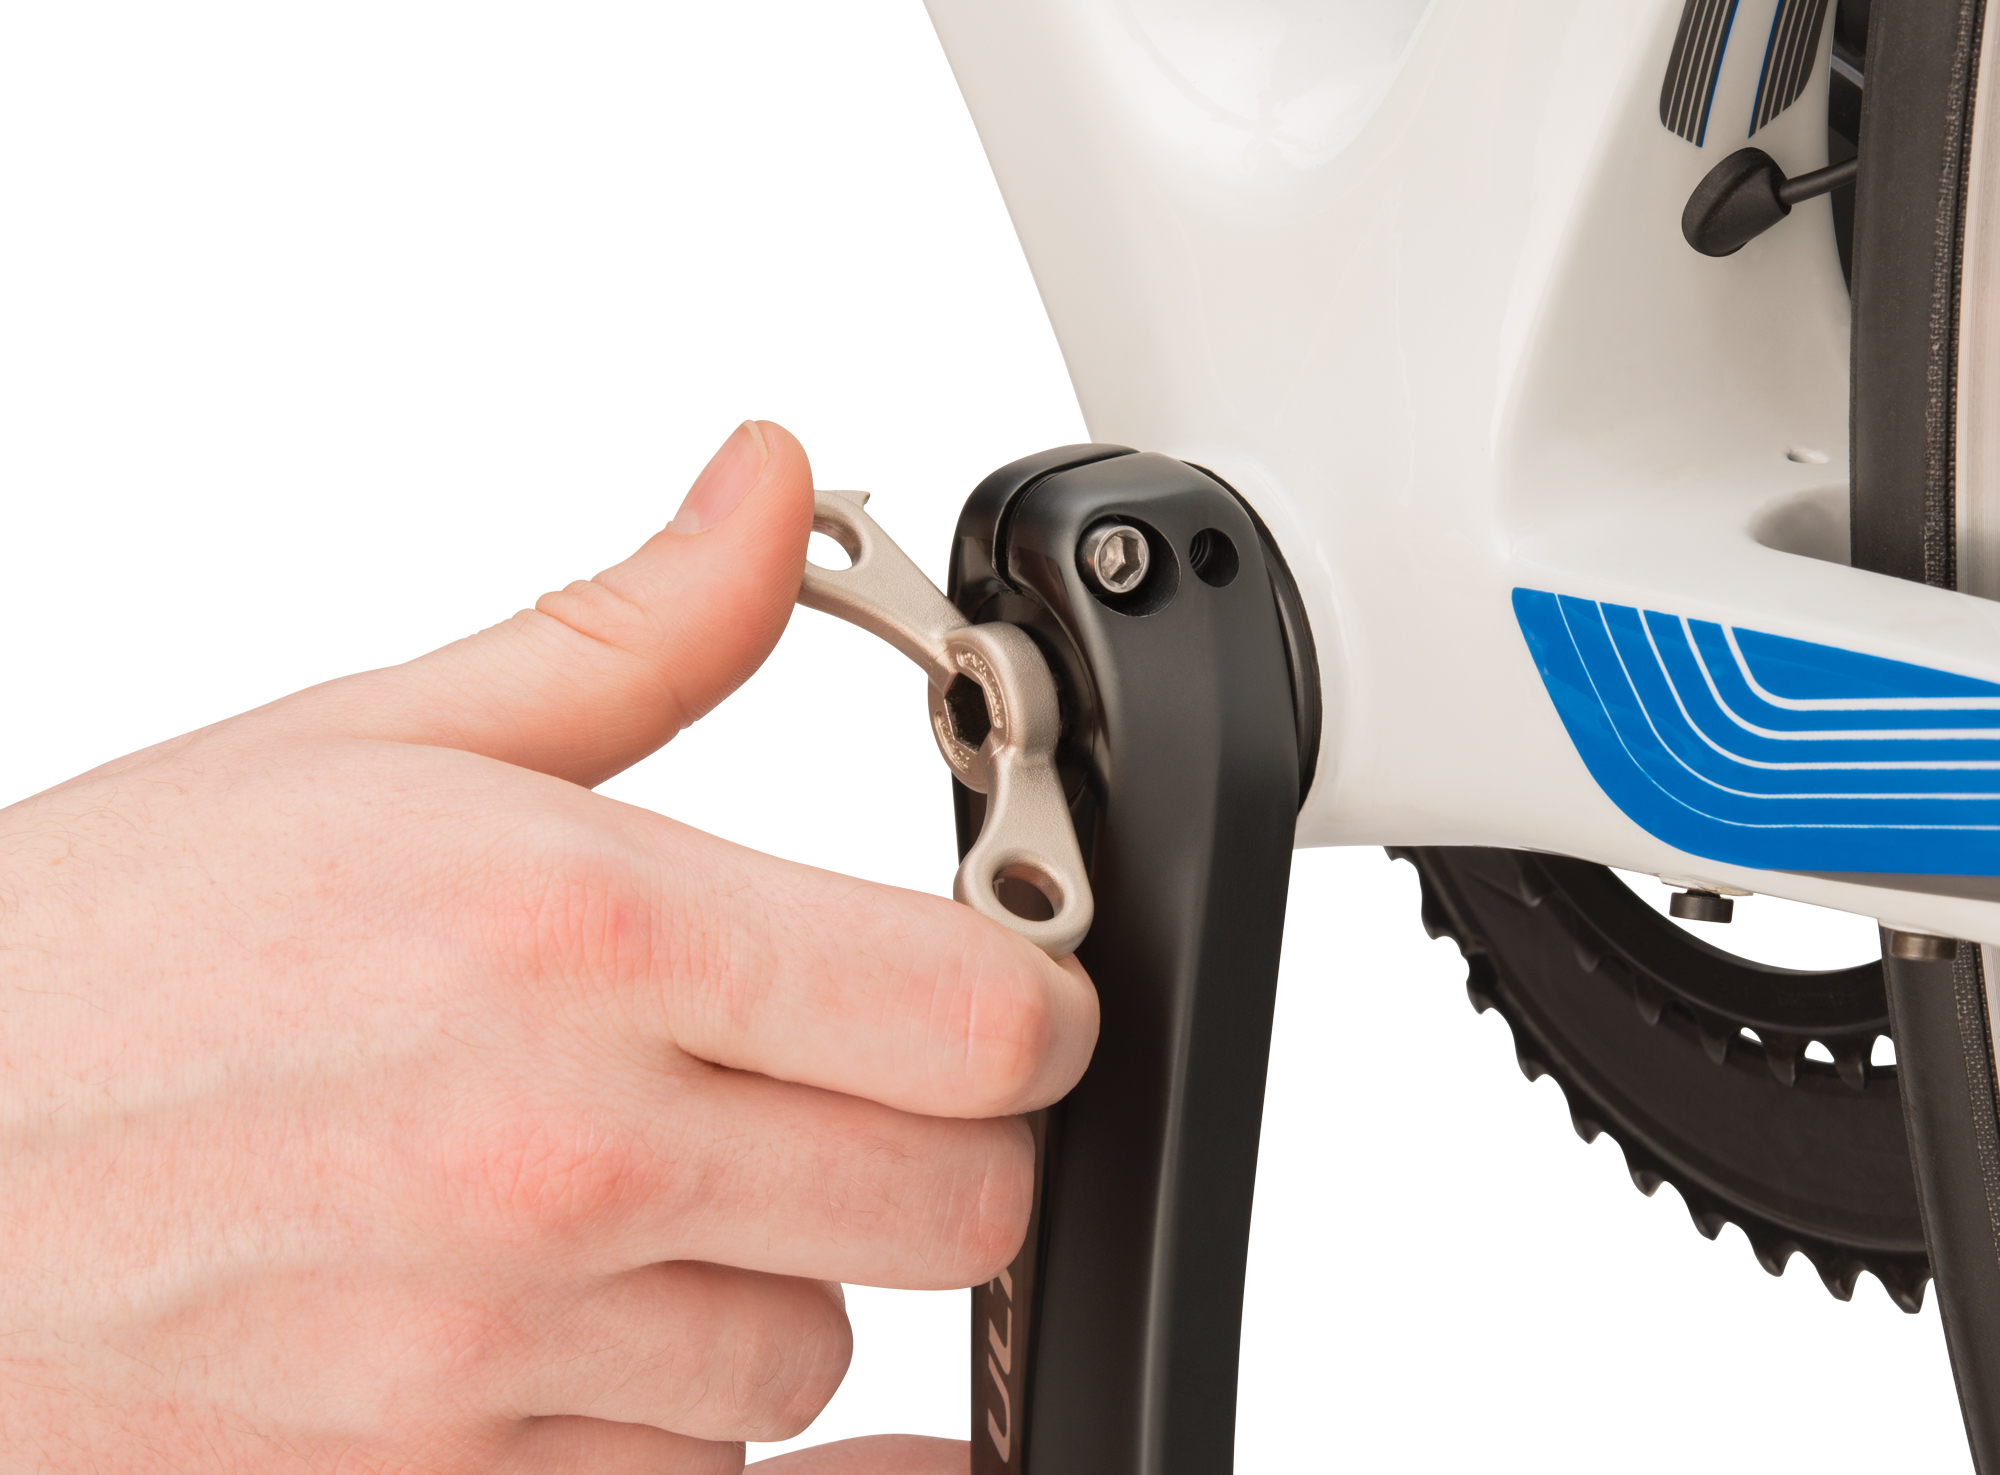
Method 4: Utilizing a Shimano Crank Cap Tool
A Shimano crank cap tool is a specialized tool designed for removing the crank cap on Shimano external-type cranks. This method is most suitable for those with Shimano external-type cranks who do not have access to a crank puller.
To begin, secure the bicycle in a repair stand or clamp it to a stable surface. Obtain a Shimano crank cap tool compatible with your crank type. Shimano crank cap tools are available in various sizes, so ensure that you select the correct size for your specific crank model.
Next, locate the crank cap on the drive-side crank arm. The crank cap is a small bolt that secures the non-drive-side crank arm to the spindle. Using the Shimano crank cap tool, loosen the crank cap by turning it counterclockwise. As the crank cap becomes loose, continue to apply pressure to the tool to counteract the torque and prevent the crank arm from rotating.
Once the crank cap is removed, carefully slide the non-drive-side crank arm off the bicycle. Be cautious not to damage the bottom bracket threads or other components during this process. When reinstalling the crank arm, tighten the crank cap to the manufacturer’s recommended torque specifications.
While the Shimano crank cap tool method is effective for Shimano external-type cranks, it is not compatible with other crank types, such as square taper or splined cranks. Additionally, this method may not be suitable for those unfamiliar with bicycle maintenance or those with limited tools and resources.
When using a Shimano crank cap tool for crank removal, exercise caution and follow the manufacturer’s instructions carefully. Misuse of this tool may result in damage to the crank arm, bottom bracket, or other bicycle components.
Choosing the Right Technique: Factors to Consider
When faced with the challenge of removing a crank without a crank puller, consider the following factors to determine the best technique for your specific situation:
- Crank Type: Identify the crank type (square taper, splined, or external-type) before attempting any removal method. This knowledge will help you choose the most appropriate technique and avoid causing damage to the components.
- Tools Available: Assess the tools at your disposal. If you have access to a crank puller, use it, as it is the most reliable and safe option for crank removal. If a crank puller is not available, consider the other alternative techniques outlined in this article and choose the one that best fits your tools and skill level.
- Skill Level: Evaluate your mechanical skills and experience. Some techniques, such as using a Shimano crank cap tool or adapting a cassette lockring removal tool, may require a higher level of skill and experience. Opt for techniques that align with your abilities to minimize the risk of damage to the bicycle components.
- Safety: Prioritize safety when choosing a technique. Always follow the manufacturer’s instructions and exercise caution when using tools and applying force to bicycle components. If you are unsure about a technique or feel uncomfortable executing it, seek assistance from a more experienced mechanic or consider investing in the appropriate tools.
- Proper Care for Bicycle Components: Regardless of the technique chosen, always prioritize the proper care for bicycle components. Avoid using excessive force, and protect the crank and bicycle components from damage during the removal process.
By considering these factors, you can choose the best technique for removing a crank without a crank puller, ensuring a smooth maintenance process and avoiding potential damage to your bicycle components.

Preventive Measures: Keep a Crank Puller Handy
While alternative techniques for crank removal without a crank puller can be helpful in a pinch, they are not always the most reliable or safe option. To avoid potential damage to your bicycle components and ensure a smooth maintenance process, invest in a crank puller. A crank puller is a specialized tool designed specifically for crank removal, providing a secure and controlled method for this task.
Crank pullers are available in various types, such as Park Tool’s crank pullers, to accommodate different crank designs and bottom bracket standards. When purchasing a crank puller, consider the following factors:
- Crank Type: Ensure that the crank puller is compatible with your crank type (square taper, splined, or external-type). Some crank pullers are designed for specific crank types, while others are versatile and can accommodate multiple crank designs.
- Bottom Bracket Standard: Confirm that the crank puller is compatible with your bicycle’s bottom bracket standard, such as square taper, ISIS, or Octalink. This information can typically be found in your bicycle’s user manual or on the manufacturer’s website.
- Quality: Opt for a high-quality crank puller from a reputable brand to ensure durability, reliability, and safety. A well-constructed crank puller will minimize the risk of damage to your bicycle components during the removal process.
By investing in a crank puller, you can simplify the crank removal process, reduce the risk of damage to your bicycle components, and ensure a smooth maintenance experience. Keep a crank puller in your toolkit, and you’ll be prepared for any crank removal task that comes your way.
