Why Remove Handle Grips?
Handle grips are an essential component of various tools, equipment, and vehicles, providing a secure and comfortable hold for users. However, over time, these grips can become worn out, damaged, or outdated, compromising their functionality and safety. In such cases, removing the old handle grips is necessary to replace them with new ones, ensuring optimal performance and preventing accidents. This article will guide you through the process of how to remove handle grips, a crucial step in maintaining and upgrading your equipment.

Click Image to Find eBike Products
There are several reasons why someone might need to remove handle grips. For instance, if the grips are old or worn out, they may not provide the necessary traction, leading to slips and falls. Upgrading to new grips can enhance the overall user experience, providing a more comfortable and secure hold. Additionally, damaged handles can be repaired by removing the old grips and replacing them with new ones. In some cases, removing handle grips may be necessary for cleaning or maintenance purposes, such as removing dirt, grime, or old adhesive.
Regardless of the reason, removing handle grips requires careful consideration and attention to detail to avoid damaging the underlying handle or surrounding components. In the following sections, we will discuss the necessary tools and materials, methods for loosening handle grips, and a step-by-step guide on how to remove handle grips safely and effectively.
Preparation is Key: Gathering the Necessary Tools and Materials
Before attempting to remove handle grips, it’s essential to gather the necessary tools and materials to ensure a safe and successful process. The right tools can make a significant difference in the ease and efficiency of the removal process. Here are some of the most common tools and materials needed to remove handle grips:
Grip removal tools are specifically designed to help loosen and remove old grips. These tools can be found at most hardware stores or home improvement centers. Some popular grip removal tools include grip removal sprays, such as WD-40 or 3M Grip Remover, and grip removal wrenches, like the Grip-Rite Wrench. These tools can help break the bond between the grip and the handle, making it easier to remove the grip.
In addition to grip removal tools, it’s also important to have the necessary safety gear to protect yourself from potential hazards. Safety glasses, gloves, and a dust mask can help prevent injury from flying debris or chemicals. It’s also a good idea to have a clean, well-lit workspace to ensure you can see what you’re doing and avoid accidents.
Other materials that may be needed to remove handle grips include solvents, such as acetone or mineral spirits, and rags or paper towels for cleaning up spills. It’s also a good idea to have some lubricant, such as silicone spray or oil, to help loosen the grip and prevent it from sticking to the handle.
By gathering the necessary tools and materials, you’ll be well-prepared to tackle the task of removing handle grips. In the next section, we’ll discuss the different methods for loosening handle grips, including using solvents, heat, or mechanical tools.

Breaking the Bond: Methods for Loosening Handle Grips
Once you have gathered the necessary tools and materials, it’s time to start loosening the handle grip. There are several methods to choose from, each with its own pros and cons. The most common methods for loosening handle grips include using solvents, heat, or mechanical tools.
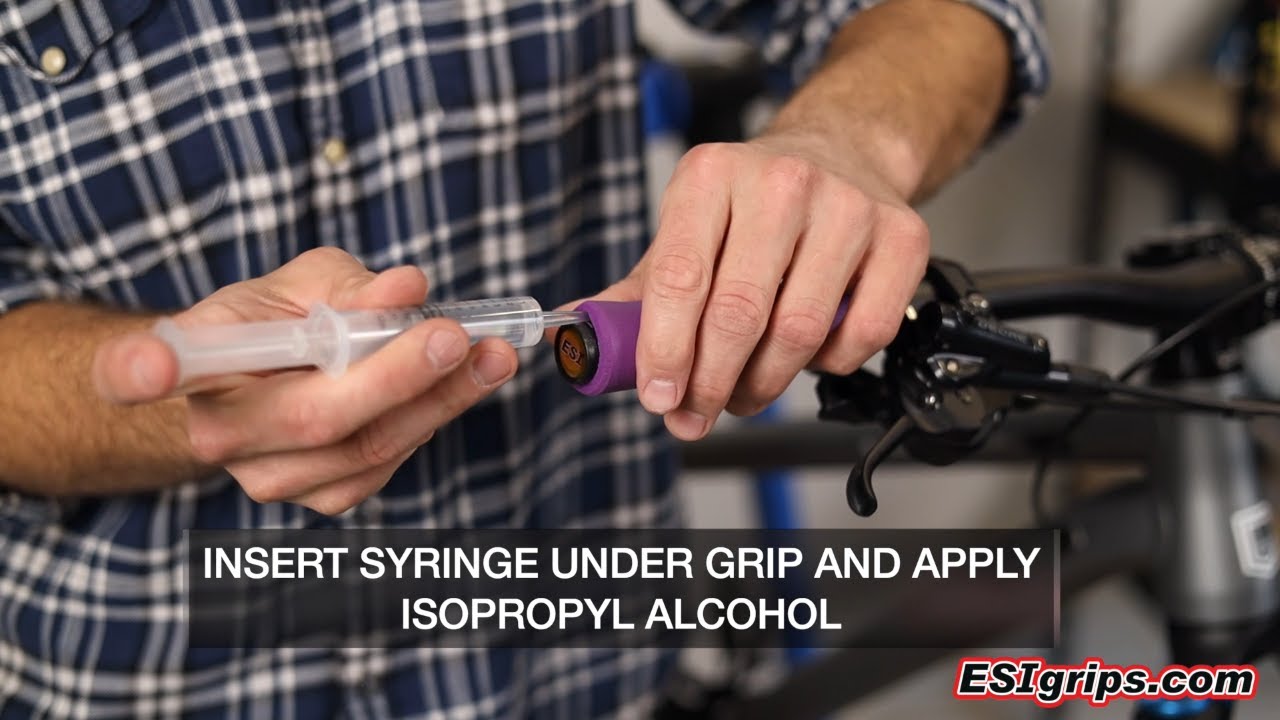
Using solvents is a popular method for loosening handle grips. Solvents, such as WD-40 or 3M Grip Remover, can help break the bond between the grip and the handle. Simply spray the solvent onto the grip and let it sit for a few minutes. The solvent will help loosen the adhesive, making it easier to remove the grip. However, be careful not to use too much solvent, as it can damage the handle or surrounding materials.
Another method for loosening handle grips is to use heat. Applying heat to the grip can help soften the adhesive, making it easier to remove. You can use a hair dryer or a heat gun to apply heat to the grip. Be careful not to apply too much heat, as it can damage the handle or surrounding materials.
Mechanical tools, such as grip removal wrenches, can also be used to loosen handle grips. These tools work by applying pressure to the grip, helping to break the bond between the grip and the handle. Grip removal wrenches are specifically designed for this purpose and can be found at most hardware stores or home improvement centers.
Regardless of the method you choose, it’s essential to be patient and gentle when loosening the handle grip. Avoid using excessive force, as it can damage the handle or surrounding materials. By taking your time and using the right tools and techniques, you can successfully loosen the handle grip and prepare it for removal.
In the next section, we’ll provide a step-by-step guide on how to remove handle grips using the methods described above. We’ll also include images and diagrams to illustrate the process and make it easier to follow.
Removing the Grip: A Step-by-Step Process
Now that you have loosened the handle grip using one of the methods described earlier, it’s time to remove it. Here’s a step-by-step guide on how to remove handle grips:
Step 1: Apply heat or solvent to the grip, if necessary. This will help loosen the adhesive and make it easier to remove the grip.
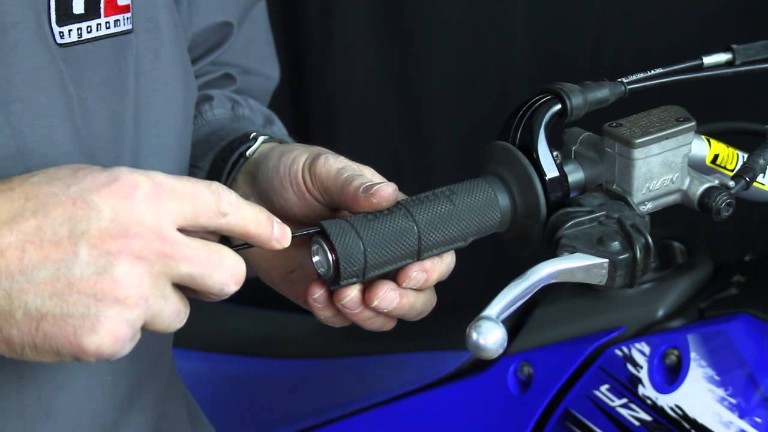
Step 2: Use a grip removal wrench or other mechanical tool to gently pry the grip away from the handle. Start at one end of the grip and work your way around, using a gentle rocking motion to loosen the grip.
Step 3: Continue to apply heat or solvent as needed to help loosen the adhesive. Be careful not to apply too much heat or solvent, as this can damage the handle or surrounding materials.
Step 4: Once the grip is loose, use a cloth or paper towel to wipe away any remaining adhesive or residue. This will help prevent the new grip from sticking to the old adhesive.
Step 5: Inspect the handle for any remaining adhesive or residue. If necessary, use a solvent or adhesive remover to clean the handle.
Step 6: Allow the handle to dry completely before installing a new grip. This will help ensure a secure and comfortable fit.
By following these steps, you should be able to successfully remove the handle grip. Remember to be patient and gentle when removing the grip, as excessive force can damage the handle or surrounding materials.
Here’s an image illustrating the process:

In the next section, we’ll discuss common issues that may arise during the grip removal process, such as stuck or damaged grips. We’ll also provide tips on how to avoid these issues and how to repair damaged handles.

Troubleshooting Common Issues: Overcoming Stuck or Damaged Grips
During the process of removing handle grips, you may encounter some common issues that can make the task more challenging. In this section, we’ll discuss some of the most common problems that may arise and provide tips on how to overcome them.
One of the most common issues is a stuck grip. This can happen when the adhesive is particularly strong or when the grip has been in place for a long time. To overcome a stuck grip, try applying more heat or solvent to the area. You can also use a grip removal wrench or other mechanical tool to gently pry the grip away from the handle.
Another common issue is a damaged grip. This can happen when the grip is old or worn out, or when it has been damaged during the removal process. To repair a damaged grip, you can try using a grip repair kit or replacing the grip entirely.
It’s also possible that the handle may be damaged during the removal process. To avoid this, make sure to use caution when applying heat or solvent, and avoid using excessive force when removing the grip. If the handle is damaged, you may need to repair or replace it before installing a new grip.
To avoid these issues, it’s essential to take your time and be patient when removing handle grips. Make sure to use the right tools and techniques, and follow the steps outlined in this guide. By doing so, you can ensure a successful removal process and avoid any potential problems.
Here are some additional tips to keep in mind:
Use a grip removal tool specifically designed for the type of grip you are removing.
Apply heat or solvent in a well-ventilated area, and avoid inhaling the fumes.
Use caution when handling sharp objects or tools.
Take your time and be patient when removing the grip.
By following these tips and using the right techniques, you can successfully remove handle grips and avoid any common issues that may arise.
Post-Removal Care: Cleaning and Preparing the Handle
After removing the handle grip, it’s essential to clean and prepare the handle for new grips. This step is crucial to ensure a secure and comfortable fit for the new grips. In this section, we’ll discuss the importance of post-removal care and provide tips on how to clean and prepare the handle.
Why is post-removal care important?
Post-removal care is essential to remove any residue or debris left behind by the old grip. This residue can interfere with the adhesion of the new grip, causing it to come loose over time. Additionally, cleaning the handle helps to prevent the buildup of dirt and grime, which can affect the performance and longevity of the new grip.
How to clean the handle:
Use a soft cloth or brush to remove any loose debris or residue from the handle. Then, use a mild soap or cleaning solution to wipe down the handle. Make sure to rinse the handle thoroughly with water to remove any soap residue.
How to prepare the handle for new grips:
Once the handle is clean, use a dry cloth to wipe it down and remove any excess moisture. This will help to ensure a secure fit for the new grip. If necessary, use a grip preparation tool to roughen the surface of the handle, providing a better bond between the handle and the new grip.
Tips for post-removal care:
Use a gentle cleaning solution to avoid damaging the handle or surrounding materials.
Avoid using harsh chemicals or abrasive materials that can damage the handle.
Make sure to dry the handle thoroughly before installing new grips.
By following these tips, you can ensure a clean and prepared handle for your new grips. This will help to ensure a secure and comfortable fit, extending the lifespan of your handle grips.

Installing New Grips: Tips for a Secure and Comfortable Fit
Now that you have removed the old handle grip and cleaned and prepared the handle, it’s time to install a new grip. In this section, we’ll provide tips on how to install new grips, including how to choose the right grip size, apply the correct amount of pressure, and ensure a secure fit.
Choosing the right grip size:
When selecting a new grip, it’s essential to choose the right size to ensure a comfortable and secure fit. Measure the handle to determine the correct grip size, and consider the type of activity or use the handle will be subjected to. For example, a thicker grip may be more suitable for heavy-duty use, while a thinner grip may be better suited for precision work.
Applying the correct amount of pressure:
When installing a new grip, it’s crucial to apply the correct amount of pressure to ensure a secure fit. Too little pressure can result in a loose grip, while too much pressure can cause the grip to become misshapen or damaged. Use a grip installation tool or a rubber mallet to apply even pressure to the grip, working from the center outwards.
Ensuring a secure fit:
To ensure a secure fit, make sure the grip is properly seated on the handle and that there are no air pockets or gaps between the grip and the handle. Use a grip adhesive or grip tape to secure the grip in place, and apply even pressure to the grip to ensure a snug fit.
Tips for installing new grips:
Use a grip installation tool to apply even pressure to the grip.
Apply a small amount of grip adhesive or grip tape to secure the grip in place.
Make sure the grip is properly seated on the handle and that there are no air pockets or gaps.
Test the grip to ensure a secure and comfortable fit.
By following these tips, you can ensure a secure and comfortable fit for your new handle grip. Remember to always follow the manufacturer’s instructions for installation and maintenance to ensure the longevity of your handle grip.
Maintenance and Upkeep: Extending the Life of Your Handle Grips
Now that you have successfully removed and replaced your handle grips, it’s essential to maintain and upkeep them to extend their lifespan. Regular cleaning, inspection, and replacement can help prevent wear and tear, ensuring your handle grips remain in good condition for a longer period.
Regular Cleaning:
Regular cleaning is crucial to remove dirt, grime, and other substances that can accumulate on the handle grips. Use a soft cloth or brush to wipe down the grips, and avoid using harsh chemicals or abrasive materials that can damage the grips.
Inspection:
Regularly inspect your handle grips for signs of wear and tear, such as cracks, cuts, or excessive wear. If you notice any damage, replace the grips immediately to prevent further damage.
Replacement:
Replace your handle grips regularly, depending on the usage and condition of the grips. If you use your handle grips frequently, you may need to replace them more often.
Tips for Maintenance and Upkeep:
Use a soft cloth or brush to clean the handle grips regularly.
Inspect the handle grips regularly for signs of wear and tear.
Replace the handle grips regularly, depending on the usage and condition.
Avoid using harsh chemicals or abrasive materials that can damage the grips.
By following these tips, you can extend the life of your handle grips and ensure they remain in good condition for a longer period. Remember to always follow the manufacturer’s instructions for maintenance and upkeep to ensure the longevity of your handle grips.