
Why Removing Road Bike Pedals is a Crucial Maintenance Task
Regularly removing and inspecting road bike pedals is a vital maintenance task that can help prevent damage, maintain performance, and ensure safety. Neglecting pedal maintenance can lead to costly repairs and compromised riding experience. Over time, pedals can become worn, corroded, or damaged, which can affect the overall performance of the bike. By removing and inspecting the pedals, riders can identify potential issues before they become major problems.

Click Image to Find eBike Products
One of the primary reasons to remove road bike pedals is to inspect the pedal threads and crank arms for damage or wear. If the pedal threads are damaged, it can be difficult or impossible to remove the pedals, which can lead to costly repairs. Additionally, worn or damaged crank arms can cause the pedals to become loose or fall off while riding, which can be a safety hazard.
Removing road bike pedals also provides an opportunity to clean and lubricate the pedal threads and bearings, which can help maintain smooth pedaling and prevent corrosion. Furthermore, inspecting the pedals can help riders identify any issues with the pedal-cleat interface, such as worn or damaged cleats, which can affect the overall performance of the bike.
In addition to preventing damage and maintaining performance, removing road bike pedals can also help ensure safety. Worn or damaged pedals can cause the rider to lose control of the bike, which can lead to accidents or injuries. By regularly inspecting and maintaining the pedals, riders can help ensure their safety and the safety of others on the road.
Overall, removing road bike pedals is a crucial maintenance task that can help prevent damage, maintain performance, and ensure safety. By incorporating pedal removal into their regular maintenance routine, riders can help extend the life of their bike and ensure a safe and enjoyable riding experience.
Understanding the Types of Road Bike Pedals and Their Removal Requirements
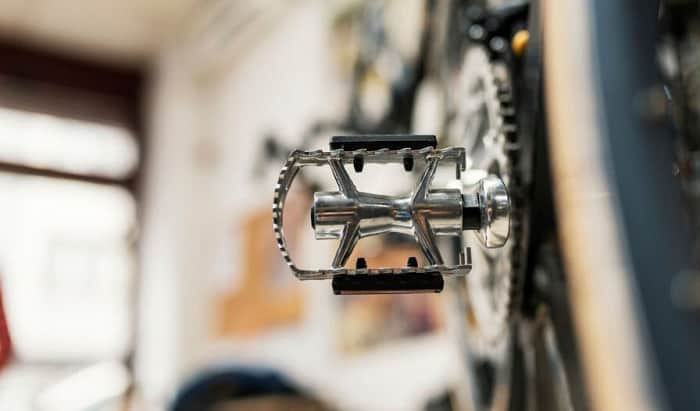
Road bike pedals come in various types, each with its unique removal requirements. Understanding the differences between these types is crucial for successful pedal removal. The three main types of road bike pedals are clipless, platform, and hybrid pedals.
Clipless pedals, also known as clip-in pedals, require a specific type of shoe with a cleat that attaches to the pedal. These pedals are popular among road cyclists due to their efficiency and comfort. To remove clipless pedals, a pedal wrench with a 6mm or 8mm Allen key is typically required. It’s essential to ensure the pedal wrench is securely attached to the pedal to avoid damaging the threads.
Platform pedals, on the other hand, do not require a specific type of shoe and are often used by commuters or recreational cyclists. These pedals are typically easier to remove than clipless pedals and require a pedal wrench with a 15mm or 17mm socket. However, some platform pedals may have a unique removal mechanism, such as a quick-release system.
Hybrid pedals combine the features of clipless and platform pedals, offering the option to use either type of shoe. These pedals often require a pedal wrench with a 6mm or 8mm Allen key, similar to clipless pedals. However, the removal process may vary depending on the specific hybrid pedal design.
When removing road bike pedals, it’s essential to consider the type of pedal and the tools required. Using the wrong tool or technique can damage the pedal or the crank arm, leading to costly repairs. By understanding the unique removal requirements for each type of pedal, cyclists can ensure a safe and successful pedal removal process.
In addition to the type of pedal, it’s also important to consider the material and construction of the pedal. Some pedals may have a more complex removal mechanism or require specialized tools. Always consult the manufacturer’s instructions or seek guidance from a professional mechanic if unsure about the removal process.
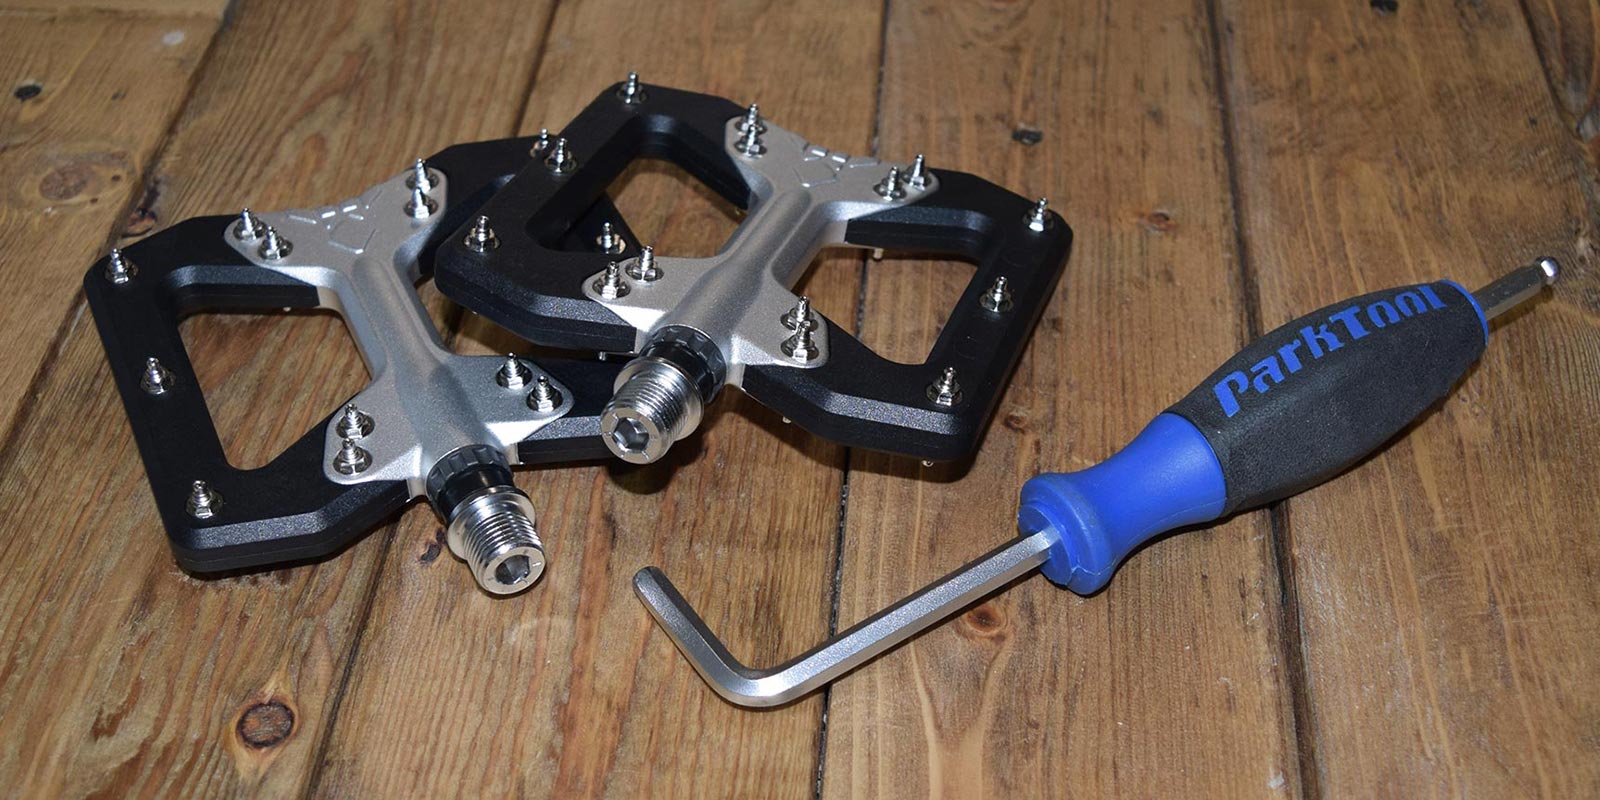
Gathering the Essential Tools for Pedal Removal
Before attempting to remove road bike pedals, it’s essential to gather the necessary tools to ensure a safe and successful process. The right tools can make all the difference in preventing damage to the pedals, crank arms, or other components of the bike.
A pedal wrench is the most critical tool for removing road bike pedals. This wrench is specifically designed to fit the pedal’s axle and provide the necessary leverage to loosen the pedal. There are two main types of pedal wrenches: 6mm and 8mm. The 6mm wrench is used for most clipless pedals, while the 8mm wrench is used for some platform and hybrid pedals.
In addition to a pedal wrench, an Allen wrench may also be required for some pedal types. This is particularly true for clipless pedals, which often have an Allen key bolt that secures the pedal to the crank arm. A 3mm, 4mm, or 5mm Allen wrench may be needed, depending on the pedal design.
Tire levers can also be useful when removing road bike pedals. These levers can help pry the pedal away from the crank arm if it becomes stuck or stubborn. However, be careful not to apply too much force, as this can damage the pedal or crank arm.
Other tools that may be useful when removing road bike pedals include a torque wrench, a socket wrench, and a set of pliers. A torque wrench can help ensure that the pedal is properly tightened when reinstalled, while a socket wrench can provide additional leverage when loosening the pedal. Pliers can be used to grip the pedal axle if it becomes stuck or difficult to remove.
When choosing tools for pedal removal, it’s essential to consider the quality and durability of the tools. Cheap or poorly made tools can damage the pedals or other components of the bike, leading to costly repairs. Look for tools made from high-quality materials, such as chrome vanadium or stainless steel, and choose tools with a comfortable grip and ergonomic design.
By gathering the essential tools for pedal removal, road bike owners can ensure a safe and successful process. Remember to always follow proper safety precautions and use caution when working with tools to avoid injury or damage to the bike.
Preparing Your Bike for Pedal Removal
Before removing your road bike pedals, it’s essential to prepare your bike to ensure a safe and successful process. This involves several steps that will help prevent damage to the bike and make the pedal removal process easier.
First, remove any accessories that may be attached to the pedals, such as toe clips or pedal cages. This will give you clear access to the pedals and prevent any damage to these accessories during the removal process.
Next, clean the area around the pedals to remove any dirt, grime, or old lubricant that may be present. This will help ensure that the pedal wrench can get a good grip on the pedal and prevent any slipping or damage to the surrounding components.
It’s also crucial to ensure that the bike is securely supported before attempting to remove the pedals. This can be done by placing the bike on a repair stand or leaning it against a wall. Make sure the bike is stable and won’t fall over during the removal process.
In addition to these steps, it’s a good idea to inspect the pedals and surrounding components for any signs of damage or wear. Check for any cracks, dents, or corrosion on the pedals, crank arms, or other components. If you notice any damage, it’s best to address it before attempting to remove the pedals.
By preparing your bike for pedal removal, you can ensure a safe and successful process. Remember to take your time and be patient, as rushing through the process can lead to mistakes and damage to the bike.
Once you’ve completed these steps, you’re ready to move on to the next stage of the pedal removal process. In the next section, we’ll provide a detailed, step-by-step guide on how to remove road bike pedals, including how to position the pedal wrench, apply the correct amount of force, and avoid damaging the pedals or crank arms.
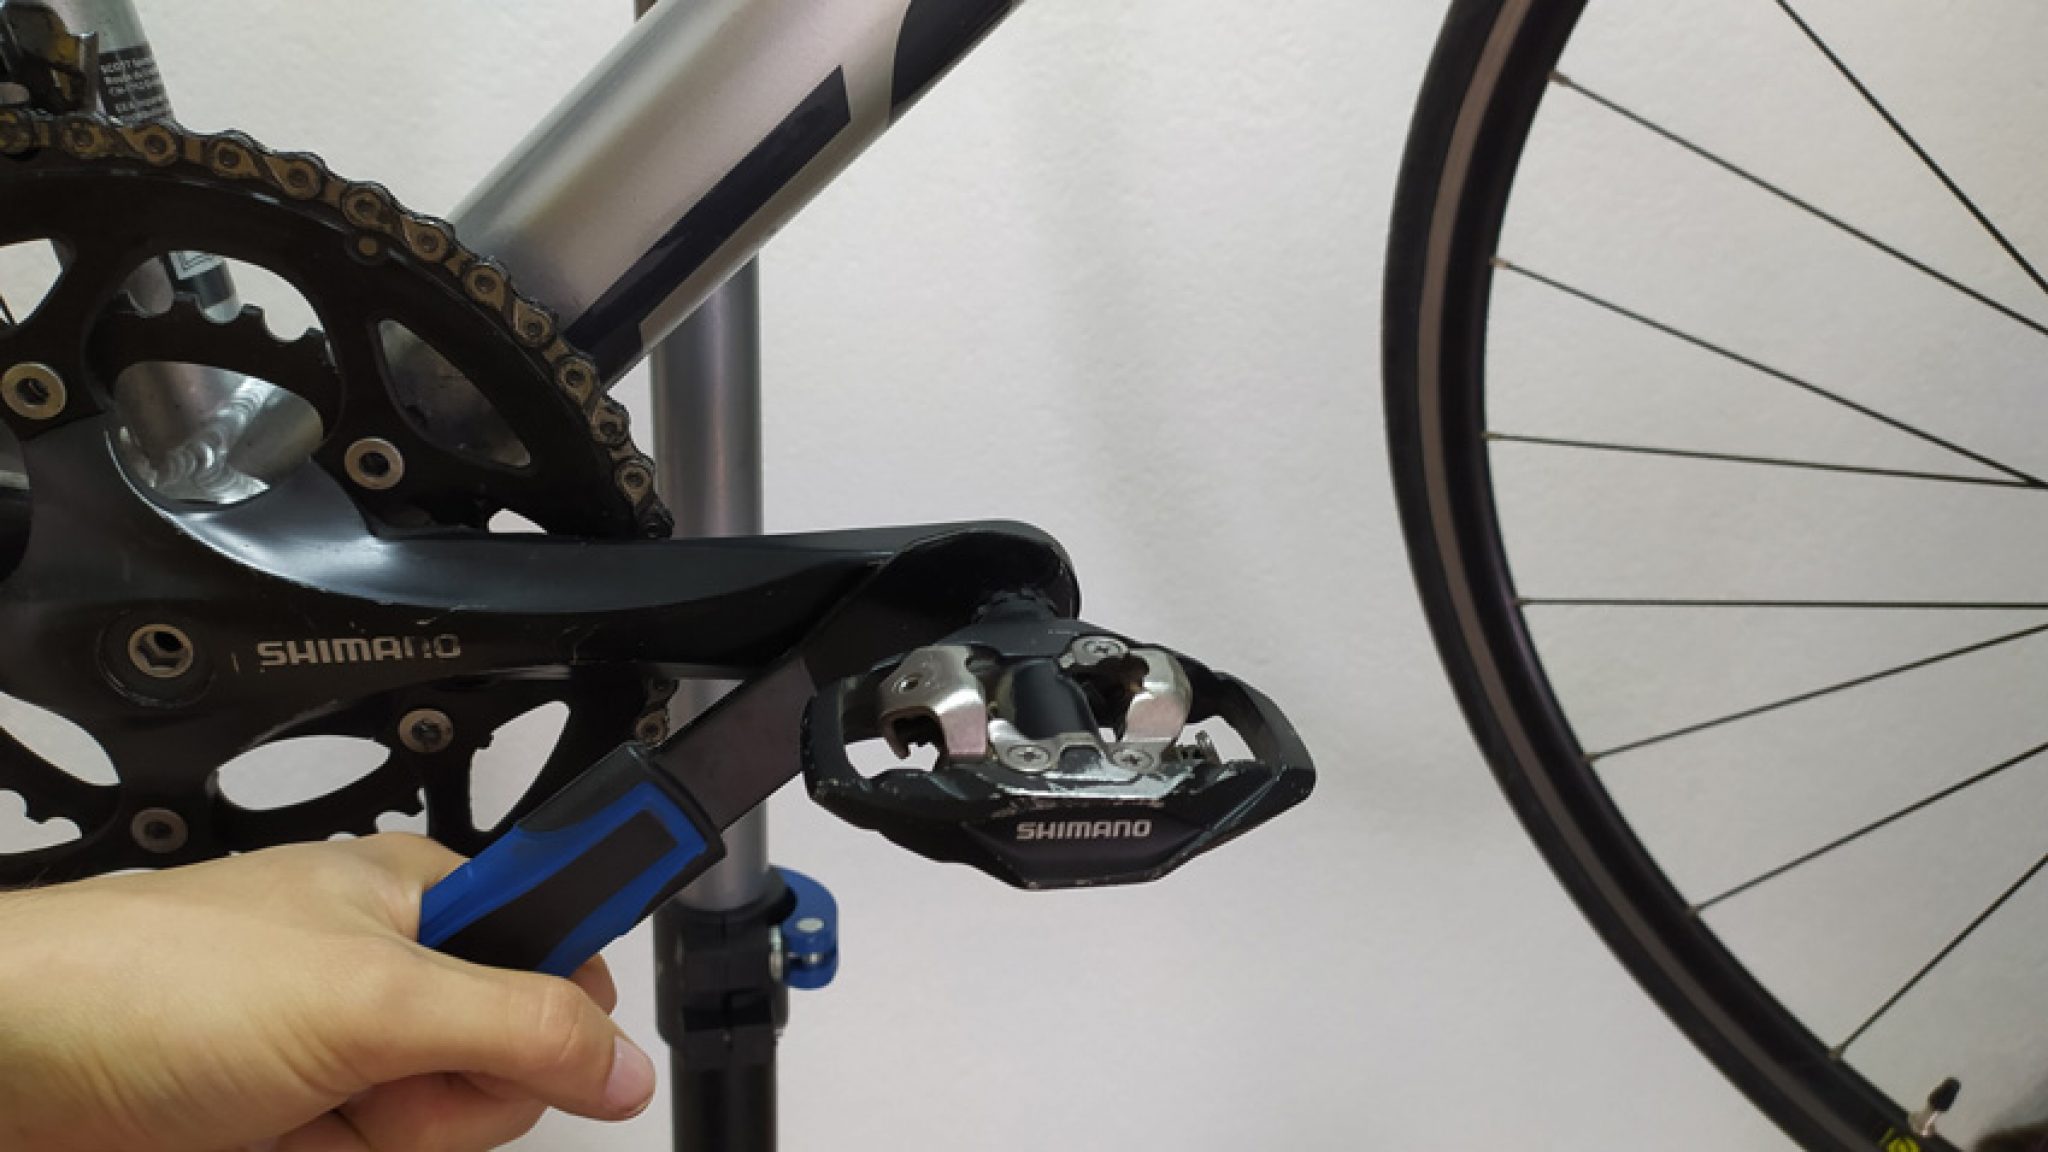
Removing the Pedals: A Step-by-Step Guide
Now that you have prepared your bike and gathered the necessary tools, it’s time to remove the pedals. This process requires attention to detail and a gentle touch to avoid damaging the pedals or crank arms.
Step 1: Position the Pedal Wrench
Place the pedal wrench on the pedal axle, ensuring that it is securely seated and aligned with the pedal. For clipless pedals, make sure the wrench is positioned on the 6mm or 8mm Allen key bolt. For platform pedals, position the wrench on the 15mm or 17mm socket.
Step 2: Apply the Correct Amount of Force
Gently apply force to the pedal wrench, using a clockwise motion to loosen the pedal. Be careful not to apply too much force, as this can damage the pedal or crank arm. If the pedal is stuck, do not force it. Instead, try applying heat or lubricant to help loosen it.
Step 3: Remove the Pedal
Once the pedal is loose, carefully remove it from the crank arm. For clipless pedals, pull the pedal straight off the crank arm. For platform pedals, lift the pedal off the crank arm, taking care not to damage the surrounding components.
Step 4: Inspect the Pedal and Crank Arm
Inspect the pedal and crank arm for any signs of damage or wear. Check for any cracks, dents, or corrosion on the pedal or crank arm. If you notice any damage, it’s best to address it before reinstalling the pedal.
By following these steps, you can successfully remove your road bike pedals. Remember to take your time and be patient, as rushing through the process can lead to mistakes and damage to the bike.
In the next section, we’ll discuss common issues that may arise during pedal removal, such as stuck pedals or stripped threads. We’ll provide troubleshooting tips and solutions to help you overcome these challenges and ensure a successful pedal removal process.
Troubleshooting Common Issues During Pedal Removal
While removing road bike pedals can be a straightforward process, there are some common issues that may arise. In this section, we’ll discuss some of the most common problems and provide troubleshooting tips and solutions to help you overcome them.
Stuck Pedals
One of the most common issues during pedal removal is a stuck pedal. This can occur when the pedal is over-tightened or when there is corrosion or dirt buildup on the pedal threads. To resolve this issue, try applying heat to the pedal using a hair dryer or heat gun. This can help loosen the pedal and make it easier to remove. If the pedal is still stuck, try using a pedal wrench with a long handle or a breaker bar to provide extra leverage.
Stripped Threads
Another common issue during pedal removal is stripped threads. This can occur when the pedal is over-tightened or when the threads are damaged. To resolve this issue, try using a thread repair kit to repair the damaged threads. If the threads are severely damaged, it may be necessary to replace the crank arm or pedal.
Pedal Wrench Slipping
If the pedal wrench is slipping or not providing enough leverage, try using a pedal wrench with a rubber grip or a wrench with a long handle. This can provide extra grip and leverage, making it easier to remove the pedal.
Other Issues
Other common issues during pedal removal include damaged or corroded pedal threads, loose or damaged crank arms, and pedals that are not properly aligned. To resolve these issues, try using a thread repair kit, replacing the crank arm or pedal, or adjusting the pedal alignment.
By being aware of these common issues and having the right tools and techniques, you can troubleshoot and resolve any problems that may arise during pedal removal. Remember to always take your time and be patient, as rushing through the process can lead to mistakes and damage to the bike.
In the next section, we’ll provide guidance on how to properly reinstall road bike pedals, including how to apply the correct amount of torque, ensure proper alignment, and test the pedals for secure attachment.
Reinstalling Your Pedals: Tips for a Smooth Reattachment
Once you have removed your road bike pedals, it’s essential to properly reinstall them to ensure a smooth and secure attachment. In this section, we’ll provide guidance on how to reinstall your pedals, including how to apply the correct amount of torque, ensure proper alignment, and test the pedals for secure attachment.
Applying the Correct Amount of Torque
When reinstalling your pedals, it’s crucial to apply the correct amount of torque to ensure a secure attachment. The recommended torque specification can be found in your pedal’s manual or on the manufacturer’s website. Use a torque wrench to apply the specified amount of torque, making sure not to over-tighten or under-tighten the pedals.
Ensuring Proper Alignment
Proper alignment is critical when reinstalling your pedals. Make sure the pedals are aligned with the crank arms and that the pedal axle is properly seated. Use a pedal alignment tool or a ruler to ensure the pedals are properly aligned.
Testing the Pedals for Secure Attachment
Once you have reinstalled your pedals, it’s essential to test them for secure attachment. Apply a small amount of force to the pedals to ensure they are securely attached to the crank arms. If the pedals feel loose or wobbly, re-tighten them according to the manufacturer’s specifications.
Additional Tips for Smooth Reattachment
In addition to applying the correct amount of torque, ensuring proper alignment, and testing the pedals for secure attachment, here are some additional tips for a smooth reattachment:
Use a pedal installation tool to help guide the pedal onto the crank arm.
Apply a small amount of lubricant to the pedal threads to ensure smooth installation.
Use a torque wrench to ensure the correct amount of torque is applied.
Test the pedals regularly to ensure they remain securely attached.
By following these tips, you can ensure a smooth and secure reattachment of your road bike pedals. Remember to always refer to your pedal’s manual or manufacturer’s website for specific installation instructions.
Conclusion: Mastering the Art of Road Bike Pedal Removal
Removing road bike pedals is a crucial maintenance task that requires attention to detail and the right techniques. By following the steps outlined in this article, you can master the art of pedal removal and ensure your road bike is running smoothly and efficiently.
Regular pedal maintenance is essential to prevent damage, maintain performance, and ensure safety. Neglecting pedal maintenance can lead to costly repairs and compromised riding experience. By removing and inspecting your pedals regularly, you can identify potential issues before they become major problems.
In this article, we’ve covered the importance of pedal maintenance, the different types of road bike pedals and their removal requirements, the essential tools needed for pedal removal, and the steps to prepare your bike for pedal removal. We’ve also provided a detailed, step-by-step guide on how to remove road bike pedals, troubleshoot common issues, and reinstall your pedals for a smooth reattachment.
By mastering the art of pedal removal, you can become a more confident and self-sufficient road bike owner. Remember to practice and refine your skills regularly to ensure your pedals are always in good working condition. With the right techniques and tools, you can keep your road bike running smoothly and efficiently, and enjoy a safe and enjoyable riding experience.
Whether you’re a seasoned road bike owner or just starting out, mastering the art of pedal removal is an essential skill to have. By following the steps outlined in this article, you can ensure your pedals are always in good working condition and your road bike is running smoothly and efficiently.