
Recognizing the Need for a New Saddle: When It’s Time for a Change
The saddle is a crucial component of any bicycle, playing a significant role in the rider’s comfort and overall cycling experience. Over time, saddles can wear out or become uncomfortable, making it essential to recognize the signs that indicate it’s time for a replacement. A well-functioning saddle contributes to enjoyable and efficient cycling, reducing the risk of pain, discomfort, or long-term injuries.

Click Image to Find eBike Products
Discomfort and pain are the most common indicators that your current saddle may no longer be suitable for your needs. Persistent saddle sores, numbness, or soreness in the genital area can be signs of pressure points that need to be addressed. These issues may arise due to the saddle’s age, wear and tear, or an ill-fitting design that doesn’t cater to your unique anatomy or riding style. By acknowledging these problems and addressing them proactively, you can significantly improve your cycling experience and prevent potential health concerns.
Selecting the Perfect Saddle: Factors to Consider
When it comes to selecting a new saddle, there is no one-size-fits-all solution. Each cyclist has unique anatomical features, riding styles, and preferences that must be taken into account. By understanding the key factors that contribute to a comfortable and efficient saddle, you can make an informed decision and find the perfect saddle for your needs. Here are some essential factors to consider:
- Saddle width: The width of the saddle plays a significant role in determining comfort and support. A saddle that is too narrow may cause pressure points and discomfort, while a saddle that is too wide may restrict your pedaling motion. Measuring the distance between your sit bones can help you determine the ideal saddle width for your anatomy.
- Saddle shape: Saddles come in various shapes, such as flat, curved, or waved. The shape should cater to your riding style and flexibility. For instance, a flat saddle is suitable for cyclists who frequently change positions, while a curved saddle may better suit those who maintain a more fixed position.
- Padding: The amount and density of padding in a saddle can significantly impact comfort. While more padding might seem like the obvious choice for comfort, it can sometimes lead to increased friction and discomfort. Experiment with different padding levels to find the right balance for your needs.
- Material: Saddle materials, including leather, synthetic, or cut-out designs, can influence breathability, durability, and maintenance requirements. Consider your personal preferences, budget, and the climate in which you typically ride when selecting a saddle material.
- Riding style and bike type: Your riding style and bike type should also factor into your saddle selection. For example, mountain bikers may prefer a saddle with a more robust design and increased padding, while road cyclists might opt for a lighter, more streamlined saddle.
By taking the time to consider these factors and understanding your unique needs, you can find a saddle that not only enhances your comfort but also contributes to improved performance and enjoyment on your bike.

Tools and Equipment: Preparing for the Saddle Replacement
Before you embark on replacing your bike saddle, ensure you have the necessary tools and equipment to complete the task efficiently and safely. Here’s a list of essential items and their roles in the replacement process:
- Allen keys: Allen keys, also known as hex keys, are used to loosen and tighten bolts on your bike. A set of Allen keys with various sizes will enable you to adjust and remove the seatpost clamp securely.
- Torque wrench: A torque wrench is a valuable tool for applying the correct tension to bolts and preventing overtightening, which can damage bike components. When installing your new saddle, use a torque wrench to tighten the seatpost clamp to the recommended torque specifications.
- Grease: Applying grease to the seatpost and clamp can reduce friction, prevent corrosion, and ensure smooth movement. A small amount of grease on the seatpost and inside the seatpost clamp will make it easier to adjust and remove the saddle in the future.
Having these tools and equipment on hand will streamline the saddle replacement process and minimize the risk of damaging bike components. Remember to always follow the manufacturer’s instructions and safety guidelines when working on your bike.

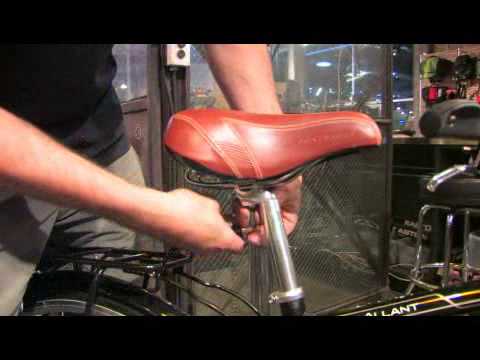
Removing the Old Saddle: Step-by-Step Instructions
Follow these step-by-step instructions to safely remove the old saddle from your bike, ensuring a smooth transition to your new saddle:
- Gather the necessary tools: Before you begin, ensure you have the required tools, such as Allen keys and possibly a torque wrench. Locate the seatpost clamp, which is typically found below the saddle.
- Loosen the seatpost clamp: Using the appropriate Allen key, loosen the seatpost clamp bolt. The clamp bolt may be located on the seat tube or underneath a cover plate. Be careful not to overloosen the bolt, as this could damage the seatpost or clamp.
- Slide out the saddle: With the seatpost clamp loosened, gently slide the saddle and seatpost out of the seat tube. You may need to rotate the saddle or apply slight pressure to the seatpost to free it from the seat tube.
- Clean the seatpost and clamp: Once the old saddle is removed, take the opportunity to clean the seatpost and clamp. Use a cloth or brush to remove any dirt, debris, or old grease. This will help ensure a secure and smooth installation of the new saddle.
By following these instructions, you can safely remove the old saddle and prepare your bike for the installation of the new saddle. Remember to always follow the manufacturer’s instructions and safety guidelines when working on your bike.

Installing the New Saddle: A Seamless Transition
Once you have safely removed the old saddle and cleaned the seatpost and clamp, you’re ready to install the new saddle. Follow these steps to ensure a smooth and secure installation:
- Apply grease to the seatpost: Before inserting the seatpost back into the seat tube, apply a thin layer of grease to the entire length of the seatpost. This will reduce friction, prevent corrosion, and make it easier to adjust or remove the saddle in the future.
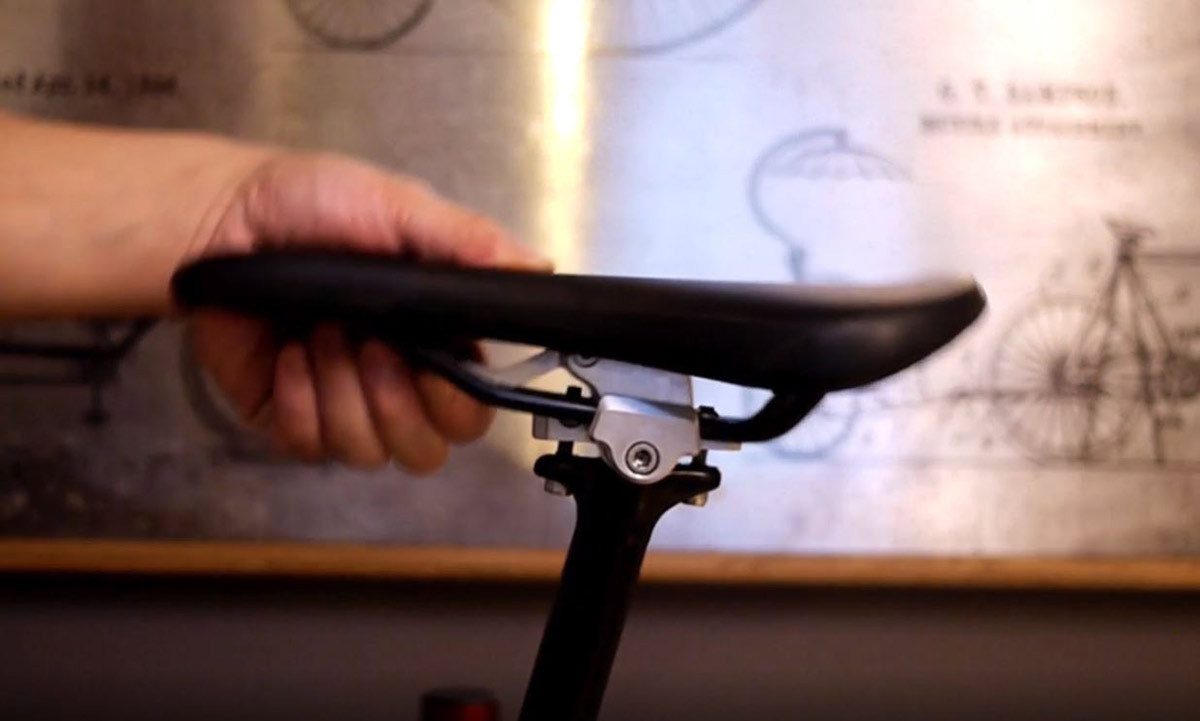
- Position the saddle on the rails: Carefully position the new saddle on the seatpost rails, ensuring that it is centered and aligned with the seatpost. The rails are typically slotted or have holes for attaching the saddle to the seatpost clamp. Make sure the saddle is securely fastened to the rails before proceeding.
- Insert the seatpost and saddle into the seat tube: With the saddle properly positioned, gently slide the seatpost and saddle into the clean seat tube. Ensure that the saddle is aligned with the top tube of the bike and that the seatpost clamp is accessible for tightening.
- Tighten the seatpost clamp: Using the appropriate Allen key, tighten the seatpost clamp bolt to the recommended torque specifications. A torque wrench can help prevent overtightening, which could damage the seatpost or clamp. Double-check that the saddle is secure and properly aligned before completing the installation.
By following these steps, you can successfully install your new saddle and enjoy a more comfortable and enjoyable cycling experience. Remember to always follow the manufacturer’s instructions and safety guidelines when working on your bike.
Adjusting the Saddle: Fine-Tuning for Comfort and Performance
After successfully installing your new saddle, it’s essential to fine-tune its position for optimal comfort and performance. Here are some guidelines on how to adjust the saddle height, angle, and fore/aft position:
Saddle height
The saddle height significantly impacts your pedaling efficiency and comfort. To determine the correct saddle height, follow these steps:
- Sit on the bike and place your heels on the pedals.
- Pedal backward until the crankarms are horizontal. Your knee should be fully extended, with a slight bend at the bottom of the pedal stroke.
- If your knee is significantly bent or overextended, adjust the saddle height accordingly and repeat the process until you find the optimal height.
Saddle angle
The saddle angle can affect your comfort and pressure distribution. A level saddle is usually a good starting point, but you can make slight adjustments based on personal preference:
- A slightly upward angle can help alleviate pressure on the hands and wrists, but be cautious not to tilt the saddle too far, as this may cause discomfort or pressure points in the perineal area.
- A slightly downward angle can reduce pressure on the perineal area but may increase pressure on the hands and wrists. Again, avoid excessive tilting.
Fore/aft position
The fore/aft position, or horizontal saddle adjustment, affects your pedaling efficiency and comfort. To set the correct fore/aft position:
- Place your pedals in a horizontal position and sit on the bike.
- Drop a plumb line from the front of your knee, just above the kneecap. The line should intersect the pedal axle when your foot is in the pedaling position.
- If the line intersects the pedal axle in front of or behind the pedal, adjust the saddle accordingly and repeat the process until you find the optimal position.
Regularly testing and adjusting your saddle position can help ensure a comfortable and efficient cycling experience. Remember to make small adjustments and test the position thoroughly before each ride, as your preferences may change over time.
Regular Maintenance: Keeping Your Saddle in Top Condition
Proper saddle maintenance is crucial for ensuring a comfortable and enjoyable cycling experience. Regular cleaning, lubricating, and checking for wear and tear can help extend the lifespan of your saddle and keep it in top condition. Here are some guidelines and recommendations for maintaining your saddle:
Cleaning
Clean your saddle after every ride, especially if you’ve been cycling in wet or muddy conditions. Use a mild detergent, warm water, and a soft cloth or sponge to gently remove dirt and debris. Avoid using harsh chemicals or abrasive materials, as these can damage the saddle’s surface or material.
Lubricating
Periodically lubricate the rails and clamp mechanism to reduce friction and prevent corrosion. Use a high-quality bicycle-specific lubricant, and apply a small amount to the rails and clamp. Wipe away any excess lubricant to prevent attracting dirt and debris.
Checking for wear and tear
Inspect your saddle regularly for signs of wear and tear, such as cracks, frayed stitching, or loose components. If you notice any issues, consider replacing the saddle or having it repaired by a professional. Addressing these problems early can help prevent further damage and ensure your safety while cycling.
Recommended maintenance frequency
Perform these maintenance tasks after every ride (cleaning) and every few months (lubricating and checking for wear and tear). Adjust the frequency based on your riding conditions and the saddle’s material and construction. For example, saddles made from delicate materials may require more frequent cleaning and maintenance.
By incorporating these maintenance practices into your cycling routine, you can keep your saddle in top condition and enjoy a more comfortable and efficient cycling experience. Regular maintenance can also help you identify potential issues early, saving you time and money in the long run.
