
Why Replace Your Pedals?
When it comes to upgrading your mountain bike, replacing the pedals is a crucial step that can significantly impact your riding experience. Over time, pedals can wear out, causing discomfort, reduced performance, and even safety issues. By learning how to replace pedals on mountain bike, you can breathe new life into your bike and enjoy a more efficient and enjoyable ride.

Click Image to Find eBike Products
One of the primary reasons to replace your pedals is to improve performance. Worn-out pedals can cause your feet to slip, reducing power transfer and making it more difficult to climb steep hills or accelerate quickly. New pedals, on the other hand, provide a secure connection between your feet and the bike, allowing you to ride more efficiently and effectively. Additionally, replacing your pedals can increase comfort by reducing pressure points and providing a more ergonomic design.
Another crucial reason to replace your pedals is safety. Worn-out pedals can be a hazard, especially when riding in wet or slippery conditions. New pedals provide a more secure connection, reducing the risk of accidents and injuries. Furthermore, replacing your pedals can also enhance the overall safety of your bike by ensuring that all components are in good working condition.
By understanding the importance of pedal replacement, you’ll be motivated to take the necessary steps to upgrade your mountain bike. In the following sections, we’ll guide you through the process of choosing the right pedals for your mountain bike and provide a step-by-step guide on how to replace them.

Choosing the Right Pedals for Your Mountain Bike
When it comes to replacing the pedals on your mountain bike, selecting the right type is crucial for a comfortable and efficient ride. There are three main types of pedals available: platform pedals, clipless pedals, and hybrid pedals. Each type has its unique features, benefits, and suitability for different riding styles.
Platform pedals are the most common type, featuring a flat platform for your foot to rest on. They are ideal for casual riders, commuters, and those who prefer a more relaxed riding style. Platform pedals provide excellent grip and control, making them suitable for a variety of terrain and conditions.
Clipless pedals, on the other hand, are designed for more serious riders who require a secure connection between their feet and the bike. They feature a cleat system that attaches to the rider’s shoes, providing a snug fit and efficient power transfer. Clipless pedals are ideal for cross-country, trail, and enduro riding.
Hybrid pedals combine the benefits of platform and clipless pedals, offering a platform for casual riding and a cleat system for more aggressive riding. They are perfect for riders who want the flexibility to switch between different riding styles.
When choosing the right pedals for your mountain bike, consider your riding style, terrain, and personal preferences. If you’re unsure, consult with a professional or visit a local bike shop for guidance. By selecting the right pedals, you’ll be able to enjoy a more comfortable and efficient ride, and get the most out of your mountain bike.
Preparing Your Bike for Pedal Replacement
Before starting the pedal replacement process, it’s essential to prepare your mountain bike to ensure a smooth and successful installation. Proper preparation will help prevent any potential issues and ensure that the new pedals are installed correctly.
First, clean the area around the pedals to remove any dirt, grime, or debris that may be accumulated. Use a soft-bristled brush or a cloth to gently remove any dirt or debris from the crank arms, pedal axles, and surrounding areas. This will help prevent any contaminants from interfering with the installation process.
Next, inspect the crank arms to ensure they are secure and free from any damage. Check for any signs of wear or damage, such as cracks, rust, or corrosion. If you find any damage, consider replacing the crank arms before installing the new pedals.
Additionally, make sure the bike is in a stable and secure position, either on a workstand or against a wall. This will prevent the bike from moving or falling during the installation process, which can cause injury or damage to the bike.
Finally, gather all the necessary tools and materials, including the new pedals, pedal wrench, and any other required tools. Having everything ready and within reach will help streamline the installation process and reduce the risk of errors.
By following these simple steps, you’ll be able to prepare your mountain bike for pedal replacement and ensure a successful installation. Remember to always refer to your bike’s manual or manufacturer’s instructions for specific guidance on preparing your bike for pedal replacement. With the right preparation, you’ll be able to enjoy a smooth and efficient ride with your new pedals.

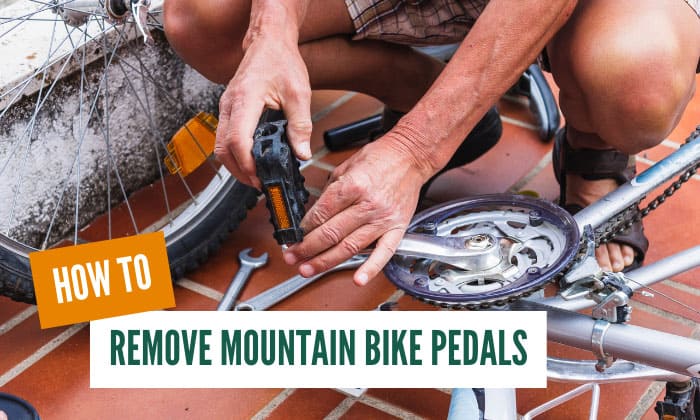
Removing the Old Pedals
Removing the old pedals from your mountain bike is a crucial step in the pedal replacement process. It’s essential to do it correctly to avoid damaging the bike or the new pedals. Here’s a step-by-step guide on how to remove the old pedals:
Tools required:
- Pedal wrench (specific to your pedal type)
- Gloves (optional)
Safety precautions:
- Ensure the bike is in a stable and secure position, either on a workstand or against a wall.
- Wear gloves to protect your hands from sharp edges and rough surfaces.
Step 1: Identify the pedal type and orientation
Before removing the pedals, identify the type of pedal (platform, clipless, or hybrid) and its orientation on the crank arm. This will help you determine the correct removal procedure.
Step 2: Loosen the pedals
Use a pedal wrench to loosen the pedals by turning them counterclockwise. Apply gentle pressure to avoid stripping the threads.
Step 3: Remove the pedals
Once the pedals are loose, remove them from the crank arm. For clipless pedals, you may need to twist and pull the pedal to release it from the cleat.
Step 4: Inspect the crank arm and pedal axle
Inspect the crank arm and pedal axle for any dirt, grime, or debris. Clean the area with a soft-bristled brush or cloth to ensure a smooth installation of the new pedals.
By following these steps, you’ll be able to safely and efficiently remove the old pedals from your mountain bike. Remember to refer to your bike’s manual or manufacturer’s instructions for specific guidance on removing pedals from your particular bike model. Now that the old pedals are removed, you’re ready to install the new ones. Learn how to replace pedals on mountain bike with our next step.
Installing the New Pedals
Now that the old pedals are removed, it’s time to install the new ones. This step requires attention to detail and patience to ensure a secure and proper fit. Follow these steps to install the new pedals on your mountain bike:
Tools required:
- Pedal wrench (specific to your pedal type)
- Torque wrench (optional)
Step 1: Inspect the new pedals
Before installation, inspect the new pedals for any damage or defects. Check the threads, axle, and body for any signs of wear or damage.
Step 2: Apply grease or lubricant
Apply a small amount of grease or lubricant to the threads of the pedal axle. This will help reduce friction and ensure a smooth installation.
Step 3: Align the pedals
Align the new pedals with the crank arm, ensuring they are properly seated and centered. For clipless pedals, make sure the cleat is aligned with the pedal body.
Step 4: Tighten the pedals
Use a pedal wrench to tighten the pedals in a star pattern (tightening one side a little, then moving to the next side, and so on). Apply gentle pressure to avoid stripping the threads.
Step 5: Check the torque
If your pedal manufacturer recommends a specific torque value, use a torque wrench to ensure the pedals are tightened to the correct specification.
Step 6: Final check
Perform a final check to ensure the pedals are securely attached and functioning properly. Check for any signs of looseness or misalignment.
By following these steps, you’ll be able to successfully install the new pedals on your mountain bike. Remember to refer to your bike’s manual or manufacturer’s instructions for specific guidance on installing pedals on your particular bike model. With the new pedals installed, you’re ready to hit the trails and experience the benefits of improved performance, increased comfort, and enhanced safety. Learn more about how to replace pedals on mountain bike and get the most out of your ride.
Tips and Tricks for a Smooth Pedal Replacement
Replacing pedals on a mountain bike can be a straightforward process, but it’s essential to follow some expert tips and tricks to ensure a smooth and successful replacement. Here are some valuable insights to help you avoid common mistakes and get the most out of your new pedals:
Avoid Over-Tightening
One of the most common mistakes when replacing pedals is over-tightening the screws. This can lead to stripped threads, damaged pedals, or even broken crank arms. To avoid this, use a torque wrench to ensure the correct torque specification, and tighten the screws in a star pattern.
Adjust for Optimal Performance
Once the new pedals are installed, take the time to adjust them for optimal performance. For clipless pedals, adjust the cleat position and tension to ensure a comfortable and secure fit. For platform pedals, adjust the pedal body to fit your foot shape and riding style.
Maintain Your Pedals
To ensure your new pedals continue to perform well over time, regular maintenance is essential. Clean the pedals regularly, lubricate the pivot points, and inspect for any signs of wear or damage.
Consider Upgrading Your Crank Arms
If you’re replacing your pedals, it may be a good opportunity to upgrade your crank arms as well. New crank arms can provide improved stiffness, reduced weight, and enhanced performance.
Take Your Time
Replacing pedals can be a time-consuming process, especially if you’re new to bike maintenance. Take your time, follow the instructions carefully, and don’t rush the process. A smooth pedal replacement requires patience and attention to detail.
By following these expert tips and tricks, you’ll be able to replace your pedals with confidence and enjoy a smoother, more comfortable ride. Remember, how to replace pedals on mountain bike is a skill that requires practice and patience, but with the right guidance, you can achieve professional results.

Common Issues and Troubleshooting
When replacing pedals on a mountain bike, several common issues can arise. Being aware of these potential problems and knowing how to troubleshoot them can save time and frustration. Here are some common issues and solutions to help you overcome them:
Stripped Threads
Stripped threads are a common issue when removing old pedals or installing new ones. To avoid this, use a pedal wrench with a secure grip, and apply gentle pressure when tightening or loosening the pedals. If the threads are already stripped, consider using a thread repair kit or consulting a professional mechanic.
Loose Pedals
Loose pedals can be a safety hazard and affect the overall performance of the bike. To avoid loose pedals, ensure the pedals are tightened to the correct torque specification, and check the pedals regularly for any signs of wear or damage.
Pedal Misalignment
Misaligned pedals can cause discomfort, affect pedaling efficiency, and lead to premature wear on the pedals and crank arms. To avoid pedal misalignment, ensure the pedals are properly aligned with the crank arms during installation, and check the pedals regularly for any signs of misalignment.
Other Common Issues
Other common issues that may arise during pedal replacement include damaged crank arms, worn-out pedal bearings, and incorrect pedal installation. To troubleshoot these issues, refer to the bike’s manual, consult online resources, or seek the advice of a professional mechanic.
By being aware of these common issues and knowing how to troubleshoot them, you can ensure a smooth and successful pedal replacement. Remember, how to replace pedals on mountain bike requires attention to detail, patience, and practice. With the right guidance and troubleshooting tips, you can overcome any obstacles and enjoy a comfortable and efficient ride.
Final Check and Test Ride
After replacing the pedals on your mountain bike, it’s essential to perform a final check to ensure they are securely attached and functioning properly. This step is crucial to guarantee a safe and enjoyable ride. Here’s a checklist to follow:
Verify the pedals are securely attached to the crank arms, and the screws are tightened to the correct torque specification.
Check the pedal alignment to ensure they are properly positioned and not misaligned.
Inspect the pedals for any signs of wear or damage, and clean them if necessary.
Test the pedals by applying gentle pressure to ensure they are functioning smoothly and efficiently.
Once you’ve completed the final check, it’s time to take your mountain bike for a test ride. This will help you identify any issues or discomforts and make any necessary adjustments. Here are some tips for a successful test ride:
Start with a short, gentle ride to get accustomed to the new pedals and ensure they are comfortable and performing as expected.
Pay attention to any unusual noises, vibrations, or sensations while pedaling.
Adjust the pedals as needed to achieve optimal performance and comfort.
Remember, how to replace pedals on mountain bike is a process that requires patience, attention to detail, and practice. By following these steps and tips, you’ll be able to enjoy a smooth and comfortable ride, knowing that your pedals are securely attached and functioning properly.