
The Benefits of Proper Bar Tape Installation
When it comes to cycling, a well-wrapped handlebar can make all the difference in the world. Properly wrapping bar tape is essential to ensure a comfortable and efficient ride. By learning how to wrap bar tape effectively, cyclists can enjoy improved grip, comfort, and control while riding. A well-wrapped handlebar can reduce fatigue, prevent blisters, and promote a more confident ride. Furthermore, a well-maintained handlebar can also improve the bike’s aesthetic appeal, making it look more professional and well-cared for. Whether you’re a seasoned cyclist or just starting out, understanding the importance of proper bar tape installation is crucial to getting the most out of your bike.

Click Image to Find eBike Products
Choosing the Right Bar Tape for Your Bike
When it comes to wrapping bar tape, selecting the right material is crucial for a comfortable and efficient ride. There are various types of bar tape materials available, each with its unique characteristics and benefits. Cork bar tape, for instance, is a popular choice among cyclists due to its durability and grip. Foam bar tape, on the other hand, provides a softer and more cushioned feel, making it ideal for riders who prefer a more comfortable ride. Gel bar tape, with its shock-absorbing properties, is perfect for riders who tackle rough terrain. Popular brands like Lizard Skins, Fizik, and Specialized offer a range of bar tape options to suit different riding styles and preferences. By understanding the characteristics of each material, cyclists can make an informed decision when choosing the right bar tape for their bike, ultimately enhancing their overall cycling experience.
Preparing Your Handlebars for Wrapping
Before diving into the process of how to wrap bar tape, it’s essential to prepare the handlebars to ensure a smooth and successful installation. The first step is to clean the handlebars thoroughly, removing any dirt, grime, or old adhesive residue. This can be done using a mild detergent and warm water. Next, remove any old bar tape, taking care not to damage the handlebars or brake levers. Inspect the handlebars for any damage or debris, such as rough edges or burrs, and address these issues before proceeding. Finally, inspect the brake levers and shifters to ensure they are securely attached and functioning properly. By taking the time to properly prepare the handlebars, cyclists can ensure a strong bond between the bar tape and the handlebars, resulting in a more comfortable and secure ride.

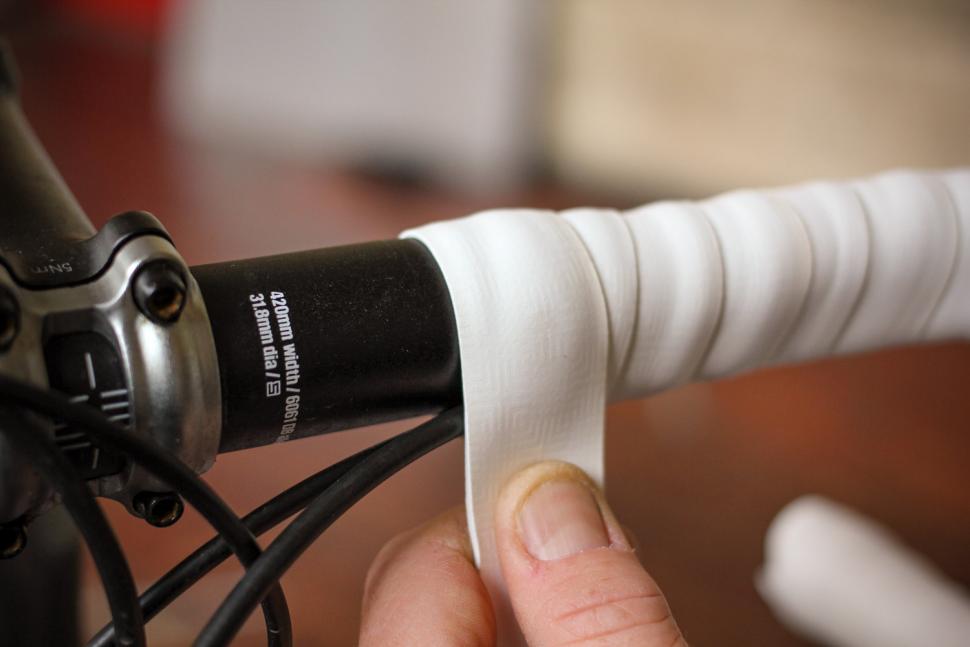
A Step-by-Step Guide to Wrapping Bar Tape
Now that the handlebars are prepared, it’s time to learn how to wrap bar tape like a pro. Follow these steps to achieve a professional-looking finish:
Step 1: Measure the Handlebars – Measure the length of the handlebars to determine how much bar tape is needed. A general rule of thumb is to use 2-3 inches of tape per inch of handlebar.
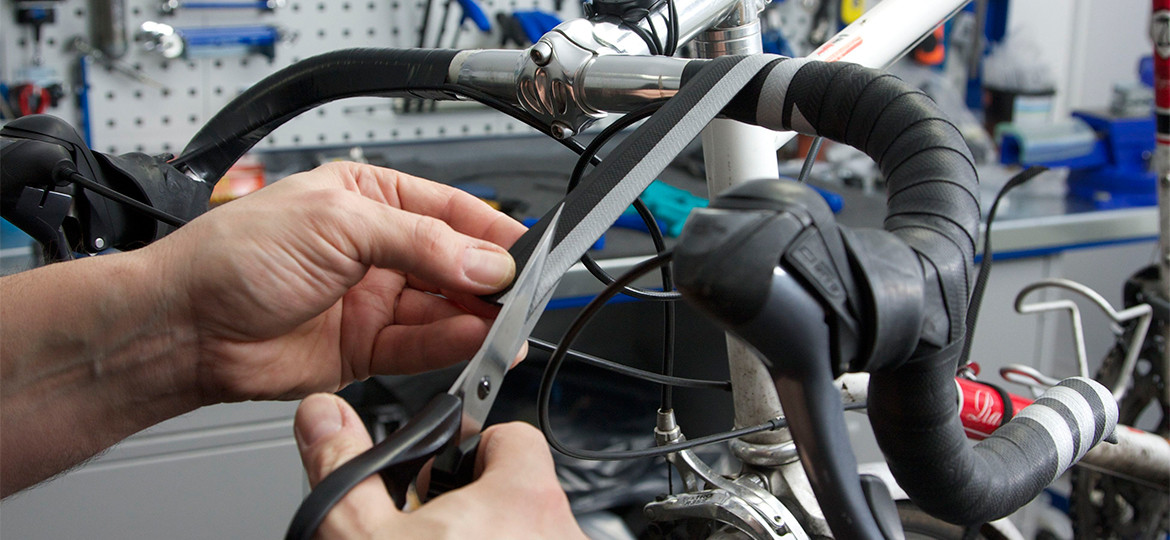
Step 2: Cut the Bar Tape – Cut the bar tape to the desired length, leaving a little extra at the ends for trimming.
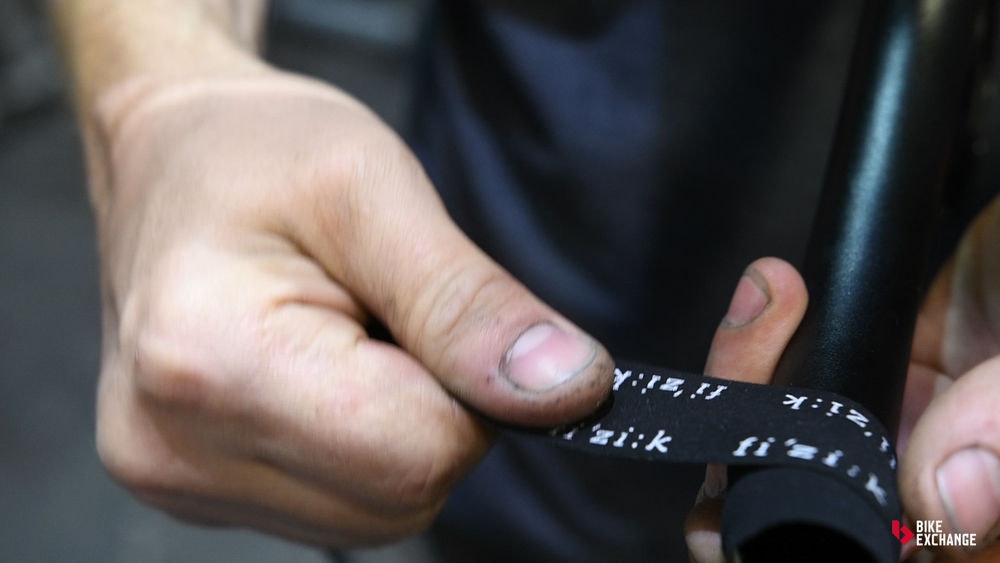
Step 3: Apply the Bar Tape – Begin applying the bar tape at the center of the handlebars, working your way outward in a spiral motion. Maintain even tension by gently stretching the tape as you apply it. Avoid wrinkles by smoothing out the tape with your fingers as you go.
Step 4: Secure the Ends – Use electrical tape to secure the ends of the bar tape, ensuring a clean and professional finish.
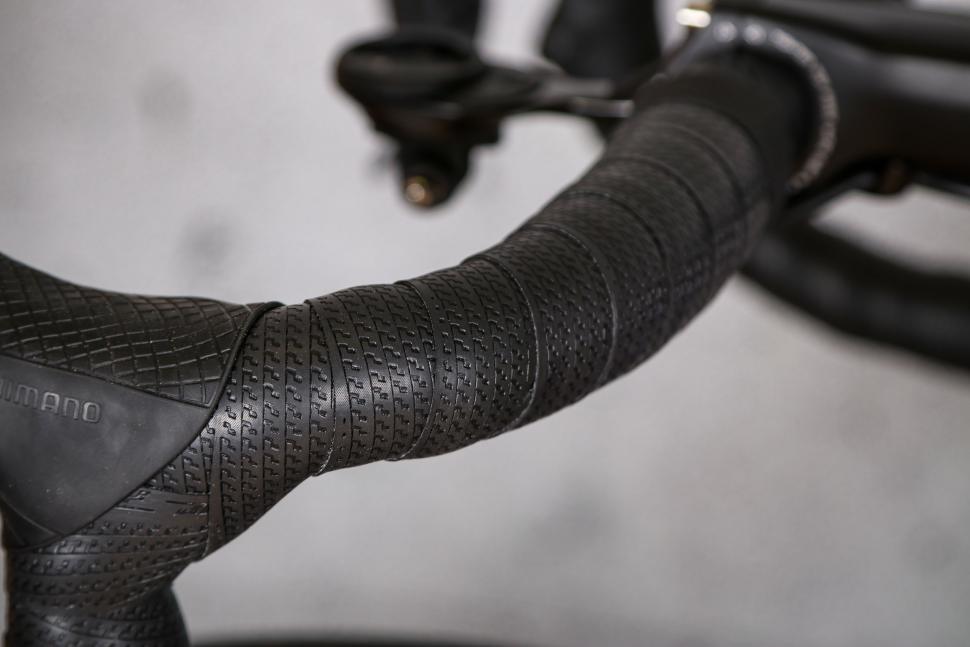
By following these steps and tips, cyclists can achieve a professional-looking finish that enhances the overall cycling experience. Remember to take your time and work methodically to avoid common mistakes, such as uneven tension and wrinkles. With practice, anyone can learn how to wrap bar tape like a pro and enjoy a more comfortable and controlled ride.
Tips and Tricks for a Professional-Looking Finish
Once the bar tape is applied, there are a few additional steps to take to achieve a professional-looking finish. One of the most important is to secure the ends of the tape using electrical tape. This not only keeps the tape in place but also provides a clean and finished look. Another tip is to apply a finishing strip to the ends of the tape, which helps to conceal any rough edges and adds a touch of elegance to the handlebars.
For an added touch of customization, cyclists can also experiment with different tape colors and patterns. Many popular brands, such as Lizard Skins and Fizik, offer a range of colors and designs to choose from. Additionally, cyclists can try wrapping the tape in different directions or patterns to create a unique and personalized look.
Finally, to ensure that the bar tape lasts as long as possible, it’s essential to regularly clean and maintain it. This can be done using a mild soap and water, and then drying the tape thoroughly to prevent water spots. By following these tips and tricks, cyclists can achieve a professional-looking finish that enhances the overall cycling experience and makes their bike stand out from the crowd.
Common Mistakes to Avoid When Wrapping Bar Tape
While wrapping bar tape may seem like a straightforward process, there are several common mistakes that can lead to a subpar finish. One of the most common mistakes is uneven tension, which can cause the tape to bunch up or sag in certain areas. To avoid this, it’s essential to maintain even tension while applying the tape, using a consistent pulling force to ensure a smooth, even application.
Another common mistake is wrinkles, which can be caused by applying the tape too quickly or with too much force. To avoid wrinkles, cyclists should apply the tape slowly and smoothly, using their fingers to smooth out any wrinkles as they go. Additionally, using a high-quality bar tape that is designed to minimize wrinkles can also help to achieve a smooth finish.
Incorrect tape alignment is another mistake to avoid. This can cause the tape to twist or turn on the handlebars, leading to an uneven and unprofessional finish. To avoid this, cyclists should ensure that the tape is aligned properly with the handlebars, using a straight edge or other guide to help maintain a straight line.
By being aware of these common mistakes and taking steps to avoid them, cyclists can ensure a professional-looking finish that enhances the overall cycling experience. Remember, how to wrap bar tape properly is a skill that takes practice, so don’t be discouraged if it doesn’t turn out perfectly the first time. With patience and practice, anyone can master the art of bar tape wrapping and enjoy a more comfortable and controlled ride.

Maintenance and Replacement of Bar Tape
Proper maintenance and replacement of bar tape are crucial to ensuring a comfortable and controlled ride. Over time, bar tape can become worn and damaged, leading to a loss of grip and comfort. To extend the life of bar tape, it’s essential to regularly inspect and clean it. This can be done using a mild soap and water, and then drying the tape thoroughly to prevent water spots.
In addition to regular cleaning, cyclists should also inspect their bar tape for signs of wear and damage. This includes checking for cracks, tears, and excessive wear on the tape. If the tape is damaged, it’s essential to replace it as soon as possible to avoid compromising the safety and comfort of the ride.
When replacing bar tape, it’s essential to choose a high-quality tape that is designed to meet the specific needs of the cyclist. This may include tapes with extra grip, cushioning, or durability. By choosing the right tape and following proper installation and maintenance techniques, cyclists can ensure a comfortable and controlled ride.
By following these tips and techniques, cyclists can learn how to wrap bar tape like a pro and enjoy a more comfortable and controlled ride. Remember, proper bar tape installation and maintenance are key to getting the most out of your bike. With a little practice and patience, anyone can master the art of bar tape wrapping and take their cycling experience to the next level.

Conclusion: A Well-Wrapped Handlebar for a Better Ride
In conclusion, properly wrapping bar tape is a crucial aspect of maintaining a comfortable and controlled ride. By following the steps and tips outlined in this article, cyclists can learn how to wrap bar tape like a pro and enhance their overall cycling experience. Remember, a well-wrapped handlebar is not only aesthetically pleasing, but it also provides improved grip, comfort, and control while riding.
By mastering the art of bar tape wrapping, cyclists can take their riding to the next level. Whether you’re a seasoned pro or a beginner, learning how to wrap bar tape is a valuable skill that can make a significant difference in your ride. So why not give it a try? With a little practice and patience, you can achieve a professional-looking finish and enjoy a more comfortable and controlled ride.
So, how to wrap bar tape? It’s easier than you think. By following the steps outlined in this article, you can learn how to wrap bar tape like a pro and take your riding to the next level. Don’t settle for a subpar ride – take the time to learn how to wrap bar tape and experience the difference for yourself.
