Why Pedal Removal is Crucial for Bike Maintenance
Regular pedal removal is a vital aspect of bike maintenance that can significantly impact the overall performance and longevity of a bicycle. By removing the pedals, cyclists can access the pedal threads, crankset, and bearings, allowing for essential cleaning, lubrication, and inspection. This process helps to prevent corrosion, reduce friction, and ensure smooth pedaling. Furthermore, regular pedal removal enables cyclists to identify and address any potential issues before they become major problems, such as worn-out bearings or damaged threads. In particular, left hand pedal removal requires special attention to avoid damaging the threads or crank arm. By incorporating pedal removal into their maintenance routine, cyclists can enjoy a safer, more efficient, and more enjoyable ride.

Click Image to Find eBike Products

Understanding the Left Hand Pedal: A Closer Look
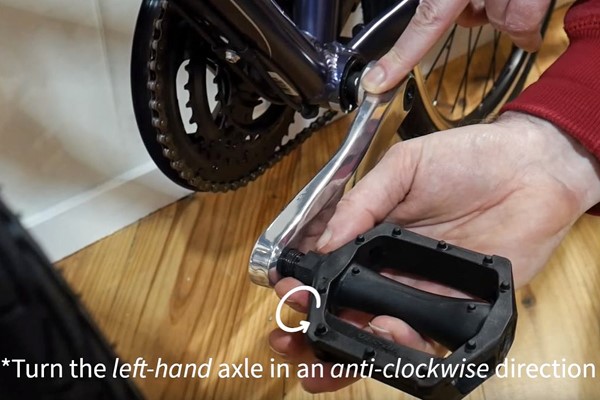
When it comes to pedal removal, it’s essential to understand the differences between left-hand and right-hand pedals. One of the primary distinctions lies in the thread direction. Left-hand pedals have a reverse thread, meaning they are installed and removed in a counterclockwise direction, whereas right-hand pedals have a standard thread and are installed and removed in a clockwise direction. This fundamental difference is crucial to avoid damaging the threads or crank arm during left hand pedal removal. Additionally, the installation procedures for left-hand and right-hand pedals vary, with left-hand pedals typically requiring a more delicate touch to avoid stripping the threads. By recognizing and respecting these differences, cyclists can ensure a safe and successful pedal removal process.
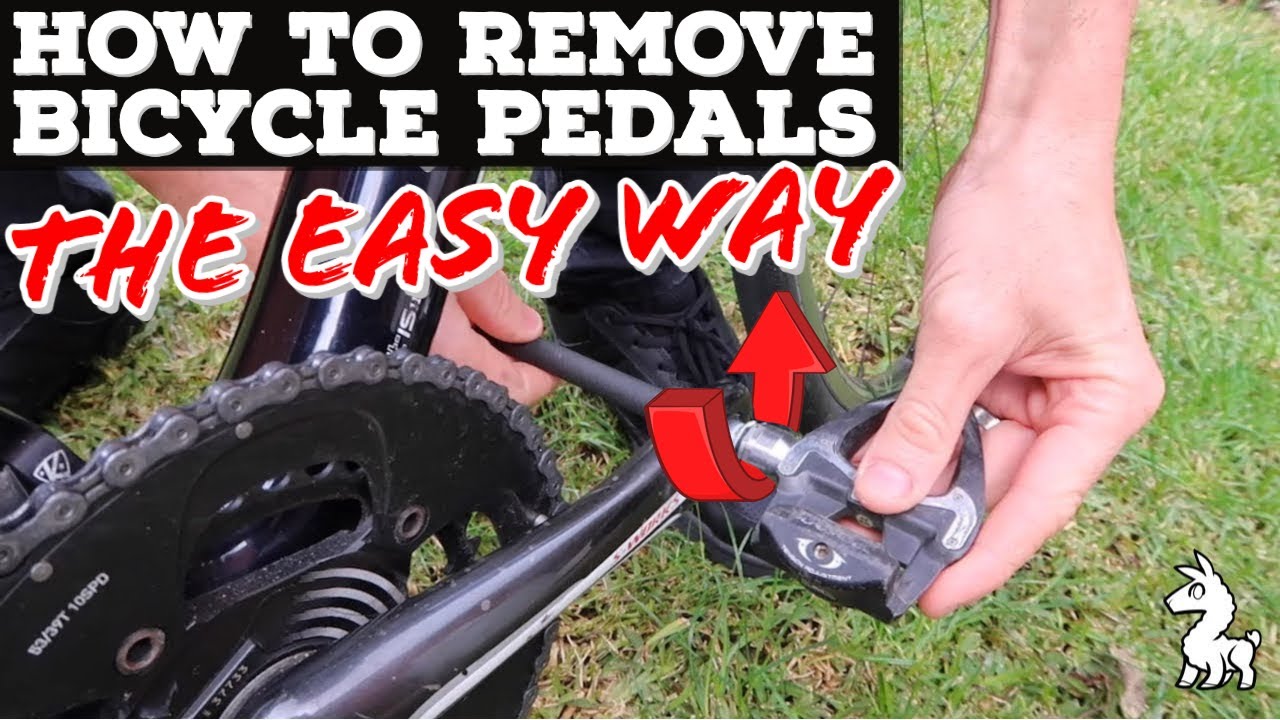
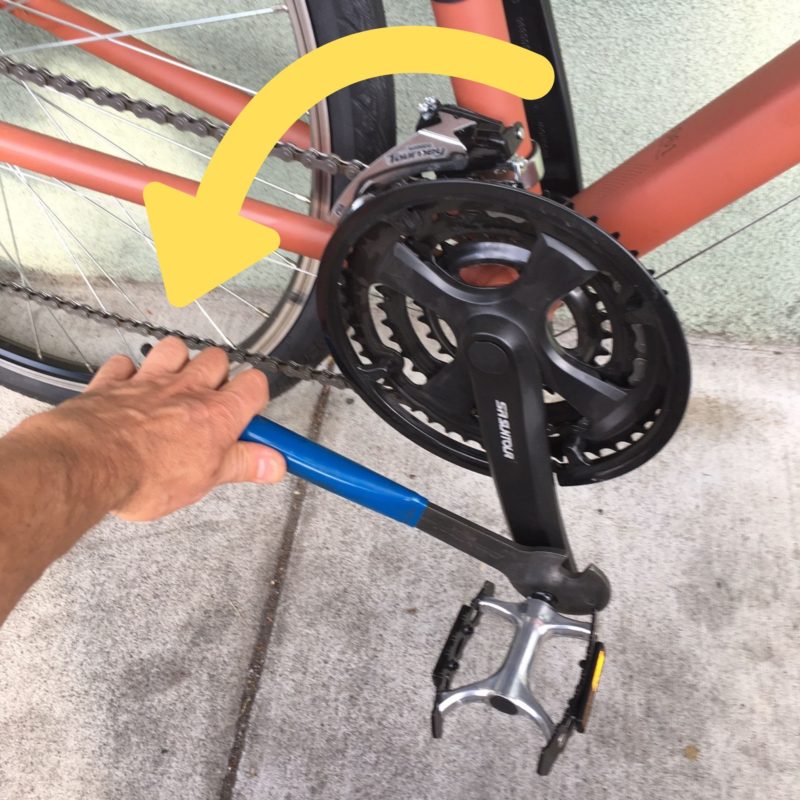
How to Remove a Left Hand Pedal with Ease
Removing a left-hand pedal can seem like a daunting task, but with the right tools and techniques, it can be a straightforward process. To begin, gather the necessary tools, including a pedal wrench and a torque wrench. Next, position the bike in a stable and secure location, ensuring the crank arm is accessible. Hold the pedal wrench in a comfortable position, with the wrench seated firmly on the pedal axle. Apply gentle, consistent pressure in a counterclockwise direction to loosen the pedal. Once loose, remove the pedal from the crank arm, taking care not to touch the threads or surrounding components. For added safety, consider using a pedal removal tool, which can help prevent damage to the crank arm and surrounding components. By following these steps and taking necessary precautions, cyclists can successfully complete left hand pedal removal and ensure a smooth, efficient ride.

Common Challenges and Solutions
During left hand pedal removal, cyclists may encounter several common challenges that can make the process more difficult. One of the most common issues is a stuck pedal, which can be caused by corrosion, dirt, or worn-out threads. To overcome this challenge, apply penetrating oil to the threads and let it sit for a few hours before attempting to remove the pedal. Another common issue is damaged threads, which can be caused by over-tightening or using the wrong tools. To prevent damaged threads, use a pedal wrench specifically designed for left-hand pedals and avoid applying excessive force. Stripped crank arms are also a common problem, which can be caused by using the wrong tools or applying too much pressure. To prevent stripped crank arms, use a torque wrench to ensure the correct amount of force is applied. By being aware of these common challenges and taking the necessary precautions, cyclists can successfully complete left hand pedal removal and avoid costly repairs.
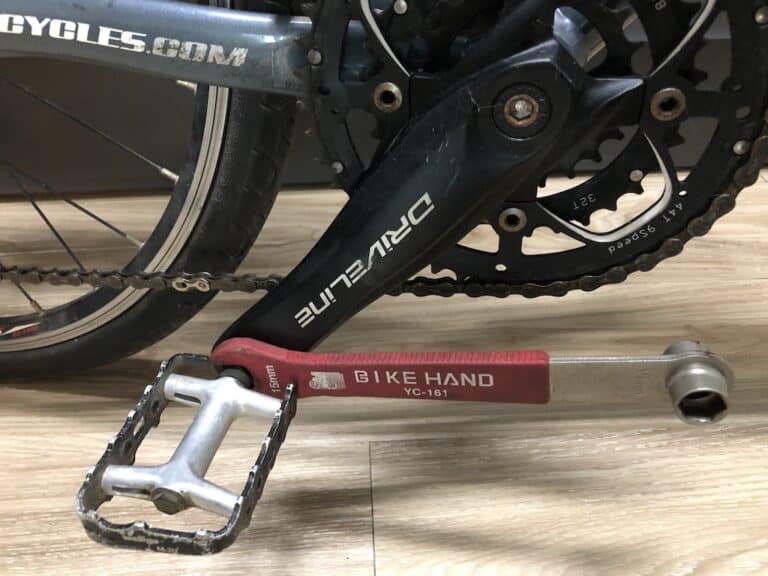
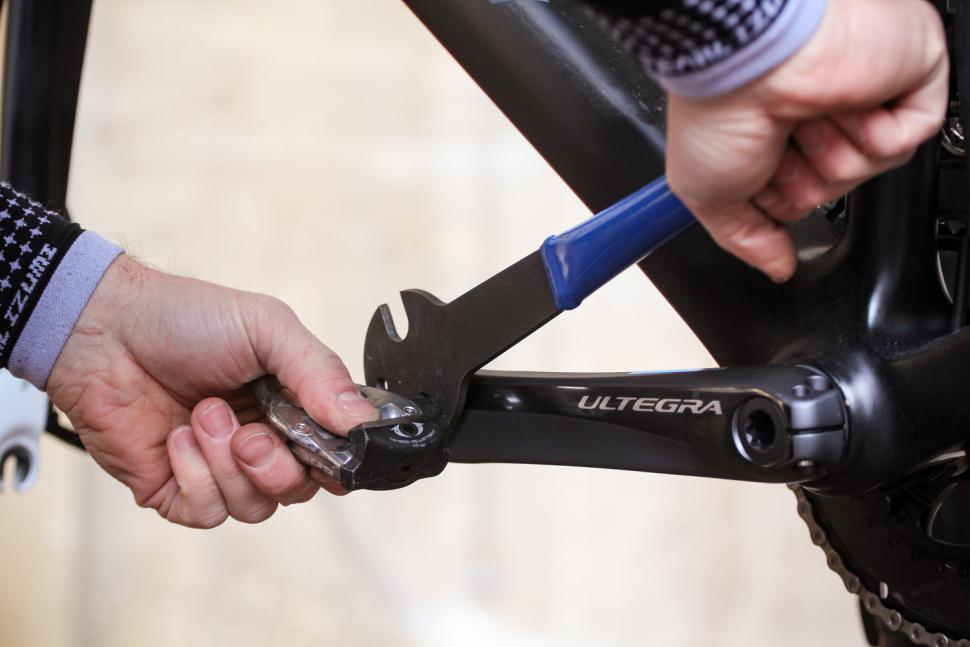
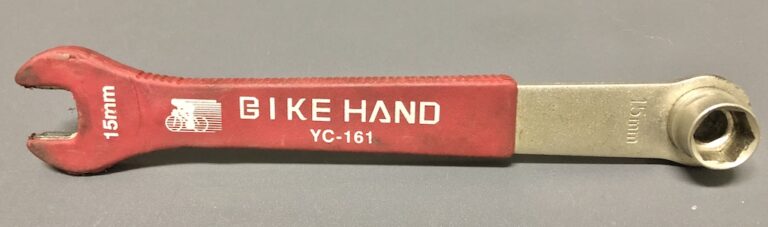
Essential Tools for Pedal Removal
When it comes to left hand pedal removal, having the right tools is crucial for a successful and safe process. A pedal wrench is the most essential tool, specifically designed to fit the pedal axle and provide the necessary leverage to loosen the pedal. There are different types of pedal wrenches available, including those with a long handle for extra leverage and those with a built-in torque wrench for precise control. An Allen wrench is also necessary for removing the pedal axle and crank arm bolts. Additionally, a torque wrench is recommended to ensure the correct amount of force is applied during left hand pedal removal, preventing damage to the threads or surrounding components. Other useful tools include penetrating oil, which can help loosen stuck pedals, and a clean cloth, which can be used to wipe away dirt and debris. By having the right tools, cyclists can ensure a smooth and efficient left hand pedal removal process.
Precautions and Safety Measures
When performing left hand pedal removal, it is crucial to take necessary precautions to ensure a safe and successful process. One of the most important safety measures is proper hand positioning, which can help prevent accidents and injuries. Cyclists should ensure their hands are positioned away from the pedal axle and crank arm to avoid getting caught or pinched during the removal process. Another essential precaution is avoiding over-tightening, which can damage the threads or surrounding components. By using a torque wrench and following the recommended torque specifications, cyclists can ensure the correct amount of force is applied during left hand pedal removal. Additionally, it is important to prevent damage to surrounding components, such as the crank arm and chainrings, by using protective covers or tape to shield them from scratches or marks. By taking these precautions and safety measures, cyclists can minimize the risk of accidents and ensure a successful left hand pedal removal process.
Reinstalling the Left Hand Pedal: Tips and Tricks
After successfully completing the left hand pedal removal process, it’s essential to reinstall the pedal correctly to ensure proper function and prevent future issues. To begin, apply a small amount of grease to the pedal threads to facilitate smooth installation. Next, align the pedal with the crank arm, ensuring it’s properly seated and centered. Use a torque wrench to tighten the pedal to the recommended specification, typically between 30-40 Nm. Avoid over-tightening, as this can damage the threads or surrounding components. Once the pedal is securely installed, perform a post-installation check to ensure the pedal is properly aligned and functioning smoothly. This includes checking for any play or wobble in the pedal and verifying that it’s securely attached to the crank arm. By following these tips and tricks, cyclists can ensure a successful left hand pedal removal and reinstallation process, getting them back on the road or trail in no time.
Maintenance and Inspection after Pedal Removal
After completing the left hand pedal removal process, it’s crucial to inspect and maintain the pedals and crankset to ensure optimal performance and prevent future issues. Begin by cleaning the pedals and crankset with a soft brush and mild detergent to remove any dirt, grime, or debris that may have accumulated. Next, apply a lubricant to the pedal threads and crank arm to reduce friction and prevent corrosion. Inspect the pedals and crankset for any signs of wear and tear, such as worn-out bearings or damaged threads. Check the pedal axle for any play or wobble, and verify that the crank arm is securely attached to the bike frame. By performing these maintenance and inspection tasks, cyclists can ensure their pedals and crankset are in good working condition, providing a smooth and efficient ride. Regular maintenance and inspection can also help prevent common issues encountered during left hand pedal removal, such as stuck pedals or damaged threads. By incorporating these tasks into their regular bike maintenance routine, cyclists can enjoy a hassle-free riding experience and extend the lifespan of their pedals and crankset.