
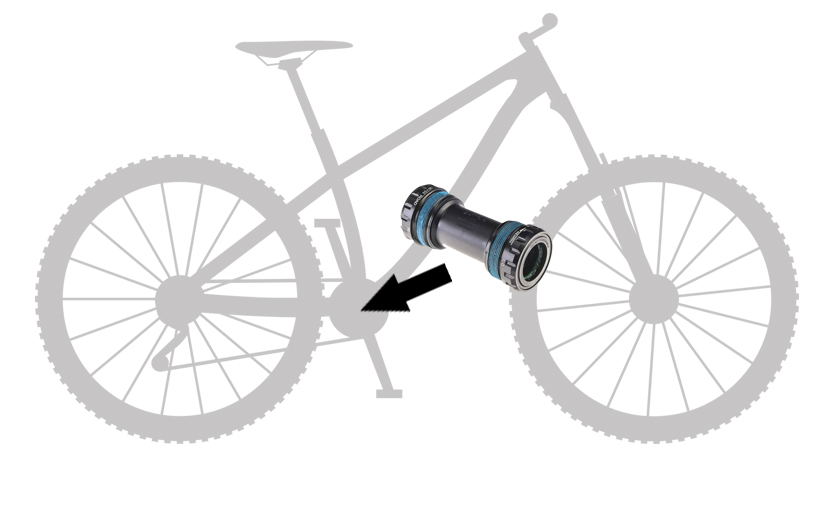
What is a Bottom Bracket and Why is it Crucial for Your Ride
A mountain bike’s performance is heavily reliant on its bottom bracket, a critical component that plays a vital role in the overall efficiency of the bike. Located at the junction of the crankset and the frame, the mountain bike bottom bracket serves as the rotational axis for the pedals, allowing riders to transfer power from their legs to the wheels. A well-maintained mountain bike bottom bracket is essential for efficient pedaling, reduced friction, and an enhanced riding experience. When properly installed and maintained, a bottom bracket can improve the overall responsiveness of the bike, making it easier to tackle challenging terrain and enjoy a smoother ride. In fact, a high-quality mountain bike bottom bracket can increase pedaling efficiency by up to 10%, resulting in a more enjoyable and rewarding ride.

Click Image to Find eBike Products
How to Choose the Perfect Bottom Bracket for Your Mountain Bike
Selecting the right mountain bike bottom bracket can be a daunting task, especially with the numerous options available in the market. However, by considering a few key factors, riders can find the perfect bottom bracket that meets their specific needs and riding style. The type of mountain bike, riding terrain, and personal preference are all crucial factors to consider when choosing a bottom bracket. For instance, cross-country riders may prefer a lightweight, high-efficiency bottom bracket, while downhill riders may require a more durable and robust option.
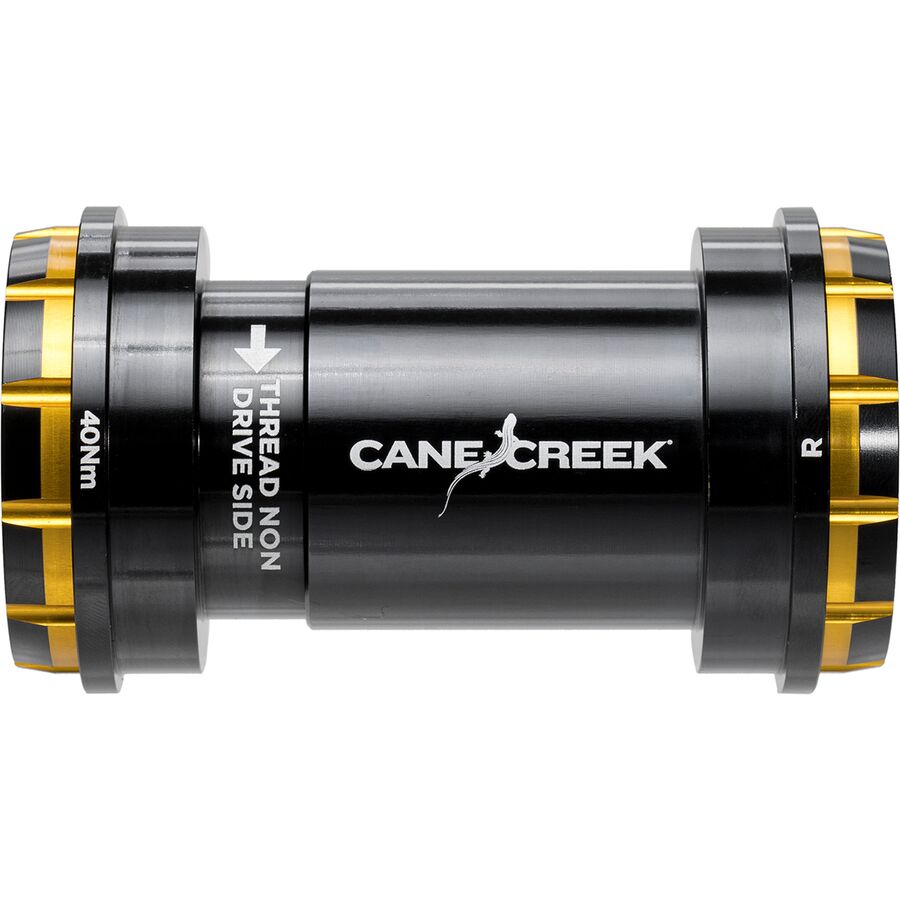
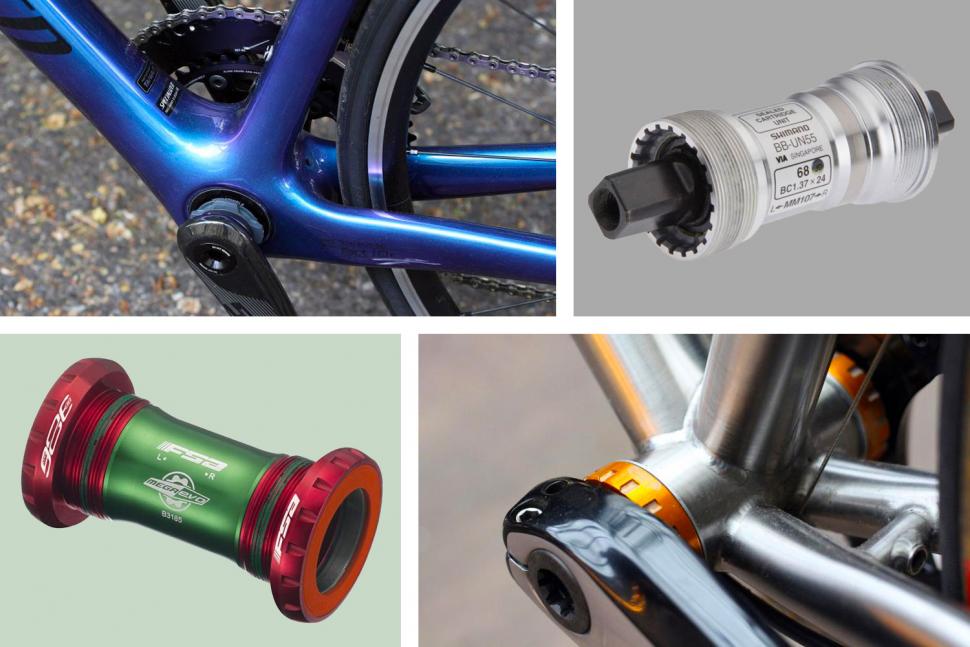
There are three main types of mountain bike bottom brackets: threaded, press-fit, and BB30. Threaded bottom brackets are the most traditional type, featuring a threaded shell that accepts a threaded bottom bracket. Press-fit bottom brackets, on the other hand, use a press-fit installation method and are often found on high-end mountain bikes. BB30 bottom brackets feature a larger diameter axle and are designed for high-performance riding. Each type of bottom bracket has its unique advantages and disadvantages, and riders should carefully consider their options before making a purchase.
In addition to the type of bottom bracket, riders should also consider the material, bearing quality, and seal type. High-quality bearings and seals can significantly improve the performance and durability of the bottom bracket. Furthermore, riders should also consider the compatibility of the bottom bracket with their existing crankset and frame. By taking the time to research and compare different mountain bike bottom brackets, riders can find the perfect option that meets their specific needs and enhances their overall riding experience.

Top-Rated Mountain Bike Bottom Brackets: A Review of Shimano and SRAM
When it comes to choosing a high-quality mountain bike bottom bracket, riders often turn to renowned brands like Shimano and SRAM. Both brands offer a range of bottom bracket models that cater to different riding styles, bike types, and terrains. In this review, we’ll compare some of the top-rated mountain bike bottom brackets from Shimano and SRAM, highlighting their features, benefits, and drawbacks.
Shimano’s Ultegra Bottom Bracket is a popular choice among cross-country and trail riders. This bottom bracket features a lightweight design, high-quality bearings, and a durable construction that can withstand the demands of rugged terrain. The Ultegra Bottom Bracket is compatible with Shimano’s Hollowtech II crankset and is available in both threaded and press-fit options.
SRAM’s GXP Bottom Bracket is another top-rated option, known for its high-efficiency design and robust construction. This bottom bracket features a unique Gutter Seal technology that helps to reduce friction and improve pedaling efficiency. The GXP Bottom Bracket is compatible with SRAM’s XX1 and X01 cranksets and is available in both threaded and press-fit options.
For riders who prioritize durability and reliability, Shimano’s XT Bottom Bracket is a great option. This bottom bracket features a robust design, high-quality bearings, and a durable construction that can withstand the demands of heavy use. The XT Bottom Bracket is compatible with Shimano’s XT crankset and is available in both threaded and press-fit options.
SRAM’s DUB Bottom Bracket is a newer addition to the market, featuring a unique design that combines the benefits of both threaded and press-fit bottom brackets. This bottom bracket is compatible with SRAM’s DUB crankset and is available in a range of options to suit different riding styles and bike types.
When choosing a mountain bike bottom bracket, riders should consider factors such as bike type, riding style, and terrain. By selecting a high-quality bottom bracket that meets their specific needs, riders can improve pedaling efficiency, reduce friction, and enhance their overall riding experience. Whether you’re a cross-country rider or a downhill enthusiast, there’s a Shimano or SRAM bottom bracket that’s right for you.
Common Issues with Mountain Bike Bottom Brackets and How to Troubleshoot Them
Even with proper maintenance, mountain bike bottom brackets can still experience issues that affect performance and ride quality. Creaking, grinding, and looseness are common problems that can occur, but with the right troubleshooting techniques, riders can diagnose and fix these issues quickly and efficiently.
Creaking is a common issue that can occur when the bottom bracket bearings wear out or become contaminated with dirt and debris. To troubleshoot creaking, riders should start by cleaning the bottom bracket and inspecting the bearings for signs of wear. If the bearings are damaged, they may need to be replaced. Additionally, riders should check the crankset and chainrings for any signs of wear or misalignment, as these can also cause creaking.
Grinding is another issue that can occur when the bottom bracket bearings become worn or damaged. To troubleshoot grinding, riders should start by checking the bottom bracket for any signs of wear or damage. If the bearings are damaged, they may need to be replaced. Riders should also check the crankset and chainrings for any signs of wear or misalignment, as these can also cause grinding.
Looseness is a common issue that can occur when the bottom bracket becomes worn or damaged. To troubleshoot looseness, riders should start by checking the bottom bracket for any signs of wear or damage. If the bearings are damaged, they may need to be replaced. Riders should also check the crankset and chainrings for any signs of wear or misalignment, as these can also cause looseness.
In addition to these common issues, riders may also experience other problems with their mountain bike bottom bracket, such as corrosion or water damage. To troubleshoot these issues, riders should start by inspecting the bottom bracket for any signs of corrosion or water damage. If the bottom bracket is damaged, it may need to be replaced. Riders should also check the crankset and chainrings for any signs of wear or misalignment, as these can also cause problems.
By following these troubleshooting techniques, riders can quickly and efficiently diagnose and fix common issues with their mountain bike bottom bracket. Regular maintenance and upkeep can also help to prevent these issues from occurring in the first place, ensuring a smooth and efficient ride.
The Importance of Regular Maintenance and Upkeep for Your Bottom Bracket
Regular maintenance and upkeep are crucial for ensuring the optimal performance and longevity of a mountain bike‘s bottom bracket. A well-maintained bottom bracket can improve pedaling efficiency, reduce friction, and enhance the overall riding experience. Neglecting maintenance, on the other hand, can lead to premature wear, corrosion, and damage to the bottom bracket and other components.
To keep the mountain bike bottom bracket in top condition, riders should perform regular cleaning and lubrication. Cleaning the bottom bracket involves removing dirt, grime, and other contaminants that can accumulate and cause friction. A soft-bristled brush and mild detergent can be used to clean the bottom bracket, followed by a thorough rinse and dry. Lubrication is also essential, as it helps to reduce friction and wear on the bearings. A high-quality lubricant specifically designed for mountain bike bottom brackets should be applied according to the manufacturer’s instructions.
In addition to cleaning and lubrication, riders should also perform regular inspections of the bottom bracket. This involves checking for signs of wear, corrosion, or damage to the bearings, cups, or other components. Riders should also check the crankset and chainrings for any signs of wear or misalignment, as these can also affect the performance of the bottom bracket.
Regular maintenance and upkeep can also help to prevent common issues with mountain bike bottom brackets, such as creaking, grinding, or looseness. By catching these issues early, riders can avoid more costly and time-consuming repairs down the line. Furthermore, a well-maintained bottom bracket can help to improve the overall performance and efficiency of the mountain bike, allowing riders to tackle challenging terrain with confidence and precision.
In conclusion, regular maintenance and upkeep are essential for ensuring the optimal performance and longevity of a mountain bike’s bottom bracket. By following these simple tips and guidelines, riders can keep their bottom bracket in top condition, improve their riding experience, and avoid costly repairs down the line.
Upgrading Your Bottom Bracket: Is it Worth the Investment?
Upgrading a mountain bike’s bottom bracket can be a significant investment, but it can also bring substantial benefits to a rider’s performance and overall riding experience. Whether you’re a seasoned pro or a casual enthusiast, understanding the advantages and disadvantages of upgrading your bottom bracket can help you make an informed decision.
One of the primary reasons to upgrade a mountain bike bottom bracket is to improve pedaling efficiency and reduce friction. A high-quality bottom bracket can provide a smoother, more responsive ride, allowing riders to tackle challenging terrain with greater ease and confidence. Additionally, an upgraded bottom bracket can also provide increased durability and resistance to wear and tear, reducing the need for frequent maintenance and repairs.
However, upgrading a mountain bike bottom bracket is not without its drawbacks. One of the most significant considerations is cost, as high-quality bottom brackets can be expensive. Furthermore, upgrading a bottom bracket may also require additional components, such as a new crankset or chainrings, which can add to the overall cost. Additionally, upgrading a bottom bracket may also require specialized tools and expertise, which can be a barrier for some riders.
So, when is it worth upgrading a mountain bike bottom bracket? If you’re experiencing frequent issues with your current bottom bracket, such as creaking, grinding, or looseness, an upgrade may be necessary to restore optimal performance. Additionally, if you’re looking to improve your pedaling efficiency and overall riding experience, an upgraded bottom bracket can be a worthwhile investment. Finally, if you’re planning to upgrade other components, such as your crankset or chainrings, it may be worth considering an upgraded bottom bracket as part of a comprehensive upgrade.
In terms of choosing the right upgrade for your mountain bike, there are several factors to consider. First, consider the type of riding you’ll be doing most often, as well as the terrain and conditions you’ll be riding in. This can help you determine the level of durability and resistance to wear and tear you’ll need. Additionally, consider your budget and the overall cost of the upgrade, as well as any additional components you may need to purchase. Finally, research different brands and models, reading reviews and comparing features to find the best upgrade for your needs.
In conclusion, upgrading a mountain bike bottom bracket can be a significant investment, but it can also bring substantial benefits to a rider’s performance and overall riding experience. By understanding the advantages and disadvantages of upgrading, as well as the factors to consider when choosing the right upgrade, riders can make an informed decision and take their riding to the next level.

DIY Bottom Bracket Installation: A Step-by-Step Guide
Installing a new mountain bike bottom bracket can seem like a daunting task, but with the right tools and a bit of patience, it’s a job that can be done at home. In this guide, we’ll walk you through the process of installing a new bottom bracket on your mountain bike, from preparation to completion.
Step 1: Prepare Your Bike
Before you start, make sure your bike is clean and free of dirt and debris. Remove the pedals, crankset, and chainrings to access the bottom bracket. If you have a press-fit or BB30 bottom bracket, you may need to remove the frame inserts or cups as well.
Step 2: Remove the Old Bottom Bracket
Use a bottom bracket removal tool to remove the old bracket from the frame. For threaded bottom brackets, this will involve unscrewing the bracket from the frame. For press-fit or BB30 bottom brackets, you’ll need to use a specialized tool to remove the bracket from the frame.
Step 3: Inspect and Clean the Frame
Inspect the frame for any dirt, debris, or old adhesive from the previous bracket. Clean the area thoroughly with a soft brush and some solvent to ensure a smooth installation.
Step 4: Install the New Bottom Bracket
Apply a thin layer of grease or adhesive to the new bottom bracket and insert it into the frame. For threaded bottom brackets, screw the bracket into the frame, making sure not to overtighten. For press-fit or BB30 bottom brackets, use the specialized tool to press the bracket into place.
Step 5: Reinstall the Crankset and Chainrings
Reinstall the crankset and chainrings, making sure they’re properly aligned and secured. Tighten the bolts in a star pattern to ensure even pressure.
Step 6: Test the Bottom Bracket
Take your bike for a test ride to ensure the new bottom bracket is properly installed and functioning smoothly. Check for any signs of creaking, grinding, or looseness, and make any necessary adjustments.
By following these steps, you can successfully install a new mountain bike bottom bracket and get back to riding with confidence. Remember to always follow the manufacturer’s instructions and take your time to ensure a smooth and trouble-free installation.

Conclusion: Optimizing Your Mountain Bike’s Performance with the Right Bottom Bracket
In conclusion, a mountain bike’s bottom bracket is a critical component that plays a vital role in the overall performance of the bike. By choosing the right bottom bracket for your mountain bike, you can improve pedaling efficiency, reduce friction, and enhance the overall riding experience. Regular maintenance and upkeep are also essential to ensure optimal performance and extend the lifespan of the bottom bracket.
Whether you’re a seasoned rider or just starting out, investing in a high-quality mountain bike bottom bracket can make a significant difference in your ride. With the right knowledge and tools, you can troubleshoot common issues, upgrade your bottom bracket, and even install a new one yourself.
Remember, a well-maintained mountain bike bottom bracket is essential for a smooth, efficient, and enjoyable ride. By following the tips and guidelines outlined in this article, you can optimize your mountain bike’s performance and take your riding experience to the next level.
So, don’t neglect your mountain bike’s bottom bracket – give it the attention it deserves, and you’ll be rewarded with a better ride and a more enjoyable experience on the trails.
