
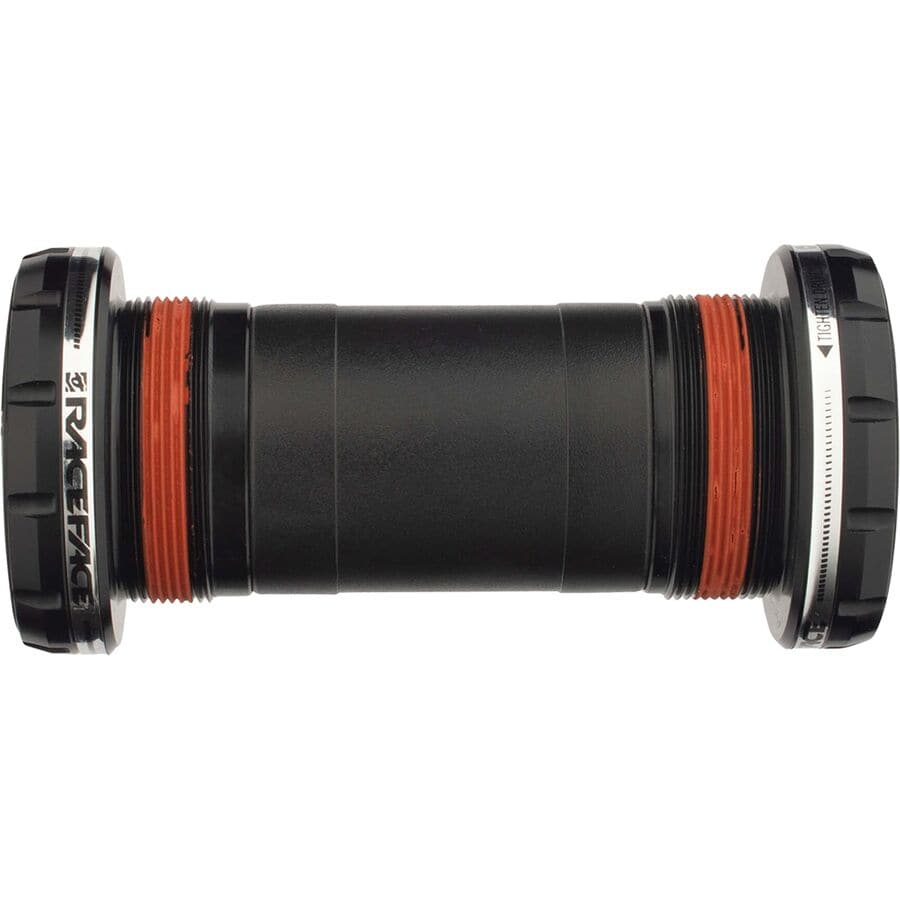
What is a Bottom Bracket and Why is it Crucial for Mountain Biking?
A mountain bike’s bottom bracket is a critical component that plays a vital role in the overall performance and efficiency of the bike. Located at the intersection of the crankset and the frame, the bottom bracket serves as the pivot point for the crank arms, allowing the rider to convert their pedaling motion into forward motion. A well-functioning bottom bracket is essential for smooth pedaling, efficient power transfer, and optimal bike handling.

Click Image to Find eBike Products
A poorly maintained or low-quality bottom bracket can lead to a range of issues, including creaking, grinding, and looseness. These problems can not only be frustrating but also compromise the safety and performance of the bike. In extreme cases, a faulty bottom bracket can even cause the crankset to seize or the frame to become damaged.
When it comes to mountain biking, the demands on the bottom bracket are particularly high. The constant exposure to dirt, dust, and moisture can take a toll on the bearings and other components, leading to premature wear and tear. Furthermore, the rugged terrain and rough trails can put additional stress on the bottom bracket, making it even more critical to choose a high-quality component that can withstand the rigors of off-road riding.
In addition to its functional importance, a mountain bike bottom bracket can also have a significant impact on the overall riding experience. A smooth and efficient bottom bracket can make pedaling feel effortless, allowing the rider to focus on the trail ahead and enjoy the ride. On the other hand, a poorly performing bottom bracket can make pedaling feel labored and unresponsive, detracting from the overall enjoyment of the ride.
Given the critical role that a mountain bike bottom bracket plays in the performance and efficiency of the bike, it’s essential to choose a high-quality component that meets the demands of off-road riding. By selecting a bottom bracket that is designed specifically for mountain biking, riders can enjoy a smoother, more efficient, and more enjoyable ride.
![]()
How to Choose the Best Bottom Bracket for Your Mountain Bike
Choosing the right bottom bracket for your mountain bike can be a daunting task, especially with the numerous options available in the market. However, by considering a few key factors, you can make an informed decision and find the perfect bottom bracket for your bike.
One of the most critical factors to consider is compatibility. Ensure that the bottom bracket you choose is compatible with your bike’s frame and crankset. Check the manufacturer’s specifications to confirm compatibility, and consult with a professional mechanic if you’re unsure.
Material is another essential factor to consider. Bottom brackets can be made from a variety of materials, including aluminum, steel, and ceramic. Each material has its pros and cons, and the right choice will depend on your riding style and preferences. For example, aluminum bottom brackets are lightweight and corrosion-resistant, while steel bottom brackets are durable and can withstand heavy use.
The type of bottom bracket is also crucial. There are several types of bottom brackets available, including threaded, press-fit, and BB30. Threaded bottom brackets are the most common type and are known for their ease of installation and maintenance. Press-fit bottom brackets, on the other hand, are designed for frames with a press-fit shell and offer improved bearing life and reduced maintenance. BB30 bottom brackets are designed for frames with a BB30 shell and offer improved stiffness and reduced weight.
When choosing a bottom bracket, it’s also essential to consider the bearing type and quality. Look for bottom brackets with high-quality bearings that are designed to withstand the rigors of mountain biking. Ceramic bearings, for example, are known for their durability and resistance to corrosion.
Finally, consider the price and brand reputation. While it’s tempting to opt for the cheapest option, a high-quality bottom bracket from a reputable brand can offer improved performance, durability, and reliability. Look for brands that specialize in mountain bike components and have a reputation for producing high-quality products.
By considering these factors, you can find the perfect bottom bracket for your mountain bike and enjoy improved performance, efficiency, and reliability. Remember to always consult with a professional mechanic if you’re unsure about any aspect of the installation or maintenance process.

Top-Rated Mountain Bike Bottom Brackets: A Review of Popular Options
When it comes to choosing a mountain bike bottom bracket, there are numerous options available in the market. In this section, we’ll review and compare some of the top-rated mountain bike bottom brackets from popular brands such as Shimano, SRAM, and Chris King.
Shimano’s BB-MT800 bottom bracket is a popular choice among mountain bikers. This bottom bracket features a threaded design and is compatible with Shimano’s Hollowtech II cranksets. It’s known for its smooth operation, durability, and ease of maintenance. The BB-MT800 is a great option for riders who want a reliable and high-performance bottom bracket.
SRAM’s GXP bottom bracket is another top-rated option. This bottom bracket features a press-fit design and is compatible with SRAM’s GXP cranksets. It’s known for its lightweight design, smooth operation, and improved bearing life. The GXP is a great option for riders who want a high-performance bottom bracket that’s easy to install and maintain.
Chris King’s ThreadFit 24 bottom bracket is a popular choice among mountain bikers who want a high-quality, American-made bottom bracket. This bottom bracket features a threaded design and is compatible with Chris King’s ThreadFit 24 cranksets. It’s known for its smooth operation, durability, and ease of maintenance. The ThreadFit 24 is a great option for riders who want a reliable and high-performance bottom bracket.
BB30 bottom brackets are also a popular choice among mountain bikers. These bottom brackets feature a press-fit design and are compatible with BB30 cranksets. They’re known for their improved stiffness, reduced weight, and improved bearing life. BB30 bottom brackets are a great option for riders who want a high-performance bottom bracket that’s easy to install and maintain.
When choosing a mountain bike bottom bracket, it’s essential to consider factors such as compatibility, material, and type. By selecting a high-quality bottom bracket from a reputable brand, riders can enjoy improved performance, efficiency, and reliability. Whether you’re a professional mountain biker or a casual rider, a good bottom bracket can make a significant difference in your riding experience.
Understanding Bottom Bracket Standards: A Guide to Threaded, Press-Fit, and More
When it comes to mountain bike bottom brackets, there are several standards to choose from, each with its own advantages and disadvantages. In this section, we’ll explore the different bottom bracket standards, including threaded, press-fit, BB30, and others.
Threaded bottom brackets are the most common type and are known for their ease of installation and maintenance. They feature a threaded shell that is integrated into the frame, and the bottom bracket is screwed into place using a threaded cup. Threaded bottom brackets are compatible with a wide range of cranksets and are a popular choice among mountain bikers.
Press-fit bottom brackets, on the other hand, feature a press-fit shell that is integrated into the frame. The bottom bracket is pressed into place using a specialized tool, and the shell is designed to provide a secure and precise fit. Press-fit bottom brackets are known for their improved bearing life and reduced maintenance, but can be more difficult to install and maintain than threaded bottom brackets.
BB30 bottom brackets are a type of press-fit bottom bracket that features a 30mm diameter shell. They are known for their improved stiffness and reduced weight, and are a popular choice among mountain bikers who want a high-performance bottom bracket. BB30 bottom brackets are compatible with a wide range of cranksets, but may require a specialized tool for installation and maintenance.
Other bottom bracket standards include PF30, BB386, and BBright, each with its own advantages and disadvantages. PF30 bottom brackets feature a press-fit shell with a 30mm diameter, and are known for their improved bearing life and reduced maintenance. BB386 bottom brackets feature a threaded shell with a 386mm diameter, and are known for their improved stiffness and reduced weight. BBright bottom brackets feature a press-fit shell with a 42mm diameter, and are known for their improved bearing life and reduced maintenance.
When choosing a bottom bracket standard, it’s essential to consider factors such as compatibility, material, and type. By selecting the right bottom bracket standard for your mountain bike, you can enjoy improved performance, efficiency, and reliability. Whether you’re a professional mountain biker or a casual rider, understanding the different bottom bracket standards can help you make an informed decision and get the most out of your bike.

How to Install and Maintain Your Mountain Bike’s Bottom Bracket
Installing and maintaining a mountain bike’s bottom bracket can be a straightforward process, but it requires attention to detail and the right tools. In this section, we’ll provide step-by-step instructions on how to install and maintain a mountain bike bottom bracket, including tips on how to avoid common mistakes and ensure smooth operation.
Before starting the installation process, make sure you have the following tools and materials:
- Bottom bracket tool
- Crankset tool
- Grease
- Threadlocker (optional)
Step 1: Remove the Crankset
Begin by removing the crankset from the bottom bracket. Use a crankset tool to loosen the bolts that hold the crankset in place. Once loose, carefully pull the crankset away from the bottom bracket.
Step 2: Remove the Old Bottom Bracket
If you’re replacing an old bottom bracket, use a bottom bracket tool to remove the old bearings and cups. Be careful not to damage the frame or the new bottom bracket.
Step 3: Install the New Bottom Bracket
Apply a small amount of grease to the new bottom bracket bearings and cups. Then, use the bottom bracket tool to install the new bearings and cups into the frame. Make sure they’re properly seated and aligned.
Step 4: Install the Crankset
Once the new bottom bracket is installed, use the crankset tool to install the crankset. Make sure it’s properly aligned and seated.
Step 5: Tighten the Bolts
Tighten the bolts that hold the crankset in place. Make sure they’re snug, but don’t overtighten.
Maintenance Tips:
Regularly check the bottom bracket for signs of wear and tear. Look for creaking, grinding, or looseness. If you notice any of these issues, address them promptly to avoid further damage.
Use a bottom bracket tool to check the bearings and cups for wear. If they’re worn out, replace them with new ones.
Apply grease to the bearings and cups regularly to keep them running smoothly.
By following these steps and tips, you can ensure that your mountain bike’s bottom bracket is properly installed and maintained, providing you with a smooth and efficient ride.

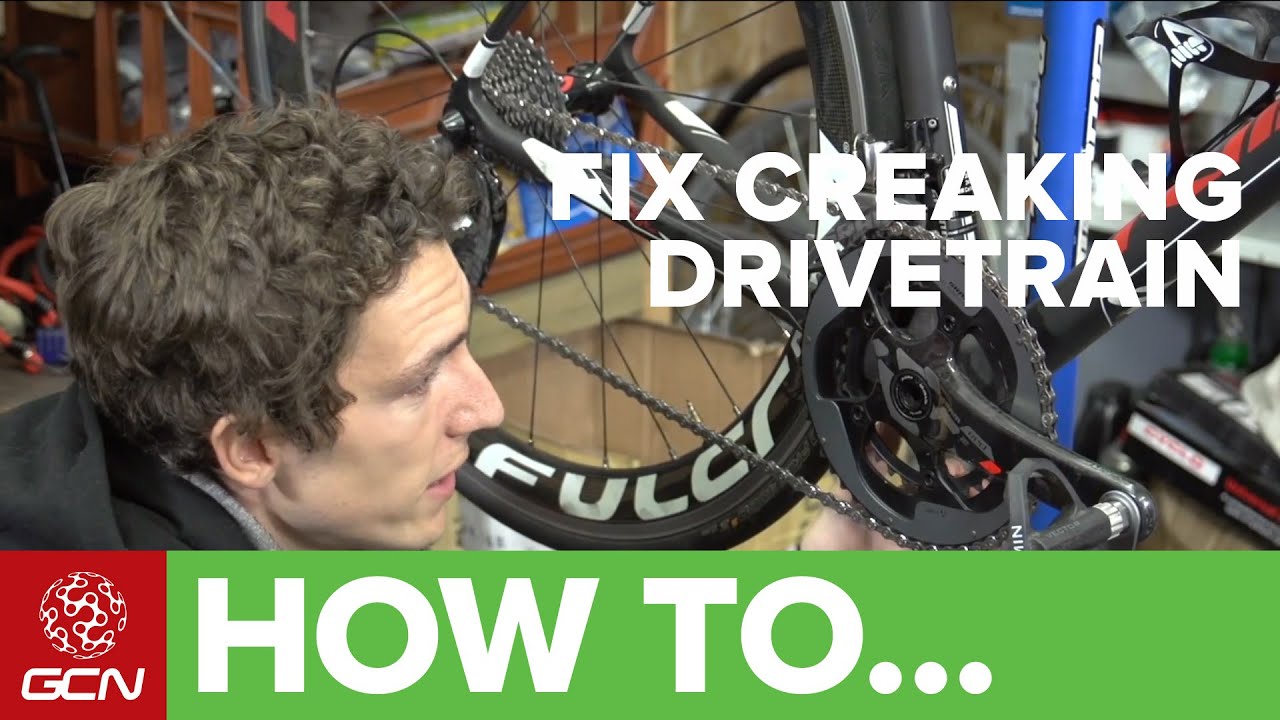
Troubleshooting Common Bottom Bracket Issues: Creaks, Grinding, and More
Mountain bike bottom brackets can be prone to various issues, including creaking, grinding, and looseness. These problems can be frustrating and affect the overall performance of the bike. In this section, we’ll identify common issues that can arise with mountain bike bottom brackets and offer troubleshooting tips and solutions to resolve these problems.
Creaking is a common issue that can occur with mountain bike bottom brackets. It’s usually caused by a loose or worn-out bearing, or a misaligned crankset. To troubleshoot creaking, check the bearing for any signs of wear or damage. If the bearing is damaged, replace it with a new one. If the crankset is misaligned, adjust it to ensure proper alignment.
Grinding is another issue that can occur with mountain bike bottom brackets. It’s usually caused by a worn-out or damaged bearing, or a misaligned crankset. To troubleshoot grinding, check the bearing for any signs of wear or damage. If the bearing is damaged, replace it with a new one. If the crankset is misaligned, adjust it to ensure proper alignment.
Looseness is a common issue that can occur with mountain bike bottom brackets. It’s usually caused by a loose or worn-out bearing, or a misaligned crankset. To troubleshoot looseness, check the bearing for any signs of wear or damage. If the bearing is damaged, replace it with a new one. If the crankset is misaligned, adjust it to ensure proper alignment.
Other common issues that can occur with mountain bike bottom brackets include corrosion, rust, and bearing failure. To prevent these issues, regularly clean and maintain the bottom bracket, and apply grease to the bearings and cups.
Troubleshooting tips:
- Regularly check the bottom bracket for any signs of wear or damage.
- Apply grease to the bearings and cups regularly to keep them running smoothly.
- Adjust the crankset to ensure proper alignment.
- Replace worn-out or damaged bearings with new ones.
By following these troubleshooting tips and solutions, you can resolve common issues that can arise with mountain bike bottom brackets and ensure smooth operation and optimal performance.
Upgrading Your Mountain Bike’s Bottom Bracket: Is it Worth the Investment?
Upgrading a mountain bike’s bottom bracket can be a significant investment, but it can also provide numerous benefits, including improved performance, durability, and cost savings. In this section, we’ll discuss the benefits and drawbacks of upgrading a mountain bike’s bottom bracket, including the potential impact on performance, durability, and cost.
Benefits of Upgrading:
- Improved performance: A high-quality bottom bracket can provide smoother pedaling, improved power transfer, and increased efficiency.
- Increased durability: A durable bottom bracket can withstand the rigors of mountain biking, including rough terrain, inclement weather, and heavy use.
- Cost savings: A high-quality bottom bracket can last longer than a lower-quality one, reducing the need for frequent replacements and saving you money in the long run.
Drawbacks of Upgrading:
- Cost: Upgrading a mountain bike’s bottom bracket can be expensive, especially if you’re purchasing a high-end model.
- Compatibility: Upgrading a bottom bracket may require additional components, such as a new crankset or frame, which can add to the overall cost.
- Installation: Installing a new bottom bracket can be a complex process, requiring specialized tools and expertise.
Is it Worth the Investment?
Whether or not upgrading a mountain bike’s bottom bracket is worth the investment depends on several factors, including your riding style, budget, and goals. If you’re a serious mountain biker who demands high performance and durability, upgrading to a high-quality bottom bracket may be a worthwhile investment. However, if you’re a casual rider who doesn’t ride frequently, a lower-cost option may be sufficient.
Ultimately, the decision to upgrade a mountain bike’s bottom bracket should be based on your individual needs and priorities. By considering the benefits and drawbacks of upgrading, you can make an informed decision and choose the best option for your mountain bike.

Conclusion: Finding the Perfect Bottom Bracket for Your Mountain Bike
In conclusion, choosing the right bottom bracket for your mountain bike is crucial for optimal performance, durability, and overall riding experience. By understanding the different types of bottom brackets, their advantages and disadvantages, and how to install and maintain them, you can make an informed decision and find the perfect bottom bracket for your mountain bike.
Remember, a high-quality bottom bracket can provide smoother pedaling, improved power transfer, and increased efficiency, while a poorly maintained or low-quality bottom bracket can lead to creaking, grinding, and looseness. By following the tips and guidelines outlined in this article, you can ensure that your mountain bike’s bottom bracket is properly installed, maintained, and upgraded, providing you with a smooth and efficient ride.
Ultimately, the key to finding the perfect bottom bracket for your mountain bike is to consider your riding style, budget, and goals. By doing so, you can choose a bottom bracket that meets your needs and provides you with the best possible performance and durability.
By investing in a high-quality bottom bracket and following proper installation and maintenance procedures, you can enjoy a smooth and efficient ride, and get the most out of your mountain bike. Whether you’re a serious mountain biker or a casual rider, a well-maintained bottom bracket is essential for optimal performance and overall riding experience.