
Why Proper Tire Pressure Matters for Road Riding
When it comes to mountain biking on road, proper tire pressure is crucial for a safe and enjoyable ride. The right tire pressure can make a significant difference in the overall performance of the bike, affecting factors such as speed, handling, and comfort. Mountain bike tire pressure for road riding is often overlooked, but it’s essential to understand its importance to get the most out of your ride.

Click Image to Find eBike Products
One of the primary benefits of proper tire pressure is improved traction. When tires are inflated to the correct pressure, they maintain optimal contact with the road surface, providing better grip and control. This is particularly important for mountain bikes, which often feature wider tires with more aggressive tread patterns. By maintaining the right tire pressure, riders can enjoy improved cornering and braking performance, reducing the risk of accidents.
In addition to improved traction, proper tire pressure also reduces rolling resistance. When tires are under-inflated, they flex more, causing the bike to work harder and reducing its overall efficiency. By maintaining the correct tire pressure, riders can enjoy a smoother ride and improved speed, making it easier to tackle longer distances and more challenging terrain.
Furthermore, proper tire pressure is essential for increased safety. Under-inflated tires are more prone to punctures and blowouts, which can be catastrophic at high speeds. By maintaining the correct tire pressure, riders can reduce the risk of tire failure and enjoy a safer ride.
In conclusion, proper mountain bike tire pressure for road riding is critical for a safe and enjoyable ride. By understanding the importance of tire pressure and maintaining the correct levels, riders can enjoy improved traction, reduced rolling resistance, and increased safety. Whether you’re a seasoned pro or a beginner, taking the time to check and adjust your tire pressure can make a significant difference in your overall riding experience.

Understanding Tire Pressure Basics: A Primer for Mountain Bikers
When it comes to mountain bike tire pressure for road riding, understanding the basics is crucial for optimal performance and safety. One of the most fundamental concepts to grasp is the difference between PSI (Pounds per Square Inch) and BAR (Barometric pressure). While both units measure pressure, they are not interchangeable, and using the wrong unit can lead to incorrect tire pressure.
PSI is the most commonly used unit of measurement for tire pressure in the United States, while BAR is more widely used in Europe and other parts of the world. To convert between the two units, you can use the following formula: 1 BAR = 14.5 PSI. For example, if a tire is recommended to be inflated to 2.5 BAR, it would be equivalent to 36.25 PSI.
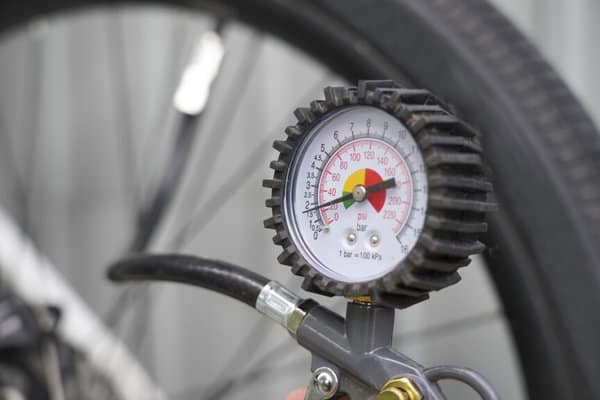
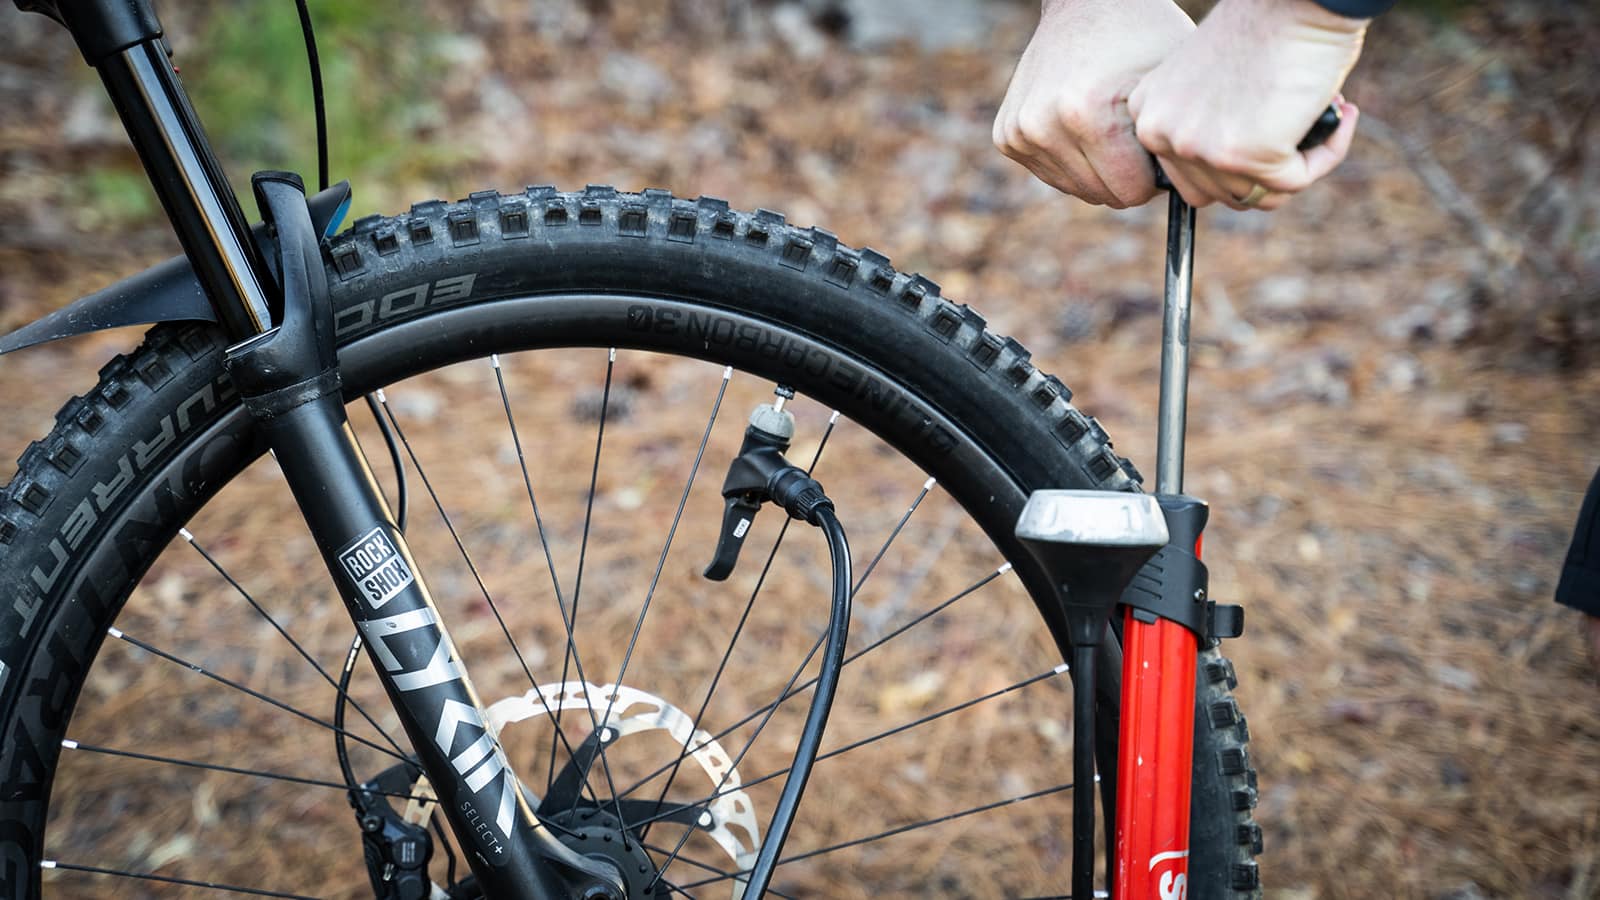
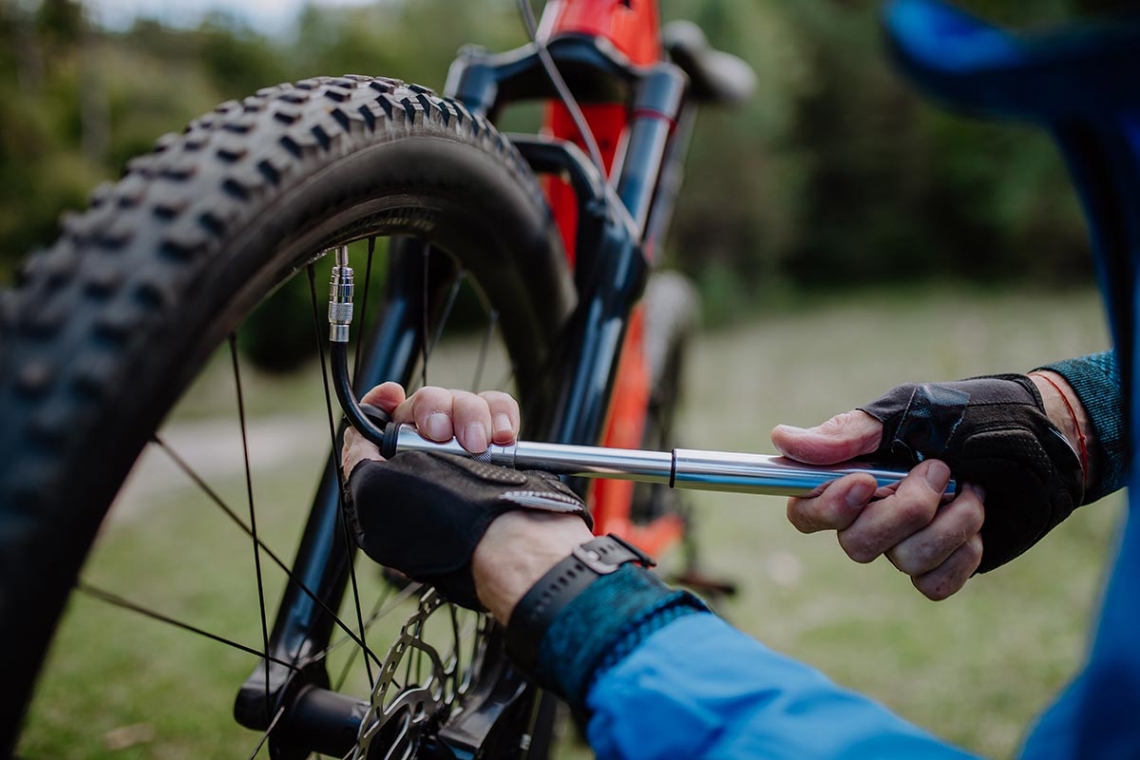
In addition to understanding the difference between PSI and BAR, it’s also essential to know how to use a tire pressure gauge. A tire pressure gauge is a simple tool that measures the air pressure in your tires. There are two types of gauges: analog and digital. Analog gauges use a needle to indicate the pressure, while digital gauges display the pressure on an LCD screen.
To use a tire pressure gauge, follow these steps:
- Remove the valve cap from the tire stem.
- Press the tire pressure gauge onto the valve stem and hold it firmly in place.
- Take a reading of the current pressure.
- Compare the reading to the recommended pressure for your tire.
- Adjust the pressure as needed.
It’s also important to note that tire pressure gauges can vary in accuracy, so it’s a good idea to use a high-quality gauge to ensure accurate readings. Additionally, it’s recommended to check tire pressure at least once a week, as pressure can fluctuate due to changes in temperature and other factors.
By understanding the basics of tire pressure and how to use a tire pressure gauge, mountain bikers can ensure optimal performance and safety on the road. Whether you’re a seasoned pro or a beginner, taking the time to learn about tire pressure can make a significant difference in your overall riding experience.
How to Choose the Right Tire Pressure for Your Mountain Bike on Road
Choosing the right tire pressure for your mountain bike on road can be a daunting task, especially for those new to road riding. However, with a few simple steps, you can determine the optimal tire pressure for your bike and enjoy a safer, more efficient ride.
Step 1: Check the Tire Manufacturer’s Recommendations
The first step in determining the right tire pressure is to check the manufacturer’s recommendations. Most tire manufacturers provide a recommended pressure range for their tires, which can be found on the sidewall of the tire or in the owner’s manual.
Step 2: Consider the Rider’s Weight
The rider’s weight is another important factor to consider when determining tire pressure. A heavier rider will require higher tire pressure to maintain optimal performance and safety. A good rule of thumb is to add 1-2 PSI to the recommended pressure for every 10 pounds of rider weight.
Step 3: Consider the Road Surface
The road surface is also an important factor to consider when determining tire pressure. Different road surfaces require different tire pressures to maintain optimal performance and safety. For example, a smooth asphalt road may require lower tire pressure than a rough concrete road.
Step 4: Consider the Tire Size
The tire size is also an important factor to consider when determining tire pressure. Larger tires require lower tire pressure than smaller tires to maintain optimal performance and safety.
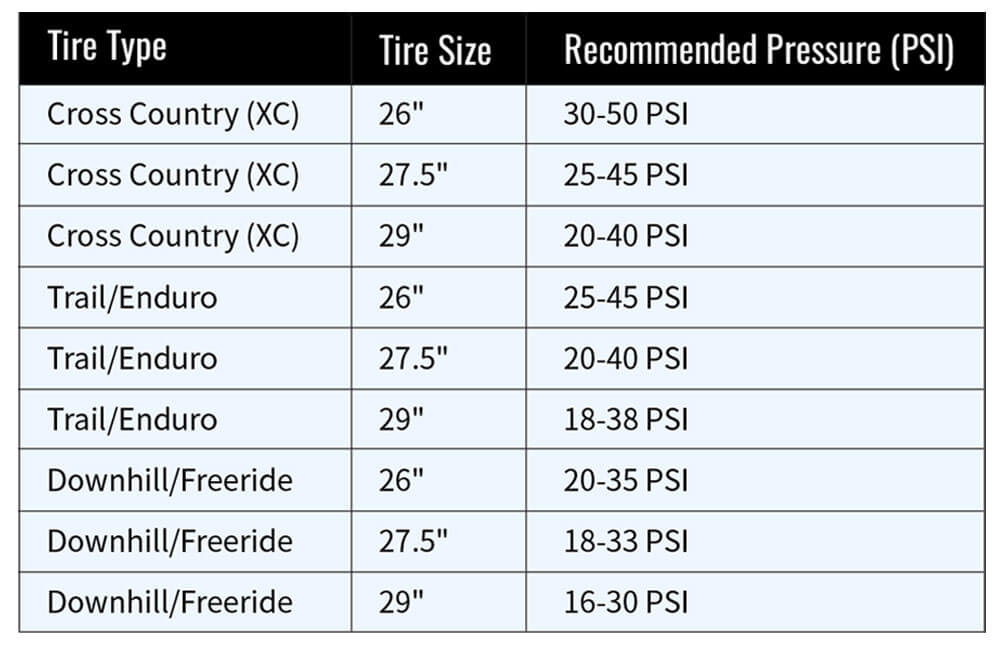
Step 5: Use a Tire Pressure Chart
A tire pressure chart can be a useful tool in determining the right tire pressure for your mountain bike on road. These charts provide a recommended pressure range based on the tire size, rider weight, and road surface.
Example of a Tire Pressure Chart:
| Tire Size | Rider Weight | Road Surface | Recommended Pressure |
|---|---|---|---|
| 26 x 2.2 | 150-200 lbs | Asphalt | 35-40 PSI |
| 26 x 2.2 | 200-250 lbs | Concrete | 40-45 PSI |
| 29 x 2.5 | 150-200 lbs | Gravel | 30-35 PSI |
By following these steps and using a tire pressure chart, you can determine the optimal tire pressure for your mountain bike on road and enjoy a safer, more efficient ride.
Tire Pressure Recommendations for Popular Mountain Bike Tires on Road
When it comes to mountain bike tire pressure for road riding, it’s essential to consider the specific tire model and brand. Different tires have unique characteristics that affect their performance and optimal pressure. Here are some tire pressure recommendations for popular mountain bike tires on road:
Maxxis Tires:
- Maxxis Ardent: 35-40 PSI (2.4-2.7 BAR)
- Maxxis High Roller: 30-35 PSI (2.1-2.4 BAR)
- Maxxis Crossmark: 25-30 PSI (1.8-2.1 BAR)
Continental Tires:
- Continental Mountain King: 35-40 PSI (2.4-2.7 BAR)
- Continental X-King: 30-35 PSI (2.1-2.4 BAR)
- Continental Trail King: 25-30 PSI (1.8-2.1 BAR)
Schwalbe Tires:
- Schwalbe Nobby Nic: 35-40 PSI (2.4-2.7 BAR)
- Schwalbe Racing Ralph: 30-35 PSI (2.1-2.4 BAR)
- Schwalbe Hans Dampf: 25-30 PSI (1.8-2.1 BAR)
It’s essential to note that these are general recommendations and may vary depending on the specific riding conditions and terrain. Always check the tire manufacturer’s recommendations and adjust the pressure accordingly.
In addition to the tire model and brand, it’s also important to consider the rider’s weight and the road surface when determining the optimal tire pressure. A heavier rider may require higher pressure to maintain optimal performance and safety, while a lighter rider may be able to get away with lower pressure.
By following these tire pressure recommendations and considering the specific riding conditions, mountain bikers can optimize their tire pressure for road riding and enjoy a safer, more efficient ride.
The Impact of Tire Pressure on Mountain Bike Performance on Road
Tire pressure plays a crucial role in determining the performance of a mountain bike on road. Proper tire pressure can significantly impact the bike’s speed, handling, and comfort, making it essential to understand how tire pressure affects mountain bike performance on road.
Speed:
Tire pressure can affect the speed of a mountain bike on road by altering the rolling resistance. Properly inflated tires will have lower rolling resistance, allowing the bike to move faster and more efficiently. Under-inflated tires, on the other hand, will have higher rolling resistance, making it more difficult to maintain speed.
Handling:
Tire pressure also affects the handling of a mountain bike on road. Properly inflated tires will provide better traction and cornering ability, making it easier to navigate tight turns and corners. Under-inflated tires, however, can lead to reduced traction and increased risk of skidding or losing control.
Comfort:
Tire pressure can also impact the comfort of a mountain bike ride on road. Properly inflated tires will provide a smoother ride, absorbing bumps and vibrations more effectively. Under-inflated tires, on the other hand, can lead to a harsher ride, causing discomfort and fatigue.
In addition to these factors, tire pressure can also affect the overall safety of a mountain bike ride on road. Properly inflated tires are less likely to suffer from punctures or blowouts, reducing the risk of accidents and injuries.
By understanding the impact of tire pressure on mountain bike performance on road, riders can optimize their tire pressure for a safer, more efficient, and more enjoyable ride.
Here are some general guidelines for optimizing tire pressure for mountain bike performance on road:
- For speed and efficiency, aim for a tire pressure of 35-40 PSI (2.4-2.7 BAR) for most mountain bike tires.
- For improved handling and traction, aim for a tire pressure of 30-35 PSI (2.1-2.4 BAR) for most mountain bike tires.
- For comfort and reduced vibration, aim for a tire pressure of 25-30 PSI (1.8-2.1 BAR) for most mountain bike tires.
Remember, these are general guidelines, and the optimal tire pressure for your mountain bike on road will depend on various factors, including the specific tire model, rider weight, and road surface.
Common Mistakes to Avoid When Setting Tire Pressure for Road Riding
When it comes to setting tire pressure for road riding, there are several common mistakes to avoid. These mistakes can lead to reduced performance, increased risk of punctures, and decreased safety. Here are some of the most common mistakes to avoid:
Under-Inflation:
Under-inflation is one of the most common mistakes when setting tire pressure for road riding. Under-inflated tires can lead to reduced traction, increased rolling resistance, and a higher risk of punctures. Make sure to check the recommended tire pressure for your mountain bike tires and adjust accordingly.
Over-Inflation:
Over-inflation is another common mistake when setting tire pressure for road riding. Over-inflated tires can lead to reduced traction, increased risk of blowouts, and a harsher ride. Make sure to check the recommended tire pressure for your mountain bike tires and adjust accordingly.
Neglecting to Check Tire Pressure Regularly:
Neglecting to check tire pressure regularly is a common mistake that can lead to reduced performance and increased risk of punctures. Make sure to check your tire pressure at least once a week, and before long rides.
Not Adjusting for Road Surface:
Not adjusting for road surface is a common mistake that can lead to reduced performance and increased risk of punctures. Make sure to adjust your tire pressure according to the road surface you will be riding on. For example, you may need to increase your tire pressure for smooth asphalt roads, and decrease it for rough gravel roads.
Not Considering Rider Weight:
Not considering rider weight is a common mistake that can lead to reduced performance and increased risk of punctures. Make sure to adjust your tire pressure according to your rider weight. For example, heavier riders may need to increase their tire pressure to maintain optimal performance and safety.
By avoiding these common mistakes, you can optimize your tire pressure for road riding and enjoy a safer, more efficient, and more enjoyable ride.
Here are some final tips for optimizing your tire pressure for road riding:
- Always check the recommended tire pressure for your mountain bike tires.
- Adjust your tire pressure according to the road surface you will be riding on.
- Consider your rider weight when adjusting your tire pressure.
- Check your tire pressure regularly to ensure optimal performance and safety.

Tire Pressure and Road Surface: How to Adjust for Different Conditions
When it comes to mountain bike tire pressure for road riding, the road surface is an important factor to consider. Different road surfaces require different tire pressures to ensure optimal performance and safety. Here’s a guide on how to adjust your tire pressure for different road surfaces:
Asphalt:
Asphalt roads are generally smooth and provide good traction. For asphalt roads, you can use a slightly higher tire pressure to reduce rolling resistance and improve speed. A good starting point is to add 1-2 PSI (0.07-0.14 BAR) to your recommended tire pressure.
Concrete:
Concrete roads can be rough and provide less traction than asphalt roads. For concrete roads, you may need to reduce your tire pressure to improve traction and comfort. A good starting point is to subtract 1-2 PSI (0.07-0.14 BAR) from your recommended tire pressure.
Gravel:
Gravel roads can be rough and provide less traction than asphalt or concrete roads. For gravel roads, you may need to reduce your tire pressure to improve traction and comfort. A good starting point is to subtract 2-3 PSI (0.14-0.21 BAR) from your recommended tire pressure.
Dirt:
Dirt roads can be rough and provide less traction than asphalt or concrete roads. For dirt roads, you may need to reduce your tire pressure to improve traction and comfort. A good starting point is to subtract 2-3 PSI (0.14-0.21 BAR) from your recommended tire pressure.
By adjusting your tire pressure according to the road surface, you can optimize your mountain bike’s performance and safety. Remember to always check your tire pressure regularly and adjust as needed to ensure optimal performance and safety.
Here are some final tips for adjusting your tire pressure for different road surfaces:
- Always check your tire pressure before adjusting it for a different road surface.
- Start with small adjustments (1-2 PSI or 0.07-0.14 BAR) and test your bike’s performance and comfort.
- Be aware of the road surface and adjust your tire pressure accordingly.
- Remember that tire pressure is just one factor that affects your bike’s performance and safety.
Conclusion: Finding the Perfect Tire Pressure for Your Mountain Bike on Road
Mountain bike tire pressure for road riding is a crucial aspect of optimizing your bike’s performance and safety. By understanding the importance of proper tire pressure, you can improve your bike’s traction, reduce rolling resistance, and increase your overall safety on the road.
In this article, we have discussed the importance of proper tire pressure for road riding, including the benefits of improved traction, reduced rolling resistance, and increased safety. We have also explained the basics of tire pressure, including the difference between PSI and BAR, and how to use a tire pressure gauge.
Additionally, we have provided a step-by-step guide on how to choose the right tire pressure for your mountain bike on road, including factors to consider such as tire size, rider weight, and road surface. We have also provided tire pressure recommendations for popular mountain bike tires on road, including examples of tires from brands such as Maxxis, Continental, and Schwalbe.
Furthermore, we have discussed the impact of tire pressure on mountain bike performance on road, including how it affects speed, handling, and comfort. We have also highlighted common mistakes to avoid when setting tire pressure for road riding, including under-inflation, over-inflation, and neglecting to check tire pressure regularly.
Finally, we have explained how to adjust tire pressure for different road surfaces, including asphalt, concrete, and gravel. By following these tips and guidelines, you can optimize your mountain bike’s tire pressure for a safe and enjoyable ride on the road.
Remember, finding the perfect tire pressure for your mountain bike on road is a process that requires patience, experimentation, and attention to detail. By taking the time to understand your bike’s tire pressure needs, you can unlock its full potential and enjoy a more efficient, comfortable, and safe ride.
