
Why Proper Pedal Removal Matters
Removing pedals from a bike is a crucial task that requires attention to detail and a clear understanding of the process. When done incorrectly, it can lead to damaged bike components, injuries, or even accidents. Proper pedal removal is essential to ensure the longevity of your bike and your safety on the road. Regular pedal maintenance is also vital to prevent dirt and grime from building up, which can affect the performance of your bike. By removing pedals correctly, you can avoid common issues like stuck pedals or stripped threads, and ensure a smooth ride. In this article, we will guide you through the process of removing pedals from your bike, including the correct direction to turn the pedals when removing them from your bike, which is a crucial step in the process.

Click Image to Find eBike Products
Understanding Pedal Types and Their Removal Mechanisms
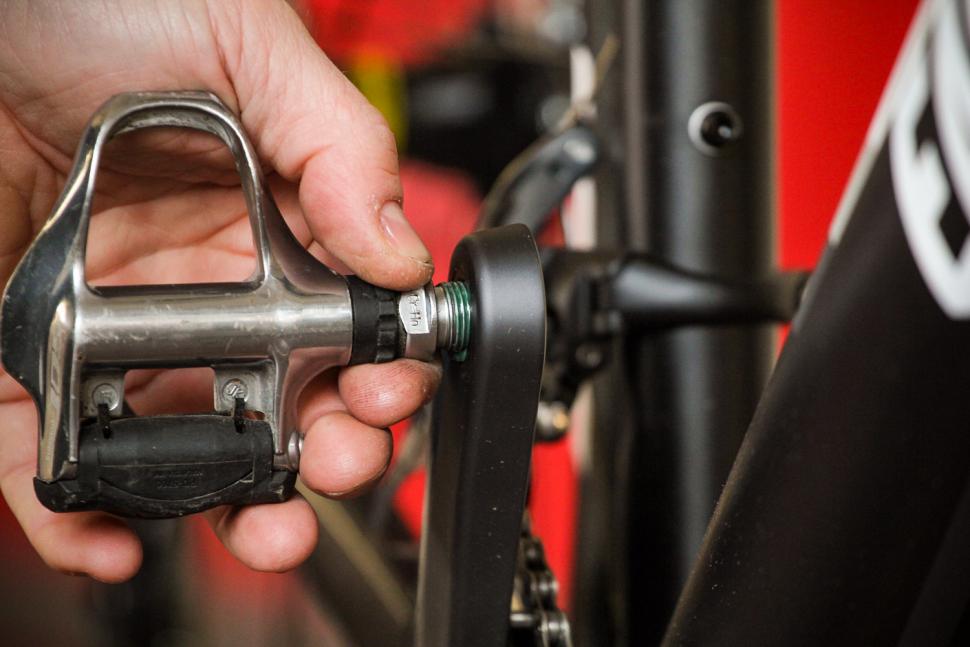
There are several types of pedals available, each with its unique removal mechanism. Understanding these differences is crucial to ensure safe and efficient pedal removal. Platform pedals, for instance, typically require a pedal wrench to loosen the axle, while clipless pedals often have a release mechanism that allows the pedal to be removed by twisting it counterclockwise. Toe clips, on the other hand, usually require a screwdriver or an Allen wrench to remove the clips and then the pedal. It’s essential to identify the type of pedal on your bike and understand its specific removal mechanism to avoid damaging the pedal or the bike. Additionally, having the correct tools, such as pedal wrenches, screwdrivers, or Allen wrenches, is vital to ensure a smooth pedal removal process. By understanding the different pedal types and their removal mechanisms, you can remove pedals from your bike with confidence and avoid common mistakes that can lead to damage or injury.
How to Remove Pedals from Your Bike
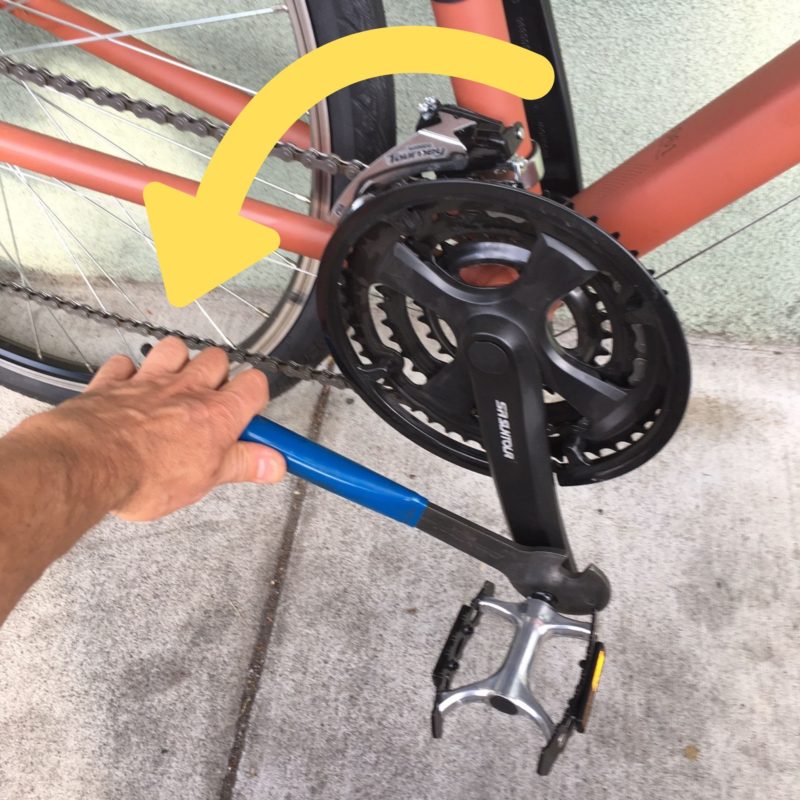
Removing pedals from a bike can seem like a daunting task, but with the right approach, it can be done safely and efficiently. To start, ensure you have the correct tools, such as a pedal wrench, and a clean, flat workspace. Next, identify the type of pedal on your bike and its unique removal mechanism. For most pedals, you’ll need to turn them counterclockwise to loosen them. When removing pedals from your bike, which direction is crucial – always turn them counterclockwise to avoid damaging the threads. Apply gentle, consistent pressure while turning the pedal to avoid using excessive force, which can damage the pedal or the bike. As you loosen the pedal, be prepared for it to come loose suddenly, so hold it firmly to avoid dropping it. Once the pedal is removed, take a moment to inspect the area for any dirt, grime, or debris that may have accumulated. By following these steps and taking the necessary precautions, you can remove pedals from your bike with confidence and avoid common mistakes that can lead to damage or injury.

Common Mistakes to Avoid When Removing Pedals
When removing pedals from a bike, it’s essential to avoid common mistakes that can lead to damage, injury, or frustration. One of the most critical mistakes to avoid is using excessive force, which can strip the threads or damage the pedal or bike. Instead, apply gentle, consistent pressure while turning the pedal counterclockwise. Another common mistake is not loosening the pedals enough, which can make them difficult to remove. Make sure to loosen the pedals sufficiently before attempting to remove them. Additionally, failing to identify the correct removal mechanism for the specific type of pedal can lead to mistakes. For example, clipless pedals often require a specific release mechanism, while platform pedals may require a pedal wrench. By understanding the unique removal mechanism for your pedals, you can avoid mistakes and ensure a smooth removal process. Furthermore, not taking the necessary precautions, such as ensuring a clean and flat workspace, can lead to accidents or damage. By being aware of these common mistakes and taking steps to avoid them, you can remove pedals from your bike safely and efficiently, and avoid the need for costly repairs or replacements.
The Role of Pedal Wrenches and Other Essential Tools
When it comes to removing pedals from a bike, having the right tools is crucial. A pedal wrench is an essential tool that should be in every bike maintenance kit. A pedal wrench is specifically designed to fit the pedal’s axle and provide the necessary leverage to loosen the pedal. Using a pedal wrench ensures that the pedal is removed safely and efficiently, without damaging the threads or the bike. In addition to a pedal wrench, other essential tools to have in your bike maintenance kit include a torque wrench, Allen wrenches, and a socket set. These tools will help you to properly reinstall the pedals and ensure that they are securely attached. It’s also important to have a clean and well-lit workspace, as well as a pair of gloves to protect your hands from scratches and abrasions. By having the right tools and a well-prepared workspace, you can remove pedals from your bike with confidence and avoid common mistakes. Remember, when removing pedals from a bike, which direction is crucial – always turn them counterclockwise to avoid damaging the threads. With the right tools and a little practice, you’ll be able to remove pedals like a pro and keep your bike in top condition.
Troubleshooting Common Pedal Removal Issues
Despite following the correct procedure, issues can still arise when removing pedals from a bike. One common problem is stuck pedals, which can be caused by corrosion or over-tightening. To resolve this issue, apply penetrating oil to the pedal axle and let it sit for a few hours before attempting to remove the pedal again. Another common issue is stripped threads, which can occur if the pedal is over-tightened or if the wrong tools are used. To prevent stripped threads, always use the correct tools, such as a pedal wrench, and avoid using excessive force. If the threads are already stripped, consider taking the bike to a professional mechanic for repair. Additionally, pedals may become seized due to rust or corrosion, making them difficult to remove. In this case, apply heat to the pedal using a hair dryer or heat gun to loosen the corrosion, and then attempt to remove the pedal again. By being aware of these common issues and knowing how to troubleshoot them, you can overcome obstacles and successfully remove pedals from your bike. Remember, when removing pedals from a bike, which direction is crucial – always turn them counterclockwise to avoid damaging the threads.

Reinstalling Pedals: Tips and Best Practices
Once the pedals have been removed, it’s essential to reinstall them correctly to ensure proper function and safety. When reinstalling pedals, make sure to align them correctly with the crank arm, taking note of the pedal’s orientation and the direction of the threads. Tighten the pedals in a star pattern to avoid over-tightening, which can damage the threads or strip the pedal. It’s also crucial to apply the correct amount of torque to the pedals, as specified in the bike’s manual or on the pedal manufacturer’s instructions. Remember, when reinstalling pedals, it’s essential to turn them in the correct direction – clockwise – to ensure they are securely attached. Additionally, consider applying a small amount of grease or lubricant to the pedal threads to prevent corrosion and make future removal easier. By following these tips and best practices, you can ensure that your pedals are properly reinstalled and ready for your next ride. Regular pedal maintenance, including proper removal and reinstallation, can help extend the life of your bike’s components and ensure a safe and enjoyable ride.

Maintenance and Inspection After Pedal Removal
After removing pedals from a bike, it’s essential to inspect and maintain the surrounding components to ensure the bike is in good working condition. Start by cleaning the area around the pedal axle and crank arm, removing any dirt, grime, or old lubricant. Use a soft-bristled brush or cloth to wipe away any debris, and then apply a small amount of lubricant, such as grease or silicone spray, to the pedal axle and surrounding components. This will help prevent corrosion and keep the pedals running smoothly. Next, inspect the pedal axle and crank arm for any signs of wear or damage, such as scratches or rust. If you notice any damage, consider replacing the affected components to prevent further damage to the bike. Additionally, take this opportunity to inspect the pedals themselves, checking for any signs of wear or damage, and replacing them if necessary. By performing regular maintenance and inspections after removing pedals from a bike, you can help extend the life of your bike’s components and ensure a safe and enjoyable ride. Remember, when removing pedals from a bike, which direction is crucial – always turn them counterclockwise to avoid damaging the threads.
