
What is a Self-Balancing Bicycle and How Does Arduino Come into Play?
A self-balancing bicycle is a two-wheeled vehicle that uses sensors and microcontrollers to maintain its balance. With the help of a gyroscope and an accelerometer, the bike can detect its tilt and adjust its motor speed to keep itself upright. This technology has been around for decades, but recent advancements in electronics and open-source hardware have made it more accessible to hobbyists and makers.

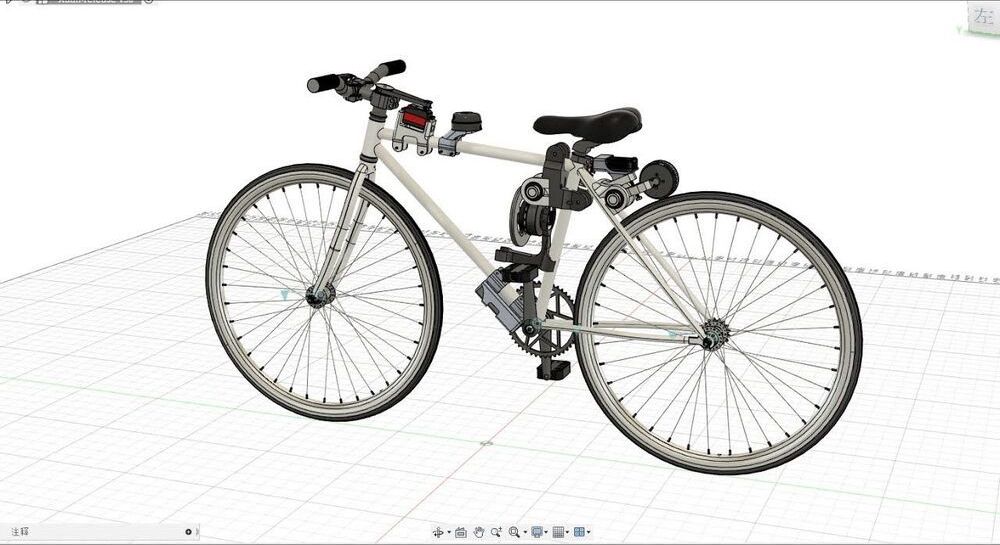
Click Image to Find eBike Products
Arduino is an open-source electronics platform that provides an easy-to-use hardware and software platform for building all sorts of projects. It has become a popular choice for building self-balancing bicycles due to its flexibility, affordability, and ease of use. With Arduino, you can program the microcontroller to read sensor data, make decisions, and control the motors to keep the bicycle balanced.
The benefits of using Arduino for building a self-balancing bicycle are numerous. For starters, it is an open-source platform, which means that there is a large community of users who can provide support and inspiration. Additionally, Arduino boards are affordable and easy to obtain, making them an excellent choice for hobbyists and makers on a budget. Finally, Arduino provides a flexible platform that can be customized to suit your specific needs and preferences.
Selecting the Right Components for Your Self-Balancing Bicycle
To build a self-balancing bicycle using Arduino, you will need several essential components. These components include a gyroscope, an accelerometer, a motor controller, and motors. Let’s take a closer look at each of these components and discuss how to select the right one for your project.
Gyroscope
A gyroscope is a device that measures angular velocity or orientation. In the context of a self-balancing bicycle, a gyroscope is used to detect the tilt of the bicycle and provide feedback to the microcontroller. When selecting a gyroscope, look for one that is sensitive, accurate, and has a wide range of measurement. The MPU-6050 is a popular choice among makers due to its high accuracy and wide range of measurement.
Accelerometer
An accelerometer is a device that measures acceleration or gravity. In the context of a self-balancing bicycle, an accelerometer is used to detect the speed and direction of the bicycle and provide feedback to the microcontroller. When selecting an accelerometer, look for one that is sensitive, accurate, and has a wide range of measurement. The ADXL345 is a popular choice among makers due to its high accuracy and wide range of measurement.
Motor Controller
A motor controller is a device that controls the speed and direction of a motor. In the context of a self-balancing bicycle, a motor controller is used to control the speed and direction of the motors based on the feedback from the gyroscope and accelerometer. When selecting a motor controller, look for one that is compatible with your motors, has a high current rating, and supports bidirectional control. The L298N is a popular choice among makers due to its compatibility with a wide range of motors and its high current rating.
Motors
The motors are the driving force behind the self-balancing bicycle. When selecting motors, look for ones that are powerful, efficient, and have a high torque rating. The N20 DC motor is a popular choice among makers due to its high power, efficiency, and torque rating. Additionally, make sure that the motors are compatible with your motor controller and can be controlled bidirectionally.
Assembling the Frame and Installing the Components
Now that you have selected the right components for your self-balancing bicycle, it’s time to assemble the frame and install the components. Here are step-by-step instructions to help you through the process:
- Assemble the frame: Begin by assembling the frame of the bicycle. This will typically involve attaching the front and rear wheels to the frame, as well as installing any other necessary components such as the seat and pedals.
- Install the motor: Once the frame is assembled, install the motor on the rear wheel. Make sure that the motor is securely attached and that the wiring is properly connected.
- Install the motor controller: Next, install the motor controller in a convenient location on the frame. This will typically involve attaching the controller to the frame with screws or zip ties and connecting the wiring to the motor and the Arduino board.
- Install the gyroscope and accelerometer: Install the gyroscope and accelerometer in a location on the frame where they will be able to accurately detect the tilt and movement of the bicycle. This will typically involve attaching the sensors to the frame with screws or double-sided tape and connecting the wiring to the Arduino board.
- Connect the Arduino board: Finally, connect the Arduino board to the motor controller, gyroscope, and accelerometer. Make sure that all of the wiring is properly connected and that there are no loose connections.
To help illustrate the process, here are some diagrams and images that you can refer to:


By following these instructions and using the provided diagrams and images, you should be able to successfully assemble the frame of your self-balancing bicycle and install the necessary components. Once the components are installed, you can move on to programming the Arduino board to control the bicycle.

Programming the Arduino Board
Once you have assembled the frame and installed the components for your self-balancing bicycle, it’s time to program the Arduino board to control the bicycle. Here are the steps to follow:
- Connect the Arduino board to your computer: Use a USB cable to connect the Arduino board to your computer. This will allow you to program the board using the Arduino Integrated Development Environment (IDE).
- Install the necessary libraries: To use the gyroscope and accelerometer with the Arduino board, you will need to install the necessary libraries. You can find these libraries in the Arduino Library Manager.
- Write the code: Next, write the code that will control the self-balancing bicycle. The code should read data from the gyroscope and accelerometer, calculate the tilt of the bicycle, and adjust the motor speed to maintain balance. Here is some sample code to get you started:
#include <Wire.h> #include <MPU6050.h> MPU6050 mpu; int motorPin1 = 2; int motorPin2 = 3; int motorPin3 = 4; int motorPin4 = 5; void setup() { Serial.begin(9600); Wire.begin(); mpu.begin(); pinMode(motorPin1, OUTPUT); pinMode(motorPin2, OUTPUT); pinMode(motorPin3, OUTPUT); pinMode(motorPin4, OUTPUT); } void loop() { mpu.update(); float tilt = mpu.getAngleZ(); if (tilt > 5) { digitalWrite(motorPin1, HIGH); digitalWrite(motorPin2, LOW); digitalWrite(motorPin3, LOW); digitalWrite(motorPin4, HIGH); } else if (tilt < -5) { digitalWrite(motorPin1, LOW); digitalWrite(motorPin2, HIGH); digitalWrite(motorPin3, HIGH); digitalWrite(motorPin4, LOW); } else { digitalWrite(motorPin1, LOW); digitalWrite(motorPin2, LOW); digitalWrite(motorPin3, LOW); digitalWrite(motorPin4, LOW); } Serial.println(tilt); } - Upload the code: Once you have written the code, upload it to the Arduino board using the Arduino IDE. This will program the board to control the self-balancing bicycle.
- Test the bicycle: Finally, test the self-balancing bicycle to make sure that it is working correctly. Adjust the sensitivity of the sensors and fine-tune the code as needed to optimize performance.
When programming the Arduino board for your self-balancing bicycle, it’s important to keep the following tips in mind:
- Use comments in your code to explain what each section does. This will make it easier for you (or someone else) to understand the code in the future.
- Test the code thoroughly before using it with the self-balancing bicycle. This will help you catch any errors or bugs before they become a problem.
- Optimize the code for better performance. This may involve reducing the number of calculations or using more efficient algorithms.
- Troubleshoot any issues that arise. This may involve checking the wiring, verifying the sensor readings, or adjusting the code.
By following these steps and tips, you can program the Arduino board to control your self-balancing bicycle. With a little practice and experimentation, you can even add advanced features and customize the bicycle to suit your needs.

Testing and Calibrating the Self-Balancing Bicycle
Once you have assembled the frame and installed the components of your self-balancing bicycle, and programmed the Arduino board, it’s time to test and calibrate the bicycle. Proper testing and calibration are crucial to ensure that the bicycle operates safely and efficiently. Here are the steps to follow:
- Check the wiring: Before testing the bicycle, double-check the wiring to make sure that all the components are properly connected. Look for loose connections, short circuits, or any other issues that may affect the performance of the bicycle.
- Power up the bicycle: Connect the battery pack to the motor controller and turn on the power. The Arduino board should start executing the program, and the motors should begin to operate.
- Test the sensors: Gently tilt the bicycle to test the gyroscope and accelerometer. Observe the sensor readings on the serial monitor to ensure that they are accurate and responsive. If the readings are erratic or inaccurate, adjust the sensitivity of the sensors in the code.
- Calibrate the motors: With the bicycle on a level surface, adjust the motor speed to ensure that the bicycle remains stationary. If the bicycle tilts forward or backward, adjust the motor speed to compensate. This may involve adjusting the values in the code or fine-tuning the motor controller.
- Test the balancing: Once the sensors and motors are calibrated, test the balancing function of the bicycle. Gently push the bicycle and observe how it responds. The bicycle should remain upright and stable, even when pushed gently. If the bicycle tilts or falls over, adjust the sensitivity of the sensors or the motor speed as needed.
- Fine-tune the code: Based on the test results, fine-tune the code to optimize the performance of the bicycle. This may involve adjusting the values of the variables, changing the algorithms, or adding new features.
When testing and calibrating your self-balancing bicycle, keep the following safety precautions in mind:
- Wear safety gear: Always wear a helmet, knee pads, and elbow pads when testing the bicycle. This will protect you from injuries in case of a fall or accident.
- Test in a safe environment: Test the bicycle in a safe and open environment, away from traffic, obstacles, or other hazards. Make sure that there is enough space for the bicycle to move around without hitting anything.
- Avoid sudden movements: When testing the bicycle, avoid sudden movements or jerks that may cause the bicycle to lose balance. Gradual and smooth movements are essential to ensure the stability of the bicycle.
- Have a spotter: When testing the bicycle, have a spotter nearby to assist you in case of any issues or accidents. The spotter can help stabilize the bicycle or provide support if needed.
By following these steps and safety precautions, you can test and calibrate your self-balancing bicycle with confidence. With proper testing and calibration, your bicycle will operate safely and efficiently, providing you with hours of fun and excitement.

How to Ride a Self-Balancing Bicycle
Now that you have built and calibrated your self-balancing bicycle, it’s time to learn how to ride it. Here are some tips to help you get started:
Mounting the Bicycle
To mount the self-balancing bicycle, stand next to it and place one foot on the footrest. Then, gently tilt the bicycle in the direction of your foot and swing your other leg over the seat. Once you are seated, place both feet on the footrests.
Starting the Bicycle
To start the bicycle, press the power button and wait for the motors to initialize. Then, gently tilt the bicycle forward or backward to build up speed. As the bicycle gains speed, it will become more stable and easier to control.
Steering the Bicycle
To steer the self-balancing bicycle, lean your body in the direction you want to go. The bicycle will respond by tilting in the same direction, allowing you to turn smoothly. Avoid making sudden movements or sharp turns, as this can cause the bicycle to become unstable.
Maintaining Balance
To maintain balance on the self-balancing bicycle, keep your body centered over the bicycle and your feet firmly planted on the footrests. If the bicycle starts to tilt, adjust your body position to compensate. The sensors and code will help the motors adjust the speed of the wheels to keep the bicycle upright.
Dismounting the Bicycle
To dismount the self-balancing bicycle, slowly bring the bicycle to a stop by tilting it forward or backward. Then, swing one leg over the seat and place your foot on the ground. Finally, step off the bicycle and bring it to a complete stop.
Safety Precautions
When riding a self-balancing bicycle, it’s important to take safety precautions to prevent injuries. Here are some tips to help you stay safe:
- Wear a helmet and other protective gear, such as knee and elbow pads.
- Ride in a safe and open area, away from traffic and obstacles.
- Start slowly and gradually build up speed as you become more comfortable.
- Avoid making sudden movements or sharp turns.
- Keep both feet on the footrests at all times.
- Don’t ride the bicycle in wet or slippery conditions.
- Don’t ride the bicycle while under the influence of alcohol or drugs.
By following these tips, you can enjoy riding your self-balancing bicycle while minimizing the risk of injuries. With practice, you can become more skilled and confident in your ability to ride and control the bicycle.

Advanced Features and Customization
Once you have mastered the basics of building and riding a self-balancing bicycle using Arduino, you may want to explore advanced features and customization options. Here are some ideas to get you started:
Adding Bluetooth or Wi-Fi Connectivity
By adding Bluetooth or Wi-Fi connectivity to your self-balancing bicycle, you can control it remotely using a smartphone or tablet. This can be a fun and convenient way to show off your creation to friends and family. To add Bluetooth or Wi-Fi connectivity, you will need to use a compatible module, such as the HC-05 or ESP8266, and modify the code to include the necessary communication protocols.
Integrating a GPS Module
By integrating a GPS module into your self-balancing bicycle, you can track its location and speed in real-time. This can be useful for navigation, safety, or performance tracking. To integrate a GPS module, you will need to use a compatible module, such as the NEO-6M, and modify the code to include the necessary communication protocols.
Adding Lights or Sound Effects
Adding lights or sound effects to your self-balancing bicycle can make it more visible and entertaining. For example, you could add LED lights to the frame or wheels, or use a speaker to play music or sound effects. To add lights or sound effects, you will need to use compatible components, such as LED strips or speakers, and modify the code to control them.
Designing Custom Enclosures or Decals
Designing custom enclosures or decals for your self-balancing bicycle can make it more aesthetically pleasing and unique. You can use a 3D printer, laser cutter, or other fabrication tools to create custom parts, or use decals and stickers to add your own style. To design custom enclosures or decals, you will need to use CAD software or graphic design tools, and have access to fabrication equipment or printing services.
Tips for Customizing Your Self-Balancing Bicycle
When customizing your self-balancing bicycle, here are some tips to keep in mind:
- Start with a solid foundation: Before adding advanced features or customizations, make sure that your self-balancing bicycle is stable, safe, and well-built. This will make it easier to modify and enhance.
- Plan ahead: Before making any modifications, plan out your design and make a list of the components and tools you will need. This will help you avoid mistakes and save time.
- Test and iterate: After making modifications, test your self-balancing bicycle thoroughly and make adjustments as needed. Don’t be afraid to experiment and try new things.
- Respect safety precautions: When adding advanced features or customizations, be sure to follow safety precautions and guidelines. This will help you avoid accidents and injuries.
By following these tips and exploring advanced features and customization options, you can take your self-balancing bicycle to the next level and make it truly unique. Happy making!

Maintaining Your Self-Balancing Bicycle
Congratulations on building your very own self-balancing bicycle using Arduino! To ensure that your bicycle stays in top condition and performs at its best, it’s important to maintain it properly. Here are some tips on how to clean, lubricate, and store your self-balancing bicycle.
Cleaning Your Self-Balancing Bicycle
To clean your self-balancing bicycle, follow these steps:
- Turn off and unplug the Arduino board and other electronic components.
- Wipe down the frame and wheels with a damp cloth to remove dirt and debris.
- Use a soft-bristled brush to clean hard-to-reach areas, such as the motor and gyroscope sensors.
- Avoid using harsh chemicals or high-pressure water, as this can damage the electronics or frame.
- Dry the bicycle thoroughly before turning it on again.
Lubricating Your Self-Balancing Bicycle
To lubricate your self-balancing bicycle, follow these steps:
- Identify the moving parts that require lubrication, such as the motor shafts and wheel bearings.
- Choose a high-quality lubricant that is suitable for the material and application.
- Apply a small amount of lubricant to the moving parts, using a brush or syringe.
- Wipe away any excess lubricant to prevent attracting dirt and debris.
- Test the bicycle to ensure that the lubricant has been applied evenly and that the moving parts are functioning smoothly.
Storing Your Self-Balancing Bicycle
To store your self-balancing bicycle, follow these tips:
- Choose a dry, clean, and well-ventilated area to store the bicycle.
- Avoid exposing the bicycle to extreme temperatures or direct sunlight, as this can damage the electronics or frame.
- Cover the bicycle with a protective cover or cloth to prevent dust and debris from accumulating.
- Remove the battery pack and store it separately in a cool, dry place.
- Check the bicycle regularly for any signs of wear, damage, or corrosion, and address any issues promptly.
Troubleshooting Common Issues
Even with proper maintenance, you may encounter common issues with your self-balancing bicycle. Here are some troubleshooting tips:
- If the bicycle is not balancing properly, check the sensitivity of the sensors and fine-tune the code.
- If the motors are making strange noises or not functioning properly, check the wiring and connections, and lubricate the moving parts.
- If the Arduino board is not responding, check the power supply and connections, and ensure that the code is uploaded correctly.
- If you are experiencing issues with the Bluetooth or Wi-Fi connectivity, check the module and antenna, and ensure that the communication protocols are correct.
By following these maintenance and troubleshooting tips, you can ensure that your self-balancing bicycle stays in top condition and provides you with hours of fun and enjoyment. Happy riding!