Why a Proper Fit Matters for Your Bike and Vehicle
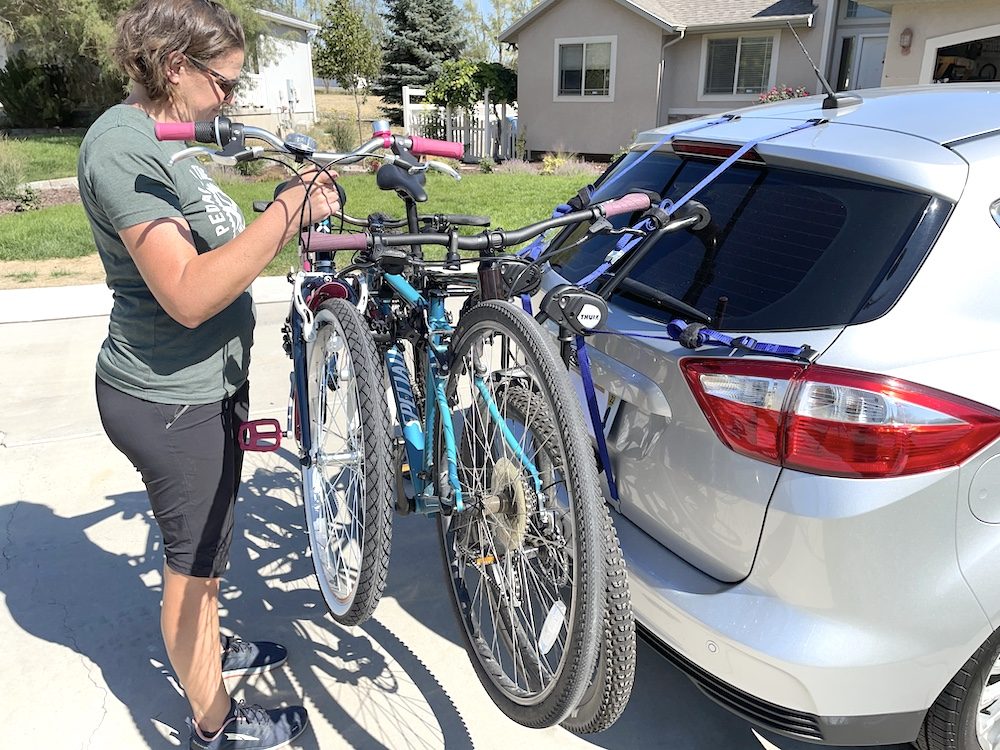
When it comes to transporting your bike, a proper fit is crucial to ensure a safe and enjoyable experience. A Thule bike rack that fits your vehicle and bike perfectly is essential to prevent damage to both the vehicle and the bike. Improper installation can lead to a range of issues, including scratches, dents, and even compromised safety. A Thule bike rack fit guide can help you navigate the process of finding the perfect fit for your vehicle and bike.

Click Image to Find eBike Products
A proper fit is not just about aesthetics; it’s also about functionality. A Thule bike rack that fits your vehicle correctly will provide a stable and secure platform for transporting your bike. This is especially important for long road trips or off-road adventures, where a loose or unstable bike rack can be a hazard. By following a Thule bike rack fit guide, you can ensure that your bike rack is installed correctly and securely, giving you peace of mind on the road.
In addition to safety and functionality, a proper fit is also important for protecting your investment. A Thule bike rack that fits your vehicle and bike perfectly will help prevent damage to both the rack and the bike. This can save you money in the long run by reducing the need for repairs or replacements. By taking the time to find the perfect fit, you can enjoy a safe and enjoyable biking experience, while also protecting your investment.
With so many different types of Thule bike racks available, finding the perfect fit can seem overwhelming. However, by following a Thule bike rack fit guide, you can navigate the process with ease. Whether you’re a seasoned cyclist or just starting out, a proper fit is essential for a safe and enjoyable experience. By taking the time to find the perfect fit, you can enjoy the freedom and adventure that comes with biking, while also protecting your vehicle and bike.
Understanding Thule Bike Rack Styles and Options
Thule offers a wide range of bike rack styles and options to suit different vehicle types, bike sizes, and riding needs. Understanding the different types of Thule bike racks available is crucial to finding the perfect fit for your vehicle and bike. Here are some of the most popular Thule bike rack styles and options:
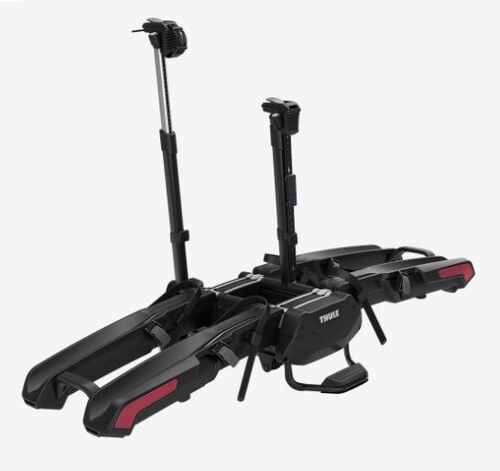
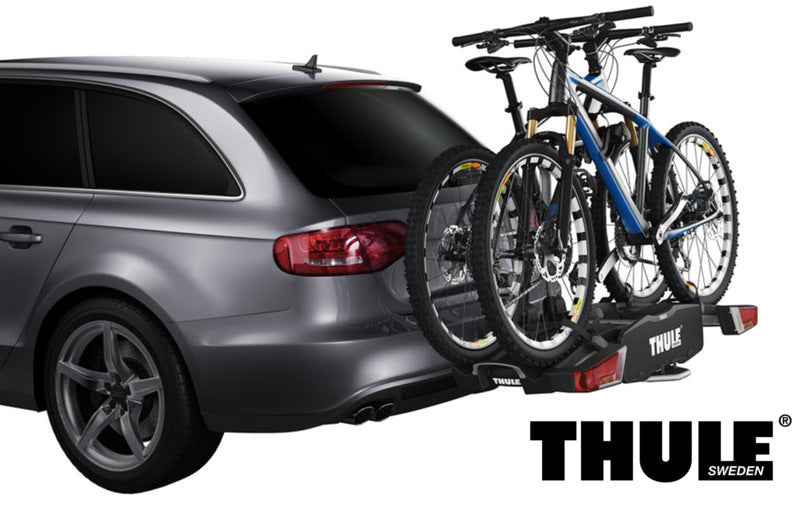
Platform bike racks are a popular choice among cyclists, offering a stable and secure platform for transporting bikes. These racks are ideal for vehicles with a hitch or roof-mounted system, and can accommodate multiple bikes. Thule’s platform bike racks, such as the Thule T2 Pro XT, are designed to provide maximum stability and security for your bikes.
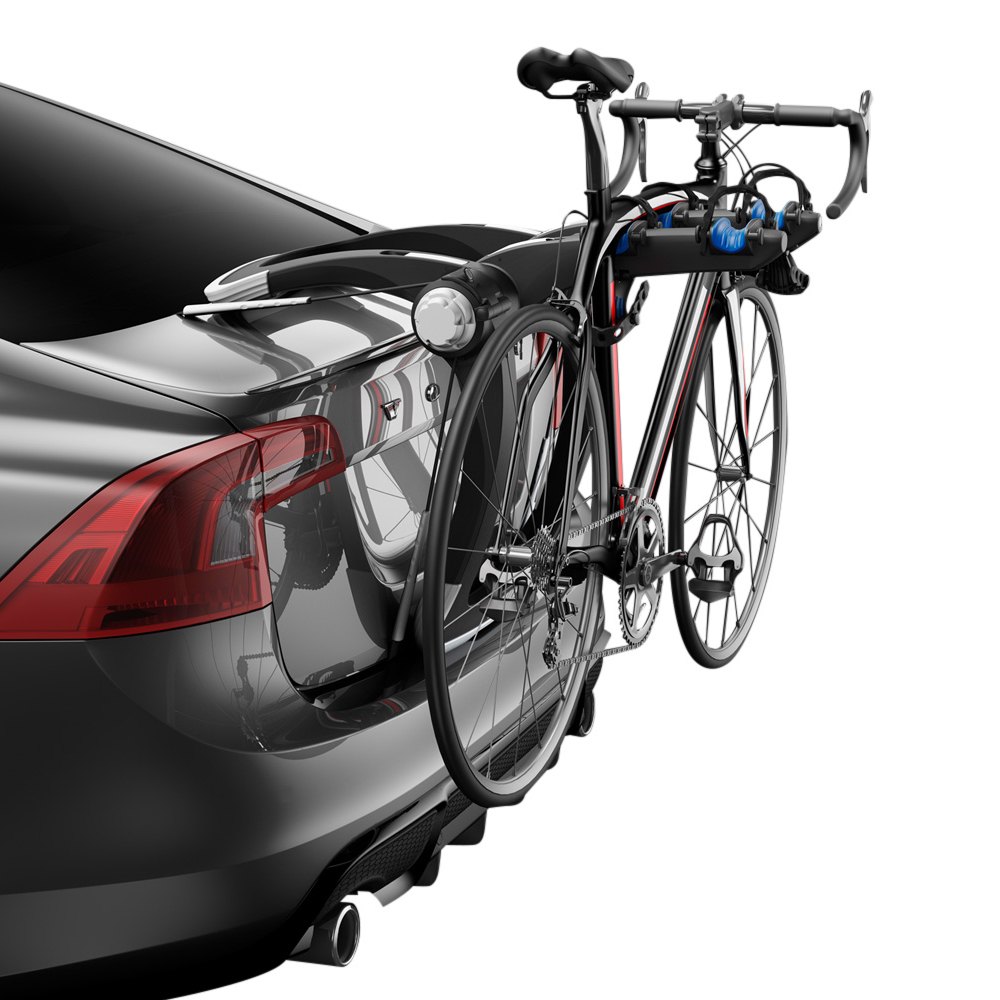
Hanging bike racks, on the other hand, are a great option for vehicles with limited roof space or no hitch. These racks hang from the vehicle’s roof or trunk, providing a convenient and space-saving solution for transporting bikes. Thule’s hanging bike racks, such as the Thule Helium Pro 3, are designed to be lightweight and easy to install.
Roof-mounted bike racks are another popular option, offering a sleek and aerodynamic design that complements your vehicle’s roofline. These racks are ideal for vehicles with a roof-mounted system, and can accommodate multiple bikes. Thule’s roof-mounted bike racks, such as the Thule UpRide, are designed to provide maximum stability and security for your bikes.
When choosing a Thule bike rack, consider factors such as vehicle type, bike size, and riding needs. A Thule bike rack fit guide can help you navigate the process of finding the perfect fit for your vehicle and bike. By understanding the different types of Thule bike racks available, you can make an informed decision and find the perfect rack for your adventures.
In addition to style and options, Thule bike racks also vary in terms of features and accessories. Some racks come with built-in locks, while others offer additional accessories such as bike locks and wheel straps. Consider what features are important to you and your riding needs, and choose a Thule bike rack that meets your requirements.
How to Measure Your Vehicle for a Thule Bike Rack
To ensure a proper fit for your Thule bike rack, it’s essential to measure your vehicle accurately. Here’s a step-by-step guide on how to measure your vehicle to determine the best rack style and size:
**Measuring the Roof:** Measure the distance between the roof’s centerline and the edge of the roof. This will help you determine the correct roof-mounted bike rack size. Make sure to take note of any obstructions, such as roof vents or antennas, that may affect the rack’s installation.
**Measuring the Hitch:** Measure the distance between the hitch’s centerline and the edge of the bumper. This will help you determine the correct hitch-mounted bike rack size. Make sure to take note of any obstructions, such as spare tires or exhaust pipes, that may affect the rack’s installation.
**Measuring the Trunk:** Measure the distance between the trunk’s centerline and the edge of the trunk. This will help you determine the correct trunk-mounted bike rack size. Make sure to take note of any obstructions, such as trunk handles or spoilers, that may affect the rack’s installation.
**Additional Measurements:** Take note of any additional features on your vehicle that may affect the bike rack’s installation, such as spoilers, roof rails, or side steps. These features may require special adapters or modifications to ensure a proper fit.
**Using a Thule Bike Rack Fit Guide:** Thule provides a comprehensive fit guide that can help you determine the best bike rack for your vehicle. The guide takes into account various factors, including vehicle make and model, roof type, and hitch size. By using the fit guide, you can ensure a proper fit for your Thule bike rack and avoid any potential installation issues.
**Tips and Considerations:** When measuring your vehicle, make sure to take note of any variations in size or shape that may affect the bike rack’s installation. Additionally, consider the type of bike you plan to transport and the frequency of use. This will help you determine the best rack style and size for your needs.

Thule Bike Rack Fit Guide: Popular Vehicle Models
Thule provides a comprehensive fit guide for popular vehicle models to ensure a proper fit for their bike racks. Here’s a list of popular vehicle models and their corresponding Thule bike rack fit recommendations:
| Vehicle Model | Recommended Rack Style | Recommended Rack Size | Installation Requirements |
|---|---|---|---|
| Honda Civic | Platform Bike Rack | Thule T2 Pro XT | No additional installation requirements |
| Toyota RAV4 | Hanging Bike Rack | Thule Helium Pro 3 | Requires Thule’s Fit Kit 181 |
| Subaru Outback | Roof-Mounted Bike Rack | Thule UpRide | Requires Thule’s Roof Rack System |
| Jeep Grand Cherokee | Platform Bike Rack | Thule T2 Pro XT | Requires Thule’s Fit Kit 182 |
| BMW 3 Series | Hanging Bike Rack | Thule Helium Pro 3 | No additional installation requirements |
It’s essential to note that these recommendations are subject to change, and it’s always best to consult Thule’s fit guide or contact their customer support for the most up-to-date information. Additionally, ensure that you follow the manufacturer’s instructions for installation and use to ensure a safe and secure bike rack fit.
By using Thule’s bike rack fit guide, you can ensure a proper fit for your vehicle and bike, providing a safe and enjoyable biking experience. Remember to always follow the manufacturer’s instructions and take necessary safety precautions when installing and using your Thule bike rack.
Common Thule Bike Rack Fit Issues and Solutions
While Thule bike racks are designed to fit a wide range of vehicles, some common fit issues may arise during installation. Here are some common fit issues and solutions to help you troubleshoot and resolve them:
**Clearance Problems:** One of the most common fit issues is clearance problems between the bike rack and other vehicle features, such as spoilers, roof rails, or side steps. To resolve this issue, try adjusting the bike rack’s position or using a different rack style that provides more clearance.
**Interference with Other Vehicle Features:** Another common fit issue is interference with other vehicle features, such as trunk lids, hatchbacks, or rear doors. To resolve this issue, try using a different rack style or adjusting the rack’s position to avoid interference.
**Hitch Fit Issues:** Hitch fit issues can occur when the bike rack’s hitch does not fit properly with the vehicle’s hitch receiver. To resolve this issue, try using a different hitch adapter or adjusting the hitch’s position to ensure a secure fit.
**Roof Rack Fit Issues:** Roof rack fit issues can occur when the bike rack’s roof attachment does not fit properly with the vehicle’s roof rails or crossbars. To resolve this issue, try using a different roof attachment or adjusting the roof rack’s position to ensure a secure fit.
**Troubleshooting Tips:** To troubleshoot fit issues, try the following:
- Consult Thule’s fit guide or customer support for specific fit recommendations.
- Check the bike rack’s instructions and manufacturer’s website for troubleshooting tips.
- Adjust the bike rack’s position or try a different rack style to resolve clearance or interference issues.
- Use a different hitch adapter or roof attachment to resolve hitch or roof rack fit issues.
By following these troubleshooting tips and solutions, you can resolve common fit issues and ensure a proper fit for your Thule bike rack.

Thule Bike Rack Installation Tips and Best Practices
Installing a Thule bike rack requires careful attention to detail and a thorough understanding of the manufacturer’s instructions. Here are some installation tips and best practices to ensure a safe and secure bike rack fit:
**Preparation:** Before installing your Thule bike rack, make sure to read the manufacturer’s instructions carefully and gather all the necessary tools and hardware. Ensure that your vehicle is clean and free of debris, and that the bike rack is properly assembled.
**Installation:** Follow the manufacturer’s instructions for installing the bike rack on your vehicle. Make sure to tighten all bolts and screws securely, and double-check that the rack is properly attached to the vehicle.
**Testing:** Once the bike rack is installed, test it by loading a bike onto the rack and checking that it is securely held in place. Make sure to check the rack’s stability and balance, and adjust the rack as needed to ensure a safe and secure fit.
**Safety Precautions:** Always follow the manufacturer’s instructions for loading and unloading bikes from the rack, and take necessary safety precautions to avoid injury or damage to the vehicle or bike.
**Best Practices:** Here are some best practices to keep in mind when installing a Thule bike rack:
- Always follow the manufacturer’s instructions for installation and use.
- Use the correct tools and hardware for installation.
- Ensure that the bike rack is properly assembled and attached to the vehicle.
- Test the bike rack before loading bikes onto it.
- Take necessary safety precautions to avoid injury or damage to the vehicle or bike.
By following these installation tips and best practices, you can ensure a safe and secure bike rack fit for your Thule bike rack.

Thule Bike Rack Maintenance and Upkeep
Regular maintenance and upkeep are crucial to ensure the longevity and performance of your Thule bike rack. Here are some tips to help you keep your bike rack in top condition:
**Cleaning:** Regularly clean your bike rack to remove dirt, dust, and debris that can accumulate and cause damage. Use a soft-bristled brush and mild soap to clean the rack, and avoid using harsh chemicals or abrasive materials that can damage the finish.
**Lubricating:** Lubricate the moving parts of your bike rack, such as the hinges and pivot points, to ensure smooth operation and prevent corrosion. Use a silicone-based lubricant and apply it sparingly to avoid attracting dirt and dust.
**Inspecting:** Regularly inspect your bike rack for signs of wear and tear, such as cracks, dents, or rust. Check the rack’s attachment points to ensure they are secure and not damaged. Inspect the bike rack’s straps and cables for signs of fraying or damage.
**Storage:** When not in use, store your bike rack in a dry, protected area to prevent damage from the elements. Avoid storing the rack in direct sunlight or extreme temperatures.
**Maintenance Schedule:** Create a maintenance schedule to ensure your bike rack is regularly inspected and maintained. Check the manufacturer’s instructions for recommended maintenance intervals and procedures.
By following these maintenance and upkeep tips, you can ensure your Thule bike rack remains in top condition and continues to provide safe and reliable transportation for your bike.
Conclusion: Finding the Perfect Thule Bike Rack Fit for Your Adventures
As we’ve discussed throughout this article, finding the perfect Thule bike rack fit for your vehicle and biking needs is crucial for a safe and enjoyable biking experience. By following the tips and guidelines outlined in this article, you can ensure a proper fit for your Thule bike rack and enjoy the freedom and adventure that comes with biking.
Remember, a proper fit is not just about ensuring the bike rack fits your vehicle, but also about ensuring it fits your bike and meets your specific biking needs. By considering factors such as bike size, vehicle type, and riding style, you can find the perfect Thule bike rack fit for your adventures.
Whether you’re a seasoned cyclist or just starting out, a Thule bike rack is a great investment for anyone who loves biking. With a wide range of styles and options available, you’re sure to find the perfect fit for your vehicle and biking needs.
So why wait? Start your search for the perfect Thule bike rack fit today and get ready to hit the road with confidence and style. With the right bike rack, you’ll be able to enjoy the freedom and adventure of biking, knowing that your bike is safe and secure.
Thanks for reading our comprehensive guide to Thule bike racks We hope you found the information helpful and informative. Happy biking!