
Understanding the Importance of a Properly Tensioned Bike Chain
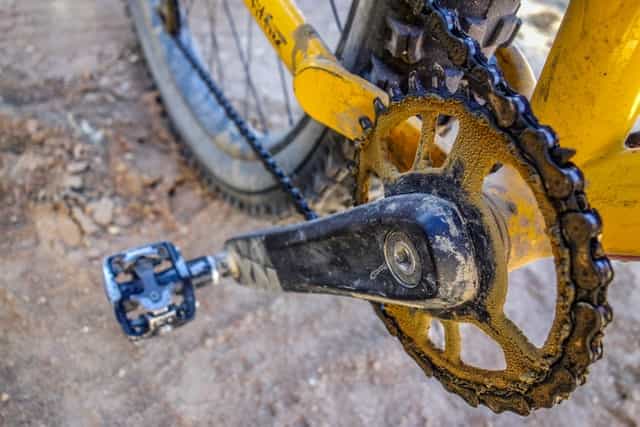
A well-maintained bike chain is crucial for the overall performance, safety, and lifespan of your bicycle. A loose chain can negatively impact power transfer, resulting in reduced efficiency and increased wear on both the chain and sprockets. Conversely, an overtightened chain can strain other components, such as the rear derailleur and the bearings in the bottom bracket, potentially leading to damage or premature failure. Maintaining the correct chain tension is essential for a smooth, efficient, and reliable ride.

Click Image to Find eBike Products
Assessing the Current Chain Tension
To evaluate the chain tension on your bike, follow these steps:
- Shift the bike into the smallest chainring in the front and the largest cog in the rear. This position allows for the most accurate chain tension measurement.
- Grab the chain approximately halfway between the chainring and the rear cog. Apply gentle upward pressure with your fingers. The chain should have some give but should not be excessively loose or tight.
- Measure the chain tension using a ruler or a chain tension gauge, if available. For most bikes, the recommended chain tension range is between 1/2 to 5/8 inch of deflection. However, this range may vary depending on the specific bike model and the manufacturer’s recommendations.
- When checking the chain tension, ensure that the bike is on a level surface and that the rear wheel is properly seated in the dropouts. Precautions should be taken to avoid damaging the frame or other components during the tension assessment.
To accurately measure and adjust the chain tension, you will need a few essential tools and materials. These typically include a chain tool, wrenches, and possibly a quick link or master link. A chain tension gauge can also be helpful but is not strictly necessary. These tools can be found at local bike shops, online retailers, or in well-stocked hardware stores.

Gathering Necessary Tools and Materials
To tighten the chain on your bike, you will need several essential tools and materials. These tools will help you accurately measure and adjust the chain tension, ensuring optimal performance and longevity for your bike. Here is a list of the tools and materials you will need:
- Chain tool: A chain tool is used to remove and install chain links. It is essential for adjusting the chain tension, as it allows you to break the chain, remove any slack, and then reconnect it using a quick link or master link.
- Wrenches: Depending on your bike’s design, you may need various wrenches to loosen and tighten the nuts and bolts that secure the rear wheel and tensioning system. Common wrench sizes include 13, 14, 15, and 17 millimeters. Ensure you have the correct wrenches for your bike’s components.
- Quick link or master link: A quick link or master link is a specialized chain component that allows you to easily connect and disconnect the chain without the need for a chain tool. These links can be particularly useful when adjusting the chain tension, as they enable you to quickly remove any excess slack and then reconnect the chain.
- Chain tension gauge (optional): While not strictly necessary, a chain tension gauge can help you accurately measure the chain tension and ensure it falls within the recommended range for your bike. These gauges are available at most bike shops or online retailers.
To find these tools and materials, visit your local bike shop or search online retailers for bicycle-specific tools. Hardware stores may also carry some of the necessary wrenches and tools. Remember to always use high-quality tools and materials to ensure the best results and avoid damaging your bike.
Loosening the Rear Wheel
Before adjusting the chain tension, you must first loosen the rear wheel to access the bike’s tensioning system. The process of loosening the rear wheel varies depending on the bike’s design and the type of dropouts or tensioning system it uses. Here, we will cover the most common mechanisms: horizontal dropouts and eccentric bottom brackets.
Horizontal Dropouts
Horizontal dropouts are a common design element in many bicycles, particularly single-speed and fixed-gear bikes. To loosen the rear wheel in a horizontal dropout system, follow these steps:
- Shift the bike into the smallest chainring in the front and the largest cog in the rear. This position allows for the most accessible chain tension adjustment.
- Locate the quick-release lever or nuts that secure the rear wheel to the frame. If your bike has a quick-release lever, ensure it is in the open position.
- Using a wrench, loosen the nuts or the quick-release lever on both sides of the rear dropout. Be careful not to lose any spacers or washers that may be present.
- Slide the rear wheel backward in the dropout, allowing the chain to slacken. Be cautious not to dislodge the wheel entirely from the dropouts.
Once the rear wheel is loose, you can proceed to adjust the chain tension as needed.
Eccentric Bottom Brackets
Eccentric bottom brackets are another method of tensioning the chain, primarily found in some full-suspension mountain bikes and single-speed bikes. To loosen the rear wheel in an eccentric bottom bracket system, follow these steps:
- Place the bike in a stand or turn it upside down so it rests on its handlebars and saddle.
- Locate the bottom bracket, which houses the bike’s crankset and pedals. Observe the position of the bottom bracket in relation to the frame. An eccentric bottom bracket can be rotated along its horizontal axis.
- Loosen the bolts that secure the bottom bracket to the frame. Rotate the bottom bracket counterclockwise to create slack in the chain. This movement will allow you to adjust the chain tension.
Once the bottom bracket is rotated, you can proceed to adjust the chain tension as needed. Remember to tighten the bolts securely once you have finished adjusting the chain tension.
In some cases, your bike may use a different tensioning system, such as a sliding dropout or tensioner. Consult your bike’s manual or visit your local bike shop for specific instructions on loosening the rear wheel for your particular bike.

Adjusting the Chain Tension
Once you have loosened the rear wheel, you can now adjust the chain tension. The goal is to find the sweet spot where the chain is neither too loose nor too tight. An overtightened chain can put undue stress on the bike’s components, while a loose chain can negatively impact power transfer and cause excessive wear. Here’s how to adjust the chain tension:
Moving the Rear Wheel Along the Dropout
For bikes with horizontal dropouts, follow these steps to adjust the chain tension:
- While holding the rear wheel, gently pedal the bike to rotate the cranks. This action will take up any slack in the chain.
- Slide the rear wheel forward in the dropout, keeping the chain taut. Be cautious not to move the wheel too far forward, as this may affect the wheel’s alignment with the frame and the derailleur’s ability to shift correctly.
- Once the chain tension feels appropriate, secure the wheel in place using the quick-release lever or nuts. Ensure that the wheel is centered in the dropouts and that the chain runs smoothly between the chainring and the cassette or freewheel.
Manipulating the Tensioning System
For bikes with eccentric bottom brackets or other tensioning systems, follow these steps to adjust the chain tension:
- Rotate the bottom bracket or tensioning system to create slack in the chain. Observe the chain as it moves through the drivetrain to ensure that it does not become too loose or too tight.
- Once the chain tension feels appropriate, secure the bottom bracket or tensioning system in place. For eccentric bottom brackets, tighten the bolts that secure it to the frame.
Regardless of the tensioning system used, always double-check the chain tension after making adjustments. A properly tensioned chain should have approximately 1/2 to 5/8 inch of deflection, depending on the bike’s design and the manufacturer’s recommendations.
To avoid overtightening the chain, use your fingers to feel for resistance as you pull the chain away from the chainring or cassette. If you encounter significant resistance or if the chain feels rigid, it may be overtightened. In this case, loosen the wheel or tensioning system slightly and re-check the chain tension.
Re-tensioning and Re-aligning the Wheel
After adjusting the chain tension, it’s essential to re-tension and realign the rear wheel to ensure proper alignment with the frame and derailleur. Here’s how to properly re-tension and realign the wheel:
Tightening the Wheel Nuts or Quick-Release Lever
Once the chain tension is adjusted, and the wheel is properly positioned in the dropouts, tighten the wheel nuts or quick-release lever securely. For wheels with nuts, use a wrench to tighten them evenly on both sides, ensuring that the wheel remains centered in the dropouts. If your bike has a quick-release lever, tighten it according to the manufacturer’s instructions, ensuring that it is snug but not overly tight.
Checking for Trueness
To ensure that the wheel is properly aligned and true, spin it while observing the distance between the rim and the brake pads. If the wheel wobbles from side to side or rubs against the brake pads, it may need truing. While some minor truing adjustments can be made using a spoke wrench, significant alignment issues should be addressed by a professional bike mechanic.
Re-aligning the Derailleur
After adjusting the chain tension and re-tensioning the wheel, it’s crucial to check the derailleur’s alignment and adjust it if necessary. A misaligned derailleur can cause poor shifting performance and increased wear on the chain and cassette or freewheel. To re-align the derailleur, follow these steps:
- Shift the bike into the smallest chainring in the front and the largest cog in the rear. This position allows for the most accurate derailleur alignment.
- Observe the distance between the derailleur pulley and the largest cog. Ideally, the pulley should be centered directly above the cog. If it is misaligned, use a screwdriver or Allen wrench to adjust the limit screw responsible for lateral derailleur movement.
- Test the shifting performance by pedaling the bike and shifting through the gears. Make any necessary adjustments to the limit screws or cable tension to ensure smooth and accurate shifting.
By properly re-tensioning, re-aligning, and adjusting the derailleur, you can help ensure optimal performance and longevity for your bike’s drivetrain components.

Re-checking Chain Tension and Final Adjustments
After completing the initial tightening and re-aligning the wheel, it’s essential to double-check the chain tension and make any necessary final adjustments. This step ensures that the chain tension remains within the recommended range, promoting optimal performance, safety, and longevity for your bike. Here’s how to re-check the chain tension and make final adjustments:
Double-checking Chain Tension
To double-check the chain tension, follow the same steps outlined in the “Assessing the Current Chain Tension” section of this guide. Use a ruler or a chain tension gauge, if available, to measure the chain tension. Ensure that the chain has the appropriate deflection, typically between 1/2 to 5/8 inch, depending on the bike’s design and the manufacturer’s recommendations.
Making Final Adjustments
If the chain tension is not within the recommended range, make any necessary final adjustments by either moving the rear wheel along the dropout or manipulating the tensioning system. Remember to avoid overtightening the chain, as this can lead to increased wear and potential damage to other components. Once the chain tension is adjusted, re-tension and realign the wheel as described in the “Re-tensioning and Re-aligning the Wheel” section.
The Importance of Regular Re-checks
It’s crucial to re-check the chain tension after a few rides to ensure it remains within the recommended range. Regular use of the bike can cause the chain tension to change due to factors such as frame flex, component wear, or cable stretching. By routinely checking and adjusting the chain tension, you can help maintain your bike’s optimal performance and extend the lifespan of its drivetrain components.

Maintaining Chain Tension Over Time
Properly maintaining the chain tension is crucial for your bike’s optimal performance, safety, and longevity. Regular inspections, adjustments, and lubrication can help ensure that the chain tension remains within the recommended range. Here are some tips and best practices for maintaining the chain tension over time:
Regular Inspections
Inspect the chain tension regularly, ideally before and after each ride. Visual and tactile inspections can help you quickly identify any changes in chain tension. If you notice that the chain tension has become too loose or too tight, it’s essential to address the issue promptly to prevent further damage to the bike’s drivetrain components.
Adjustments and Lubrication
In addition to regular inspections, make any necessary adjustments to the chain tension as needed. Use the methods described in the “Adjusting the Chain Tension” and “Re-tensioning and Re-aligning the Wheel” sections of this guide to make adjustments as required. Additionally, regularly lubricate the chain to reduce wear and ensure smooth operation. Use a high-quality bicycle-specific chain lubricant and follow the manufacturer’s instructions for application and frequency.
Quick Links and Master Links
Consider using a quick link or master link when installing or reinstalling the chain. These specialized components allow for easy chain removal and reinstallation during maintenance, eliminating the need for a chain tool. Quick links and master links can save time and effort while maintaining your bike’s drivetrain and are widely available at bike shops and online retailers.
Professional Servicing
While many cyclists can manage routine chain tension maintenance, it’s essential to have your bike professionally serviced periodically. A professional bike mechanic can perform a comprehensive inspection and adjustment of your bike’s drivetrain, ensuring that all components are properly aligned and functioning optimally. Regular professional servicing can help extend the lifespan of your bike’s drivetrain components and maintain its overall performance and safety.
