
Why Proper Lighting is Crucial for Mountain Biking
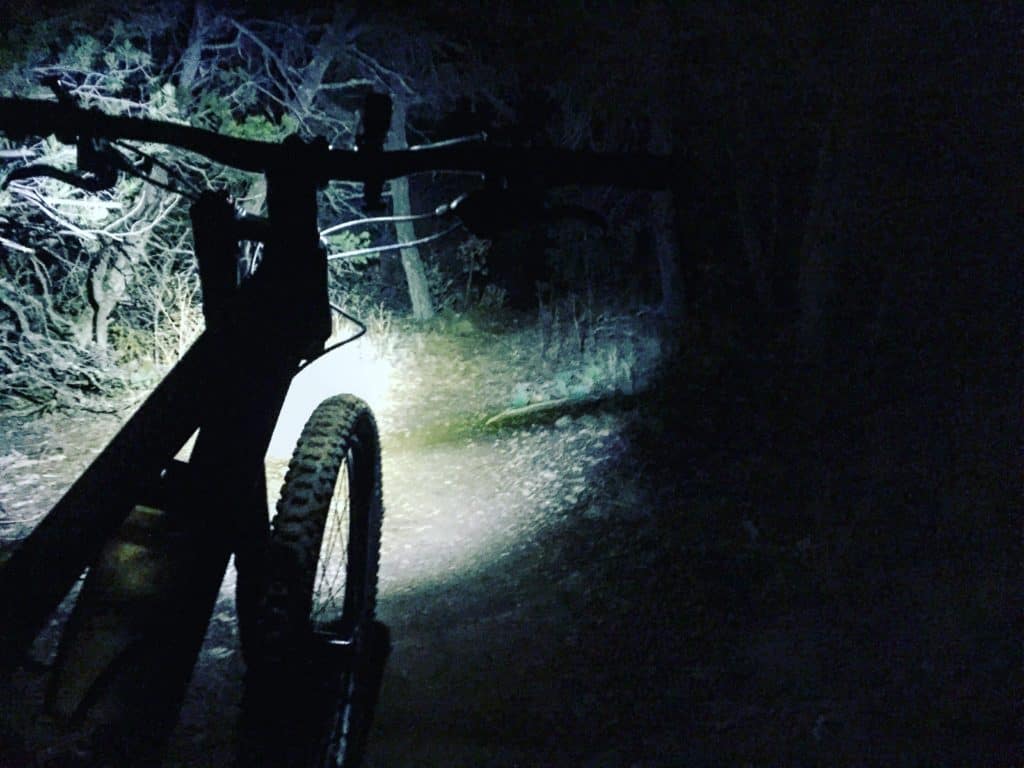
Mountain biking is an exhilarating sport that offers an adrenaline rush like no other. However, it can also be a hazardous activity, especially when riding in low-light conditions. That’s why proper lighting is crucial for mountain biking. Without adequate lighting, riders are more likely to encounter obstacles, lose control, or collide with other trail users. In fact, according to the National Safety Council, the majority of mountain biking accidents occur during dawn, dusk, or nighttime hours when visibility is poor.

Click Image to Find eBike Products
The risks associated with riding in low-light conditions are numerous. Insufficient lighting can make it difficult to see obstacles such as rocks, roots, and potholes, which can lead to serious injuries or even fatalities. Moreover, poor visibility can also increase the risk of collisions with other trail users, such as hikers, horseback riders, or other mountain bikers. Furthermore, inadequate lighting can also make it challenging to navigate through technical sections of the trail, which can result in loss of control or accidents.
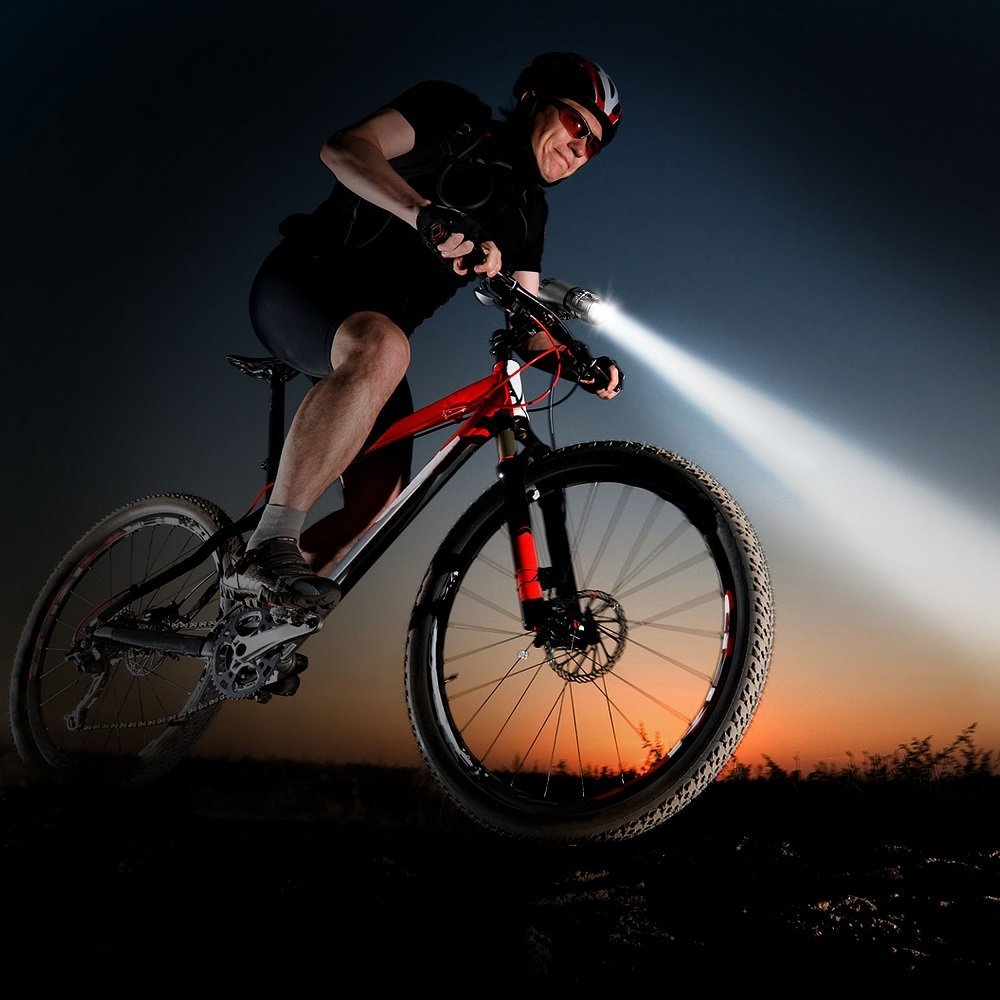
On the other hand, proper lighting can significantly enhance the mountain biking experience. With adequate lighting, riders can see the trail ahead more clearly, which enables them to ride with more confidence and control. Proper lighting can also reduce the risk of accidents and injuries, allowing riders to enjoy the thrill of mountain biking without compromising their safety. In addition, top mountain bike lights can also provide a sense of security and comfort, especially when riding in remote or isolated areas.
In recent years, there has been a significant improvement in mountain bike lighting technology. Modern mountain bike lights are designed to be more efficient, durable, and reliable, providing riders with a range of options to suit their needs and preferences. From compact and lightweight lights to high-powered and feature-rich models, there is a wide range of top mountain bike lights available on the market. By choosing the right light for their needs, mountain bikers can enjoy a safer and more enjoyable riding experience.
How to Choose the Right Mountain Bike Light for Your Needs
With so many top mountain bike lights available on the market, choosing the right one can be a daunting task. However, by considering a few key factors, you can find the perfect light to suit your needs and preferences. Here’s a step-by-step guide to help you choose the right mountain bike light:
Step 1: Determine Your Riding Style
Before choosing a mountain bike light, it’s essential to consider your riding style. Do you ride on smooth trails or technical singletrack? Do you ride during the day or at night? Different riding styles require different types of lights. For example, if you ride on smooth trails, a light with a narrow beam pattern may be sufficient. However, if you ride on technical singletrack, a light with a wider beam pattern may be more suitable.
Step 2: Consider the Lumen Output
The lumen output of a mountain bike light is a measure of its brightness. Generally, lights with higher lumen outputs are more suitable for night riding, while lights with lower lumen outputs are more suitable for daytime riding. When choosing a light, consider the lumen output and whether it will provide sufficient illumination for your riding style.
Step 3: Think About the Beam Pattern
The beam pattern of a mountain bike light refers to the way the light is distributed. Some lights have a narrow beam pattern, while others have a wider beam pattern. A narrow beam pattern is more suitable for smooth trails, while a wider beam pattern is more suitable for technical singletrack.
Step 4: Check the Battery Life
The battery life of a mountain bike light is an essential consideration. Look for lights with long battery life, especially if you plan to ride for extended periods. Some lights have rechargeable batteries, while others require disposable batteries.
Step 5: Evaluate the Durability
A mountain bike light should be durable and able to withstand the rigors of off-road riding. Look for lights with rugged construction and weather-resistant materials.
By considering these factors, you can find the perfect top mountain bike light to suit your needs and preferences. Remember to always choose a light that provides sufficient illumination for your riding style and terrain.

Top Picks: Review of the Best Mountain Bike Lights on the Market
After researching and testing various top mountain bike lights, we’ve compiled a list of our top picks. These lights offer a combination of high-quality performance, durability, and innovative features that make them stand out from the rest.
1. Light & Motion Seca 2000
The Light & Motion Seca 2000 is a high-end mountain bike light that offers an impressive 2000 lumens of output. Its compact design and lightweight construction make it easy to mount on your helmet or handlebars. The Seca 2000 also features a unique “pulse” mode that helps to increase visibility to other trail users.
2. Garmin Varia UT800
The Garmin Varia UT800 is a versatile mountain bike light that offers a range of features and modes. Its high-intensity beam pattern provides excellent visibility on the trail, while its low-profile design makes it easy to mount on your handlebars. The Varia UT800 also features a built-in accelerometer that helps to adjust the light’s output based on your riding speed.
3. NiteRider Lumina 1200
The NiteRider Lumina 1200 is a high-performance mountain bike light that offers an impressive 1200 lumens of output. Its unique “group ride” mode helps to reduce glare and increase visibility to other riders, making it an excellent choice for group rides. The Lumina 1200 also features a durable and water-resistant design that can withstand the rigors of off-road riding.
The Lezyne Super Drive 1500XXL is a high-end mountain bike light that offers an impressive 1500 lumens of output. Its unique “overdrive” mode provides an intense beam pattern that helps to increase visibility on the trail. The Super Drive 1500XXL also features a durable and water-resistant design that can withstand the rigors of off-road riding.
5. Exposure Diablo MK11
The Exposure Diablo MK11 is a high-performance mountain bike light that offers an impressive 1100 lumens of output. Its unique “optic” mode helps to increase visibility to other trail users, while its low-profile design makes it easy to mount on your handlebars. The Diablo MK11 also features a durable and water-resistant design that can withstand the rigors of off-road riding.
Understanding Lumens and Beam Patterns: What You Need to Know
When it comes to choosing the right mountain bike light, two of the most important factors to consider are lumens and beam patterns. But what exactly do these terms mean, and how do they affect the performance of a mountain bike light?
Lumens refer to the amount of light that a light emits. In the context of mountain bike lights, lumens are a measure of the light’s brightness. Generally, lights with higher lumens are more suitable for night riding, while lights with lower lumens are more suitable for daytime riding. However, it’s not just about the number of lumens – the beam pattern of the light also plays a crucial role in determining its performance.
Beam patterns refer to the way that the light is distributed. There are several different types of beam patterns, including spot beams, flood beams, and hybrid beams. Spot beams are narrow and focused, making them ideal for riding on smooth trails. Flood beams, on the other hand, are wider and more diffuse, making them better suited for technical singletrack. Hybrid beams combine the best of both worlds, offering a balance between spot and flood beams.
Understanding the difference between lumens and beam patterns is crucial when choosing a mountain bike light. For example, a light with a high lumen output but a narrow beam pattern may not be the best choice for technical singletrack, while a light with a lower lumen output but a wider beam pattern may be more suitable. By considering both lumens and beam patterns, you can choose a light that provides the right amount of illumination for your riding style and terrain.
Here are some examples of how different beam patterns can be used for various riding conditions:
* Spot beams: Smooth trails, night riding, and high-speed descents
* Flood beams: Technical singletrack, low-speed riding, and navigating obstacles
* Hybrid beams: General trail riding, commuting, and touring
By understanding the difference between lumens and beam patterns, you can choose a mountain bike light that provides the right amount of illumination for your riding style and terrain. Whether you’re a casual rider or an experienced enthusiast, the right light can make all the difference in your mountain biking experience.

Mounting and Installation: Tips for Getting the Most Out of Your Light
Once you’ve chosen the right mountain bike light for your needs, it’s essential to properly mount and install it to get the most out of its performance. Here are some tips to help you do just that:
1. Choose the Right Mounting System
There are several different types of mounting systems available for mountain bike lights, including handlebar mounts, helmet mounts, and seatpost mounts. When choosing a mounting system, consider the type of riding you’ll be doing and the location of the light on your bike. For example, if you’ll be riding on technical singletrack, a helmet mount may be the best option to provide a clear view of the trail ahead.
2. Adjust the Light for Optimal Performance
Once you’ve mounted your light, it’s essential to adjust it for optimal performance. This includes adjusting the beam pattern, brightness, and angle of the light to suit your riding style and terrain. For example, if you’ll be riding on smooth trails, you may want to adjust the beam pattern to a narrower setting to reduce glare and improve visibility.
3. Consider the Weight and Balance of the Light
When mounting a light on your bike, it’s essential to consider the weight and balance of the light. A light that is too heavy or unbalanced can affect the handling and stability of your bike, especially when riding on technical terrain. Look for lights that are designed to be lightweight and compact, and consider using a mounting system that allows you to adjust the position of the light to achieve optimal balance.
4. Use a Secure and Durable Mounting System
A secure and durable mounting system is essential to ensure that your light stays in place and continues to perform optimally over time. Look for mounting systems that are designed to withstand the rigors of off-road riding, and consider using a system that includes a quick-release mechanism for easy removal and installation.
5. Test the Light Before Riding
Before heading out on a ride, it’s essential to test your light to ensure that it’s working properly and adjusted correctly. This includes checking the beam pattern, brightness, and angle of the light, as well as ensuring that the mounting system is secure and durable.
By following these tips, you can ensure that your mountain bike light is properly mounted and installed, and that you get the most out of its performance. Whether you’re a casual rider or an experienced enthusiast, a well-mounted and adjusted light can make all the difference in your mountain biking experience.

Battery Life and Charging: How to Keep Your Light Powered Up
Battery life and charging are essential considerations when it comes to mountain bike lights. A light with a long battery life can provide peace of mind on long rides, while a light with a short battery life can leave you stranded in the dark. In this section, we’ll discuss the importance of battery life and charging for mountain bike lights, and provide tips on how to choose a light with a long battery life and how to properly charge and maintain the battery.
Why Battery Life Matters
Battery life is a critical factor to consider when choosing a mountain bike light. A light with a long battery life can provide several benefits, including:
* Increased safety: A light with a long battery life can provide a sense of security and safety on long rides, especially in low-light conditions.
* Convenience: A light with a long battery life can eliminate the need for frequent battery replacements or recharging, making it a convenient option for riders who want to focus on their ride.
* Performance: A light with a long battery life can provide consistent performance, even on long rides, which can enhance the overall riding experience.
How to Choose a Light with a Long Battery Life
When choosing a mountain bike light, look for the following features to ensure a long battery life:
* High-capacity battery: Look for lights with high-capacity batteries that can provide several hours of runtime.
* Energy-efficient design: Look for lights with energy-efficient designs that minimize power consumption and maximize battery life.
* Adjustable brightness: Look for lights with adjustable brightness settings that allow you to customize the light’s output to suit your needs.
How to Properly Charge and Maintain the Battery
To ensure a long battery life, it’s essential to properly charge and maintain the battery. Here are some tips:
* Follow the manufacturer’s charging instructions: Make sure to follow the manufacturer’s charging instructions to avoid overcharging or undercharging the battery.
* Store the battery properly: Store the battery in a cool, dry place to prevent damage and prolong its lifespan.
* Avoid extreme temperatures: Avoid exposing the battery to extreme temperatures, which can affect its performance and lifespan.
By choosing a light with a long battery life and properly charging and maintaining the battery, you can ensure a safe and enjoyable riding experience. Whether you’re a casual rider or an experienced enthusiast, a reliable and long-lasting battery is essential for any mountain bike light.
Additional Features to Consider: Remote Switches, Red Light Modes, and More
When choosing a top mountain bike light, there are several additional features to consider that can enhance the performance and convenience of the light. In this section, we’ll explore some of these features and how they can benefit your riding experience.
Remote Switches
A remote switch allows you to control the light’s output and mode without having to physically touch the light. This can be especially useful when riding in low-light conditions, as it allows you to adjust the light’s output without having to take your hands off the handlebars.
Red Light Modes
Red light modes are designed to preserve your night vision while still providing enough light to see the trail ahead. These modes typically use a red or amber light, which is less harsh on the eyes than a white light. Red light modes can be especially useful when riding in low-light conditions, as they allow you to see the trail ahead without disrupting your night vision.
GoPro Mounts
GoPro mounts allow you to attach your light to your helmet or handlebars, providing a secure and convenient way to mount your light. These mounts are especially useful when riding in technical terrain, as they allow you to position the light in a way that provides optimal visibility.
Other Features to Consider
Other features to consider when choosing a top mountain bike light include:
* Adjustable brightness: Look for lights with adjustable brightness settings that allow you to customize the light’s output to suit your needs.
* Multiple light modes: Look for lights with multiple light modes, such as high, medium, and low, that allow you to adjust the light’s output to suit your riding conditions.
* Waterproofing: Look for lights with waterproofing features, such as IPX7 or higher, that can withstand exposure to water and moisture.
By considering these additional features, you can choose a top mountain bike light that provides the performance, convenience, and features you need to enhance your riding experience.
Conclusion: Find the Right Light for Your Next Mountain Biking Adventure
Choosing the right mountain bike light can be a daunting task, but by considering the factors outlined in this article, you can find the perfect light for your needs. Whether you’re a casual rider or an experienced enthusiast, a top mountain bike light can provide the visibility and safety you need to enjoy your ride.
Remember to consider the lumens, beam pattern, battery life, and durability of a light when making your decision. Additionally, think about the additional features that can enhance the performance and convenience of a light, such as remote switches, red light modes, and GoPro mounts.
By taking the time to research and choose the right mountain bike light, you can ensure a safe and enjoyable ride, even in low-light conditions. So why wait? Start exploring the world of top mountain bike lights today and find the perfect light for your next adventure.
With the right light, you’ll be able to ride with confidence and visibility, even in the most challenging conditions. Whether you’re riding on smooth trails or technical singletrack, a top mountain bike light can provide the illumination you need to stay safe and have fun.
So don’t let low-light conditions hold you back from enjoying your favorite trails. Invest in a top mountain bike light today and experience the thrill of riding in the dark with confidence and visibility.
%20(m).jpg)