Unveiling the Benefits of Mountain Bike Riser Bars
Mountain bike riser bars offer a multitude of advantages that can significantly enhance a rider’s experience on technical trails. These handlebars, which typically feature a slight upward bend, provide improved control, enhanced comfort, and increased confidence compared to flat bars. The rise in the handlebars positions the rider’s hands higher, promoting a more upright riding position that reduces strain on the back, shoulders, and wrists. This adjustment also allows for a better view of the trail ahead, making it easier to spot obstacles and navigate tricky sections.

Click Image to Find eBike Products
Riders may prefer riser bars due to their ability to better handle challenging terrains. By providing a more natural hand position, riser bars enable riders to maintain better balance and stability, making it easier to tackle steep inclines and descents. Furthermore, riser bars can improve cornering capabilities, as the increased leverage allows for more precise steering and maneuverability. This enhanced control can lead to a more enjoyable and engaging riding experience, particularly for those tackling technical trails.

How to Choose the Perfect Pair of Mountain Bike Riser Bars
Selecting the ideal mountain bike riser bars involves considering several factors to ensure a perfect fit and optimal performance. These factors include width, rise, sweep, clamp diameter, and material. By understanding these elements, riders can make informed decisions when purchasing riser bars and enjoy the benefits they offer.
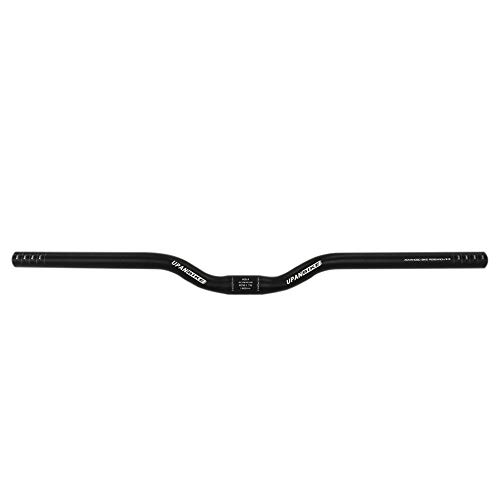
Width: The width of riser bars typically ranges from 700 to 800 millimeters. A wider bar provides better control and stability, while a narrower bar offers increased maneuverability. To determine the ideal width, measure your shoulder width and add 50 to 100 millimeters. This measurement will provide a comfortable and balanced riding position.
Rise: The rise of riser bars refers to the vertical distance between the center of the handlebar clamp and the highest point of the grip area. A higher rise promotes a more upright riding position, reducing strain on the back, shoulders, and wrists. Common rise options include 10, 25, 35, and 50 millimeters. Select a rise based on your riding style and the terrain you typically encounter. For instance, a higher rise is beneficial for technical trails and steep inclines, while a lower rise is suitable for smoother trails and faster speeds.
Sweep: The sweep of riser bars refers to the horizontal angle of the grip area relative to the center of the handlebar clamp. A backsweep angle positions the grips slightly towards the rider, while an upsweep angle positions the grips slightly upwards. Common sweep options include 5 to 10 degrees of backsweep and 3 to 5 degrees of upsweep. These angles promote a natural hand position and reduce strain on the wrists and forearms.
Clamp Diameter: The clamp diameter of riser bars is the diameter of the section where the handlebar clamp attaches to the stem. Common clamp diameters include 31.8 and 35 millimeters. Ensure that your stem is compatible with the clamp diameter of your chosen riser bars.
Material: Riser bars are typically made of aluminum or carbon fiber. Aluminum bars are more affordable and durable, while carbon fiber bars are lighter and offer improved vibration dampening. Consider your budget, riding style, and preferences when selecting a material.
When measuring for the ideal riser bar dimensions, consider your current handlebar setup and riding style. Adjustments to the width, rise, and sweep can significantly impact your comfort, control, and performance on the trails. By selecting riser bars with the right dimensions and material, you can elevate your riding experience and tackle technical trails with confidence.

Top Mountain Bike Riser Bars in the Market
When it comes to selecting the best mountain bike riser bars, there are several high-quality options available. Each product offers unique features, benefits, and drawbacks, catering to various riding styles and preferences. Here are three top-rated mountain bike riser bars to consider:
Race Face SixC 35
The Race Face SixC 35 is a popular choice among mountain bikers due to its robust construction and innovative design. Featuring a 35mm clamp diameter, this riser bar boasts a width of 780mm and a rise of 20mm, providing excellent control and stability on technical trails. The SixC 35 is crafted from UD carbon fiber, making it both lightweight and durable. Its 8-degree backsweep and 5-degree upsweep angles promote a natural hand position, reducing strain on the wrists and forearms. However, the SixC 35 comes with a premium price tag, which may deter budget-conscious riders.
Easton Havoc 35
The Easton Havoc 35 is another excellent option for mountain bikers seeking a reliable and high-performing riser bar. Constructed from aluminum, the Havoc 35 offers a 35mm clamp diameter, a width of 800mm, and a rise of 25mm. This bar’s TaperWall technology enhances strength and durability, while its 7-degree backsweep and 5-degree upsweep angles provide a comfortable hand position. The Havoc 35 is more affordable than the Race Face SixC 35, making it an attractive choice for riders who prioritize value without compromising quality.
Renthal Fatbar Lite Carbon
The Renthal Fatbar Lite Carbon is a premium riser bar designed for serious mountain bikers. With a 35mm clamp diameter, this bar offers a width of 760mm and a rise of 20mm. Crafted from high-modulus unidirectional carbon fiber, the Fatbar Lite Carbon is both lightweight and robust. Its 7-degree backsweep and 5-degree upsweep angles promote a natural hand position, while its unique AMS (Advanced Material System) construction ensures exceptional strength and stiffness. However, the Fatbar Lite Carbon’s high price point may be prohibitive for some riders.
Ultimately, the best mountain bike riser bar for you will depend on your specific needs, preferences, and budget. By understanding the unique features and benefits of each product, you can make an informed decision and enjoy the enhanced control, comfort, and confidence that riser bars provide on the trails.
Installing and Adjusting Mountain Bike Riser Bars
Installing and adjusting mountain bike riser bars is a straightforward process that can significantly improve your riding experience. By following these steps, you can ensure a secure and comfortable fit:
Tools Required
To install and adjust your mountain bike riser bars, you will need the following tools:
- Allen wrenches (typically 4mm, 5mm, or 6mm)
- Torque wrench
- Pedal wrench (if removing pedals)
- Grease
Step-by-Step Guide
- Remove the existing handlebars: Loosen the stem bolts using an Allen wrench, and carefully slide the handlebars out of the stem. Be sure to support the front wheel to prevent the bike from tipping over.
- Prepare the new riser bars: Before installing the new riser bars, apply a thin layer of grease to the handlebar clamp area to prevent corrosion and ensure a smooth installation. Measure and mark the desired width, rise, and sweep angles using a tape measure and a permanent marker.
- Install the riser bars: Slide the new riser bars into the stem, aligning the marks you made in step 2. Tighten the stem bolts to the manufacturer’s recommended torque setting using a torque wrench. This step is crucial to prevent overtightening, which can damage the stem or handlebars, or under-tightening, which can lead to instability.
- Adjust the handlebar height: To adjust the handlebar height, loosen the stem bolts, slide the stem up or down the steerer tube, and re-tighten the stem bolts to the recommended torque setting. Ensure that the handlebars are level or slightly angled upwards for optimal control and comfort.
- Adjust the grip positioning: Position the grips on the handlebars, ensuring they are evenly spaced and aligned with the brake levers and shifters. Use a grip tightening compound or hairspray to prevent the grips from rotating during use.
- Check the stem length: The stem length should be proportional to the handlebar width, with shorter stems for narrower handlebars and longer stems for wider handlebars. A general guideline is a 1:1 ratio between stem length and handlebar width, but this may vary depending on your riding style and bike geometry.
- Test the fit and adjust as necessary: Once the riser bars are installed and adjusted, take your bike for a test ride to ensure a comfortable and secure fit. Make any necessary adjustments to the handlebar height, grip positioning, or stem length for optimal performance.
By following these steps, you can successfully install and adjust your mountain bike riser bars, ensuring a secure and comfortable fit that enhances your riding experience. Regularly inspect and maintain your riser bars to ensure their longevity and performance.

Maximizing Performance with Mountain Bike Riser Bars
Mountain bike riser bars offer numerous benefits, including improved control, enhanced comfort, and increased confidence on technical trails. By employing specific techniques and strategies, riders can fully leverage these advantages to elevate their performance and enjoy a more engaging riding experience. Here are some tips and techniques on how to make the most of riser bars:
Body Positioning
Proper body positioning is crucial when using riser bars. Maintain a neutral spine, with your weight evenly distributed between your pedals and handlebars. Engage your core muscles to support your upper body, and slightly bend your elbows to absorb shock and maintain control. This balanced position allows you to react quickly to changing trail conditions and maintain stability during technical sections.
Cornering
Riser bars can significantly improve cornering performance. By providing a more upright riding position, riser bars enable riders to better distribute their weight and maintain traction during turns. To maximize cornering with riser bars, focus on leaning your bike into the turn, rather than your body. This technique maintains a consistent center of gravity and allows for smoother, more controlled cornering.
Descending
When descending steep or technical trails, riser bars can enhance control and stability. By positioning your body further back on the bike, you can lower your center of gravity and maintain better traction. Additionally, riser bars provide increased leverage for steering and maneuvering, allowing you to navigate tight turns and obstacles with greater precision. When descending, focus on maintaining a relaxed grip and using your body weight to absorb shock and maintain balance.
Tackling Steep Inclines
Riser bars can help riders tackle steep inclines by providing a more upright riding position, which allows for better weight distribution and increased traction. When climbing, focus on maintaining a steady cadence and engaging your lower body muscles to generate power. Use the increased leverage of riser bars to guide your bike up the incline, making small adjustments to your line and body positioning as needed.
By incorporating these tips and techniques, riders can maximize the benefits of mountain bike riser bars and enjoy a more engaging, controlled, and enjoyable riding experience. Regularly practice these strategies to build confidence and refine your skills, ensuring optimal performance on various trail conditions.
Comparing Mountain Bike Riser Bars with Other Handlebar Types
Mountain bike riser bars offer unique advantages compared to other handlebar types, such as flat bars, drop bars, and moustache bars. Understanding the pros and cons of each type can help riders determine when riser bars are the most suitable choice for their mountain biking needs.
Riser Bars vs. Flat Bars
Flat bars are a common handlebar type for mountain bikes, providing a straightforward, no-nonsense design. While flat bars offer a lightweight and aerodynamic profile, riser bars provide several advantages. Riser bars offer improved control and stability, as their slight upward bend positions the rider’s hands higher, promoting a more upright riding position. This adjustment reduces strain on the back, shoulders, and wrists, and allows for better trail visibility. Additionally, riser bars provide increased leverage for steering and maneuvering, making them more suitable for technical trails and steep inclines.
Riser Bars vs. Drop Bars
Drop bars, commonly found on road bikes, offer multiple hand positions for varied riding styles. However, they are generally not recommended for mountain biking due to their limited control and stability on technical trails. Riser bars, on the other hand, provide better traction and handling on uneven terrain, allowing riders to maintain better control and confidence in challenging conditions. Furthermore, riser bars enable riders to distribute their weight more evenly, reducing the risk of injury or fatigue during long rides.
Riser Bars vs. Moustache Bars
Moustache bars, also known as butterfly or trekking bars, feature a unique design with two horizontal bars branching off from the stem. While moustache bars offer additional hand positions and versatility, they can be cumbersome and less responsive during technical riding. Riser bars, in contrast, provide a simpler, more intuitive design that promotes better control and stability on mountain biking trails. Riser bars also allow for easier installation and adjustment, ensuring a secure and comfortable fit for riders of all skill levels.
In summary, riser bars offer distinct advantages over other handlebar types, particularly in the realm of mountain biking. By providing improved control, enhanced comfort, and increased stability, riser bars enable riders to tackle technical trails and steep inclines with confidence and ease. When selecting a handlebar type, consider the unique advantages of riser bars and how they can enhance your mountain biking experience.

Maintaining and Caring for Mountain Bike Riser Bars
Proper maintenance and care are essential for ensuring the longevity and performance of your mountain bike riser bars. By following these guidelines, you can keep your riser bars in optimal condition and address common issues, such as bent or cracked bars.
Cleaning and Lubricating
Regularly clean your mountain bike riser bars with a mild detergent and warm water to remove dirt, debris, and grime. After cleaning, apply a light lubricant, such as a teflon-based spray or silicone, to the handlebar clamp area and any moving parts, like shifters and brake levers. This lubrication reduces wear and tear and ensures smooth operation.
Inspecting for Wear and Tear
Periodically inspect your mountain bike riser bars for signs of wear and tear, such as scratches, dents, or cracks. Pay particular attention to the areas around the handlebar clamp, where stress and strain are most concentrated. If you notice any damage, consider replacing the riser bars to prevent potential accidents or injuries.
Addressing Common Issues
Bent or cracked riser bars can compromise the safety and performance of your mountain bike. If you notice any bending or cracking, replace the riser bars immediately. Additionally, ensure that your riser bars are securely fastened and properly aligned to prevent unnecessary strain or damage.
Preventive Measures
To minimize wear and tear on your mountain bike riser bars, avoid overtightening stem bolts and handlebar clamps, as this can cause stress fractures and reduce the lifespan of the bars. Furthermore, use handlebar grips or bar tape to protect the riser bars from direct contact with your hands, which can cause scratches, dents, or other damage.
By following these maintenance and care guidelines, you can keep your mountain bike riser bars in excellent condition and ensure a safe, comfortable, and enjoyable riding experience. Regularly inspect and maintain your riser bars to identify and address any issues before they become serious problems.
Customizing Your Mountain Bike with Riser Bars
Mountain bike riser bars offer a range of customization options, allowing riders to tailor their bikes to their specific preferences and needs. By adding bar ends, grips, or accessories, riders can further enhance their riding experience and performance.
Bar Ends
Bar ends are extensions that attach to the ends of your handlebars, providing additional hand positions and leverage. They can be particularly beneficial for long rides, as they help distribute pressure and reduce hand fatigue. When selecting bar ends, consider factors such as material, shape, and size to ensure a comfortable and secure fit. Popular bar end options include the Origin8 Pro Pulsion Alloy Bar Ends and the Ergon GP1 Grips with Bar Ends.
Grips
Grips are a crucial component of any mountain bike, as they provide a secure and comfortable hold on the handlebars. When customizing your riser bars, consider upgrading your grips for enhanced comfort and control. Look for grips with ergonomic designs, shock-absorbing materials, and secure lock-on mechanisms. Some top-rated grip options include the Ergon GA3 Grip, the ODI Elite Pro Lock-On Grip, and the ESI Chunky Grip.
Accessories
Various accessories can be added to your mountain bike riser bars to enhance functionality and style. These may include bike computers, lights, bells, or handlebar bags. When selecting accessories, ensure they are compatible with your riser bars and do not interfere with other components, such as shifters and brake levers. Popular accessory brands include Garmin, Lezyne, and Blackburn.
Customizing your mountain bike with riser bars can significantly improve your riding experience and performance. By adding bar ends, grips, or accessories, you can tailor your bike to your specific needs and preferences, ensuring a comfortable and enjoyable ride. Always ensure that any modifications are securely installed and do not compromise the safety or performance of your bike.